2024.02追記: 最新のRaspberryPiOS(bookworm 32bitと64bit)では、ライブラリのインストール方法が異なります。不具合の原因ははっきりしていませんが、動作しなくなってしまいました。参考メモ 違うドライバで作った2号機
やっと一号機が動いたところなので、プログラムが全然洗練されていないところはご容赦ください。28号くらいでAIカーと呼んでも良いくらいのレベルになってると良いな(^^;
出来ること
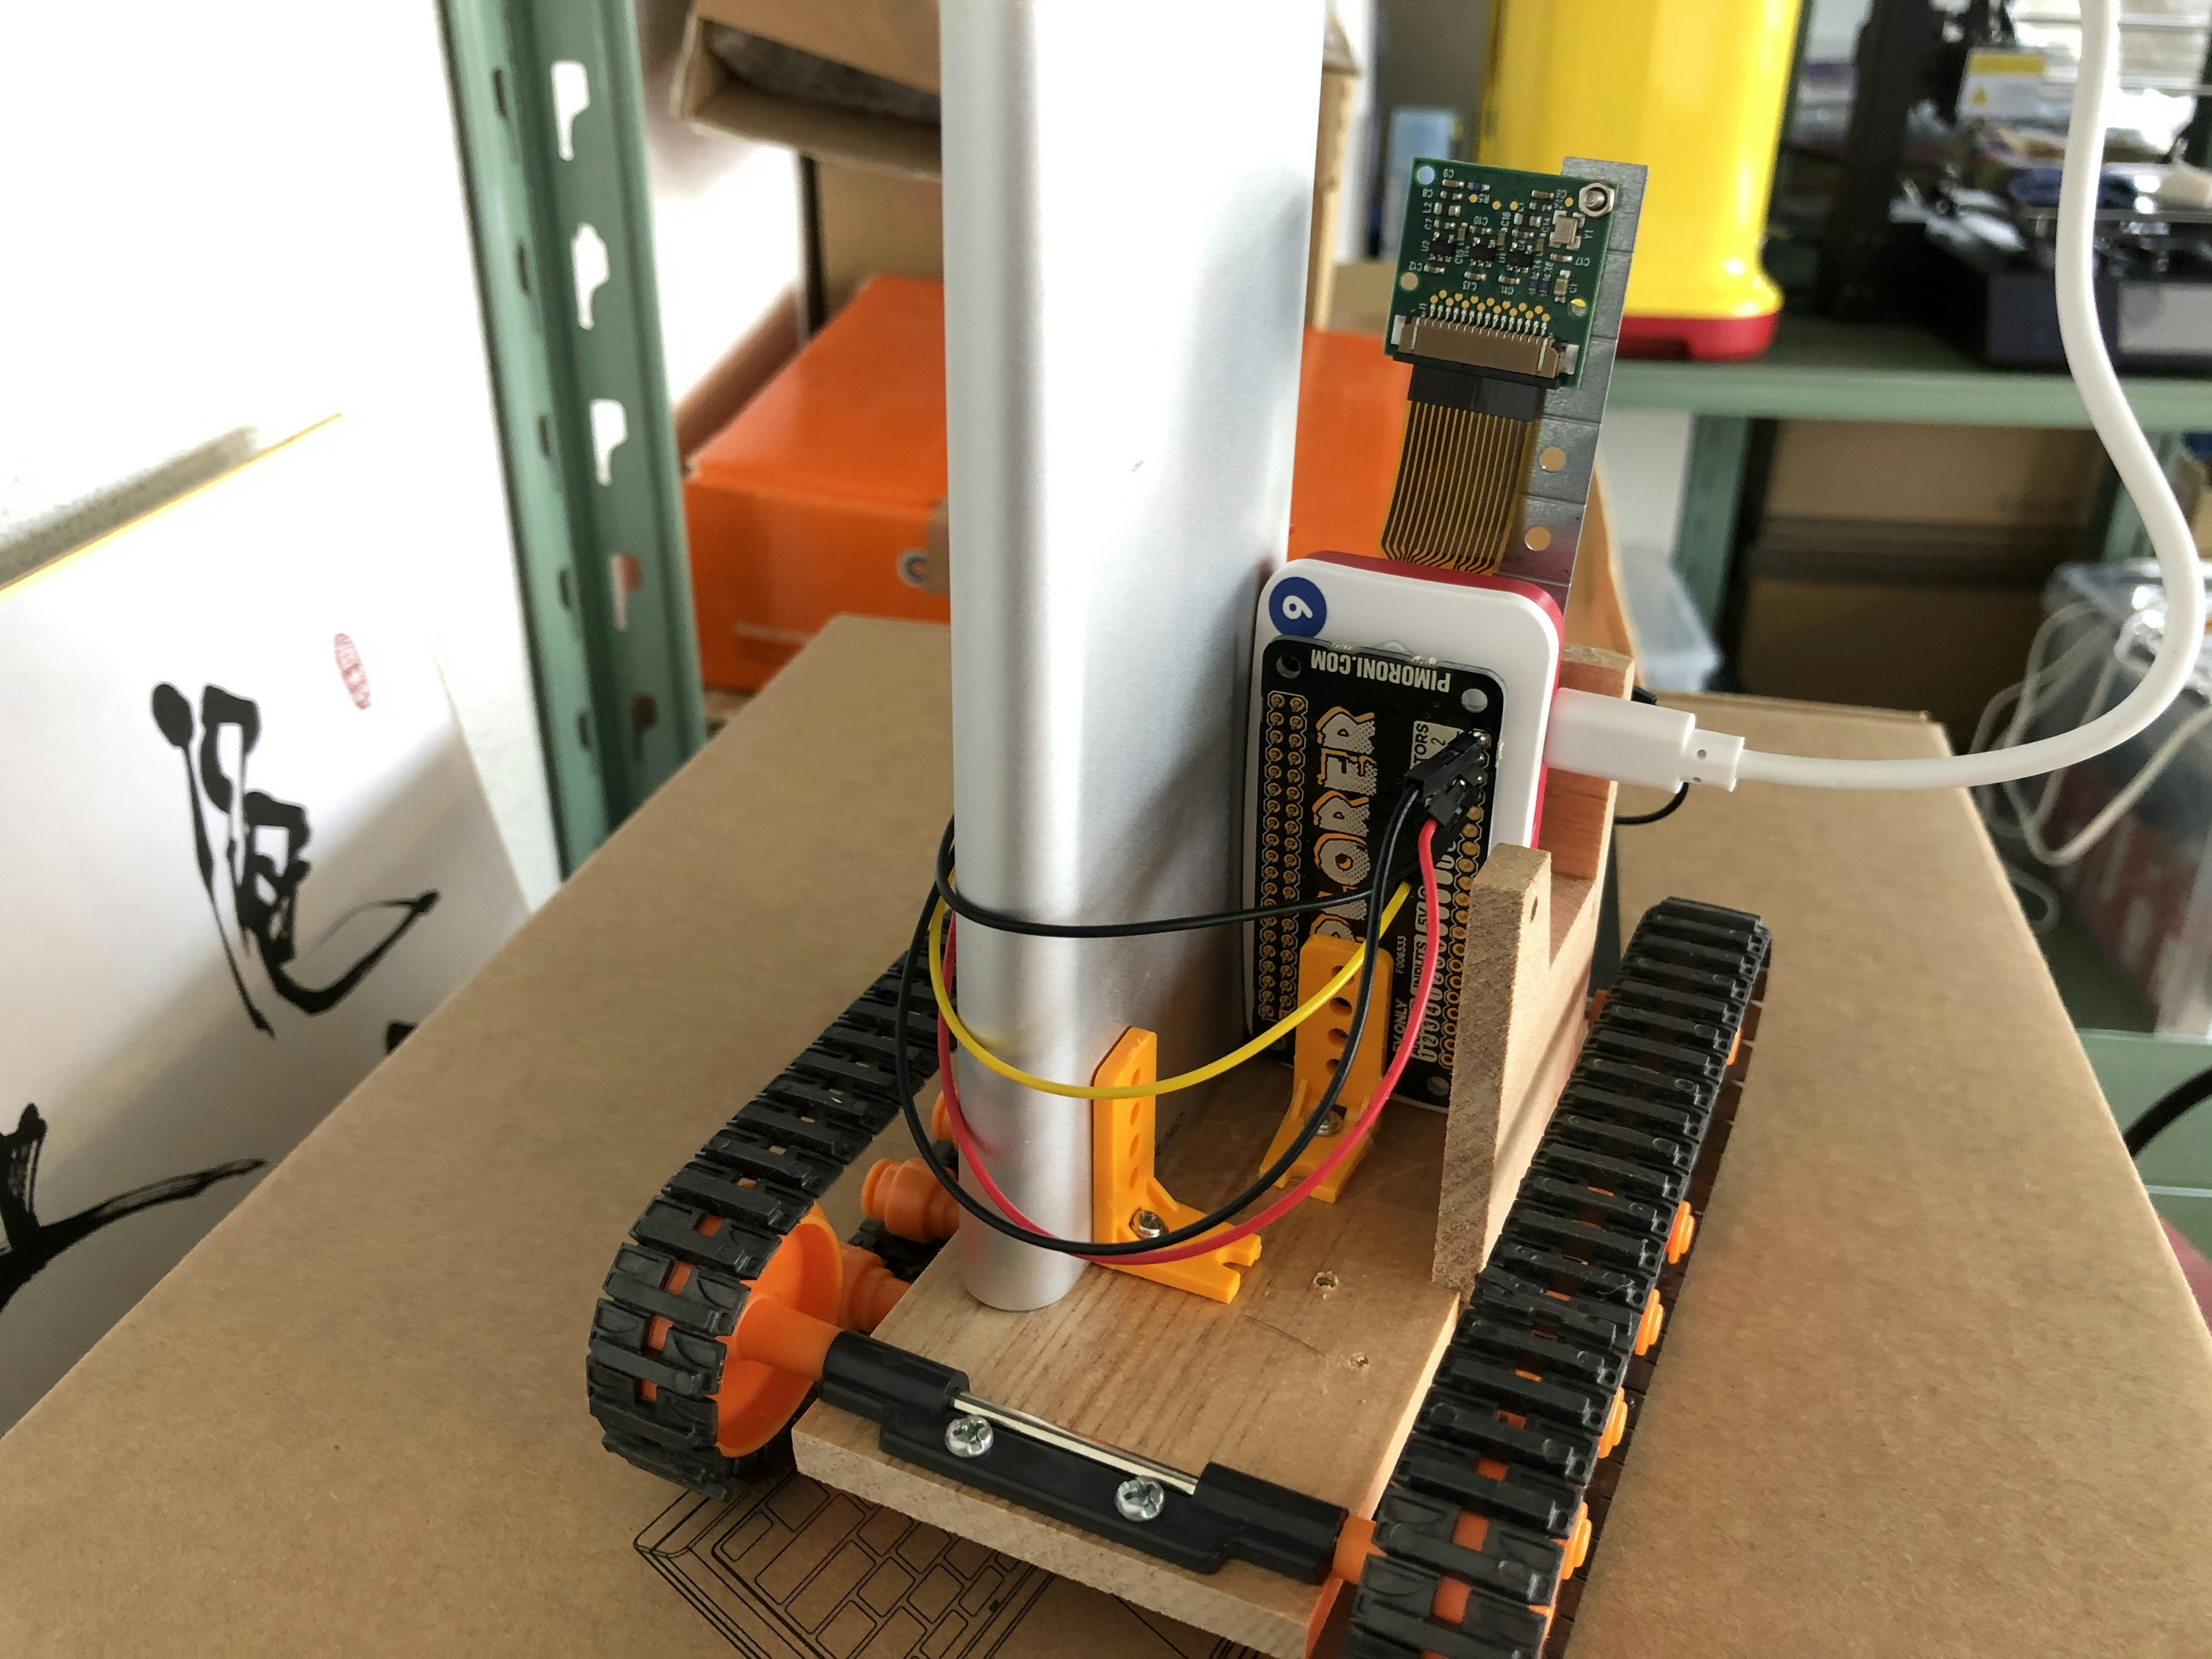
カメラに映った「赤い色」の領域を追いかけて方向転換をしながら前進します。「赤い色」が見つからない場合は停止します。
構成
- Raspberry Pi Zero W
- Camera Module
- Pimoroni Explorer PHAT(モータードライバ)
- モバイルバッテリー
- TAMIYA ショベルドーザー工作基本セット(キャタピラ部分のみ)
- TAMIYA ユニバーサルアームセット(バッテリーとRaspiの固定用)
プログラムの準備
まずはライブラリのインストール。OpenCVをRaspberryPiに入れるときは、ベースのイメージは「Desktop」を選んだ方がスムーズです。「Lite」だと、追加のライブラリが諸々必要になっててこずります。。
pip3 install --upgrade pip
pip3 install opencv-python
sudo apt -y install pimoroni
pimoroni-dashboard
pimoroni-dashboardはメニュー形式のアプリですので、ExplorerPHATを探してドライバとサンプルプログラムをインストールします。
プログラムは以下のようになります。カメラから取得した画像をHSV色空間に変換し、色相が赤のエリアを抽出し、その中で面積が最大の領域の中心座標を求めます。その座標の方向に向かって舵を切るように左右のモーターの速度を調整します。一定以上の大きさの領域が見つからない時はモータを止めています。
import time
import picamera
import picamera.array
import cv2
import numpy as np
import explorerhat

DEBUG = False

low = np.array([160,128,128])
high = np.array([200,255,255])

camera = picamera.PiCamera()
camera.resolution = (640,480)
camera.vflip = True
camera.hflip = True
camera.start_preview()
time.sleep(1)
camera.stop_preview()

r = explorerhat.motor.one
l = explorerhat.motor.two

def get_target():
  global camera
  stream = picamera.array.PiRGBArray(camera)
  camera.capture(stream, format='bgr')
  image = stream.array
  hsv = cv2.cvtColor(image, cv2.COLOR_BGR2HSV)
  mask = cv2.inRange(hsv, low, high)
  contours,_ = cv2.findContours(mask,cv2.RETR_LIST,cv2.CHAIN_APPROX_SIMPLE)
  cx, cy, max_a = -1,-1,0
  for i in range(0,len(contours)):
    if len(contours[i]) == 0: continue
    x,y,w,h = cv2.boundingRect(contours[i])
    a = cv2.contourArea(contours[i])
    if a < 1000: continue
    if a > max_a:
      cx = x + w/2
      cy = y + h/2
      max_a = a
  if DEBUG:
    cv2.imshow("image",image)
    cv2.imshow("debug",mask)
    cv2.waitKey(0)
  return (cx,cy)

w = camera.resolution[0]

while True:
  x,y = get_target()
  p = x/w if x > -1 else -1 # 0.0 - 1.0 or -1(not found)
  print("%.1f" % (p))
  if p == -1:
    r.forward(0)
    l.forward(0)
  elif p > 0.6:
    r.forward(70)
    l.forward(20)
  elif p < 0.4:
    r.forward(20)
    l.forward(70)
  else:
    r.forward(70)
    l.forward(70)
  time.sleep(0.1)
crontabに書いておくと、RaspberryPiの電源投入時に自動実行してくれます(スクリプトは$HOMEに置いてある前提です)。
@reboot python3 cvcar.py
冒頭にも書いている通り、この手順ではもはや動きません。将来似たライブラリが出てき多時にプログラムの大枠は利用できるかなと考えて残しています。
