
シンプルなTodoアプリのstate管理をreduxへと移します。
reduxではまりがちなArrayを使ったいいサンプルだと思います。
なぜならreduxではmutativeなメソッドであるpush, spliceなどの配列操作のメソッドは非推奨です。
ES6のスプレッド演算子かsliceメソッドを使いましょう。
それでは以下のtodoアプリをgit cloneしてください。
https://github.com/brunolsantos/React-Native-ToDoApp
react-native run-iosして動くことを確認しましょう。
以下のような画面が現れます。
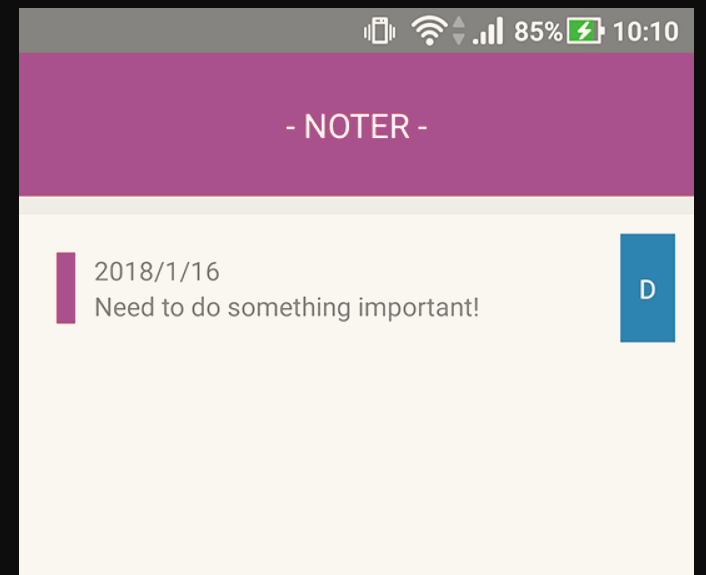
さあそれではこのシンプルなアプリにreduxを入れていきましょう。
まずはrootフォルダで
yarn add redux react-redux
reduxとreactを一緒に使うにはreact-reduxが必要です。
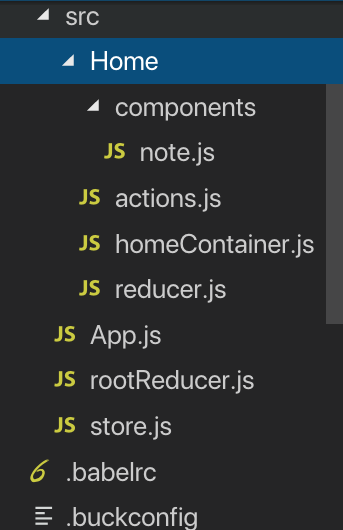
必要なフォルダ、ファイルを作りましょう。
以下のようにフォルダとファイルを作り直してください。
1. rootReducerを作ります。
rootReducerはreduxのAPIのcombineReducersで全てのreducerを一つにまとめ扱いやすくしたreducerです。
// src/rootReducer
import { combineReducers } from "redux";
import HomeReducer from "./Home/reducer";

export default combineReducers({
  home: HomeReducer
  // mapStateToPropsでstate.home.fooなどと参照できる
});
2. storeを作ります。
state専用データベースのようなものです。実態は巨大なjsonです。一度、console.log(store)して確かめてみましょう。ここにstateを集約することでスパゲッティを防いでいます。
// src/store.js
import { createStore } from "redux";
import rootReducer from "./rootReducer";

export const store = createStore(rootReducer);
3. Providerで配下のコンポーネントにstoreを渡します。
JSXで囲んであげましょう。
// src/App.js
import React, { Component } from "react";
import { Provider } from "react-redux";
import { store } from "./store";
import Home from "./Home/homeContainer";

const App = () => (
  <Provider store={store}>
    <Home />
  </Provider>
);

export default App;
以上で、どのアプリでも必要なreduxのセットアップを書き終えました。
次にactionを作っていきましょう。actionとはreducerで扱うデータをjsonにしたものです。reducerは純粋な関数、actionは関数に渡すオブジェクト/引数と考えてokです。なお、actionはreduxの機能ではなく、純粋なjsです。
const ADD_NOTE = "ADD_NOTE"の部分はredux的に必要です。
諦めて書きましょう。
4. actionを作成する。
// src/Home/actions.js
export const ADD_NOTE = "ADD_NOTE";
export const DELETE_NOTE = "DELETE_NOTE";

export const addNote = payload => ({
  type: "ADD_NOTE",
  payload: { noteText: payload }
});

export const deleteNote = payload => ({
  type: "DELETE_NOTE",
  payload
});
5. reducerを作成する。
ここで作成したreducerをrootReducerに食わせます。reducerは純粋な関数です。
reducerはstateを加工してdispatchでstoreに保存します。
switch文でactionの名前ごとに処理を分けます。
reducer自体に名前は必要ないので省略していますが、(export defaultされるものに名前は必要ない)名前をつけることも出来ます。
// src/Home/reducer.js
const INITIAL_STATE = {
  noteArray: []
};

export default (state = INITIAL_STATE, action) => {
  switch (action.type) {
    case "ADD_NOTE":
      return {
        noteArray: [...state.noteArray, action.payload]
      };
    case "DELETE_NOTE":
      return {
        ...state,
        noteArray: [...state.noteArray, action.payload]
      };
    default:
      return state;
  }
};
7. containerを作成する。containerとはreduxからstateを受け取るコンポーネントです。connect関数を利用してstoreからstateを受け取ります。stateを受け取らないコンポーネントはcomponentフォルダに置くのが一般的です。
簡潔に言うと、
mapStateToProps = グローバルstate
mapDispatchToProps = dispatchする関数
を表します。。
// src/Home/homeContainer.js
import React, { Component } from "react";
import {
  View,
  Text,
  StyleSheet,
  TextInput,
  ScrollView,
  TouchableOpacity
} from "react-native";
import { connect } from "react-redux";
import { addNote, deleteNote } from "./actions";

import Note from "./components/note";

class Home extends Component {
  // constructorはthis.stateを使う時のみ必要。reactの機能ではなく、jsの機能のなので注意。
  constructor(props) {
    super(props);
    this.state = {
      noteText: ""
    };
  }

  // renderとreturnの間には、render以下で使う変数を定義できる。ここではJSXをnotesという変数に入れている。
  // arrayの中には、keyを保存せず、子コンポーネントに渡すときにゼロからmapでキーを生成している。
  render() {
    let notes = this.props.noteArray.map((val, key) => {
      return (
        <Note
          key={key}
          keyval={key}
          val={val}
          deleteMethod={() => this.deleteNote(key)}
        />
      );
    });
    return (
      <View style={styles.container}>
        <View style={styles.header}>
          <Text style={styles.headerText}>- NOTER -</Text>
        </View>
        <ScrollView style={styles.scrollContainer}>{notes}</ScrollView>

        <View style={styles.footer}>
          <TextInput
            style={styles.textInput}
            placeholder=">note"
            onChangeText={noteText => this.setState({ noteText })}
            value={this.state.noteText}
            placeholderTextColor="white"
            underlineColorAndroid="transparent"
          />
        </View>
        <TouchableOpacity
          onPress={this.addNote.bind(this)}
          style={styles.addButton}
        >
          <Text style={styles.addButtonText}>+</Text>
        </TouchableOpacity>
      </View>
    );
  }

  addNote() {
    if (this.state.noteText) {
      this.props.onAddNote(this.state.noteText);
      this.setState({ noteText: "" });
    }
  }

  deleteNote(key) {
    this.state.noteArray.splice(key, 1);
    this.setState({ noteArray: this.state.noteArray });
  }
}

const mapStateToProps = state => {
  // stateとはstoreのこと。巨大なjsonで全てのstateを管理する
  console.log(state)
  return {
    noteArray: state.home.noteArray
  };
};

const mapDispatchToProps = dispatch => {
  // dispatchも確認してみよう。
  console.log(dispatch)
  return {
    onAddNote: text => dispatch(addNote(text))
  };
};

export default connect(mapStateToProps, mapDispatchToProps)(Home);

const styles = StyleSheet.create({
  container: {
    flex: 1
  },
  header: {
    backgroundColor: "#E91E63",
    alignItems: "center",
    justifyContent: "center",
    borderBottomWidth: 10,
    borderBottomColor: "#ddd"
  },
  headerText: {
    color: "white",
    fontSize: 18,
    padding: 26
  },
  scrollContainer: {
    flex: 1,
    marginBottom: 100
  },
  footer: {
    position: "absolute",
    bottom: 0,
    left: 0,
    right: 0,
    zIndex: 10
  },
  textInput: {
    alignSelf: "stretch",
    color: "#fff",
    padding: 20,
    backgroundColor: "#252525",
    borderTopWidth: 2,
    borderTopColor: "#ededed"
  },
  addButton: {
    position: "absolute",
    zIndex: 11,
    right: 20,
    bottom: 90,
    backgroundColor: "#E91E63",
    width: 70,
    height: 70,
    borderRadius: 35,
    alignItems: "center",
    justifyContent: "center",
    elevation: 8
  },
  addButtonText: {
    color: "#fff",
    fontSize: 24
  }
});
9. note.jsをcomponentsの中に移動する。
// src/components/nots.js
import React, { Component } from "react";
import { View, Text, StyleSheet, TouchableOpacity } from "react-native";

export default class Note extends Component {
  render() {
    return (
      <View key={this.props.keyval} style={styles.note}>
        <Text style={styles.noteText}>{this.props.val.noteText}</Text>

        <TouchableOpacity
          onPress={this.props.deleteMethod}
          style={styles.noteDelete}
        >
          <Text style={styles.noteDeleteText}>D</Text>
        </TouchableOpacity>
      </View>
    );
  }
}

const styles = StyleSheet.create({
  note: {
    position: "relative",
    padding: 20,
    paddingRight: 100,
    borderBottomWidth: 2,
    borderBottomColor: "#ededed"
  },
  noteText: {
    paddingLeft: 20,
    borderLeftWidth: 10,
    borderLeftColor: "#E91E63"
  },
  noteDelete: {
    position: "absolute",
    justifyContent: "center",
    alignItems: "center",
    backgroundColor: "#2980b9",
    padding: 10,
    top: 10,
    bottom: 10,
    right: 10
  },
  noteDeleteText: {
    color: "white"
  }
});
ところで、このメモアプリ一つ欠点がある。
それはアプリを閉じるとメモが消えてしまうこと笑
そこでredux-persistを使いstoreを永続化(スマホのデータベースに保存)することにより解決する。
さあ次のチュートリアルに進もう。
あと少しで君もRNマスターだ。
世界一シンプルなReact-native + Reduxチュートリアル3
最後に
4つもファイルが増えました。めんどくさいですね。
本当にredux必要ですか?
unstatedなら30分で基本的な使い方マスターできますよ。
ただ、大規模になればなるほど、疎結合であり、スパゲッティになりにくいreduxの強みが生きてきます。
とてもよくスケールするので、他人の書いたコードを気にせずに自分のコードを書けるのでストレスが貯まりません。
reduxのことは嫌いになってもReactNativeのことは嫌いにならないでください。