・MFCで開発をするときは、ドラッグアンドドロップで各種コントロールを配置できましたが、UWPアプリではXamlを編集して各種コントロールを配置して行きます。それほど難しいことをやるつもりはないので気楽にしてください。
・以下のWebページを参考にさせていただきました。ありがとうございます。
XAMLの基本(Xamarin公式XAMLページ全訳)と基礎の入り口
WPF Tips集(~するには)
XAML入門 XAMLの概要
基本的には上記を参考にした方が良く書かれています。
xamlとは
・MSのXAMLの概要をよく読んでください(糸冬 了)。
・C++/WinRTを利用する立場から言うと、コントロールの配置やコントロールの各種プロパティー、イベントハンドラーの設定、バインドの設定等に使用する言語です。基本xmlなんでタグで編集して見た目やイベントハンドラーを設定するために必要と思ってもらえれば大丈夫っぽい?VSのintellicodeが優秀なので、適当にプロパティー等を追加できるのがありがたいです。
1. どんな外観を作成するか
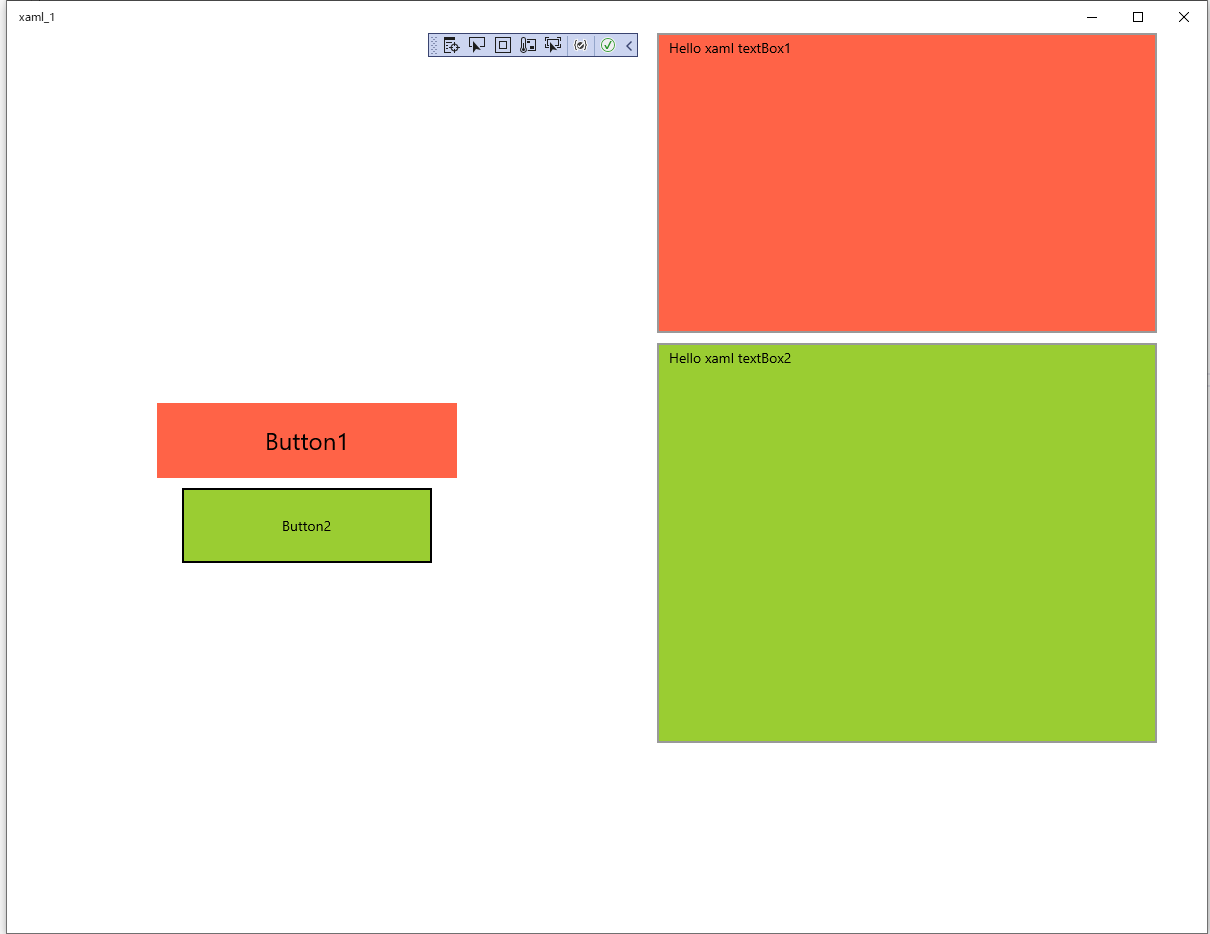
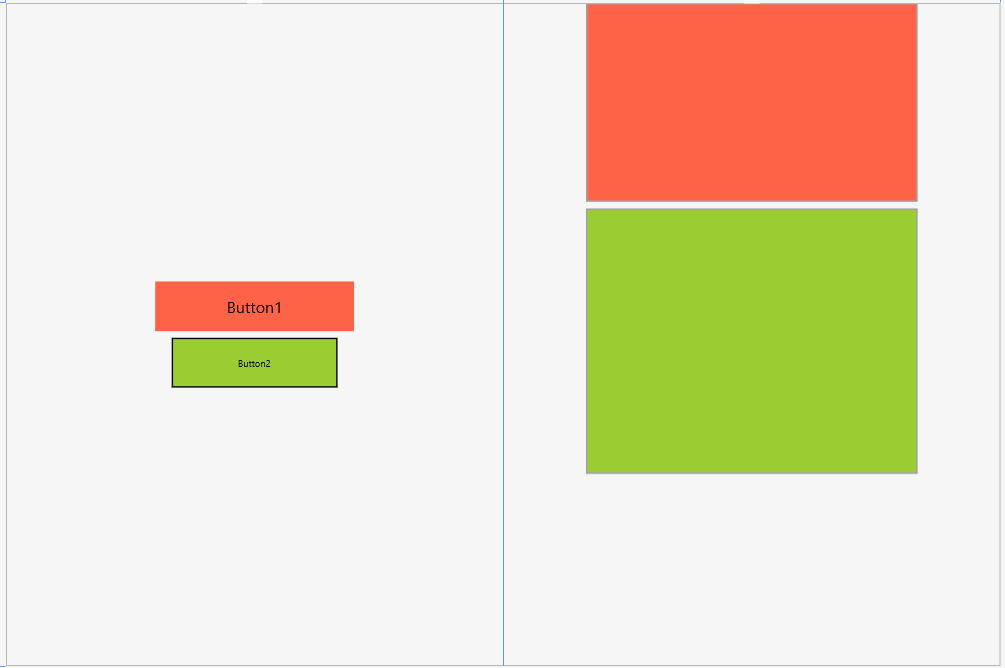
・画面を二つに分けて、左にボタンを配置、右にTextBoxを配置。ボタンは真ん中揃え、TextBoxは上端揃えマージンは10という感じです。
2. プロジェクトの作成
・前回と同じく、Blank App(C++/WinRT)を選び、今回は「xaml_1」という名前でプロジェクトを作成します。
3. 邪魔なボタンを消す
・MainPage.xamlを選び、deleteキーで消しちゃってください。こんな感じに
<Page
    x:Class="BlankApp1.MainPage"
    xmlns="http://schemas.microsoft.com/winfx/2006/xaml/presentation"
    xmlns:x="http://schemas.microsoft.com/winfx/2006/xaml"
    xmlns:local="using:BlankApp1"
    xmlns:d="http://schemas.microsoft.com/expression/blend/2008"
    xmlns:mc="http://schemas.openxmlformats.org/markup-compatibility/2006"
    mc:Ignorable="d">

    <StackPanel Orientation="Horizontal" HorizontalAlignment="Center" VerticalAlignment="Center">
        <Button x:Name="myButton" Click="ClickHandler">Click Me</Button>
    </StackPanel>
</Page>
<Page
    x:Class="BlankApp1.MainPage"
    xmlns="http://schemas.microsoft.com/winfx/2006/xaml/presentation"
    xmlns:x="http://schemas.microsoft.com/winfx/2006/xaml"
    xmlns:local="using:BlankApp1"
    xmlns:d="http://schemas.microsoft.com/expression/blend/2008"
    xmlns:mc="http://schemas.openxmlformats.org/markup-compatibility/2006"
    mc:Ignorable="d">

    <StackPanel Orientation="Horizontal" HorizontalAlignment="Center" VerticalAlignment="Center">

    </StackPanel>
</Page>
・ハンドラが記述されているMainPage.cppもCliclHandlerを消してください。
・あ、忘れてましたが、MainPage.hからも消して下さい。
# include "pch.h"
# include "MainPage.h"
# include "MainPage.g.cpp"

using namespace winrt;
using namespace Windows::UI::Xaml;

namespace winrt::BlankApp1::implementation
{
    MainPage::MainPage()
    {
        InitializeComponent();
    }

    int32_t MainPage::MyProperty()
    {
        throw hresult_not_implemented();
    }

    void MainPage::MyProperty(int32_t /* value */)
    {
        throw hresult_not_implemented();
    }

    void MainPage::ClickHandler(IInspectable const&, RoutedEventArgs const&)
    {
        myButton().Content(box_value(L"Clicked"));
    }
}
# include "pch.h"
# include "MainPage.h"
# include "MainPage.g.cpp"

using namespace winrt;
using namespace Windows::UI::Xaml;

namespace winrt::BlankApp1::implementation
{
    MainPage::MainPage()
    {
        InitializeComponent();
    }

    int32_t MainPage::MyProperty()
    {
        throw hresult_not_implemented();
    }

    void MainPage::MyProperty(int32_t /* value */)
    {
        throw hresult_not_implemented();
    }
}
・これでビルドすると、邪魔なボタンが消えます。次からが本番です。
4.MainPage.xamlの編集
・Mainpage.xamlを以下のように書き換えます
<Page
    x:Class="BlankApp1.MainPage"
    xmlns="http://schemas.microsoft.com/winfx/2006/xaml/presentation"
    xmlns:x="http://schemas.microsoft.com/winfx/2006/xaml"
    xmlns:local="using:BlankApp1"
    xmlns:d="http://schemas.microsoft.com/expression/blend/2008"
    xmlns:mc="http://schemas.openxmlformats.org/markup-compatibility/2006"
    mc:Ignorable="d">

    <Grid>
        <Grid.ColumnDefinitions>
            <ColumnDefinition />
            <ColumnDefinition />
        </Grid.ColumnDefinitions>

        <StackPanel Orientation="Vertical" HorizontalAlignment="Center" VerticalAlignment="Center" Grid.Column="0">
            <Button x:Name="button1" Width="300" Height="75" Content="Button1" FontSize="24" Background="Tomato"/>
            <Button x:Name="button2" Width="250" Height="75" Content="Button2" Margin="0,10,0,0" HorizontalAlignment="Center" Background="YellowGreen" >
                <Button.BorderBrush>
                    <SolidColorBrush Color="{ThemeResource SystemColorBackgroundColor}"/>
                </Button.BorderBrush>
            </Button>
        </StackPanel>

        <StackPanel Orientation="Vertical" HorizontalAlignment="Center" VerticalAlignment="Top" Grid.Column="1">
            <TextBox x:Name="textBox1" Height="300" Width="500" Background="Tomato" ></TextBox>
            <TextBox x:Name="textBox2" Height="400" Width="500" Margin="0,10,0,0" Background="YellowGreen" ></TextBox>
        </StackPanel>
    </Grid>
</Page>
・ここで「Button」にClick=""を追加すると以下のように<新しいイベント ハンドラー>が追加できるようになるので、これが出てきたら<新しいイベントハンドラー>をクリック。イベントハンドラーを追加してください。同様にbutton2にも追加してあげてください。

・MainPage.cppでは「button1_Click」と「button2_Click」のイベントハンドラーが追加されているはず。確かめたら、簡単にxamlの説明に入ります。
・<Grid>:今回は画面を二つに分けるために使用しています。
・<Grid.ColumnDefinitions>:<ColumnDefinition />の数だけ画面を横に分割します。今回は2回なので横に2分割しています。今回は使用しませんでしたが、<Grid.RowDefinitions>で画面を縦に分割することもできます。
・<StackPanel>:複雑な配置にするときは使用しませんが、今回は並べて表示するだけなので使用しました。各コントロールにMarginを忘れると、後ろに隠れるので注意してください。
・後は色々察してください。xamlの編集でもIntelliCodeで色々表示されるのでよくわからなくてもいろんな機能が追加できるはずです。
5.MainPage.cppを編集してビルド、実行
・MainPage.cppのイベントハンドラーに以下のように追加します。コード量が少ないので全部載せます。
# include "pch.h"
# include "MainPage.h"
# include "MainPage.g.cpp"

using namespace winrt;
using namespace Windows::UI::Xaml;

namespace winrt::BlankApp1::implementation
{
    MainPage::MainPage()
    {
        InitializeComponent();
    }

    int32_t MainPage::MyProperty()
    {
        throw hresult_not_implemented();
    }

    void MainPage::MyProperty(int32_t /* value */)
    {
        throw hresult_not_implemented();
    }

}


void winrt::BlankApp1::implementation::MainPage::button1_Click(winrt::Windows::Foundation::IInspectable const& sender, winrt::Windows::UI::Xaml::RoutedEventArgs const& e)
{
    //追加
    textBox1().Text(L"Hello xaml textBox1");
}


void winrt::BlankApp1::implementation::MainPage::button2_Click(winrt::Windows::Foundation::IInspectable const& sender, winrt::Windows::UI::Xaml::RoutedEventArgs const& e)
{
    //追加
    textBox2().Text(L"Hello xaml textBox2");
}
・ビルド実行して、ボタンをクリックして以下のようになれば成功です。

・タイトルを変えましたがこれはPackage.appxmanifest→アプリケーション→表示名から変更できます。
こいつもGithubをおいておきます。
yoshiyoshi-git/xaml_1
次はデータバインディングその1です。このあたりからC#と比較して面倒になっていきます・・・
