はじめに
この記事では、input[type=radio] を用いたスタイリッシュなラジオボタンのカスタマイズ方法を解説します。次のような悩みを持つ方の参考になれば幸いです
- ラジオボタンが希望のデザインにならない
- スマートフォンで表示が異なってしまう
- ライブラリを使用した経験はあるが、自作はしたことがない
今回のゴール
スマートフォンのGoogle Chromeおよびデスクトップ版Chromeで統一された下記のデザインのラジオボタンを作成することです。

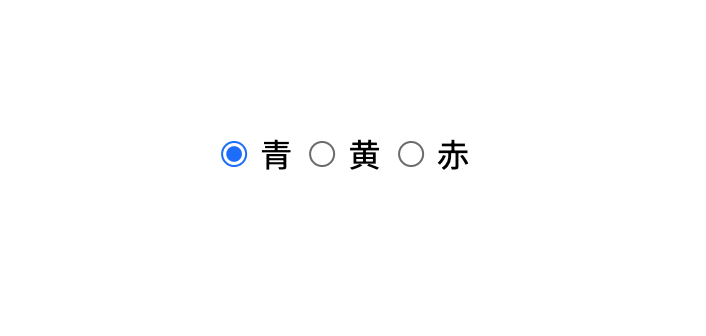
デフォルトのラジオボタンの課題
以下、サンプルソース
<!DOCTYPE html>
<html lang="ja">

<head>
  <meta charset="UTF-8">
  <meta name="viewport" content="width=device-width, initial-scale=1.0">
  <style lang="scss">
    @import url('https://fonts.googleapis.com/css2?family=Noto+Sans+JP:wght@300;400;500&display=swap');

    .select-color {
      font-family: "Noto Sans JP", sans-serif;
      position: absolute;
      top: 50%;
      left: 50%;
      transform: translate(-50%, -50%);
    }
  </style>
</head>

<body>
  <div class="select-color">
    <input type="radio" name="color" class="input-radio" />
    <label for="blue" class="label">青</label>

    <input type="radio" name="color" class="input-radio" />
    <label for="yellow" class="label">黄</label>

    <input type="radio" name="color" class="input-radio" />
    <label for="red" class="label">赤</label>
  </div>
</body>

</html>
実は、ブラウザやOSごとにラジオボタンのデフォルト表示が異なるため、見た目の統一が困難です。これは、各プラットフォームがユーザーの視認性や操作感を最適化しようとする結果です。
しかし、実際のプロジェクトでは、ウェブとモバイル間で一貫性のあるデザインが求められることが多いです。このため、カスタムスタイリングスキルは必須となります。
それでは、本記事で目標とするカスタムラジオボタンの実装について詳しく解説していきましょう。
カスタムスタイリング手順
1. デフォルトスタイルの無効化と基本形状の設定
まずは、ブラウザのデフォルトスタイリングを無効化し、基本的な円形を形成します。これには以下のCSSプロパティを使用します
.input-radio {
  -webkit-appearance: none;
  height: 18px;
  width: 18px;
  border: 1px solid #000;
  border-radius: 50%;
}
2. 選択状態のカスタムデザイン
次に、ユーザーがラジオボタンをクリックしたときに表示される内側の丸(選択インジケータ)をカスタマイズします。
疑似要素を活用し、以下のように設定します
.input-radio:before {
  content: "";
  display: block;
  position: absolute;
  width: 60%;
  height: 60%;
  top: 50%;
  left: 50%;
  transform: translate(-50%, -50%);
  border-radius: 50%;
}
この設定により、ラジオボタンが選択されたときに、内側に位置する丸が中心から均等に配置されるようになります。
positionとtransformを使った中心寄せの方法は覚えておくと何かと便利です。
3. 選択状態での色の設定
最終ステップとして、ラジオボタンがクリックされた際に色が変化するように設定しましょう。ここでは:checked疑似クラスを用いて、選択された状態を検出し、以下のように背景色を変更します
.input-radio:checked:before {
    background: black;
}
このCSS設定により、ラジオボタンが選択されると、内部の丸が黒色に変わります。これはチェックボタンなどの他のフォーム要素にも応用可能です。
以下、完成したソースです
<!DOCTYPE html>
<html lang="ja">

<head>
  <meta charset="UTF-8">
  <meta name="viewport" content="width=device-width, initial-scale=1.0">
  <style lang="scss">
    @import url('https://fonts.googleapis.com/css2?family=Noto+Sans+JP:wght@300;400;500&display=swap');

    .select-color {
      font-family: "Noto Sans JP", sans-serif;
      position: absolute;
      top: 50%;
      left: 50%;
      transform: translate(-50%, -50%);
      display: flex;
      column-gap: 10px;
      align-items: center;

    }

    .input-radio {
      -webkit-appearance: none;
      height: 18px;
      width: 18px;
      border: 1px solid #000;
      border-radius: 50%;
      position: relative;

      &:before {
        content: "";
        display: block;
        position: absolute;
        width: 60%;
        height: 60%;
        top: 50%;
        left: 50%;
        transform: translate(-50%, -50%);
        border-radius: 50%;
      }

      &:checked:before {
        background: black;
      }
    }
  </style>
</head>

<body>
  <div class="select-color">
    <input type="radio" name="color" class="input-radio" />
    <label for="blue" class="label">青</label>

    <input type="radio" name="color" class="input-radio" />
    <label for="yellow" class="label">黄</label>

    <input type="radio" name="color" class="input-radio" />
    <label for="red" class="label">赤</label>
  </div>
</body>

</html>
まとめ
ここまでinput[type=radio] をカスタマイズする基本的な手順について解説しました。
多くの場合、デフォルトのラジオボタンではプロジェクトの具体的な要件を満たすことが難しく、外部ライブラリを使用しても同様の課題が生じることがあります。
そのため、自分で直接カスタムデザインを実装する基本的な手順が頭の片隅にあると良いかなと思っています。

