Scratch3.0 の scratch-render package を、使ってみましょう。
どんな感じに動作させることができるのでしょうか?
試して見ましょう
Scratch-Renderの機能を読み取ってみよう
scratch-render では、RenderWebGL を使う
を見てください。
Entry は src/index.js のようです。
次は、scratch-reader の Entry を見てください。
https://github.com/LLK/scratch-render/blob/develop/src/index.js
module.exports = RenderWebGL;
と記載されています。
scratch-render では、RenderWebGL を使うことが解りました。
Scratchで利用していた機能が見つかる
https://github.com/LLK/scratch-render/blob/develop/src/RenderWebGL.js
のメソッドを見て見てください。
これが、Scratch-Renderで利用できる機能です。
resize (pixelsWide, pixelsTall)
setBackgroundColor (red, green, blue)
setDebugCanvas (canvas)
setStageSize (xLeft, xRight, yBottom, yTop)
getNativeSize ()
createBitmapSkin (bitmapData, costumeResolution, rotationCenter)
createSVGSkin (svgData, rotationCenter)
createPenSkin ()
createTextSkin (type, text, pointsLeft)
updateSVGSkin (skinId, svgData, rotationCenter)
updateTextSkin (skinId, type, text, pointsLeft)
destroySkin (skinId)
createDrawable ()
destroyDrawable (drawableID)
setDrawableOrder (drawableID, order, optIsRelative, optMin)
draw ()
getSkinSize (drawableID)
isTouchingColor (drawableID, color3b, mask3b)
isTouchingDrawables (drawableID, candidateIDs)
pick (centerX, centerY, touchWidth, touchHeight, candidateIDs)
extractDrawable (drawableID, x, y)
extractColor (x, y, radius)
updateDrawableProperties (drawableID, properties)
getFencedPositionOfDrawable (drawableID, position)
penClear (penSkinID)
penPoint (penSkinID, penAttributes, x, y)
penLine (penSkinID, penAttributes, x0, y0, x1, y1)
penStamp (penSkinID, stampID)
onNativeSizeChanged (event)
これらが、scratch-renderで利用できる機能です。
うーむ、Scratch を使っている人なら馴染みの名前を見つけられますね。
Pen とか
Sramp とか
基本的な使い方は、Sprite を生成してLoopするだけ
Canvasから、WebGLRenderを生成する。
var canvas = document.getElementById('scratch-stage');
var renderer = new ScratchRender(canvas);
WebGLRender から、画像を読み込む
renderer.createBitmapSkin()
renderer.updateDrawableProperties()
位置情報とか更新する
renderer.updateDrawableProperties(this.drawableID, {
  position: [this.x, this.y], scale: [20, 20], direction: 90
});
以上をループする。
function drawStep() {
   ..
   ..
    renderer.draw();
    requestAnimationFrame(drawStep);
}
drawStep();
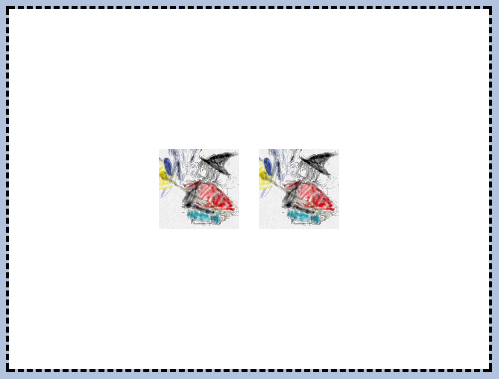
使ってみよう。
上下左右キーで画像が上下左右に移動する
アプリを作成して見ましょう!!
project.json を作る
mkdir scratch-render-hello
cd scratch-render-hello
npm init -f
npm install --save-dev webpack babel-core babel-loader babel-eslint babel-preset-es2015
npm install --save-dev webpack-dev-server scratch-render copy-webpack-plugin
webpack.config.js を作る
emacs webpack.config.js
const CopyWebpackPlugin = require('copy-webpack-plugin');
const path = require('path');
const webpack = require('webpack');

const base = {
    devServer: {
        contentBase: false,
        host: '0.0.0.0',
        port: process.env.PORT || 8362
    },
    module: {
        rules: [
            {
                include: [
                    path.resolve(__dirname, 'src')
                ],
                loader: 'babel-loader',
                options: {
                    presets: ['es2015']
                }
            },
        ]
    },
    plugins: process.env.NODE_ENV === 'production' ? [
        new webpack.optimize.UglifyJsPlugin({
            include: /\.min\.js$/,
            minimize: true
        })
    ] : []
};

module.exports = [
    Object.assign({}, base, {
        target: 'web',
        entry: {
            'scratch-render-hello': './src/hello/scratch-render-hello.js'
        },
        output: {
            path: path.resolve(__dirname, 'hello'),
            filename: '[name].js'
        },
        plugins: base.plugins.concat([
            new CopyWebpackPlugin([
                {
                    from: 'src/hello'
                }
            ])
        ])
    }),
];
JavaScrpt と Index.htmlを作る
mkdirs src/hello
emacs src/hello/index.html
<!DOCTYPE html>
<html lang="en">
<head>
    <meta charset="UTF-8">
    <title>Hello, World</title>
    <style>
        #scratch-stage { width: 480px; border:3px dashed black;}
    </style>
</head>
<body style="background: lightsteelblue">
<canvas id="scratch-stage"></canvas>
<script src="scratch-render-hello.js"></script>
</body>
</html>
emacs src/hello/scratch-render-hello.js
const ScratchRender = require('scratch-render');
class Chara {
   constructor(renderer, name, imageUrl, x=0, y=0) {
       this.x = x;
       this.y = y;
       this.name;
       this.drawableID = renderer.createDrawable();
       this.updateImage(renderer, this.drawableID, imageUrl);
   }

   updateImage(renderer, drawableID, imageUrl) {
        var image = new Image();
        image.crossOrigin = 'anonymous';
        image.src = imageUrl;
        image.onload = function () {
            var skinId = renderer.createBitmapSkin(image);
            console.log(""+drawableID);
            renderer.updateDrawableProperties(drawableID, {
                skinId: skinId
            });
        };
   }
   update(renderer) {
        renderer.updateDrawableProperties(this.drawableID, {
            position: [this.x, this.y],
            scale: [20, 20],
            direction: 90
        });
   }
   onKeyDown(keyCode) {}
}

class CharaA extends Chara {
   onKeyDown(keyCode) {
        switch(keyCode) {
            case 37: // left
            this.x -=10;
            break;
            case 39: // right
            this.x +=10;
            break;
            case 38: // up
            this.y +=10;
            break;
            case 40: // down
            this.y -=10;
            break;
        }
   }
}
class CharaB extends Chara {
   onKeyDown(keyCode) {
        switch(keyCode) {
            case 72: //h
            this.x -=10;
            break;
            case 76: //l
            this.x +=10;
            break;
            case 75: //k
            this.y +=10;
            break;
            case 74: //j
            this.y -=10;
            break;
        }
   }
}

var canvas = document.getElementById('scratch-stage');
var renderer = new ScratchRender(canvas);
var chara1 = new CharaA(renderer, "test", "icon.png", -50,0);
var chara2 = new CharaB(renderer, "test", "icon.png", 50,0);

document.onkeydown = function (ev) {
    chara1.onKeyDown(ev.keyCode);
    chara2.onKeyDown(ev.keyCode);
};


function drawStep() {
    chara1.update(renderer);
    chara2.update(renderer);
    renderer.draw();
    requestAnimationFrame(drawStep);
}
drawStep();
PS
今回のコードは以下
以下の場所でも、アレコレ書いていきます。
Scratch3.0 自分専用機 を作ろう!!
(0)
(1) Scratch3.0をビルドしてみよう
(2) Scratch3.0 を Androidアプリとして動作させてみよう (1)
(3) Scratch3.0 を Androidアプリとして動作させてみよう (2)
(4) Scratch3.0 を Androidアプリとして動作させてみよう (3)
(5) Webpack とは)
(6) Scratch3.0 の package.jsonを読んでみよう
(7) scratch-gui を インストールしてみよう
(8) scratch-vm に利用されている、scratch-xxx を触ってみよう
(9) Babel を触ってみよう
(10) scratch-render.js で 何か作って触ってみよう
Scratch2.0 入門

火の型 With Scratch 2.0 (プログラム入門) 第00巻
火の型 With Scratch 2.0 (プログラム入門) 第01巻
炎の型 With Scratch 2.0 (ゲームプログラム入門)