概要
本記事ではPayjpを用いてトークンを取得するまでを解説します。
Payjp自体の説明は割愛させていただきます。
前提
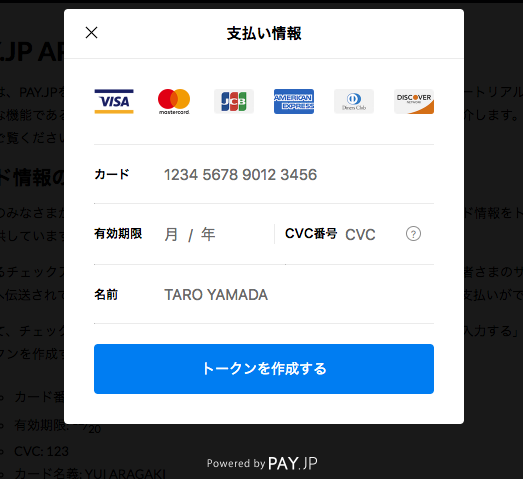
Viewに決済用のフォームを作成するのですが、今回はscriptタグを1行記述するだけでデザインされた決済フォーム、カード情報のバリデーション、カード情報のトークン化を行うフォームを生成することができる機能は用いません。

理由としてはこれを用いてしまうと、自由にViewをカスタマイズ出来ないからです。
・言語はRuby
・Payjpのgemは導入済み
・Haml使用
・ローカル環境での使用
全体の流れ
トークンを取得する流れとしては
- Viewファイルにてフォームを実装
- JSファイル作成
- JSファイル内でトークン作成処理
となりますので一つずつ解説していきます。
Viewファイルにてフォームを実装
View実装は自由にカスタムする形となります。
基本的にFormが実装できていれば問題ありません。
        = form_tag("/payments", method: :post, id: 'charge-form') do
          %span.charge-errors
          .register-inner__content

            .form-group
              %span.registration_font カード番号
              %span.require-icon 必須
              %input.number.input-default{maxlength: "16", name: "number", placeholder: "カード番号", type: "text", id: "payment_card_no"}/
              = image_tag "card.png", class:"card-png"

            .form-group
              %span.registration_font 有効期限
              %span.require-icon 必須
              .expiration_date_box
                .expiration_date_box__wrap
                  %select.exp_month#payment_expiration_date_1i{maxlength: "2", name: "exp_month", type: "text"}
                    %option{value: "1"}01
                    %option{value: "2"}02
                    %option{value: "3"}03
                    %option{value: "4"}04
                    %option{value: "5"}05
                    %option{value: "6"}06
                    %option{value: "7"}07
                    %option{value: "8"}08
                    %option{value: "9"}09
                    %option{value: "10"}10
                    %option{value: "11"}11
                    %option{value: "12"}12
                  %i.fas.fa-angle-down.payment-select-icon
                  %text.expiration_date_box__text 月

              .expiration_date_box
                .expiration_date_box__wrap
                  %select.exp_year#payment_expiration_date_2i{maxlength: "4", name: "exp_year", type: "text"}
                    %option{value: "2019"}19
                    %option{value: "2020"}20
                    %option{value: "2021"}21
                    %option{value: "2022"}22
                    %option{value: "2023"}23
                    %option{value: "2024"}24
                    %option{value: "2025"}25
                    %option{value: "2026"}26
                    %option{value: "2027"}27
                    %option{value: "2028"}28
                    %option{value: "2029"}29
                  %i.fas.fa-angle-down.payment-select-icon
                  %text.expiration_date_box__text 年

            .form-group
              %span.registration_font セキュリティー番号
              %span.require-icon 必須
              %input.cvc.input-default{maxlength: "3", name: "cvc", placeholder: "カード背面もしくは4桁もしくは3桁の番号", type: "text", id: "payment_card_cvc"}
              .card-indo
                カード裏面の番号とは
            .actions
              %button.register-member#submit-button{type: "submit"} 登録完了

ここでの必須機能
・formに対してID指定
= form_tag("/payments", method: :post, id: 'charge-form') do
・それぞれのform要素に対してname属性、IDを指定
%input.number.input-default{maxlength: "16", name: "number", placeholder: "カード番号", type: "text", id: "payment_card_no"}
%select.exp_month#payment_expiration_date_1i{maxlength: "2", name: "exp_month", type: "text"}
%select.exp_year#payment_expiration_date_2i{maxlength: "4", name: "exp_year", type: "text"}
%input.cvc.input-default{maxlength: "3", name: "cvc", placeholder: "カード背面もしくは4桁もしくは3桁の番号", type: "text", id: "payment_card_cvc"}
%button.register-member#submit-button{type: "submit"} 登録完了
JSファイル作成
まずpayjp.jsをheadタグで読み込みます。
%script{src: "https://js.pay.jp/", type: "text/javascript"}
payjp.jsはカード情報のトークン化のみに特化したライブラリです。
payjp.jsライブラリは、 https://js.pay.jp にホストされているので、このドメインを読み込んで使います。ローカル(file:///)上では動作しません。
つまりこれを読み込む事で、トークン取得などのメソッドを使用できるようになります。
そしてpayjp.jsファイルを作成します。
$(document).on('turbolinks:load', function() {
  var form = $("#charge-form");
  Payjp.setPublicKey('pk_test_46e0715c69e5c4ec9239df4c');
  $(document).on("click", "#submit-button", function(e) {

    e.preventDefault();
    form.find("input[type=submit]").prop("disabled", true);

    var card = {
        number: $("#payment_card_no").val(),
        cvc: $("#payment_card_cvc").val(),
        exp_month: $("#payment_expiration_date_1i").val(),
        exp_year: $("#payment_expiration_date_2i").val(),
    };
    Payjp.createToken(card, function(s, response) {
      if (response.error) {
        alert('トークン作成エラー発生');
      }
      else {
        $(".number").removeAttr("name");
        $(".cvc").removeAttr("name");
        $(".exp_month").removeAttr("name");
        $(".exp_year").removeAttr("name");
        var token = response.id;

        form.append($('<input type="hidden" name="payjpToken" />').val(token));
        form.get(0).submit();
      }
    });
  });
});
JSファイル内でトークン作成処理
JSファイル内の記述を解説していきます。
Payjpにログイン後、APIキーの情報のところからテスト公開鍵を持ってきて記述します
Payjp.setPublicKey('pk_test_46e0715c69e5c4ec9239df4c');
Formがsubmitされた時にイベント発火させ、それぞれform要素のvalueを取り出します。
  $(document).on("click", "#submit-button", function(e) {

    e.preventDefault();
    form.find("input[type=submit]").prop("disabled", true);

    var card = {
        number: $("#payment_card_no").val(),
        cvc: $("#payment_card_cvc").val(),
        exp_month: $("#payment_expiration_date_1i").val(),
        exp_year: $("#payment_expiration_date_2i").val(),
    };
最後にPayjp.createTokenというメソッドを使ってトークンを作成します。
トークン作成は Payjp.createToken というメソッドを使って行います。
    Payjp.createToken(card, function(s, response) {
      if (response.error) {
        alert('トークン作成エラー発生');
      }
      else {
        $(".number").removeAttr("name");
        $(".cvc").removeAttr("name");
        $(".exp_month").removeAttr("name");
        $(".exp_year").removeAttr("name");
        var token = response.id;

        form.append($('<input type="hidden" name="payjpToken" />').val(token));
        form.get(0).submit();
      }
    });
そしてformにinput要素をappendして、name属性にトークンのキー名を指定します。
form.append($('<input type="hidden" name="payjpToken" />').val(token));
form.get(0).submit();
