以前、「さくらVPS(CentOS7)で、Nginx+PHP7.1(7.3)+MariaDBのWordPressを構築(HTTPS対応)」という記事を書きましたが、その続編(だいぶ時間空いてるけど)として、同じ環境下にphpMyAdminを入れてみます。
前提としては、
- CentOS Linux release 7.2.1511 (Core)
- nginx version: nginx/1.12.1
- PHP 7.1.8 (cli) (built: Aug 2 2017 12:13:05) ( NTS )
- mysql Ver 15.1 Distrib 10.2.7-MariaDB, for Linux (x86_64) using readline 5.1
一応、Remiリポジトリを確認
$ rpm -qa | grep "remi-"
remi-release-7.7-1.el7.remi.noarch
前回入れているので、特に問題はないですが、前回は以下のように入れました。
// Remiリポジトリ
# rpm -Uvh http://rpms.famillecollet.com/enterprise/remi-release-7.rpm
Updating / installing...
   1:remi-release-7.3-2.el7.remi      ################################# [100%]
yumでphpMyAdmin
$ sudo yum --enablerepo=remi-php71 install phpMyAdmin
--enablerepo=remi-php71がないと、依存性の部分でエラーが発生してしまいます。
メモ: php7.3 version
$ sudo yum --enablerepo=remi,remi-php73 install phpMyAdmin
phpMyAdmin用のDB
phpMyAdminを動かすだけなら(おそらく)DBは不要なのですが、どうやら環境設定を保持できない(セッション限りになる?)ようなので、作っておくことにします。
create_tablesの編集
必要なDBやTableを作成するためのSQLファイルがもともとcreate_tables.sqlとして準備されているので、これを一部編集して使います。
※編集しなくても使えるはずですが、DBユーザがrootになる気がします。
Before
-- (activate this statement if necessary)
-- GRANT SELECT, INSERT, DELETE, UPDATE, ALTER ON `phpmyadmin`.* TO
--    'pma'@localhost;
After
-- (activate this statement if necessary)
GRANT SELECT, INSERT, DELETE, UPDATE, ALTER ON `phpmyadmin`.* TO
  'hogehoge'@localhost;
ちなみに、ここで権限を与えるhogehogeユーザは既に存在していることが前提です。
実行
rootユーザで入ります。
$ mysql -u root -p
MariaDB [(none)]> source /usr/share/phpMyAdmin/sql/create_tables.sql
MariaDB [(phpmyadmin)]> FLUSH PRIVILEGES;
実行結果は省略してますが、特にエラーが出なければ大丈夫です。
PHP-FPM
これも前回インストール済みですが、確認しておきます。
$ yum info installed php-fpm
読み込んだプラグイン:fastestmirror, langpacks
インストール済みパッケージ
名前                : php-fpm
アーキテクチャー    : x86_64
バージョン          : 7.1.32
リリース            : 1.el7.remi
容量                : 4.7 M
リポジトリー        : installed
提供元リポジトリー  : remi-php71
要約                : PHP FastCGI Process Manager
URL                 : http://www.php.net/
ライセンス          : PHP and Zend and BSD and MIT and ASL 1.0 and NCSA
説明                : PHP-FPM (FastCGI Process Manager) is an alternative PHP FastCGI
                    : implementation with some additional features useful for sites of
                    : any size, especially busier sites.
もし、存在しない場合は、
$ sudo yum -y install --enablerepo=remi-php71 php-fpm
nginxでPHPを動かす際、PHP-FPMを使いますが、連携のための設定としてUNIX socketと127.0.0.1:9000といったポート指定の二種類があります。
参考)PHP-FPMの設定はUNIX socketとポート番号、どちらが良いのか
前回は何も考えず、後者のポート指定を使っていましたが、いい機会なので前者のUNIX socketに切り替えてみます。
PHP-FPMの設定変更
;listen = 127.0.0.1:9000
listen = /var/run/php-fpm/php-fpm.sock

;listen.owner = nobody
;listen.group = nobody
;listen.mode = 0660
listen.owner = nginx
listen.group = nginx
listen.mode = 0666
PHPの設定変更(php.ini)
;session.save_path = "/tmp"
session.save_path = "/var/lib/php/session"
sudo chown -R root.nginx /var/lib/php/session
nginxの設定変更
ポート指定となっている127.0.0.1:9000をコメントアウトし、php-fpm.sockのファイルパスを入れます。(この時点ではphp-fpm.sockは存在していなくて大丈夫です)
       #fastcgi_pass  127.0.0.1:9000;
        fastcgi_pass unix:/var/run/php-fpm/php-fpm.sock;
    location /phpMyAdmin {
        alias /usr/share/phpMyAdmin/;
        try_files $uri $uri/ /index.php;

        location ~ ^/phpMyAdmin/(.+\.php)$ {
            alias /usr/share/phpMyAdmin;
            fastcgi_pass unix:/var/run/php-fpm/php-fpm.sock;
            fastcgi_param SCRIPT_FILENAME /usr/share/phpMyAdmin/$1;
            include fastcgi_params;
            fastcgi_intercept_errors on;
            allow XXX.XXX.XX.XX;  # 接続元許可IP(あれば)
            deny  all;            # 上記のIP以外からの接続を拒否
        }
    }
再起動(設定の反映)
$ sudo systemctl restart php-fpm.service
$ sudo systemctl reload nginx.service
sockファイルの確認
再起動すると生成されるようです。
$ ls -l /var/run/php-fpm/php-fpm.sock
srw-rw-rw- 1 nginx nginx 0  9月 28 17:01 /var/run/php-fpm/php-fpm.sock
動作確認
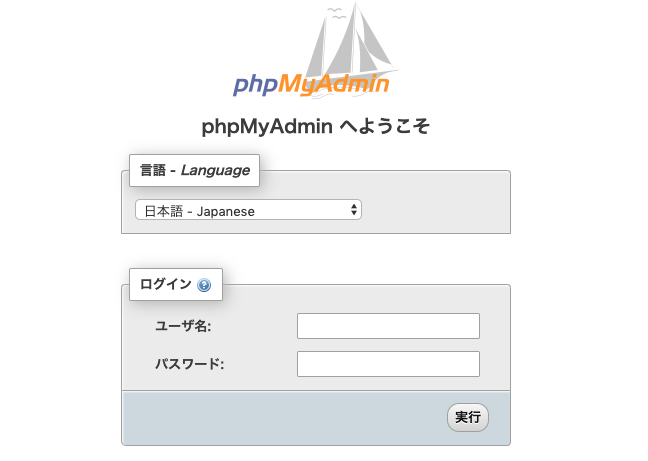
https://hogehoge.com/phpMyAdmin/といったURLでアクセスできます。
Appendix
nginxのwarning
phpMyAdminとは直接関係はないですが、nginxのエラーログに時々[warn]で以下のようなログが出てくるようになりました。
PHP-FPMとの連携を、ポート指定からUNIX socketに変更したのがトリガーだと思われます。
参考)Nginxの「proxy_buffer_size」のエラーログ対策・設定方法まとめ(upstream response is buffered to a temporary file)
2019/09/28 18:36:42 [warn] 9529#9529: *1078 an upstream response is buffered to a temporary file /var/cache/nginx/fastcgi_temp/2/02/0000000022 while reading upstream, client: 66.249.64.116, server: hogehoge.com, request: "GET /wp/page/51/ HTTP/1.1", upstream: "fastcgi://unix:/var/run/php-fpm/php-fpm.sock:", host: "hogehoge.com"
取り急ぎ、バッファサイズの変更を設定してみたところ、エラーは出なくなりました。
http {
// 略
    proxy_buffering on;
    proxy_buffer_size     8k;
    proxy_buffers         100 8k;
// 略
}
tempディレクトリへのアクセス
phpMyAdminにログイン後、以下のようなエラーが出ていました。

該当のディレクトリの権限を確認し、Webサーバ(nginx)の実行ユーザに変更します。
Before
$ ll /var/lib/phpMyAdmin
drwxr-x--- 2 apache apache 6  9月 21 15:20 config
drwxr-x--- 2 apache apache 6  9月 21 15:20 save
drwxr-x--- 2 apache apache 6  9月 21 15:20 temp
drwxr-x--- 2 apache apache 6  9月 21 15:20 upload
Run
$ cd /var/lib/
$ sudo chown nginx:nginx phpMyAdmin -R
After
$ ll /var/lib/phpMyAdmin
合計 0
drwxr-x--- 2 nginx nginx  6  9月 21 15:20 config
drwxr-x--- 2 nginx nginx  6  9月 21 15:20 save
drwxr-x--- 3 nginx nginx 17  9月 29 01:43 temp
drwxr-x--- 2 nginx nginx  6  9月 21 15:20 upload
暗号化用の非公開パスフレーズ
tempディレクトリ同様にphpMyAdminにログイン後の画面にてエラーが出ていました。(キャプチャなし)
設定ファイルに、暗号化 (blowfish_secret) 用の非公開パスフレーズの設定を必要とするようになりました。
設定ファイルを確認してみると、blowfish_secretの項目には値が入っています。
/**
 * This is needed for cookie based authentication to encrypt password in
 * cookie. Needs to be 32 chars long.
 */
$cfg['blowfish_secret'] = 'xxxxxxxxxxxxxxxxxxxxxxxxxxxxxxxxxxx'; /* YOU MUST FILL IN THIS FOR COOKIE AUTH! */
こちらもやはり権限の問題でした。
Before
$ sudo ls -ld /etc/phpMyAdmin/
drwxr-x--- 2 root apache 27  9月 29 01:50 /etc/phpMyAdmin/

$ sudo ls -l /etc/phpMyAdmin/config.inc.php
-rw-r----- 1 root apache 4587  9月 28 17:21 /etc/phpMyAdmin/config.inc.php
Run
sudo chown root:nginx /etc/phpMyAdmin -R
After
$ sudo ls -ld /etc/phpMyAdmin/
drwxr-x--- 2 root nginx 27  9月 29 01:50 /etc/phpMyAdmin/

$ sudo ls -l /etc/phpMyAdmin/config.inc.php
-rw-r----- 1 root nginx 4587  9月 28 17:21 /etc/phpMyAdmin/config.inc.php
phpMyAdminはDBを操作できてしまうあれなので、公開している環境で運用する場合、アクセス制限などは要検討かと思います。