今回はCentOS7.1上で、nginxを用いたウェブサーバを構築したので、手順をまとめておきます。
構築した環境は以下の通りです。
環境
| OS/ミドルウェア | バージョン |
|---|---|
| CentOS | 7.1 |
| php | 7.3 |
| nginx | 1.8.1 |
1. システムユーザの作成
まず、ウェブサーバの処理を行うシステムユーザを作成します。
$ sudo groupadd hoge
$ sudo useradd -g hoge hoge
作成したシステムユーザとしてログインされないように以下のコマンドを入力しておきます。
$ sudo usermod -s /bin/false hoge
2. PHPのインストール
最新のPHPをCentOSにインストールするためにEPELリポジトリとRemiリポジトリを追加します。
- EPELリポジトリの追加
$ sudo rpm -ivh https://dl.fedoraproject.org/pub/epel/7/x86_64/Packages/e/epel-release-7-11.noarch.rpm
$ sudo yum -y update epel-release
- Remiリポジトリの追加
$ sudo rpm --import http://rpms.famillecollet.com/RPM-GPG-KEY-remi
$ sudo rpm -ivh http://rpms.famillecollet.com/enterprise/remi-release-7.rpm
$ sudo yum -y update remi-release
リポジトリの追加が完了したら以下のコマンドでPHPを一式インストールします。
$ sudo yum -y --enablerepo=remi-php73,epel install php-fpm php-gd php-gmp php-mbstring php-mcrypt php-opcache php-pdo php-pear-MDB2-Driver-mysqli php-pecl-memcached php-pecl-msgpack php-xml
$ php -v
$ php -v
PHP 7.3.0RC5 (cli) (built: Nov  6 2018 10:22:47) ( NTS )
Copyright (c) 1997-2018 The PHP Group
Zend Engine v3.3.0-dev, Copyright (c) 1998-2018 Zend Technologies
    with Zend OPcache v7.3.0RC5, Copyright (c) 1999-2018, by Zend Technologies
PHPのインストールの完了後、PHPの設定ファイルを以下のように編集します。
- php.ini
$ vi /etc/php.ini
・
・
date.timezone = "Asia/Tokyo"  # タイムゾーンを Asia/Tokyo に設定
・
・
・
-
www.conf
php-fpmの実行ユーザを hoge(手順1で作成したシステムユーザ) に変更します。
Fast-CGIを受け入れるアドレスをUnixドメインソケットに変更します。
$ vi /etc/php-fpm.d/www.conf
・
・
・
# 22行目あたり
; RPM: apache Choosed to be able to access some dir as httpd
user = hoge
; RPM: Keep a group allowed to write in log dir.
group = hoge
・
・
・
# 37行目あたり
listen = /var/run/php-fpm/php-fpm.sock
・
・
・
# 48行目あたり
listen.owner = hoge
listen.group = hoge
listen.mode = 0660
・
・
・
3. nginxのインストール
今回の環境がCentOS7系なので、nginx-release-centos-7-0.el 7.ngx.noarch.rpmをリポジトリに追加し、nginxをインストールします。
$ sudo rpm -ivh http://nginx.org/packages/centos/7/noarch/RPMS/nginx-release-centos-7-0.el7.ngx.noarch.rpm
$ sudo yum -y update nginx-release-centos
$ sudo yum -y --enablerepo=nginx install nginx
$ nginx -v
nginx version: nginx/1.8.1
- nginxのconfファイルを修正
nginxの実行ユーザを hoge(手順1で作成したシステムユーザ) に変更します。
$ sudo vi /etc/nginx/nginx.conf
# 2行目あたり
user  hoge;
nginxでPHPの処理が行えるようにconfファイルに以下の内容を追加します。
$ sudo vi /etc/nginx/conf.d/default.conf
    # 30行目あたり
    location ~ \.php$ {
        root   /usr/share/nginx/html;
        fastcgi_pass   unix:/var/run/php-fpm/php-fpm.sock;
        fastcgi_index  index.php;
        fastcgi_param  SCRIPT_FILENAME  $document_root$fastcgi_script_name;
        include        fastcgi_params;
    }
4. PHP-FPM・nginxの起動
以下のコマンドで php-fpmとnginxを起動します。
$ sudo systemctl start php-fpm.service
$ sudo systemctl start nginx.service
以下のコマンドで php-fpmとnginxが正常に動作しているか確認します。
$ ps aux | grep -e nginx -e php-fpm
root     13785  0.0  4.7 492728 29788 ?        Ss   12:42   0:00 php-fpm: master process (/etc/php-fpm.conf)
hoge     13786  0.0  1.2 493148  8168 ?        S    12:42   0:00 php-fpm: pool www
hoge     13787  0.0  1.2 493148  7840 ?        S    12:42   0:00 php-fpm: pool www
hoge     13788  0.0  0.9 493016  6048 ?        S    12:42   0:00 php-fpm: pool www
hoge     13789  0.0  0.8 492728  5356 ?        S    12:42   0:00 php-fpm: pool www
hoge     13790  0.0  0.8 492728  5356 ?        S    12:42   0:00 php-fpm: pool www
root     13910  0.0  0.1  47520  1152 ?        Ss   13:29   0:00 nginx: master process /usr/sbin/nginx -c /etc/nginx/nginx.conf
hoge     13911  0.0  0.3  47912  2144 ?        S    13:29   0:00 nginx: worker process
vagrant  13940  0.0  0.1 112656   964 pts/0    R+   13:44   0:00 grep --color=auto -e nginx -e php-fpm
続いて、サーバの再起動が行われた場合でも自動で php-fpmとnginxが起動されるように設定します。
$ sudo systemctl enable php-fpm.service
Created symlink from /etc/systemd/system/multi-user.target.wants/php-fpm.service to /usr/lib/systemd/system/php-fpm.service.
$ sudo systemctl enable nginx.service
Created symlink from /etc/systemd/system/multi-user.target.wants/nginx.service to /usr/lib/systemd/system/nginx.service.
以下のコマンドで自動起動設定が正常にされているかを確認します。
$ systemctl list-unit-files -t service | grep -e nginx -e php-fpm
nginx.service                               enabled
php-fpm.service                             enabled
5. 動作確認
最後にウェブサーバの動作確認を行います。
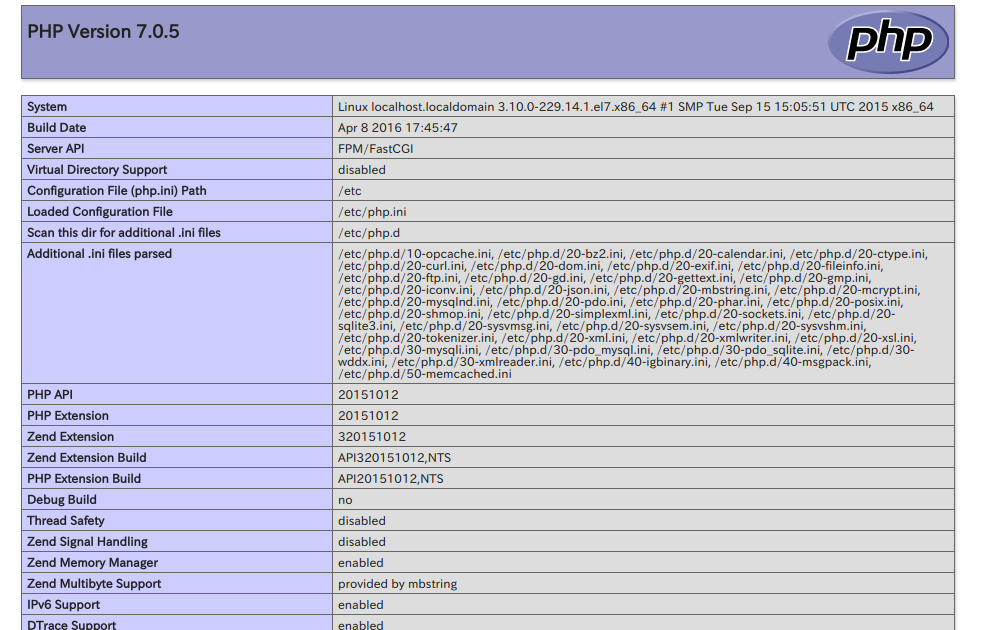
ウェブ(nginx)サーバで正常にPHPの処理がされているか確認するため、ドキュメントルート /usr/share/nginx/html 配下に index.php ファイルを作成します。
$ sudo vi /usr/share/nginx/html/index.php
<?php phpinfo() ?>
ウェブサーバにアクセスし、以下のように出力されていれば完了です。
$ curl localhost/index.php | head
  % Total    % Received % Xferd  Average Speed   Time    Time     Time  Current
                                 Dload  Upload   Total   Spent    Left  Speed
  0     0    0     0    0     0      0      0 --:--:-- --:--:-- --:--:--     0<!DOCTYPE html PUBLIC "-//W3C//DTD XHTML 1.0 Transitional//EN" "DTD/xhtml1-transitional.dtd">
<html xmlns="http://www.w3.org/1999/xhtml"><head>
<style type="text/css">
body {background-color: #fff; color: #222; font-family: sans-serif;}
pre {margin: 0; font-family: monospace;}
a:link {color: #009; text-decoration: none; background-color: #fff;}
a:hover {text-decoration: underline;}
table {border-collapse: collapse; border: 0; width: 934px; box-shadow: 1px 2px 3px #ccc;}
.center {text-align: center;}
.center table {margin: 1em auto; text-align: left;}
100 48904    0 48904    0     0   291k      0 --:--:-- --:--:-- --:--:--  292k
curl: (23) Failed writing body (248 != 4256)
参考文献
- ログイン出来ないユーザを作成する方法, https://www.express.nec.co.jp/linux/distributions/knowledge/system/false.html, Online; accessed 9-April-2016.
- PHP-FPM(PHP7) + nginx インストール(CentOS 6) - Qiita, http://qiita.com/TatsuNet/items/54d486652377a76104d1#php-fpm-%E3%81%AE%E8%B5%B7%E5%8B%95, Online; accessed 2–February–2016.
- nginxでPHPを動かす - Qiita, http://qiita.com/duke-gonorego/items/817b5f8ac7cab19a8897, Online; accessed 2-Februrary-2016.
- CentOS 7 サービス自動起動設定 _ server-memo.net, http://www.server-memo.net/centos-settings/centos7/systemctl-enable.html, Online; accessed 9-April-2016.
- 久保 達彦, 道井 俊介, "nginx実践入門 (WEB+DB PRESS plus)", 2016/1/16.
- nginx と PHP-FPM の仕組みをちゃんと理解しながら PHP の実行環境を構築する - Qiita, http://qiita.com/kotarella1110/items/634f6fafeb33ae0f51dc, Online; accessed 9-April-2016.
- 調べなきゃ寝れない!と調べたら余計に寝れなくなったソケットの話 - Qiita, http://qiita.com/kuni-nakaji/items/d11219e4ad7c74ece748, Online; accessed 9-April-2016.
