前々回のAnimation Browser、前回のRobot Viewerでの内容を踏まえた上で、様々なエディターを解説していきたいと思います。今回はAnimation Editorについて学習してみましょう。
#1.Animation Timelineファイルの作成
まずはAnimation Timelineファイルを作成してみましょう。
<手順>
1.FileメニューのNewから、Animation Timelineを選択してください。
2.アニメーションファイルの名前を入力しCreateボタンをクリックしてください。すると、空のアニメーションファイルのAnimationEditorが表示されます。
DopesheetとCurvesビューはデフォルトで表示されており、Animation Timelineは.qianimファイルで保存されます。
Animation Editorが表示されない場合、文末のトラブルシューティングを参照して下さい。
#2.Animation Timelineファイルの編集
<手順>
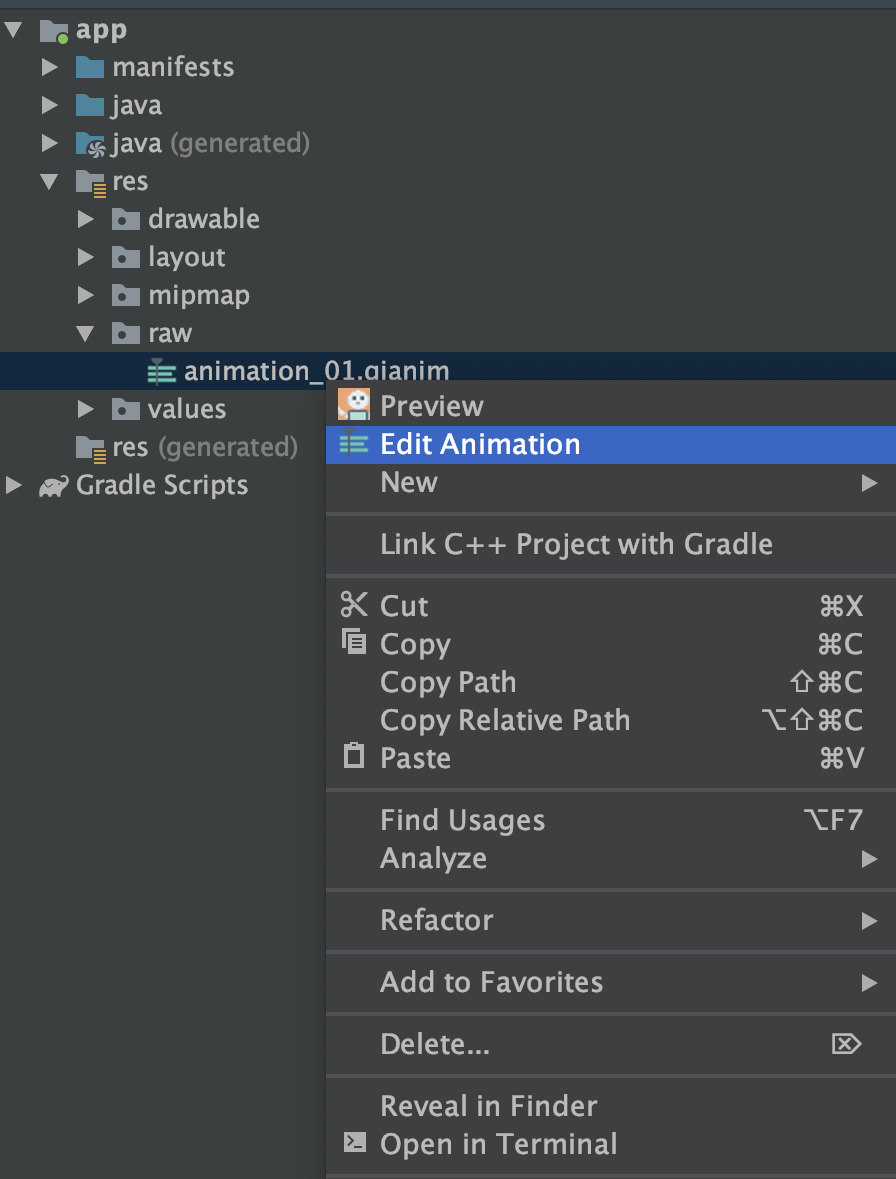
ファイル名をダブルクリックすると、Animation Editorが起動します。

コンテキストメニューからEdit Animationを選択してもAnimation Editorは起動します。

#《トラブルシューティング》
Animation Editorが起動しない場合や、Android Studio内に表示された場合1は、最新のバージョンのPepper SDK pluginをインストールしてみてください。
-
最新のバージョンのPepper SDK pluginでは、Animation Editorは別ウィンドウで開きます。 ↩

