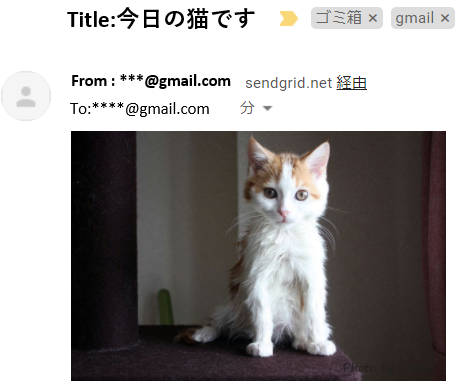
完成形
こんな感じの猫画像メールを毎日特定の時間に配信する。猫画像は毎日日替わり。
システム環境
| 名称 | 説明 | URL |
|---|---|---|
| Heroku | アプリケーションの実行環境(PaaS) | https://jp.heroku.com/ |
| Twilio SendGrid | Herokuアドオン。メール送信サービス | https://elements.heroku.com/addons/sendgrid |
| Heroku Scheduler | Herokuアドオン。定期実行などのスケジューラーサービス | https://elements.heroku.com/addons/scheduler |
| The Cat API | 猫画像を取得できたりするサービス | https://thecatapi.com/ |
構築手順
1. Heroku環境構築
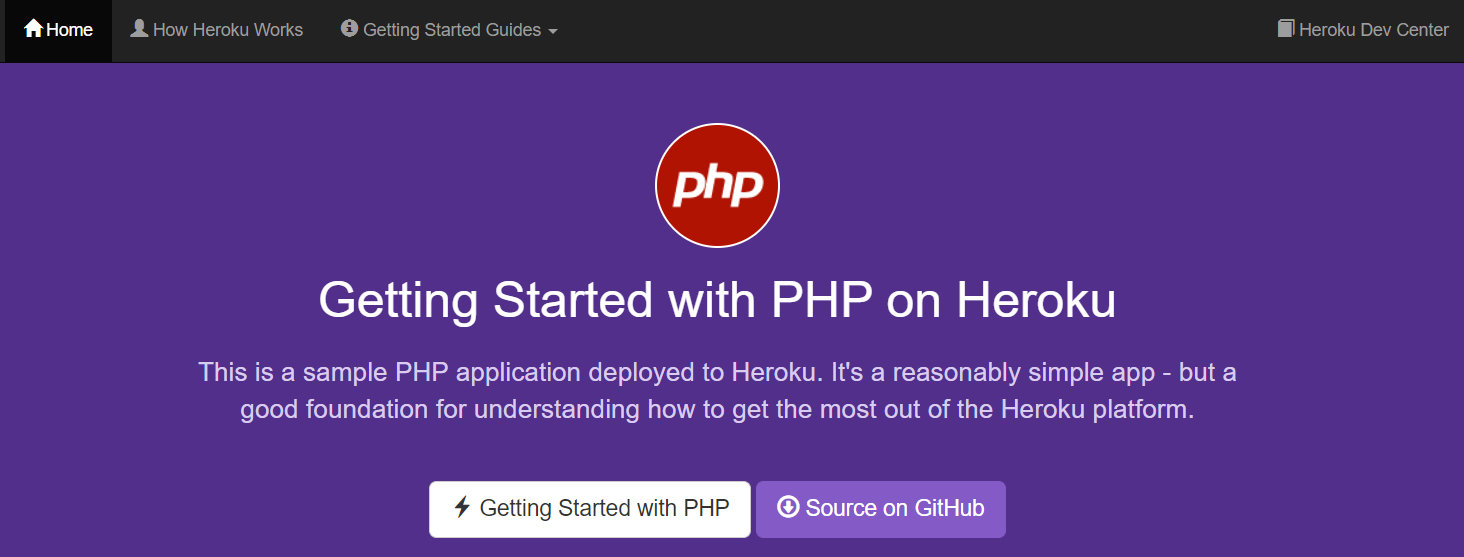
Heroku スターターガイド (PHP)を参考にPHP環境を構築する。
アプリの準備
>mkdir nekoproject
>cd nekoproject
>git clone https://github.com/heroku/php-getting-started.git
>cd php-getting-started
アプリのデプロイ
>heroku create
>git push heroku main
>heroku open
heorku open で以下のような画面が表示されればデプロイ成功。
2. The Cat API のAPIキーを取得
https://thecatapi.com/ にアクセスして「SIGN UP FOR FREE」をクリックしてメールアドレスを入力すると、しばらくするとAPIキーが送られてくる。
取得したAPIキーをURLに追加してアクセス。結果のJSONファイルをデコードし以下のコードで猫画像のURLを取得できる。
// Get a cat image
$json = file_get_contents('https://api.thecatapi.com/v1/images/search?api_key=***********');
$arr = json_decode($json,true);
$url = $arr[0]['url'];
3. Twilio SendGrid(メールサービス)の設定
アドオンの追加
SendGridのアドオンをプロビジョニングする。(Herokuではアドオンのプロビジョニングにはクレジットカードの登録が必要です)
heroku addons:create sendgrid:starter
SendGrid API Key の取得と設定
SendGridであらかじめアカウントを登録する。(審査に数日程度かかります)
SendGridのコントロールパネルを開き、Settings→API Keysを開く。そして、「Create API Key」を押し、Full AccessのAPI Keyを作成する。
以下のコマンドで環境変数に作成したAPI Keyを設定する。
heroku config:set SENDGRID_API_KEY=*****************************
SendGridをPHPから使用するためのライブラリのインストール
composer.jsonを編集し、"sendgrid/sendgrid": "~7" の行を追加する。
{
  "require" : {
    "silex/silex": "^2.0.4",
    "monolog/monolog": "^1.22",
    "twig/twig": "^2.0",
    "symfony/twig-bridge": "^3",
    "sendgrid/sendgrid": "~7"
  },
  "require-dev": {
    "heroku/heroku-buildpack-php": "*"
  }
}
以下のコマンドでcomposerをアップデートし、ライブラリをインストールする。
composer update
4. ソースコードのデプロイ
以下のコードをcatmail.phpとしてphp-getting-started直下に配置する。(Cat APIのKeyと、メールの送信元、送信先のアドレスは適宜書き換えてください)
<?php
require 'vendor/autoload.php';

// Get a cat image
$json = file_get_contents('https://api.thecatapi.com/v1/images/search?api_key=******');
$arr = json_decode($json,true);
$url = $arr[0]['url'];

// Set the email parameters
$email = new \SendGrid\Mail\Mail();
$email->setFrom("***@gmail.com");
$email->setSubject("今日の猫です");
$email->addTo("****@gmail.com");
$email->addContent("text/html", "<img width='300' src='" . $url . "'/>");
$sendgrid = new \SendGrid(getenv('SENDGRID_API_KEY'));

// Send the email
try {
    $response = $sendgrid->send($email);
    print $response->statusCode() . "\n";
    print_r($response->headers());
    print $response->body() . "\n";
    echo "email sent!\n";
} catch (Exception $e) {
    echo 'Caught exception: '. $e->getMessage() ."\n";
}
デプロイする。
git add .
git commit -m "NEKO"
git push heroku main
以下を実行してメールが届けば成功。
heroku run "php catmail.php"
5. スケジューラ登録
アドオンの追加
スケジューラのアドオンをプロビジョニングする。
heroku addons:create scheduler:standard
スケジューラ登録
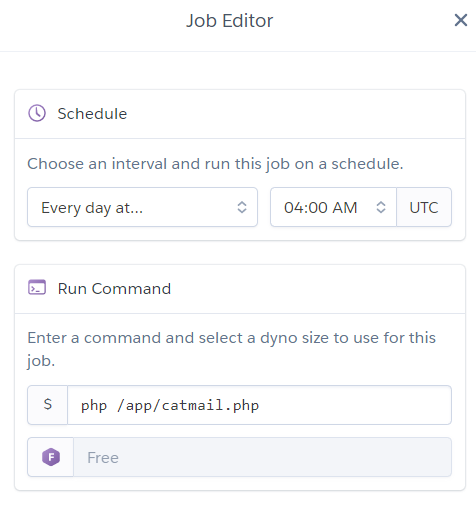
Herokuのコンソール画面から、Resorce→Heroku Schedulerを開き、Create Jobボタンをクリック。
今回は、以下の画面の様に毎日13時にcatmail.phpが実行されるように設定した。(協定世界時(UTC)で時刻を設定する必要があるため、9時間マイナスした時刻を設定)
参考サイト
Heroku スターターガイド (PHP)
猫の画像が次々届くサーバーレスなシステム
Heroku PHPでSendGridを使用してメール送信 添付ファイルも可
GitHub - sendgrid/sendgrid-php: The Official Twilio SendGrid Led, Community Driven PHP API Library
Herokuでスケジューラ(cron)を設定する方法【Heroku Scheduler】