(この記事は一連の解説記事の一つになります)
先頭記事:入門編
前の記事:4. ツールの追加
次の記事:6. レシピの追加
防具の追加
4. ツールの追加では剣を含むツール類の追加をしました。武器を手にした次に欲しいのはやはり防具ですね!今回は防具類の追加をしていきましょう。
//...
public class ItemList {
    public static Item ExampleHelmet = new ArmorItem(ArmorMaterial.IRON, EquipmentSlotType.HEAD, new Item.Properties().group(ExampleItemGroup.DEFAULT))
            .setRegistryName(new ResourceLocation(ExampleMod.MOD_ID, "example_helmet"));
    public static Item ExampleChestplate = new ArmorItem(ArmorMaterial.IRON, EquipmentSlotType.CHEST, new Item.Properties().group(ExampleItemGroup.DEFAULT))
            .setRegistryName(new ResourceLocation(ExampleMod.MOD_ID, "example_chestplate"));
    public static Item ExampleLeggings = new ArmorItem(ArmorMaterial.IRON, EquipmentSlotType.LEGS, new Item.Properties().group(ExampleItemGroup.DEFAULT))
            .setRegistryName(new ResourceLocation(ExampleMod.MOD_ID, "example_leggings"));
    public static Item ExampleBoots = new ArmorItem(ArmorMaterial.IRON, EquipmentSlotType.FEET, new Item.Properties().group(ExampleItemGroup.DEFAULT))
            .setRegistryName(new ResourceLocation(ExampleMod.MOD_ID, "example_boots"));

    @SubscribeEvent
    public static void registerItems(RegistryEvent.Register<Item> event) {
        event.getRegistry().registerAll(
                ExampleHelmet,
                ExampleChestplate,
                ExampleLeggings,
                ExampleBoots
        );
    }
}
今回は別途クラスを作らず、ItemListでArmorItemクラスを直接宣言します。
引数は順に、材質、スロット箇所、アイテムプロパティです。
細かい設定をしていきます。
\src\main\resources\assets\example_mod
   ├ blockstates
   ├ lang
   │  └ en_us.json
   │  └ ja_jp.json
   ├ models
   │  ├ block
   │  └ item
   │     ├ example_helmet.json
   │     ├ example_chestplate.json
   │     ├ example_leggings.json
   │     └ example_boots.json
   └ textures
      ├ blocks
      └ items
         ├ example_helmet.png
         ├ example_chestplate.png
         ├ example_leggings.png
         └ example_boots.png
{
  "item.example_mod.example_helmet": "Example Helmet",
  "item.example_mod.example_chestplate": "Example Chestplate",
  "item.example_mod.example_leggings": "Example Leggings",
  "item.example_mod.example_boots": "Example Boots"
}
{
  "item.example_mod.example_helmet": "例のヘルメット",
  "item.example_mod.example_chestplate": "例のチェストプレート",
  "item.example_mod.example_leggings": "例のレギンス",
  "item.example_mod.example_boots": "例のブーツ"
}
{
  "parent": "item/generated",
  "textures": {
    "layer0": "example_mod:items/example_helmet"
  }
}
{
  "parent": "item/generated",
  "textures": {
    "layer0": "example_mod:items/example_chestplate"
  }
}
{
  "parent": "item/generated",
  "textures": {
    "layer0": "example_mod:items/example_leggings"
  }
}
{
  "parent": "item/generated",
  "textures": {
    "layer0": "example_mod:items/example_boots"
  }
}
ゲームを起動してみます。

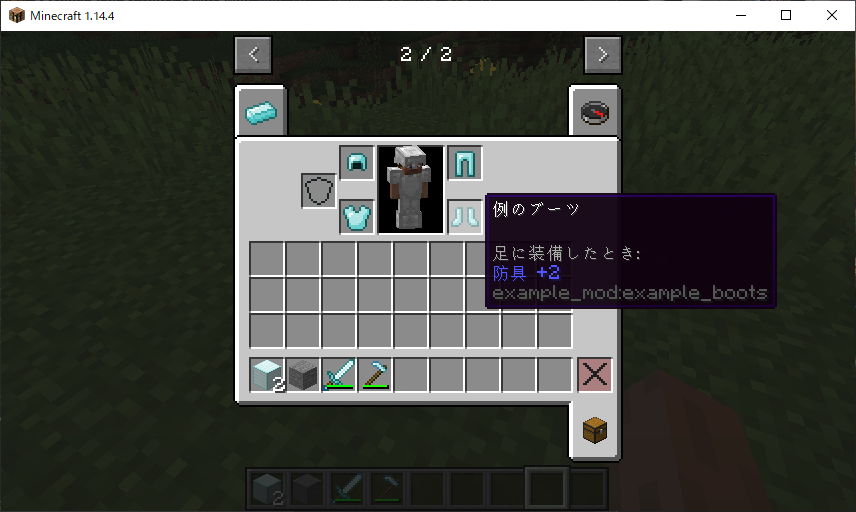
防具の追加ができ…てません!!
着てみたら見た目が鉄防具になってしまいました(それ以外にもステータスや修理材料など実はいろいろと鉄防具っぽいことになっています)。これはArmorItemの材質としてArmorMaterial.IRONを渡しているせいです。
ツールの時にも行ったように、新しい独自のマテリアルを定義しましょう。
\src\main\java\jp\koteko\example_mod\
   ├ items
   │   └ ExampleArmorMaterial.java
   ├ lists
   ├ ExampleItemGroup.java
   └ ExampleMod.java
package jp.koteko.example_mod.items;

import jp.koteko.example_mod.ExampleMod;
import jp.koteko.example_mod.lists.ItemList;
import net.minecraft.inventory.EquipmentSlotType;
import net.minecraft.item.IArmorMaterial;
import net.minecraft.item.crafting.Ingredient;
import net.minecraft.util.LazyLoadBase;
import net.minecraft.util.SoundEvent;
import net.minecraft.util.SoundEvents;
import net.minecraftforge.api.distmarker.Dist;
import net.minecraftforge.api.distmarker.OnlyIn;

import java.util.function.Supplier;

public enum ExampleArmorMaterial implements IArmorMaterial {
    EXAMPLE("example", 66, new int[]{3, 6, 8, 3}, 30, SoundEvents.ITEM_ARMOR_EQUIP_DIAMOND, 3.0F, () -> {
        return Ingredient.fromItems(ItemList.ExampleIngot);
    });

    private static final int[] MAX_DAMAGE_ARRAY = new int[]{13, 15, 16, 11};
    private final String name;
    private final int maxDamageFactor;
    private final int[] damageReductionAmountArray;
    private final int enchantability;
    private final SoundEvent soundEvent;
    private final float toughness;
    private final LazyLoadBase<Ingredient> repairMaterial;

    private ExampleArmorMaterial(String nameIn, int maxDamageFactorIn, int[] damageReductionAmountsIn, int enchantabilityIn, SoundEvent equipSoundIn, float toughnessIn, Supplier<Ingredient> repairMaterialSupplier) {
        this.name = nameIn;
        this.maxDamageFactor = maxDamageFactorIn;
        this.damageReductionAmountArray = damageReductionAmountsIn;
        this.enchantability = enchantabilityIn;
        this.soundEvent = equipSoundIn;
        this.toughness = toughnessIn;
        this.repairMaterial = new LazyLoadBase<>(repairMaterialSupplier);
    }

    public int getDurability(EquipmentSlotType slotIn) {
        return MAX_DAMAGE_ARRAY[slotIn.getIndex()] * this.maxDamageFactor;
    }

    public int getDamageReductionAmount(EquipmentSlotType slotIn) {
        return this.damageReductionAmountArray[slotIn.getIndex()];
    }

    public int getEnchantability() {
        return this.enchantability;
    }

    public SoundEvent getSoundEvent() {
        return this.soundEvent;
    }

    public Ingredient getRepairMaterial() {
        return this.repairMaterial.getValue();
    }

    @OnlyIn(Dist.CLIENT)
    public String getName() {
        return ExampleMod.MOD_ID + ":" + this.name;
    }

    public float getToughness() {
        return this.toughness;
    }
}
name : 内部名
maxDamageFactor : 基礎耐久係数
MAX_DAMAGE_ARRAY : 部位ごとの耐久値
damageReductionAmountArray : 部位ごとの防御力
enchantability : エンチャント効率
soundEvent : 装着時の音
toughness : 防具強度1
repairMaterial : 修理素材
[各部位の耐久値] = [maxDamageFactor]×[MAX_DAMAGE_ARRAY[部位]]
ダイヤモンドより強い性能にしてみました。防具のマテリアルをこれに替えます。
//...
public class ItemList {
    public static Item ExampleHelmet = new ArmorItem(ExampleArmorMaterial.EXAMPLE, EquipmentSlotType.HEAD, new Item.Properties().group(ExampleItemGroup.DEFAULT))
            .setRegistryName(new ResourceLocation(ExampleMod.MOD_ID, "example_helmet"));
    public static Item ExampleChestplate = new ArmorItem(ExampleArmorMaterial.EXAMPLE, EquipmentSlotType.CHEST, new Item.Properties().group(ExampleItemGroup.DEFAULT))
            .setRegistryName(new ResourceLocation(ExampleMod.MOD_ID, "example_chestplate"));
    public static Item ExampleLeggings = new ArmorItem(ExampleArmorMaterial.EXAMPLE, EquipmentSlotType.LEGS, new Item.Properties().group(ExampleItemGroup.DEFAULT))
            .setRegistryName(new ResourceLocation(ExampleMod.MOD_ID, "example_leggings"));
    public static Item ExampleBoots = new ArmorItem(ExampleArmorMaterial.EXAMPLE, EquipmentSlotType.FEET, new Item.Properties().group(ExampleItemGroup.DEFAULT))
            .setRegistryName(new ResourceLocation(ExampleMod.MOD_ID, "example_boots"));
//...
}
ゲームを起動します。
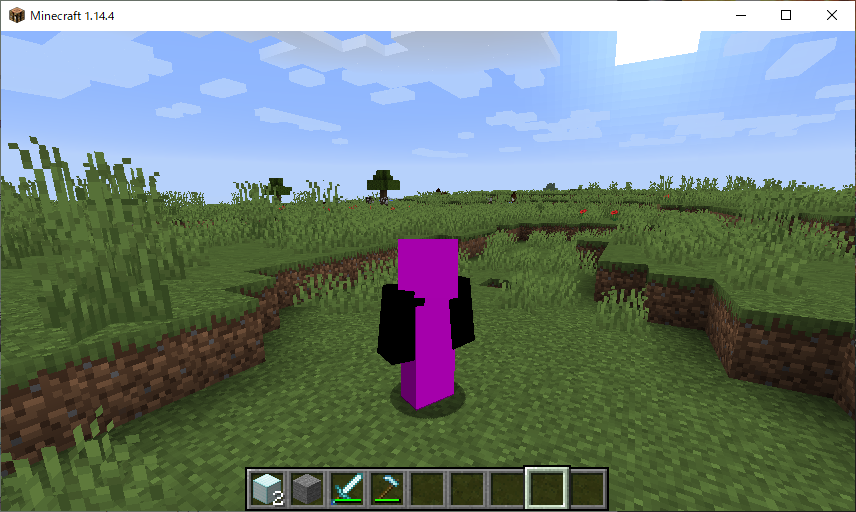
**怪物が誕生しました。**テクスチャが設定されていませんね。
\src\main\resources\assets\example_mod
   ├ blockstates
   ├ lang
   ├ models
   └ textures
      ├ blocks
      ├ items
      └ models
         └ armor
            ├ example_layer_1.png
            └ example_layer_2.png
\assets\example_mod\textures\models\armorフォルダを作り、[マテリアルの内部名]_layer_1.png、[マテリアルの内部名]_layer_2.pngを配置します。バニラの防具のテクスチャなどを参考にしましょう。
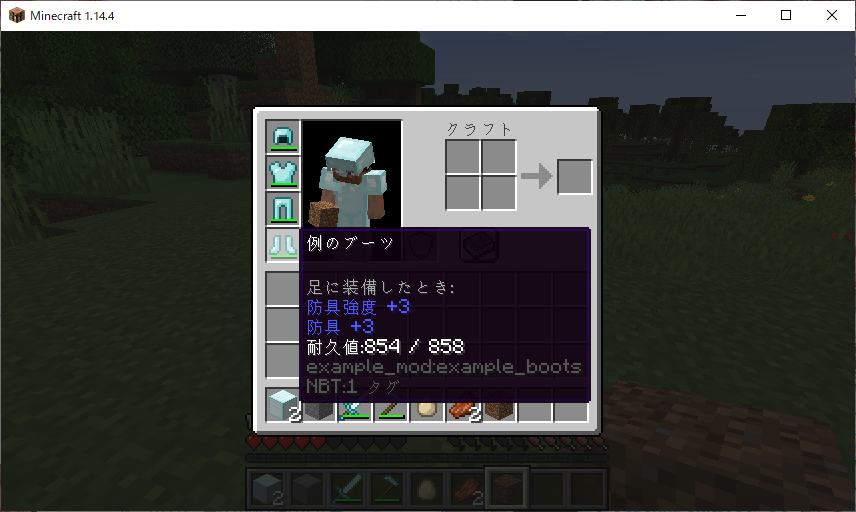
ダイヤっぽい色合いでややわかりづらいですが、きちんとテクスチャが反映されました。また、耐久値が66*13=858になっていることが確認できます。
今度こそ防具の追加ができました!
参考
Minecraft 1.14.4 Forge Modの作成 その7 【防具の追加】