はじめに
防具を追加してみます。
ハロウィン中の作業で、カボチャを被ってるスケルトンが湧きました。
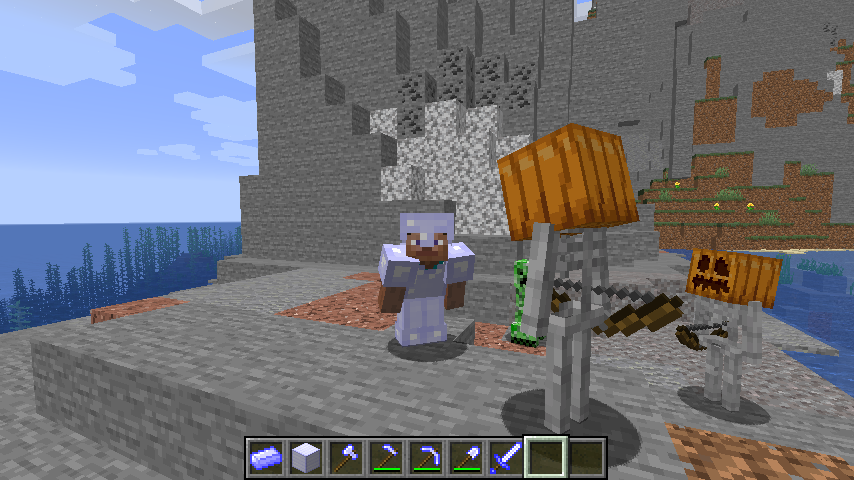
装着時の音はバケツを満たすが再生されます。
参考
Armor - Minecraft Modding Tutorial for MC 1.14/1.14.3
💻開発環境
ここでは環境は以下のようにします。
- Windows 10
- JDK 8u211
- Minecraft 1.14.4
- Minecraft Forge 1.14.4 (28.1.0)
- IntelliJ IDEA 2019.2.3
アイテムの宣言
package jp.yuyu.biwako_mod.lists;

import net.minecraft.item.Item;

public class ItemList {
    public static Item BiwakoHelmet;
    public static Item BiwakoChestplate;
    public static Item Biwakoleggings;
    public static Item Biwakoboots;
}
アーマーマテリアルの追加
ツールを追加した時と同様に、Enumを利用します。
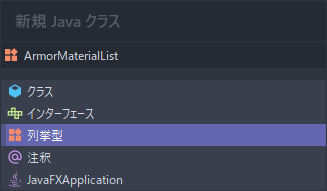
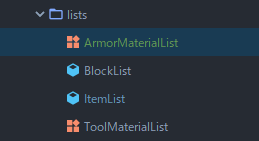
新規Javaクラスを作成する際に列挙型を指定し、ArmorMaterialList.java作成します。
とりあえず全体像を記載します。
package jp.yuyu.biwako_mod.lists;

import jp.yuyu.biwako_mod.BiwakoMod;
import net.minecraft.inventory.EquipmentSlotType;
import net.minecraft.item.IArmorMaterial;
import net.minecraft.item.Item;
import net.minecraft.item.crafting.Ingredient;
import net.minecraft.util.SoundEvent;
import net.minecraft.util.SoundEvents;

public enum ArmorMaterialList implements IArmorMaterial {
    MATERIAL_BIWAKO("biwako",35,new int[] {3,6,8,3},25, SoundEvents.ITEM_BUCKET_FILL,3.0f, ItemList.BiwakoIngot);

    private static final int[] MAX_DAMAGE_ARRAY = new int[]{13, 15, 16, 11};
    private final String name;
    private final int maxDamageFactor;
    private final int[] damageReductionAmountArray;
    private final int enchantability;
    private final SoundEvent soundEvent;
    private final float toughness;
    private final Item repairMaterial;

    private ArmorMaterialList(String nameIn, int maxDamageFactorIn, int[] damageReductionAmountsIn, int enchantabilityIn, SoundEvent soundEventIn, float toughnessIn, Item repairMaterialIn) {
        this.name = nameIn;
        this.maxDamageFactor = maxDamageFactorIn;
        this.damageReductionAmountArray = damageReductionAmountsIn;
        this.enchantability = enchantabilityIn;
        this.soundEvent = soundEventIn;
        this.toughness = toughnessIn;
        this.repairMaterial = repairMaterialIn;
    }

    @Override
    public int getDurability(EquipmentSlotType slotIn) {
        return MAX_DAMAGE_ARRAY[slotIn.getIndex()] * this.maxDamageFactor;
    }

    @Override
    public int getDamageReductionAmount(EquipmentSlotType slotIn) {
        return this.damageReductionAmountArray[slotIn.getIndex()];
    }

    @Override
    public int getEnchantability() {
        return this.enchantability;
    }

    @Override
    public SoundEvent getSoundEvent() {
        return this.soundEvent;
    }

    @Override
    public Ingredient getRepairMaterial() {
        return Ingredient.fromItems(this.repairMaterial);
    }

    @Override
    public String getName() {
        return BiwakoMod.MOD_ID + ":" + this.name;
    }

    @Override
    public float getToughness() {
        return this.toughness;
    }
}
どのように使われるのか分からないものがあったので、それぞれまとめておこうと思います。
参考
防具の追加 - Minecraft Modding Wiki
name
private final String name;
ResourceLocationのpath名に使用される。
そのため、無機能アイテムの追加時にも記載したように全て小文字でないとエラーが返されます。
setRegistryName(new ResourceLocation(MOD_ID, "biwako_ingot"))でアイテムID名の指定です。
アイテムID名のアルファベットは全て小文字でないとForgeがエラーを吐きます
maxDamageFactor
private final int maxDamageFactor;
マテリアルの耐久度。実際の防具の耐久度は、この値に部位ごとに11,16,15,13のいずれかを掛けて1を加算したものとなる。
MAX_DAMAGE_ARRAY
private static final int[] MAX_DAMAGE_ARRAY = new int[]{13, 15, 16, 11};
maxDagageFactorに記載した部位ごとの定数値。
Index:0からブーツ、レギンス、チェストプレート、ヘルメットの並びになっている。
耐久値を取得するgetDurabilityメソッドで使用する。
damageReductionAmountArray
private final int[] damageReductionAmountArray;
部位別のAP値(防御力)。
値が2の時、防具アイコンが1個分表示される。
soundEvent
private final SoundEvent soundEvent;
防具装着時の音。
net/minecraft/util/SoundEvents.classにサウンドファイル名が書かれているので、
好きなものを探して適用することができる。
今回はバケツを満たすを再生するようにしてみました。びちゃびちゃ...。
toughness
private final float toughness;
防具強度。
バニラでは、ダイヤモンドのみ2.0fでそれ以外は0.0fが設定されている。
アイテムの登録
引数は、マテリアル、防具の部位、クリエイティブタブの3つ。
        public static void onItemsRegistry(final RegistryEvent.Register<Item> itemRegistryEvent) {
            LOGGER.info("HELLO from Register Item");
            itemRegistryEvent.getRegistry().registerAll(
                    ItemList.BiwakoHelmet = new ArmorItem(ArmorMaterialList.MATERIAL_BIWAKO, EquipmentSlotType.HEAD, new Item.Properties().group(ItemGroup_Biwako))
                            .setRegistryName(new ResourceLocation(MOD_ID, "biwako_helmet")),
                    ItemList.BiwakoChestplate = new ArmorItem(ArmorMaterialList.MATERIAL_BIWAKO, EquipmentSlotType.CHEST, new Item.Properties().group(ItemGroup_Biwako))
                            .setRegistryName(new ResourceLocation(MOD_ID, "biwako_chestplate")),
                    ItemList.Biwakoleggings = new ArmorItem(ArmorMaterialList.MATERIAL_BIWAKO, EquipmentSlotType.LEGS, new Item.Properties().group(ItemGroup_Biwako))
                            .setRegistryName(new ResourceLocation(MOD_ID, "biwako_leggings")),
                    ItemList.Biwakoboots = new ArmorItem(ArmorMaterialList.MATERIAL_BIWAKO, EquipmentSlotType.FEET, new Item.Properties().group(ItemGroup_Biwako))
                            .setRegistryName(new ResourceLocation(MOD_ID, "biwako_boots"))
            );
        }
翻訳ファイル
{
    "item.biwako_mod.biwako_helmet": "Biwako Helmet",
    "item.biwako_mod.biwako_chestplate": "Biwako Chestplate",
    "item.biwako_mod.biwako_leggings": "Biwako Leggings",
    "item.biwako_mod.biwako_boots": "Biwako Boots"
}
{
    "item.biwako_mod.biwako_helmet": "琵琶湖のヘルメット",
    "item.biwako_mod.biwako_chestplate": "琵琶湖のチェストプレート",
    "item.biwako_mod.biwako_leggings": "琵琶湖のレギンス",
    "item.biwako_mod.biwako_boots": "琵琶湖のブーツ"
}
モデルファイル
無機能アイテムのモデルファイルと同じ書き方。
{
    "parent": "item/generated",
    "textures": {
        "layer0": "biwako_mod:items/biwako_helmet"
    }
}
{
    "parent": "item/generated",
    "textures": {
        "layer0": "biwako_mod:items/biwako_chestplate"
    }
}
{
    "parent": "item/generated",
    "textures": {
        "layer0": "biwako_mod:items/biwako_leggings"
    }
}
{
    "parent": "item/generated",
    "textures": {
        "layer0": "biwako_mod:items/biwako_boots"
    }
}
テクスチャファイル
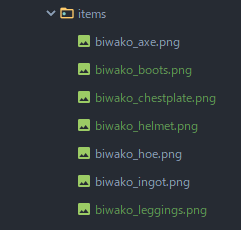
アイテムテクスチャ


アーマーテクスチャ
アイテムとしてのテクスチャは用意しました。
防具の場合は、装着時のテクスチャも用意する必要があります。
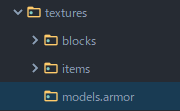
フォルダの作成
textures/models/armorフォルダを作成します。
表記はmodels.armorですが、新規フォルダを作成する場合は、
-
modelsフォルダを作成してからarmorフォルダを作成する -
models/aromrと入力してフォルダを作成する
ことに注意してください。
テクスチャの用意
バニラテクスチャも/assets/minecraft/textures/models/armorにあります。
また、*_layer_1.png,*_layer_2.pngの2つのテクスチャが必要になります。
*の部分には、アーマーマテリアルの作成時に指定したnameが入ります。
今回の場合は、biwako_layer_1.pngとbiwako_layer_2.pngの2つのテクスチャを用意し、配置します。


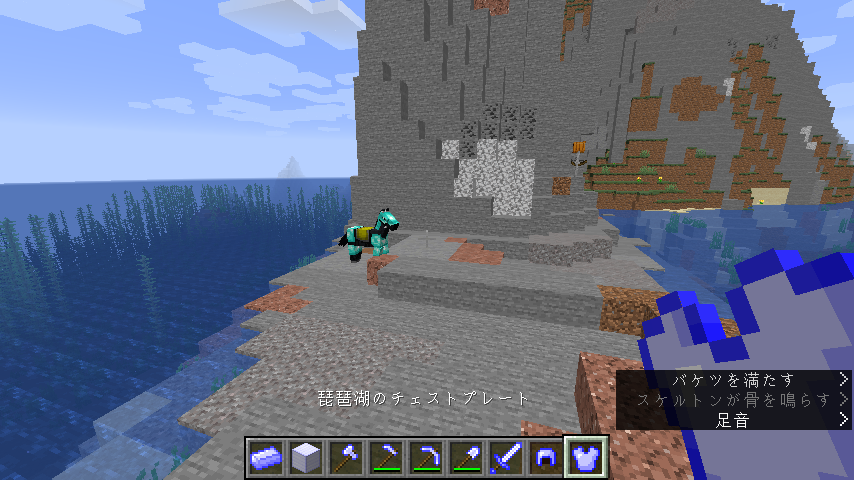
Minecraftの起動
右クリックで装着してみると、バケツを満たすが再生されることが分かります。
Githubにてプロジェクトを公開しています。