WebServer 構築
ーーーーーーーーーーーーーーーーーーー
OS・格パッケージのVersion
OS: ubuntu server 20.04.2
php: 7.4
※ 基本的に全て特権ユーザで実行する
※ SSHでインスタンスにログイン・ドメインの取得については割愛します。
ーーーーーーーーーーーーーーーーーーー
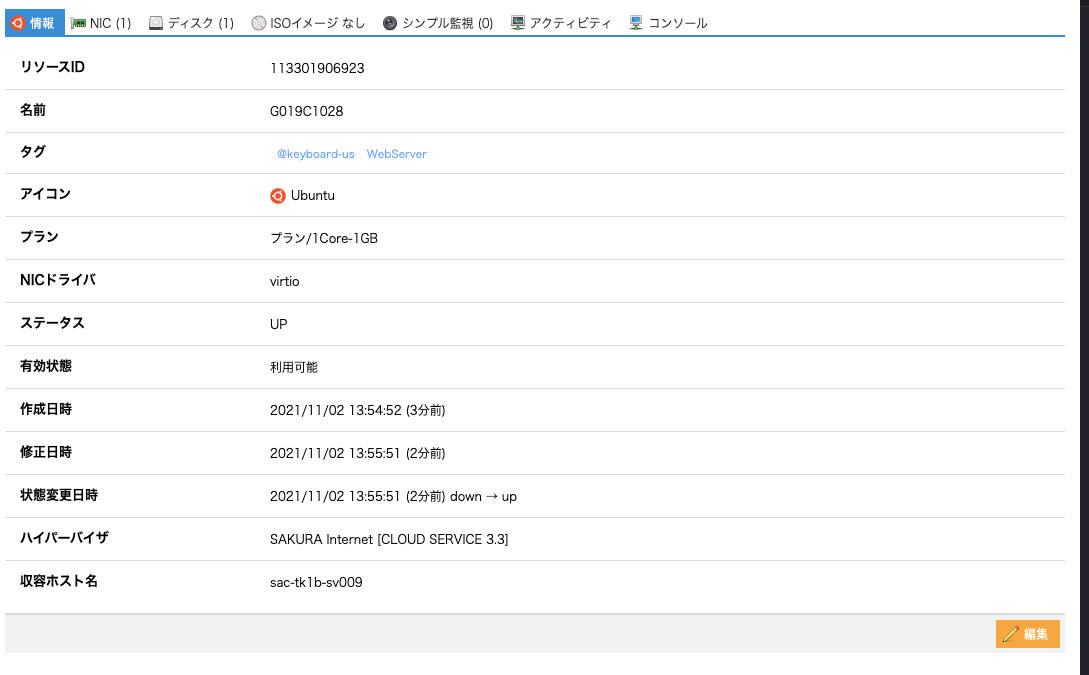
- Ubuntuを使用してインスタンスを作成
-- インスタンス情報
1. nginxの設定
ubuntu@ubuntu:~$ sudo apt update -y   // apt のupdate
ubuntu@ubuntu:~$ sudo apt upgrade //aptでインストールしたパッケージの更新
ubuntu@ubuntu:~$ sudo apt install nginx
`nginxの起動設定`
ubuntu@ubuntu:~$ sudo systemctl start nginx
ubuntu@ubuntu:~$ sudo systemctl enable nginx
2. HTTPS設定
SSl・TLSについて
- Let's Encryptを使用 ##### - 証明書を発行するためのクライアントツールをインストールubuntu@ubuntu:~$ sudo apt install -y certbot
ubuntu@ubuntu:~$ sudo certbot certonly --webroot -w /var/www/html -d xxxx.domain.name.com
- configの修正
listen 443 ssl default_server;
listen [::]:443 ssl default_server;
ssl_certificate        /etc/letsencrypt/live/xxxx.domain.name.com/fullchain.pem;
ssl_certificate_key    /etc/letsencrypt/live/xxxx.domain.name.com/privkey.pem;


server_name xxxx.domain.name.com;
nginxの再起動
ubuntu@ubuntu:~$ sudo systemctl restart nginx
3. Wordpress構築
- MariaDBのインストール・設定
ubuntu@ubuntu:~$ sudo apt install mariadb-server mariadb-client

ubuntu@ubuntu:~$ sudo systemctl start mariadb
ubuntu@ubuntu:~$ sudo systemctl enable mariadb
-- MariaDBにDBとユーザを作成(アクセス権付与も)
-
ubuntu@ubuntu:~$ sudo mysql -u rootコマンドを使用してmariadbにログイン
CREATE DATABASE wordpress

CREATE USER 'wordpress'@'%' IDENTIFIED BY 'wordpress';
GRANT ALL ON wordpress.* TO 'wordpress'@'%' WITH GRANT OPTION;

UPDATE mysql.user SET password=password('root') WHERE user = 'root';

FLUSH PRIVILEGES;
~point~
CREATE USER 'wordpress'@'%' IDENTIFIED BY 'wordpress';
-
wordpress@'%': 制限なし。 -
wordpress@'localhost': "localhost"と記述すると当インスタンスでしかmariadbにアクセスできない。
* 今回の場合は"localhost"でもOK
- PHPのインストール・設定
ubuntu@ubuntu:~$ sudo apt install php7.4-fpm -y
ubuntu@ubuntu:~$ sudo apt install php7.4-xml php7.4-curl php7.4-gd php7.4-mbstring php7.4-readline -y
ubuntu@ubuntu:~$ sudo apt install php7.4-bz2 php7.4-zip php7.4-json php7.4-opcache -y
上記コマンドは↑phpを使用してzipを作成・解凍、jsonのデコード・エンコード、画像処理を行うためインストール
ubuntu@ubuntu:~$ sudo apt install -y php-mysql //phpを使用してmysqlに接続・操作するためにインストール
-- /etc/php/7.4/fpm/php.ini or ファイルを編集
~ 最大送信量が少ないから ~
post_max_size = 32M
- 下記を追記
# pass PHP scripts to FastCGI server
        #
        location ~.php$ {
                include snippets/fastcgi-php.conf;

                # With php-fpm (or other unix sockets):
                fastcgi_pass unix:/var/run/php/php7.4-fpm.sock;
                # With php-cgi (or other tcp sockets):
        #       fastcgi_pass 127.0.0.1:9000;
        }
- Wordpressのインストール・設定
ubuntu@ubuntu:~$ cd /tmp
ubuntu@ubuntu:~$ wget https://wordpress.org/latest.tar.gz
ubuntu@ubuntu:~$ tar -zxvf latest.tar.gz
ubuntu@ubuntu:~$ sudo mv wordpress /var/www/html/
`tar`コマンドで使用したオプション
ーーーーーーーーーーーーーーーーーーーーーーーーーーーーーーー
-z : gzファイルの解答
-f : アーカイブファイルを指定
-x : アーカイブファイルを展開・復元
-v : 実行処理を可視化
ーーーーーーーーーーーーーーーーーーーーーーーーーーーーーーー
- wordpress/index.phpにアクセスするための設定
-
- "index.php"を追記。
index index.php index.html index.htm index.nginx-debian.html;
- ファイルの所有者・グループを変更
ubuntu@ubuntu:~$ sudo chown -R www-data:www-data /var/www/html/wordpress/
便利コマンド
- grepコマンドを使用してファイル内の文字列検索
例:
grep -R hoge /
ルートディレクトリ以降の階層から "hoge"という文字列が入っているファイルのパスを調べる
