https://creativesdk.adobe.com/
今まで散々様々なSDKを使ってきましたが、正直感動しました。
こんな簡単に超リッチな画像加工ができるなんて本当にすごいです。
しかも 実装方法が超かんたん。
まずは少しみてください。
一部機能の紹介
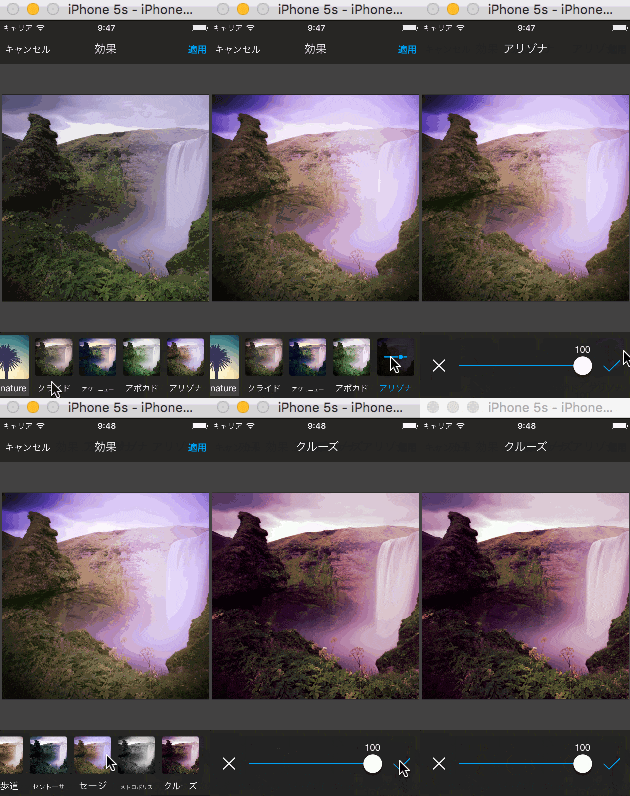
画像のフィルター
フィルターの種類も豊富で、お手軽にインスタグラムっぽい画像を作れちゃいます
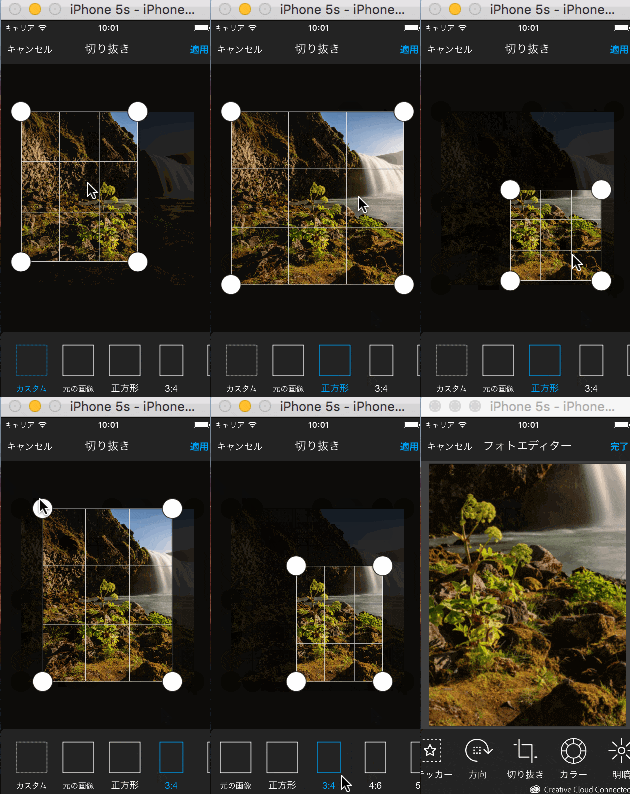
画像の切り抜き
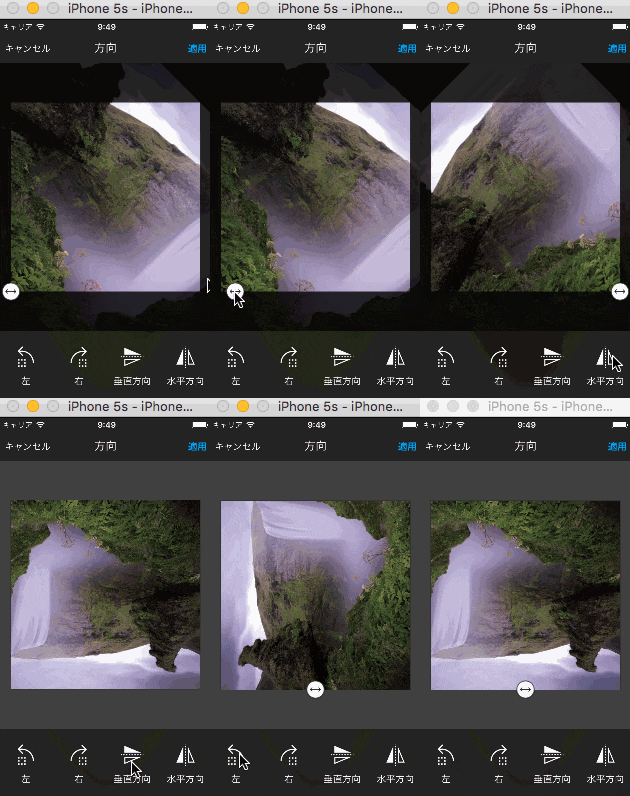
画像の方向変換
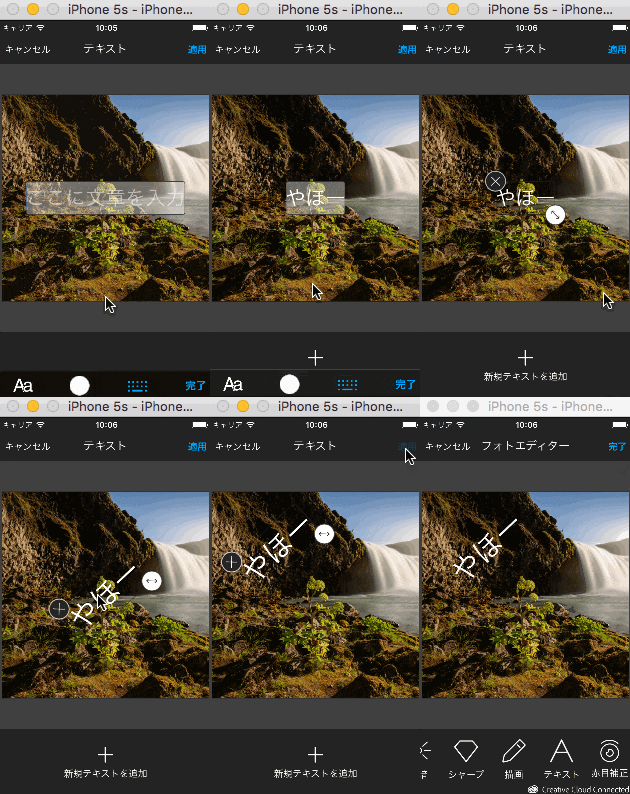
文字入力
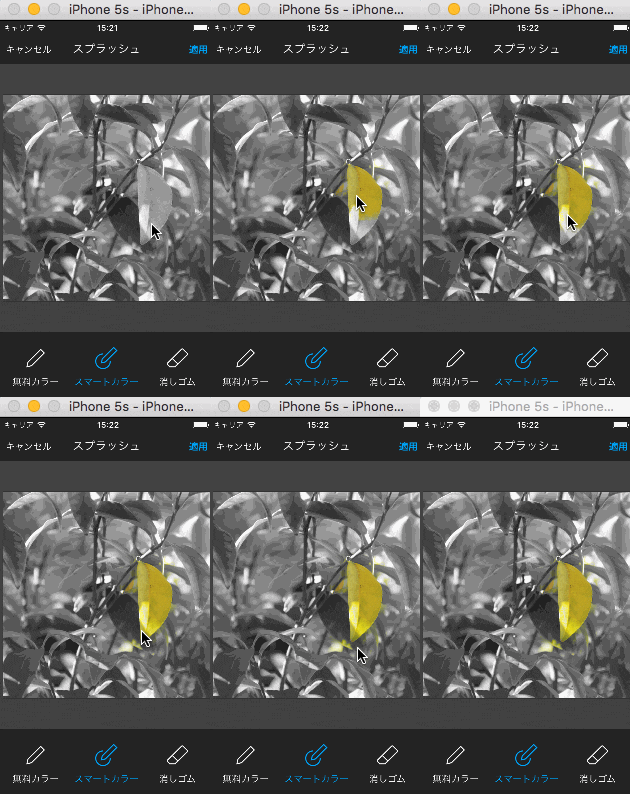
指定した色だけ色を出したり
ほら、やばい
実装方法
swiftで書きますので、objective-cの方は適時読み替えてください。
一応今回のサンプルコードもgithubにアップしておきます。
https://github.com/yamasakitomohiro/AdobeCreativeSample
SDKのダウンロード
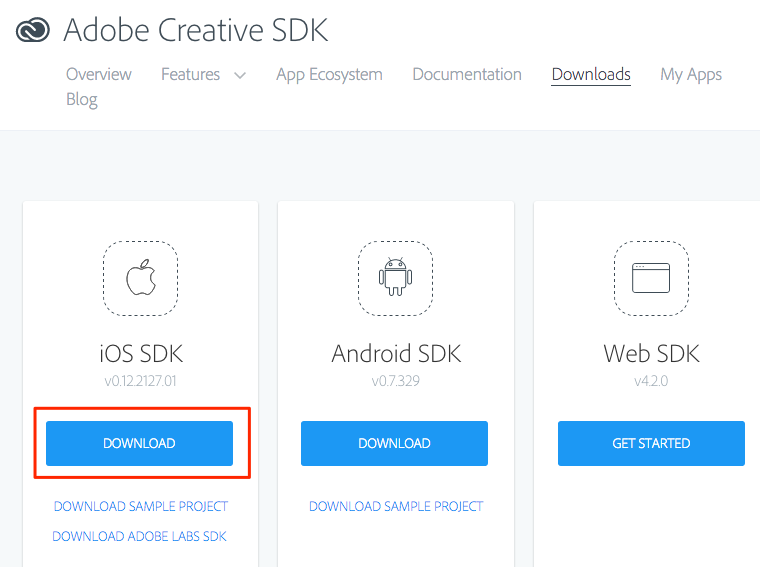
以下のリンク作からiOS SDKをダウンロードしてください。
https://creativesdk.adobe.com/downloads.html
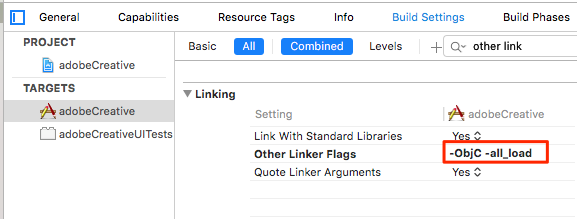
[Other Linker Flags]の設定
[AdobeCreativeSDKCoreResourcesSDK.bundle]をプロジェクトにコピー
AdobeCreativeSDKCore.framework > Resources > AdobeCreativeSDKCoreResources.bundle
をプロジェクト内にコピーする
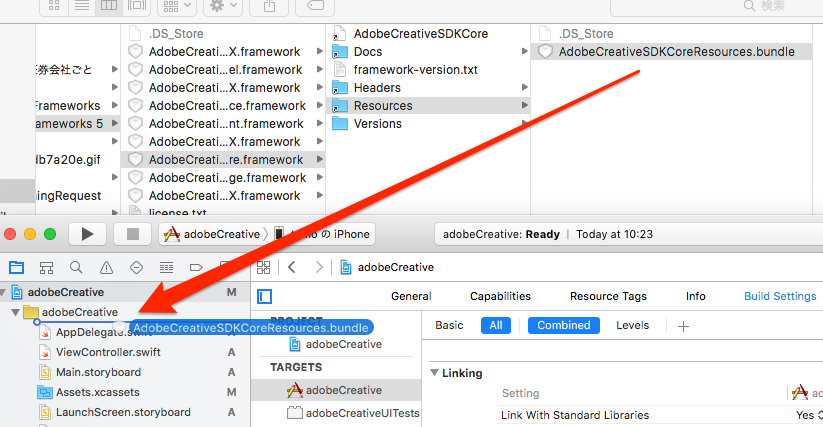
[AdobeCreativeSDKImageResources.bundle]をプロジェクトにコピー
上と同様に
AdobeCreativeSDKImage.framework > Resources > AdobeCreativeSDKImageResources.bundle
をプロジェクト内にコピーする
[AdobeCreativeSDKCore.framework]をプロジェクトにコピー
[AdobeCreativeSDKCore.framework]をプロジェクトにコピー
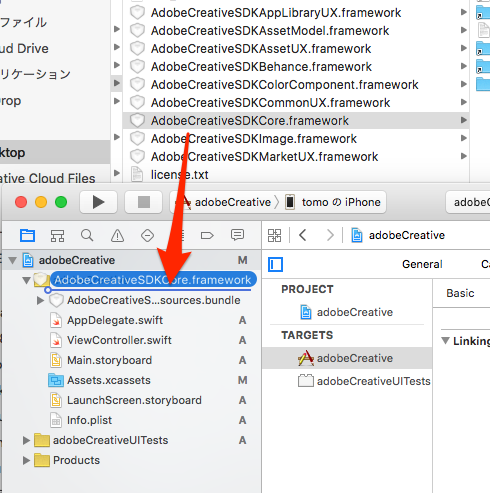
[AdobeCreativeSDKImage.framework]をプロジェクトにコピー
上と同様に
[AdobeCreativeSDKImage.framework]をプロジェクトにコピー
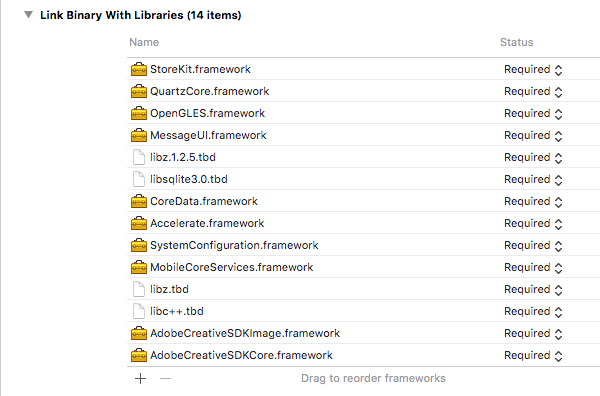
必要なライブラリを追加
以下のライブラリを追加してください。
・libc++.dylib
・libz.dylib
・MobileCoreServices.framework
・SystemConfiguration.framework
・Accelerate.framework
・CoreData.framework
・libsqlite3.0.dylib
・libz.1.2.5.dylib
・MessageUI.framework
・OpenGLES.framework
・QuartzCore.framework
・StoreKit.framework
BridgingHeaderにインポート
BridgingHeaderに
・<AdobeCreativeSDKCore/AdobeCreativeSDKCore.h>
・<AdobeCreativeSDKImage/AdobeCreativeSDKImage.h>
をインポート
# ifndef AdobeCreative_Bridging_Header_h
# define AdobeCreative_Bridging_Header_h

# import <AdobeCreativeSDKCore/AdobeCreativeSDKCore.h>
# import <AdobeCreativeSDKImage/AdobeCreativeSDKImage.h>

# endif /* AdobeCreative_Bridging_Header_h */
SDKの使用に[SECRET KEY]と[CLIENT ID]が必要になるのでアプリの登録を行う。
以下のリンク先からアプリの登録を行います。
https://creativesdk.adobe.com/myapps.html
登録をすると以下のポップアップが表示され必要な情報が出ているのでメモる

※ここで出てくるIDはデベロッパーモードとなっているため、リリースする場合は、adobeへの申請が必要になると思います。
初期設定
appDelegateに以下のように初期設定コードを追加
func application(application: UIApplication, didFinishLaunchingWithOptions launchOptions: [NSObject: AnyObject]?) -> Bool {
	AdobeUXAuthManager.sharedManager().setAuthenticationParametersWithClientID("CLIENT ID", withClientSecret: "SECRET KEY")
    return true
}
Adobeのビューコントローラーを起動
コンストラクタにUIImageを渡すだけの簡単なお仕事
func open(sender: AnyObject) {
    let adobeViewCtr = AdobeUXImageEditorViewController(image: UIImage(named: "aiko_photo.jpg"))
    adobeViewCtr.delegate = self
    self.presentViewController(adobeViewCtr, animated: true) { () -> Void in

    }
}
編集画像の受け取り
delegateメソッドを実装します。
ま、よくあるパターンですね。
[AdobeUXImageEditorViewControllerDelegate]を宣言
func photoEditor(editor: AdobeUXImageEditorViewController!, finishedWithImage image: UIImage!) {
    editor.dismissViewControllerAnimated(true, completion: nil)

    image//これが編集された画像です
}

func photoEditorCanceled(editor: AdobeUXImageEditorViewController!) {
    editor.dismissViewControllerAnimated(true, completion: nil)
}
※一応NavigationControllerに対しても、pushできるのですが、AdobeUXImageEditorViewControllerがNavigationControllerを継承してできているので、推奨はしてないそうです。
カスタマイズ
アイコン画像を変えたり、機能を制限したりなど、多少のカスタマイズはできるようです。
かなり機能が豊富なので、実際に使う場合にこれは必要ないということがあるので、機能制限の方法を記載します。
表示させるタブの種類と並べ替え
カスタマイズ用のクラスが用意されており、以下のようにそのクラスのクラスメソッドを叩くだけでカスタマイズが出来ます。
渡すリストの項目を削除したり、並べ替えして、
[AdobeUXImageEditorViewController]を起動すればカスタマイズされた状態で起動します。
AdobeImageEditorCustomization.setToolOrder([
    kAdobeImageEditorEnhance,        /* Enhance */
    kAdobeImageEditorEffects,        /* Effects */
    kAdobeImageEditorStickers,       /* Stickers */
    kAdobeImageEditorOrientation,    /* Orientation */
    kAdobeImageEditorCrop,           /* Crop */
    kAdobeImageEditorColorAdjust,    /* Color */
    kAdobeImageEditorLightingAdjust, /* Lighting */
    kAdobeImageEditorSharpness,      /* Sharpness */
    kAdobeImageEditorDraw,           /* Draw */
    kAdobeImageEditorText,           /* Text */
    kAdobeImageEditorRedeye,         /* Redeye */
    kAdobeImageEditorWhiten,         /* Whiten */
    kAdobeImageEditorBlemish,        /* Blemish */
    kAdobeImageEditorBlur,           /* Blur */
    kAdobeImageEditorMeme,           /* Meme */
    kAdobeImageEditorFrames,         /* Frames */
    kAdobeImageEditorFocus,          /* TiltShift */
    kAdobeImageEditorSplash,         /* ColorSplash */
    kAdobeImageEditorOverlay,        /* Overlay */
    kAdobeImageEditorVignette        /* Vignette */
    ])

let adobeViewCtr = AdobeUXImageEditorViewController(image: UIImage(named: "aiko_photo.jpg"))
adobeViewCtr.delegate = self
self.presentViewController(adobeViewCtr, animated: true) { () -> Void in

}
まとめ
これを実装しただけで、リリースできるんじゃないかと思うほどすごいSDKだと思います。
今回紹介したもの以外にもまだまだ面白そうなSDKが含まれているので触ってみると楽しいのではないかなと思います。
adobe乗りに乗ってんなー
