はじめに
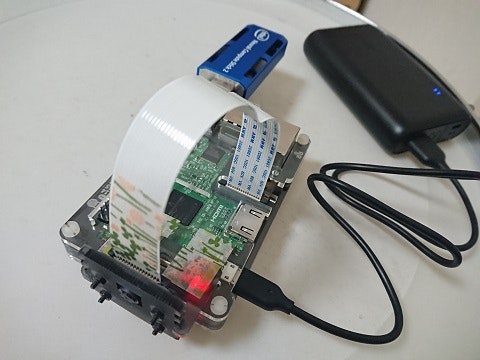
前回 に続いて、NCS2(Neural Compute Stick2)と Raspberry Pi を使って、MobileNet-SSD(Single-Shot multi-box Detector) でリアルタイムの動体検出を試しました。
以下のサイト/投稿を参考にさせていただきました。ありがとうございました。
-
Object detection with deep learning and OpenCV
https://www.pyimagesearch.com/2017/09/11/object-detection-with-deep-learning-and-opencv/ -
RaspberryPi3をNeural Compute Stick 2(NCS2 1本)で猛烈ブーストしMobileNet-SSDの爆速パフォーマンスを体感する (Core i7なら21 FPS)
https://qiita.com/PINTO/items/fc1fcecce4d5600c20bb
↑ MobileNet-SSDを使った実装や、cv2 の dnn モジュールではなくinference_engine API を使うところなど、この方の投稿を見なければ思いつきませんでした。(凄すぎて、もはや何をやっているのか理解はできませんが、、)
MobileNet-SSD でのリアルタイム物体検出
Environment
- Raspberry Pi 3B
- Raspbian Stretch with desktop (2018-11-13-raspbian-stretch)
- OpenVINO Toolkit 2018 R5 (l_openvino_toolkit_ie_p_2018.5.445.tgz)
実行結果
Raspberry Pi に テレビで Youtube で箱根駅伝 を再生したものを見せました。非同期モードで 10 ~ 13 FPS。
タイムラグとフレーム飛びが激しく厳しい結果ですが、それなりに検出してくれていて個人的には満足です。
※画像は Youtubeのリンクになっています。

使用したコード
ベースとなる MobileNet-SSD での物体検出は、上の参考サイト "Object detection with deep learning and OpenCV" からダウンロードした"deep_learning_object_detection.py" を使用しています。
また、Camera の VideoCapture を 非同期で推論処理する部分は、OpenVINO Toolkit が提供している Pythonのサンプルコード "object_detection_demo_ssd_async.py" を使用しました。
Gist(VNC version):
https://gist.github.com/kodamap/620819c7c965860b9694d1da084738a7#file-mobilenet-ssd_object_detection_async-py
あと、ブラウザで手軽に Streaming 表示させたかったので Flask で WebUI を作りました。
(これ自体はあんまり意味なかったかも。。)でもこれを実装したお蔭で非同期モードの仕組みが理解できました。
GitHub(browser version):
https://github.com/kodamap/object_detection_demo
非同期/同期モードについて
OpenVINO Toolkit が提供している Pythonのサンプルコード "object_detection_demo_ssd_async.py" では、 推論処理のモード(同期/ 非同期)を切り替えることができます。非同期モードでは、現在の frame の推論処理完了を待っている間に、次の frame の処理を実行させることで、同期処理と比べて高いパフォーマンスがでます。推論処理のリクエストid(cur_request_id , next_request_id )と フレーム (next_frame, frame) を入れ替えて非同期処理を実現する素敵なロジックでした。
    # リクエストid の初期値。while ループの最後で id を入れ替える。
    cur_request_id = 0
    next_request_id = 1

    while cap.isOpened():
        # 非同期処理の場合 next_frame に 現在のフレームを取得する。
        if is_async_mode:
            ret, next_frame = cap.read()
        else:
            ret, frame = cap.read()
        .
        .
        # 取得した next_frame に対して 推論処理を実行する。
        # その際、request_id には next_request_id を指定する(cur_request_id ではないのがポイント)。
        if is_async_mode:
            in_frame = cv2.resize(next_frame, (w, h))
            in_frame = in_frame.transpose((2, 0, 1))  # Change data layout from HWC to CHW
            in_frame = in_frame.reshape((n, c, h, w))
            exec_net.start_async(
                request_id=next_request_id, inputs={input_blob: in_frame})
        .
        .
        # 推論処理処理の完了チェック。
        # cur_request_id の結果が完了していたら、frame に対して 検出結果を解析処理する。
        # ここでの frame には、前回処理した next_frame が入っている(whileループの最後を参照)
        if exec_net.requests[cur_request_id].wait(-1) == 0:
            .
            .
            # current_id のリクエスト結果を解析する
            res = exec_net.requests[cur_request_id].outputs[out_blob]
                    .
                    .
                    cv2.rectangle(frame, (xmin, ymin), (xmax, ymax), color, 2)
        .
        .
        # 解析処理を反映したframeを表示
        cv2.imshow("Detection Results", frame)
        .
        .
        # リクエストid (cur_request_id, next_request_id)を入れ替える。
        # frame に、推論処理を実行中の next_frame を 入れる。
        # この リクエストid と frame の入れ替えによって、次回のループ処理時には 先の next_request_id
        # でのリクエストを current_id として結果を受け取り、frame に反映することができる。
        if is_async_mode:
            cur_request_id, next_request_id = next_request_id, cur_request_id
            frame = next_frame
MobileNet モデルの IR ファイル変換
MobileNetのトレーニング済みのモデルを OpenVINO のInference Engine で使用するには、IRファイルに変換する必要があります。
Deployment Workflow
https://software.intel.com/en-us/articles/OpenVINO-InferEngine
トレーニング済みモデルは、上の参考サイト "Object detection with deep learning and OpenCV" からダウンロードしたファイルを使いました。IRへの変換は、Raspberry Pi で出来ないため、OpenVINOをインストールしたPC(Windows10) 上で実施します。
> python C:\Intel\computer_vision_sdk\deployment_tools\model_optimizer\mo.py --data_type FP16 --input_model MobileNetSSD_deploy.caffemodel --input_proto MobileNetSSD_deploy.prototxt.txt
> dir object_detection_demo\IR\MobileNetSSD_FP16
2019/01/01  20:45        11,566,834 MobileNetSSD_deploy.bin
2019/01/01  20:45            16,508 MobileNetSSD_deploy.mapping
2019/01/01  20:45            69,542 MobileNetSSD_deploy.xml
実行例
Raspberry Pi 上での実行例です。オプションは、 -i (input) 、-m (model)、-d (device)を指定します。
$ git clone https://github.com/kodamap/object_detection_demo
$ cd object_detection_demo
$ python3 app.py -i cam -m IR/MobileNetSSD_FP16/MobileNetSSD_deploy.xml -d MYRIAD
 * Serving Flask app "app" (lazy loading)
 * Environment: production
   WARNING: Do not use the development server in a production environment.
   Use a production WSGI server instead.
 * Debug mode: off
2019-01-06 07:34:13,742 INFO werkzeug _log():  * Running on http://0.0.0.0:5000/ (Press CTRL+C to quit)
ブラウザでアクセスします。
http://<your raspberryPi ip addr>:5000/
async mode / sync mode ボタンで、推論処理の非同期/同期モードを切り替えることができます。Streaming 画面右上には フレームレート(FPS)が表示されます。また、矢印ボタンで 画面を回転させることができます。

まとめ(感想)
Raspberry Pi のCPUでの処理(MKLDNNPlugin)と比べられないので NCS2 がどれくらい速いのかよく分かりませんが、エッジデバイスでのリアルタイム推論がここまで出来ることが分かったのは自分にとって収穫でした。
現状は「ただやってみた」状態なので、今後ディープラーニングに関してもっと基本的なことを勉強していこうと思います。