This article is an English version of a post I previously published in Japanese on Qiita.
Want to use Pyxel more easily?
Pyxel is a game engine that lets you create retro-style games and apps using Python.
(If this is your first time hearing about Pyxel, please see the introductory article:
“[Official] You’ll Find No Reason Not to Use the Retro Game Engine Pyxel”.)

Pyxel is built around the concept of “casual and fun game programming,” and it really is easy to use.
However, there has always been one unavoidable prerequisite:
You need to install Python and Pyxel in advance.
For example:
- When you want to let complete beginners use Pyxel in a programming class.
- Or when you suddenly feel like making a game with Pyxel on a company PC. (At your own risk 😉)
In situations like these, this “preparation step” can become a surprisingly big hurdle.
To solve this “last bit of setup” problem, we created a new development environment called Pyxel Code Maker.
What is Pyxel Code Maker?
Pyxel Code Maker is an online development environment where you can write Pyxel programs, create resources such as graphics and sounds, and run them directly in your browser.
There is no need to install Python or Pyxel beforehand.
As long as you have a web browser, you can start using it immediately with zero setup.
You can edit code and resources and run them on the spot to see the results, allowing you to smoothly repeat the cycle of write → create → run.
Let’s open the following link and try Pyxel Code Maker right away:
Screen layout of Pyxel Code Maker
When you launch Pyxel Code Maker, you will see a screen like this:
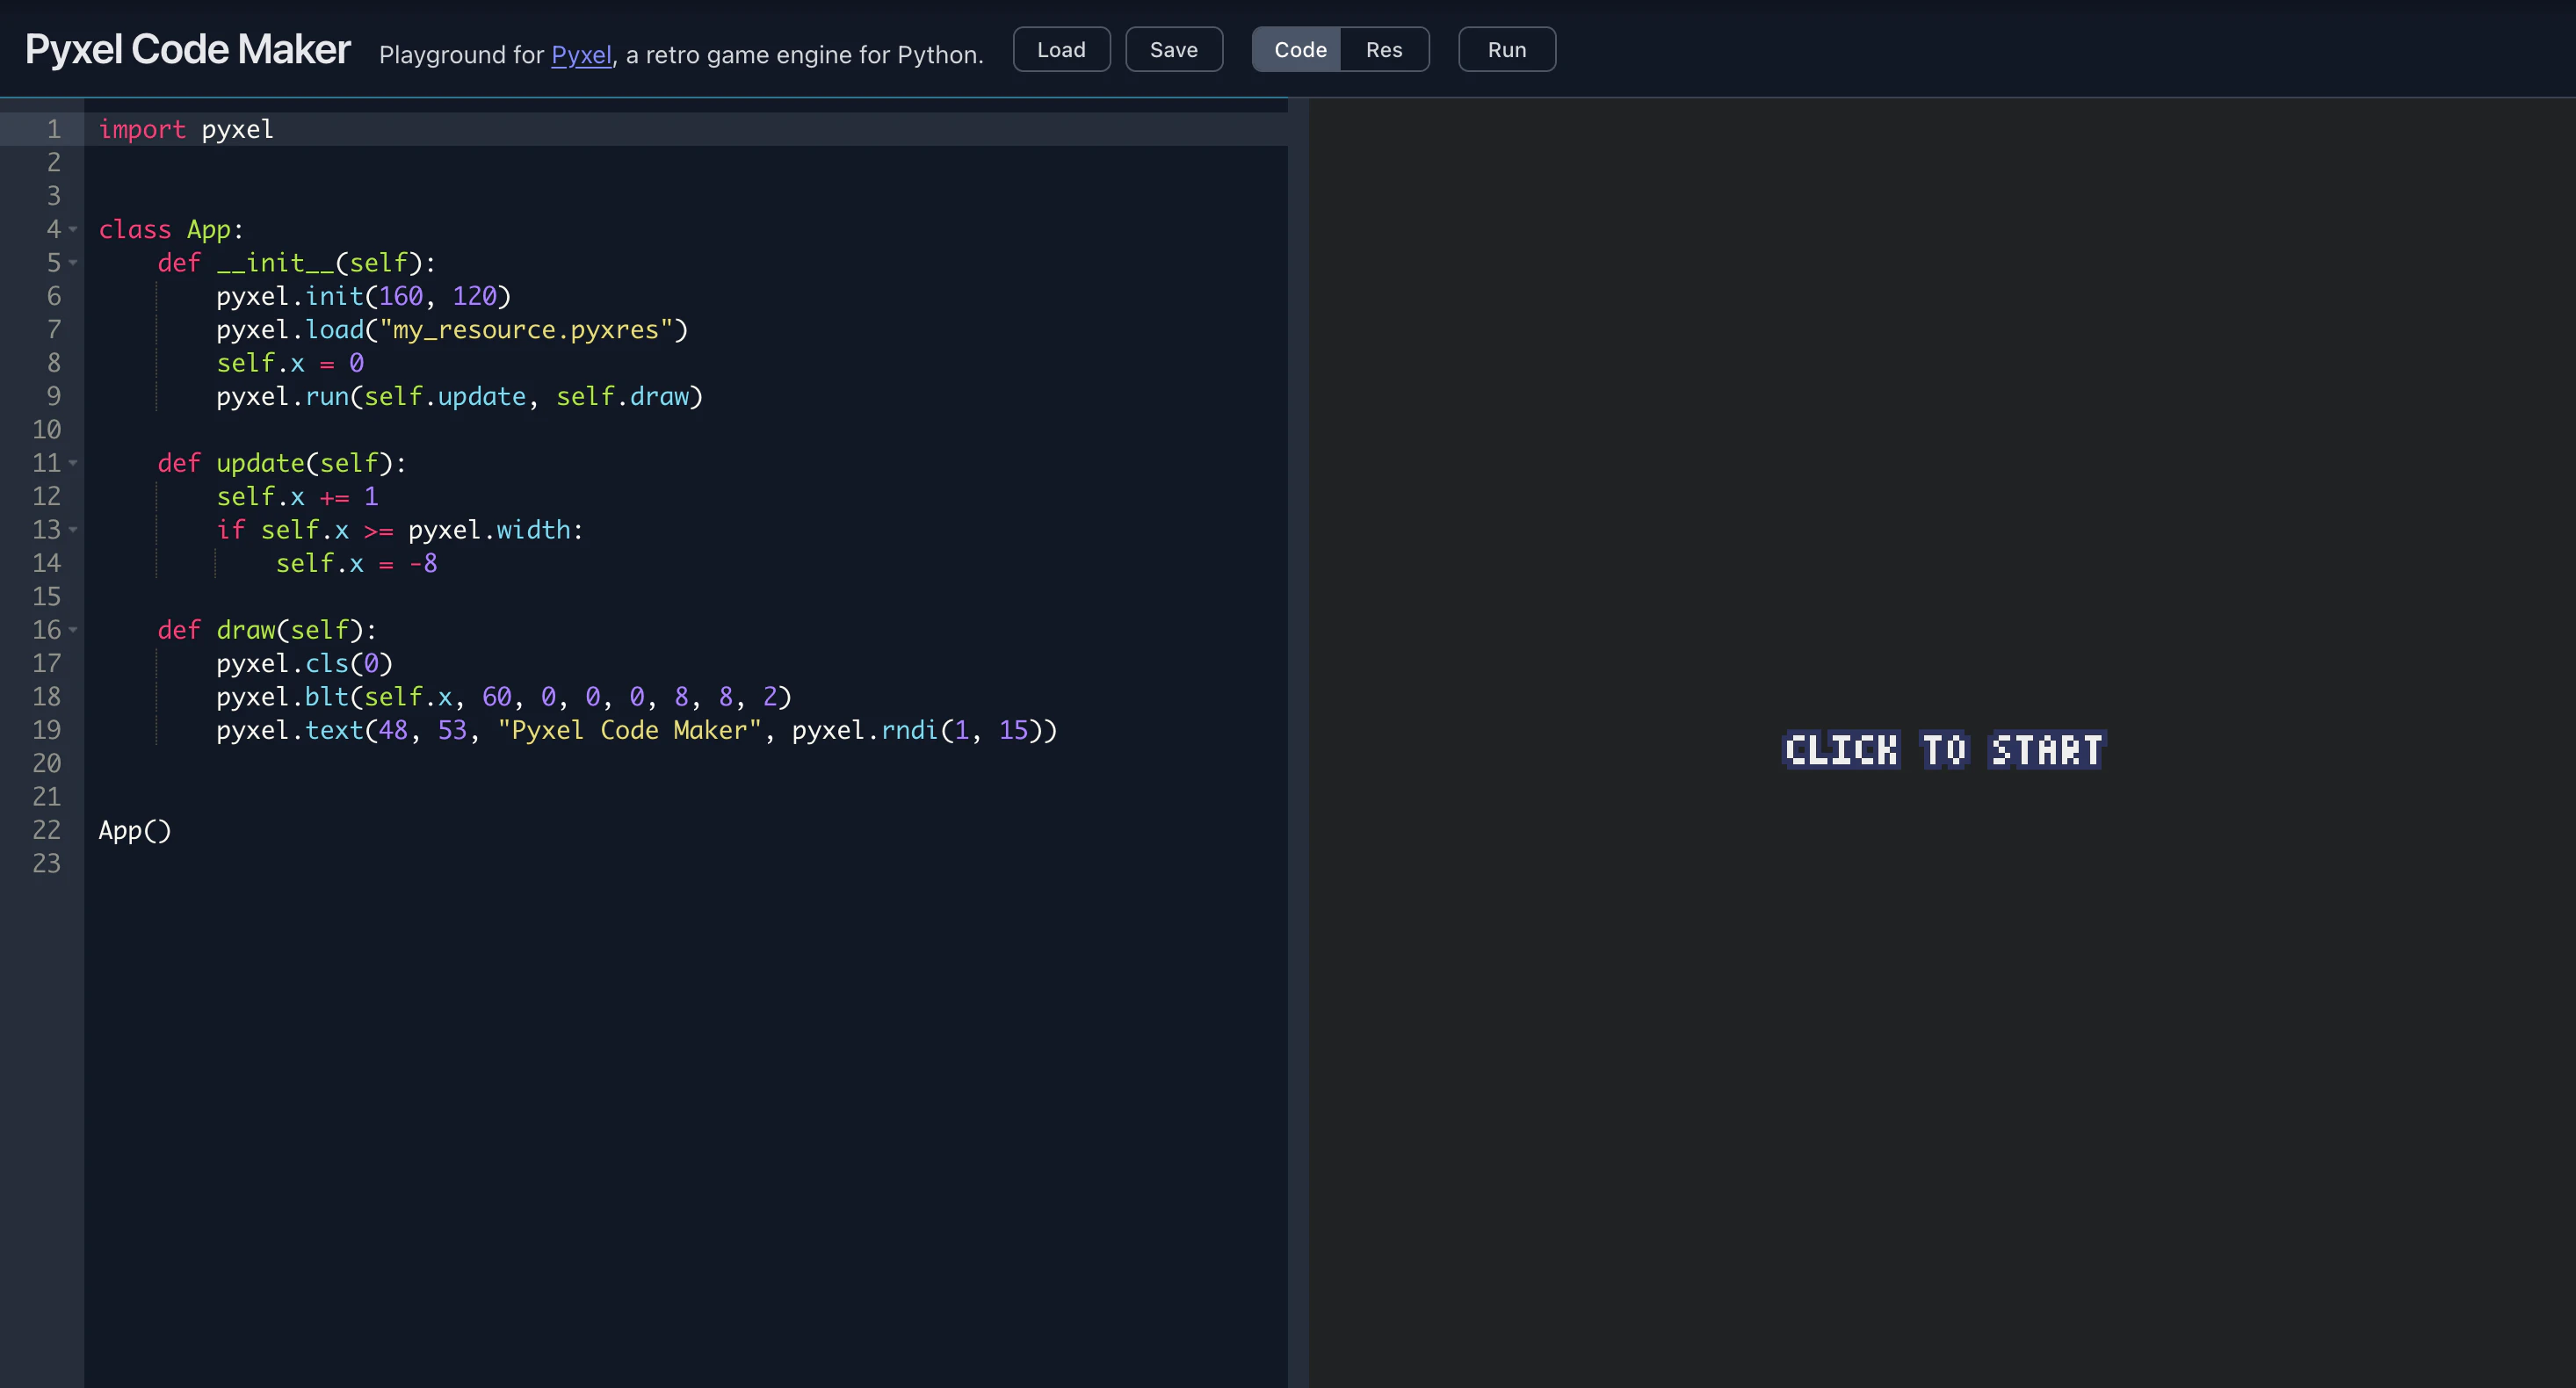
If you have used other online development environments before, you can probably guess how it works just by looking at it.
Here is a brief explanation of each UI element.
Control buttons
At the top right of the screen, you will find several control buttons:

-
LOAD/SAVE
Load and save project files. -
CODE/RES
Switch between the code editor and the resource editor. -
RUN
Run (or re-run) the application.
All basic operations can be performed using these buttons alone.
Editing area
The left side of the screen is the editing area for code and resources (graphics and sounds).
When you start, it shows the code editor. Pressing the RES button switches to Pyxel’s resource editor.
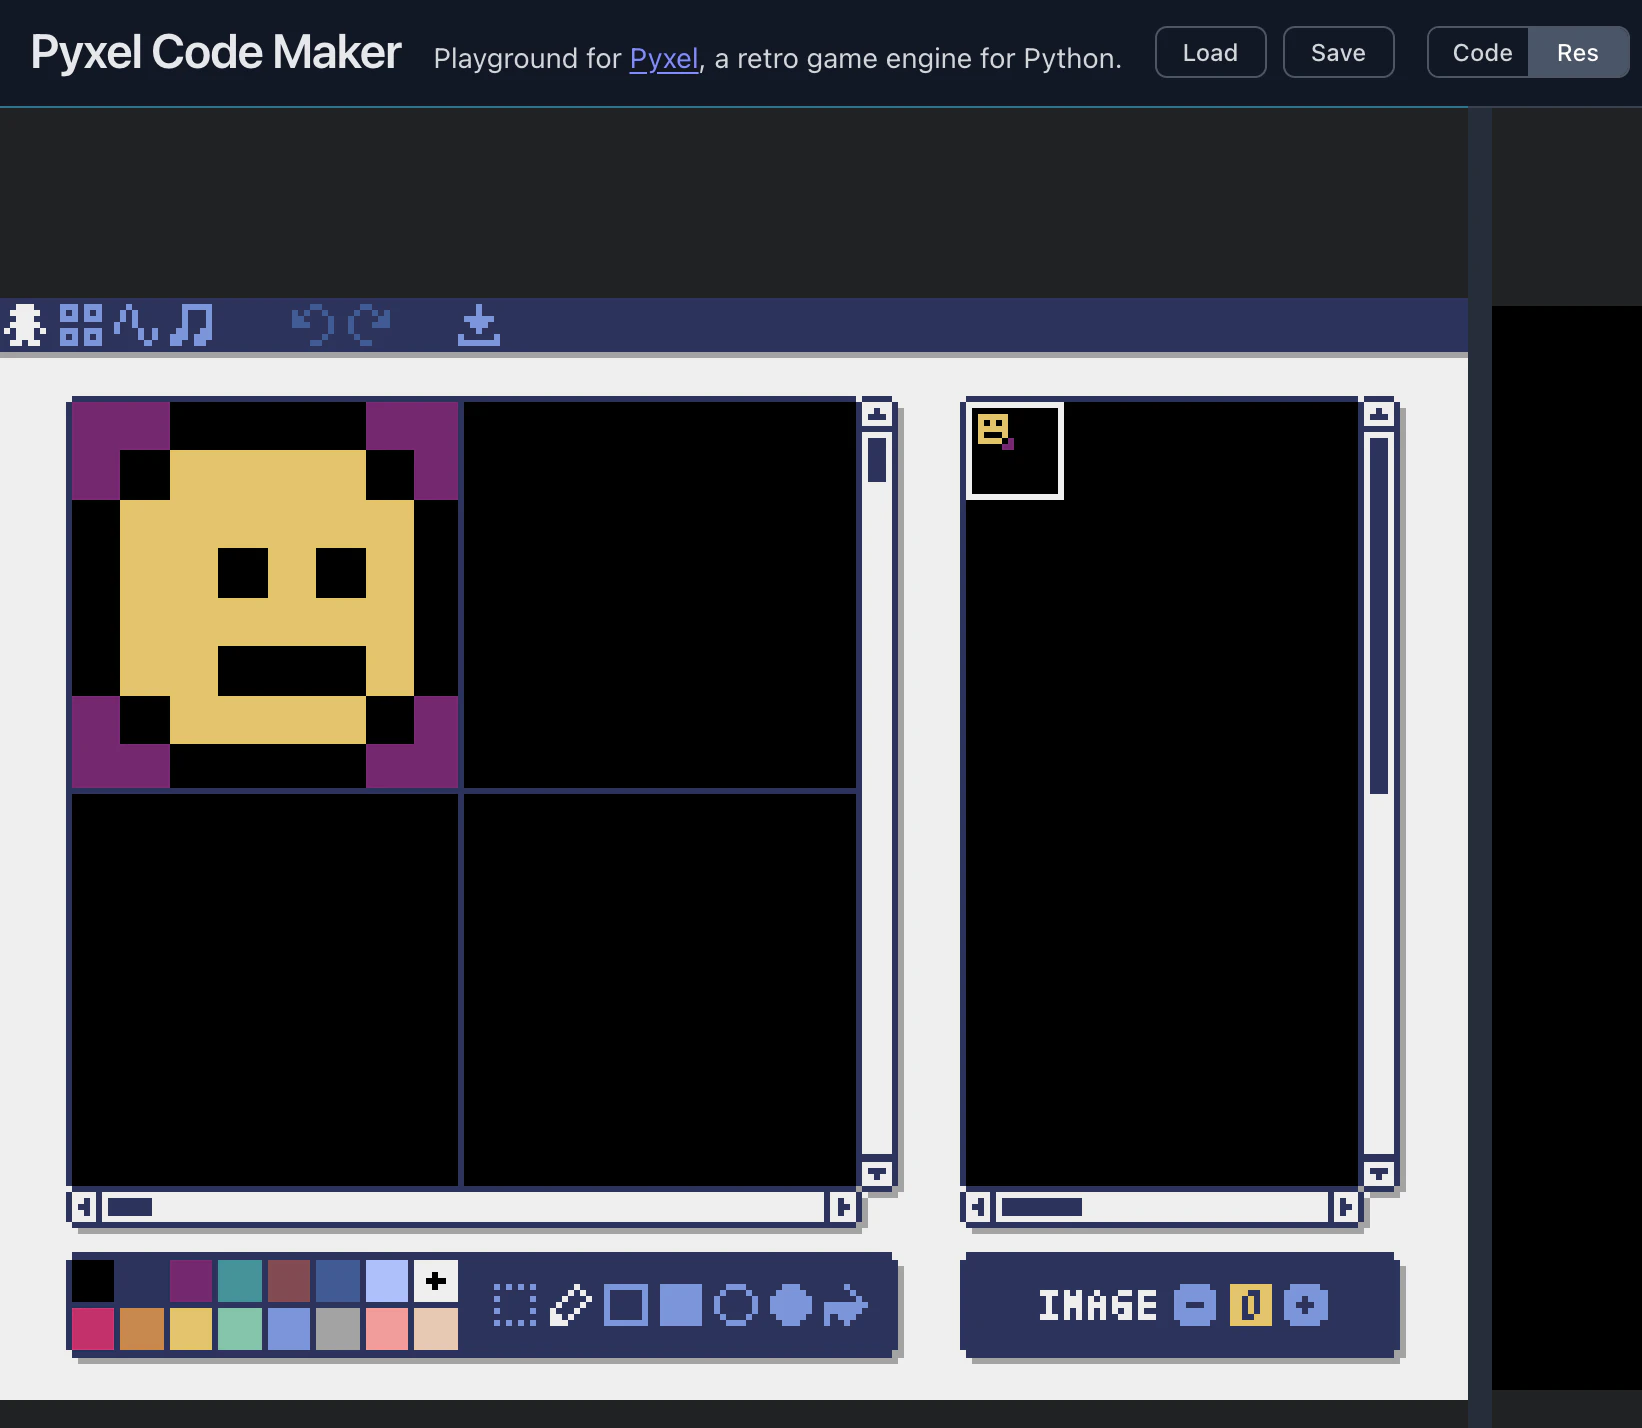
This resource editor works exactly the same as the one bundled with Pyxel for local environments.
Note that the resource file name is fixed as:
my_resource.pyxres
Execution screen
On the right side of the screen, you can see the running application.
When you edit the code or resources and press the RUN button, the result is immediately reflected here.

You can also drag the boundary between the editing area and the execution screen to adjust the layout, depending on whether you want to see more code or a larger execution window.
Useful shortcuts
Pyxel Code Maker provides several shortcut keys to make editing and running faster:
-
Ctrl (Cmd) + ,
Switch between the code editor and the resource editor -
Ctrl (Cmd) + Enter
Run (or re-run) the application -
Ctrl (Cmd) + .
Switch focus between the editing area and the execution screen
The last one, “focus switching,” is especially useful when you write code, move focus to the execution screen to control a character, and then quickly return to the editor to make changes.
Once you get used to it, you can work with very little mouse usage, so be sure to take advantage of it.
About project files
When you press the LOAD or SAVE button, you can load or save a ZIP file that contains both the code and resource files together.
This ZIP file includes everything you are editing in Pyxel Code Maker, making it easy to share or back up projects.
As a slightly advanced (and somewhat tricky) use case, you can also extract the ZIP file and manually add extra files such as font data.
(This is intended for advanced users only and is not strongly recommended.)
This ZIP file is also compatible with Pyxel’s application file format (.pyxapp).
That means you can run it directly in a local environment like this:
pyxel play project_name.zip
Now that I can use it… what should I make?
With this, you can start developing with Python and Pyxel with zero setup.
Still, some people may think:
“I have the environment, but I don’t know what to make.”
“I don’t know what order I should study things in.”
If so, we recommend the official beginner’s book by the author of Pyxel:
“Learn Python Through Games! Retro Game Programming with Pyxel”
https://gihyo.jp/book/2025/978-4-297-14657-3

In closing
Thank you very much for reading.
Pyxel is developed for free, motivated by stars on GitHub.
If you would like to support the project, please consider starring the
Pyxel repository. It would be a great encouragement to the author!