はじめに
今回は、コマンドラインで実行するプログラムをまるでHoudiniのSOPであるかのように![]() 扱う方法について記事を書きたいと思います。
扱う方法について記事を書きたいと思います。
その題材として、ここでは画像をトレースしてベジェ曲線を作成するpotrace SOPを作成します。
既にHoudiniにはTrace SOPというものが存在しますが、それは画像からポリラインを生成するものです。
Houdini19.0からCurve SOPによるベジェ曲線の編集が使いやすくなったこともあり、やっぱりポリポリするよりベジェベジェしたいです![]()
Houdiniに限らずPython単体またはMayaなどの他のDCCでも役に立つようにサンプルのスクリプトを書きたいと思います![]()
potraceとは
そもそもpotraceって何?って思う人もいると思いますが、potraceとはビットマップ画像をベクトルデータに変換するオープンソースソフトウェアです。
公式サイト: https://potrace.sourceforge.net/
マニュアル: https://potrace.sourceforge.net/potrace.1.html
potraceの技術的な解説: https://potrace.sourceforge.net/potracelib.pdf
このPDFはかなり読み応えがあってすごくいいです。おすすめ![]()
あとここのGithubも素晴らしいです![]() : https://github.com/skyrpex/potrace
: https://github.com/skyrpex/potrace
Pythonバインディングだけでなく、potraceライブラリを読み込んで自身のプログラムにPotraceの機能が取り込めるのも面白そうですね。
実際にBlenderのGrease PencilのTrace Image to Grease Pencil

Inkscapeのビットマップのトレース
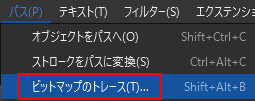
これらの機能はpotraceライブラリを使用して実装されています。
なので、HoudiniでもHDKを使ったり、Pythonでinlinecpp( https://www.sidefx.com/ja/docs/houdini/hom/extendingwithcpp.html )を使って同様の機能をHoudinini実装することができます。
しかし、もっと手軽にpotraceの機能をHoudiniに組み込むことができます。
この記事ではそれについて解説します。
potraceコマンドラインの基本
コマンドライン:potrace 入力画像ファイルのパス -o 出力ファイルのパス -b ベクトルフォーマット
対応している入力画像ファイル形式: BMP,PBM,PGM,PPM
対応している出力ベクトルファイル形式: SVG,PDF,EPS,PS,OGM,DXF,GeoJson,Gimppath,XFig
マニュアルを読んでみると、
入力ファイルの指定方法に関して
A filename of "-" may be given to specify reading from standard input.
出力ファイルの指定方法に関しても
-o filename, --output filename
A filename of "-" may be given to specify writing to standard output.
と書かれていて、potraceが標準入力と標準出力に対応しています。
例えば、
potrace - -o - --svg
のコマンドで標準入力のデータをSVGデータとして標準出力に吐き出すことができます。
今回は、このコマンドラインの形式を利用します。
potrace SOPを実装する前に
上記のようにpotraceが対応している入力画像ファイル形式が少ないです。
JPEGとかPNG、さらにはHoudiniのCOPのデータを読み込みたいです。
HoudiniにはPIL(Python Image Library)モジュールが 標準で同梱されています。
このPILモジュールを使用すれば入力画像ファイルをBMPに変換することができます。
また、potraceはデフォルトでは2値化した結果として黒になった部分に閉じたカーブを生成します。
potraceが対応している出力ベクトルファイル形式はHoudiniではDXF、EPSを読み込むことができます。
しかし、ベジェ曲線には対応していないので事実上対応していないのも同然です。
Houdiniがベジェ曲線として読み込めるベクトルファイル形式はIllustratorの.aiくらいです。
potraceから出力されたベクトルデータをHoudiniに取り込む方法は、potraceでベクトルデータをSVGとして書き出して、そのSVGをHoudiniに読み込めるようにする方法があります。
なのでSVGを読み込む機能も実装する必要があります。
HoudiniでSVGを読み込む機能の実装となると規模がでかくなってしまいますが、potraceから出力されたSVGデータの読み込みに限定するとさほど実装は難しくないです。なぜならば、potraceから出力されるSVGはpathエレメントで構成されていて、そのパスタイプは3次ベジェとラインだけが使われているからです。
以上のことから、
- 画像またはCOPからデータを読み込んでグレースケール画像にしてBMPデータに変換する -> 画像変換として
PILモジュールを利用 - そのBMPデータを標準入力としてpotraceコマンドに渡してSVGデータとして標準出力に出力する -> 外部プログラムの実行として
subprocessモジュールを利用 - そのSVGデータを標準入力としてSVGパーサーに渡して3次ベジエ曲線をHoudini上で作成する-> SVGパーサーとして
svg.pathモジュールを利用
の工程でpotrace SOPが実装できそうです。
画像/COPデータをBMPに変換する
Pythonを使って特定の画像をグレースケールのビットマップ画像に変換するサンプルを以下に載せます。
from PIL import Image
import io
filename = "$HH/pic/houdinisplash.png"
filename = hou.text.expandString(filename)#$変数を展開
img = Image.open(filename)
img = img.convert("L")#8bitグレイスケールに変換
img_bytes = io.BytesIO()#標準出力を用意
img.save(img_bytes, "BMP")#BMP画像変換
img.show()#画像を開いて内容を確認
次に、PythonでCOPデータを読み込んでグレースケールのビットマップ画像に変換するサンプルを以下に載せます。
from PIL import Image,ImageOps
import io
cop = hou.node("/img/comp1/default_pic")
pixels = cop.allPixelsAsString(plane="C",depth=hou.imageDepth.Int8)#デフォルトの16bit floatは都合が悪いので8bit intとして読み込む
img = Image.frombytes("RGB",(cop.xRes(),cop.yRes()),pixels)#8bit intとしてデータを読み込む
img = ImageOps.flip(img)#COPデータの並びは底辺が最初なので上下反転させる。
img_bytes = io.BytesIO()#標準出力を用意
img.save(img_bytes, "BMP")#BMP画像変換
img.show()#画像を開いて内容を確認
今回の実装で上記のコードをテストしたのですが、COPノードの読み込みでクラッシュするケースがあって安定しなかったです。
allPixelsAsString関数のdepthでInt8を指定すると特にそうです。
そこで下記のようにコードを修正しました。
from PIL import Image,ImageOps
import io
import numpy
cop = hou.node("/img/comp1/default_pic")
pixels = numpy.frombuffer( cop.allPixelsAsString(plane="C") ,
             dtype=numpy.float32).reshape(cop.yRes(),cop.xRes(),3).copy()
pixels = (pixels*255).round().astype(numpy.uint8)
img = Image.fromarray(pixels,mode="RGB")
img = ImageOps.flip(img)#COPデータの並びは底辺が最初なので上下反転させる。
img_bytes = io.BytesIO()#標準出力を用意
img.save(img_bytes, "BMP")#BMP画像変換
img.show()#画像を開いて内容を確認
potraceコマンドで画像をSVGに変換する
入力ファイルパスと出力ファイルパスを指定する場合
Pythonを使ってpotraceコマンドを実行するサンプルを以下に載せます。
import subprocess
command = "C:/potrace-1.16.win64/potrace.exe"
inputBitmapFilePath = "BMP画像の入力ファイルパス"
outputSvgFilePath = "SVGの出力ファイルパス"
threshold = 1
blacklevel = 0.5
args = [command,inputBitmapFilePath, "-o", outputSvgFilePath,"--svg","--alphamax",str(threshold),"--blacklevel",str(blacklevel)]
proc = subprocess.Popen(args,stdin=subprocess.PIPE,stdout=subprocess.PIPE,stderr=subprocess.PIPE,shell=False)
stdout, stderr = proc.communicate()
標準入力と標準出力を指定する場合
Pythonを使ってpotraceコマンドを実行するサンプルを以下に載せます。
import subprocess
from PIL import Image
import io
filename = "$HH/pic/houdinisplash.png"
filename = hou.text.expandString(filename)
img = Image.open(filename)
img = img.convert("L")
img_bytes = io.BytesIO()
img.save(img_bytes, "BMP")
inputData = img_bytes.getvalue()#標準入力のデータを用意する

command = "C:/potrace-1.16.win64/potrace.exe"
threshold = 1
args = [command,"-", "-o", "-","--svg","--alphamax",str(threshold)]
proc = subprocess.Popen(args,stdin=subprocess.PIPE,stdout=subprocess.PIPE,stderr=subprocess.PIPE,shell=False)
stdout, stderr = proc.communicate(input=inputData)

print(stdout.decode("utf-8"))#標準出力の内容をプリントする
SVGパーサーで読み込んだpathエレメントからベジェ曲線を作成する
今回はSVGパーサーとしてsvg.pathモジュールを使用します。
pip install svg.path --target "モジュールの保存先"
を実行してsvg.pathをインストールします。
svg.pathモジュールの保存先が"C:/AdventCalendar2022/modules"と仮定して、
Pythonを使ってpotraceから出力されたSVGをHoudiniに読み込むサンプルを以下に載せます。
import sys
module = "C:/AdventCalendar2022/modules"
if module not in sys.path:
    sys.path.append(module)#PYTHONPATHに登録されてない特定のモジュールをPythonで利用可能にする
from xml.dom import minidom#SVGはXMLなのでXML DOMを利用する。
import svg.path

path = "C:/AdventCalendar2020/svgs/logo.svg"#読み込むSVGのファイルパス

node = hou.pwd()
geo = node.geometry()
doc = minidom.parse(path)
paths = doc.getElementsByTagName("path")
count = 0
for path in paths:
    d = path.getAttribute("d")
    pathObj = svg.path.parse_path(d)
    listSegments = []
    listClose = []
    listEnds = []
    listSegmentTypes = []
    segmentIndex = -1
    for part in pathObj:
        if type(part)==svg.path.path.Move:
            listSegments.append([])
            listClose.append(False)
            listEnds.append([])
            listSegmentTypes.append([])
            segmentIndex +=1
        elif type(part)==svg.path.path.Line:
            listSegments[segmentIndex].append(hou.Vector3(part.start.real,part.start.imag,0.0))
            listSegments[segmentIndex].append(hou.Vector3(part.start.real,part.start.imag,0.0))
            listSegments[segmentIndex].append(hou.Vector3(part.end.real,part.end.imag,0.0))
            listEnds[segmentIndex]=hou.Vector3(part.end.real,part.end.imag,0.0)
            listSegmentTypes[segmentIndex]=svg.path.path.Line
        elif type(part)==svg.path.path.CubicBezier:
            listSegments[segmentIndex].append(hou.Vector3(part.start.real,part.start.imag,0.0))
            listSegments[segmentIndex].append(hou.Vector3(part.control1.real,part.control1.imag,0.0))
            listSegments[segmentIndex].append(hou.Vector3(part.control2.real,part.control2.imag,0.0))
            listEnds[segmentIndex]=hou.Vector3(part.end.real,part.end.imag,0.0)
            listSegmentTypes[segmentIndex]=svg.path.path.CubicBezier
        elif type(part)==svg.path.path.Close:
            listClose[segmentIndex]=True
        else:
            continue
    for segmentIndex , eachSegment in enumerate(listSegments):
        if len(listSegments[segmentIndex])==0:
            continue
        close = listClose[segmentIndex]
        if not close:
            eachSegment.append(listEnds[segmentIndex])
        else:
            eachSegment.append(listEnds[segmentIndex])
            eachSegment.append(listEnds[segmentIndex])
            eachSegment.append(listEnds[segmentIndex])
        curvePrim = geo.createBezierCurve(len(eachSegment), is_closed=close, order=4)
        for vertexIndex, eachVertex in enumerate(curvePrim.vertices()):
           curvePoint = eachVertex.point()
           curvePoint.setPosition(hou.Vector3(eachSegment[vertexIndex][0],eachSegment[vertexIndex][1],eachSegment[vertexIndex][2]))
doc.unlink()
このスクリプトではSVGのpathエレメントのCubicBezierとLineのみに対応しています。
開いたカーブと閉じたカーブの両方に対応させていますが、potraceから書き出されるカーブは閉じているので実際は開いたカーブの処理は不要です。
ただ、ベジェ曲線の作成の勉強用に開いたカーブにも対応させています。
3次ベジェ曲線を作成する上でおさえておきたいのは、開いたカーブのコントロールポイントの個数は3n+1、閉じたカーブのコントロールポイントの個数は3nとなることです。
これを間違えるとエラーが発生します。
Houdiniのヘルプはこの説明に関してすごく親切です。
potrace SOPの実装
これまでのスクリプトをまとめてPython SOPに実装します。
必要に応じてEdit Parameter Interfaceでユーザパラメータを追加して扱いやすくします。
実装したhipファイルはこちらです。
svg.pathモジュールがC:/AdventCalendar2022/modules
potrace実行可能ファイルがC:/potrace-1.16.win64/potrace.exe
と想定して設定していますが、ここを各自の環境に合わせて設定してください。
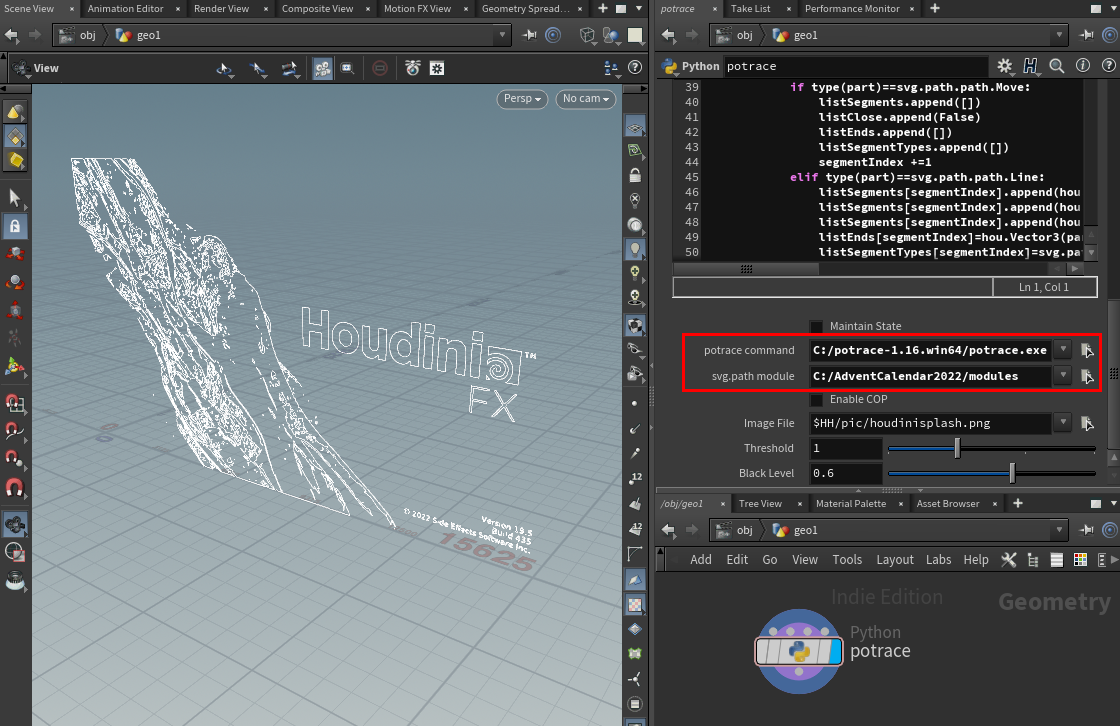
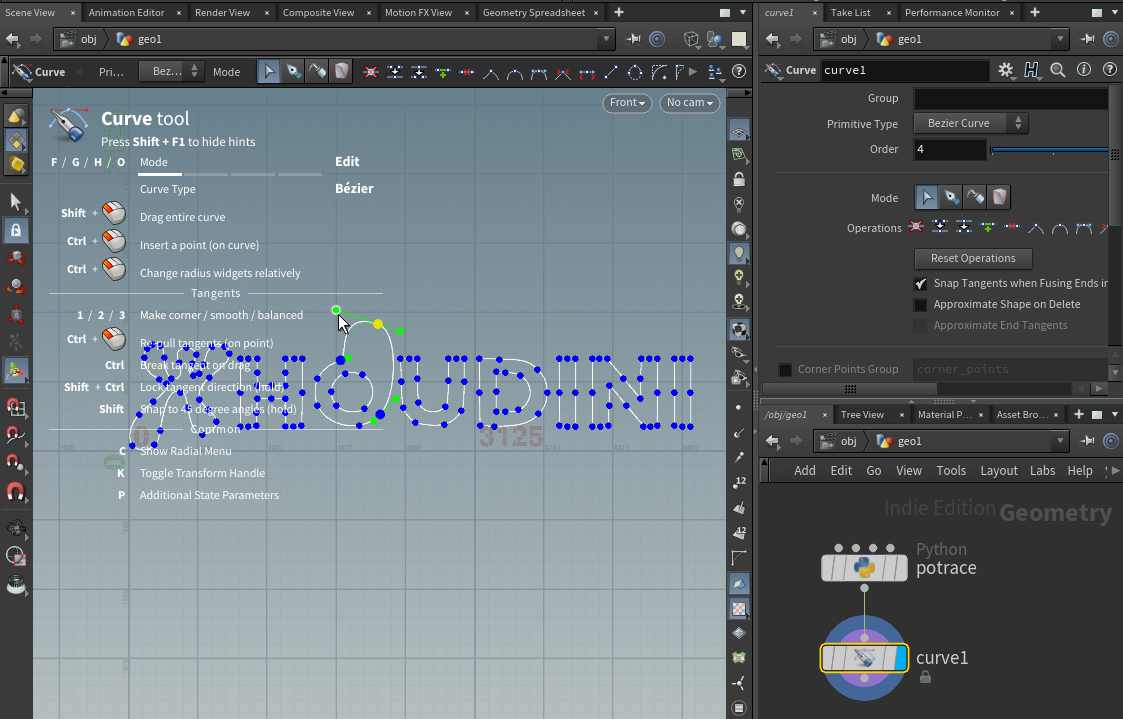
Curve SOPを接続して、ビューポート上でEnterを押してハンドルモードに切り替えれば、Fキーでベジェ曲線がドラッグで編集できるようになります。
potraceには中心線を作成する機能がないので、それはLabs Straight Skeleton 2Dノードで作成できます。
おまけ
autotrace SOPを作る
画像からベジェ曲線を生成するオープンソースソフトウェアはpotraceの他にもautotraceがあります。
このautotraceの目玉機能は中心線を計算することができることです。
線画をトレースしたい場合だと、potraceのように輪郭をトレースするよりも、中心線をトレースしたいことでしょう。
このautotrace SOPを作りたい!となった場合は、この記事で書いた内容を参考にして作ることができると思います。
autotraceコマンドで画像から抽出した中心線をSVGに変換する
autotraceコマンドの基本的な使い方:
atutotrace --centerline --color-count 2 --input-format BMP --output-format SVG --output-file 書き出し先の出力パス 入力画像ファイルのパス
です。
--output-file引数を指定しなかった場合は標準出力に出力されます。
標準入力には対応してない模様です。
対応している入力ファイルはppm, png, pbm, pnm, bmp, tga, pgm, gfとなっています。
今回はPythonを使ってPILで任意の画像をグレースケールのビットマップ画像に変換してそれに対してautotraceコマンドを実行するサンプルを以下に載せます。
from PIL import Image
import os
import tempfile
import subprocess
command = "C:/autotrace/autotrace.exe"
inputImageFilePath = "PILが対応している画像の入力ファイルパス"
outputSvgFilePath = "SVGの出力ファイルパス"

img = Image.open(inputImageFilePath)
img = img.convert("L")
tmpBitmapFilePath = os.path.join(tempfile.gettempdir(), next(tempfile._get_candidate_names())+"_autotrace.bmp")#実際にファイルを生成せずに一時ファイルのパス名を取得
img.save(tmpBitmapFilePath, "BMP")
args = [command,"--centerline", "--color-count","2","--input-format","BMP","--output-format","SVG","--output-file",outputSvgFilePath,tmpBitmapFilePath]
proc = subprocess.Popen(args,stdin=subprocess.PIPE,stdout=subprocess.PIPE,stderr=subprocess.PIPE,shell=False)
stdout, stderr = proc.communicate()
os.remove(tmpBitmapFilePath)#一時ファイルの削除
これに基づいてautotrace SOPを実装したhipファイルはこちらです。
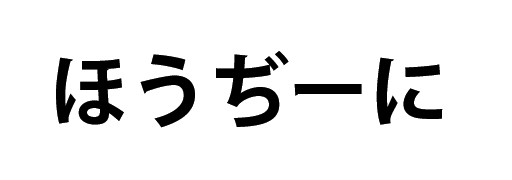
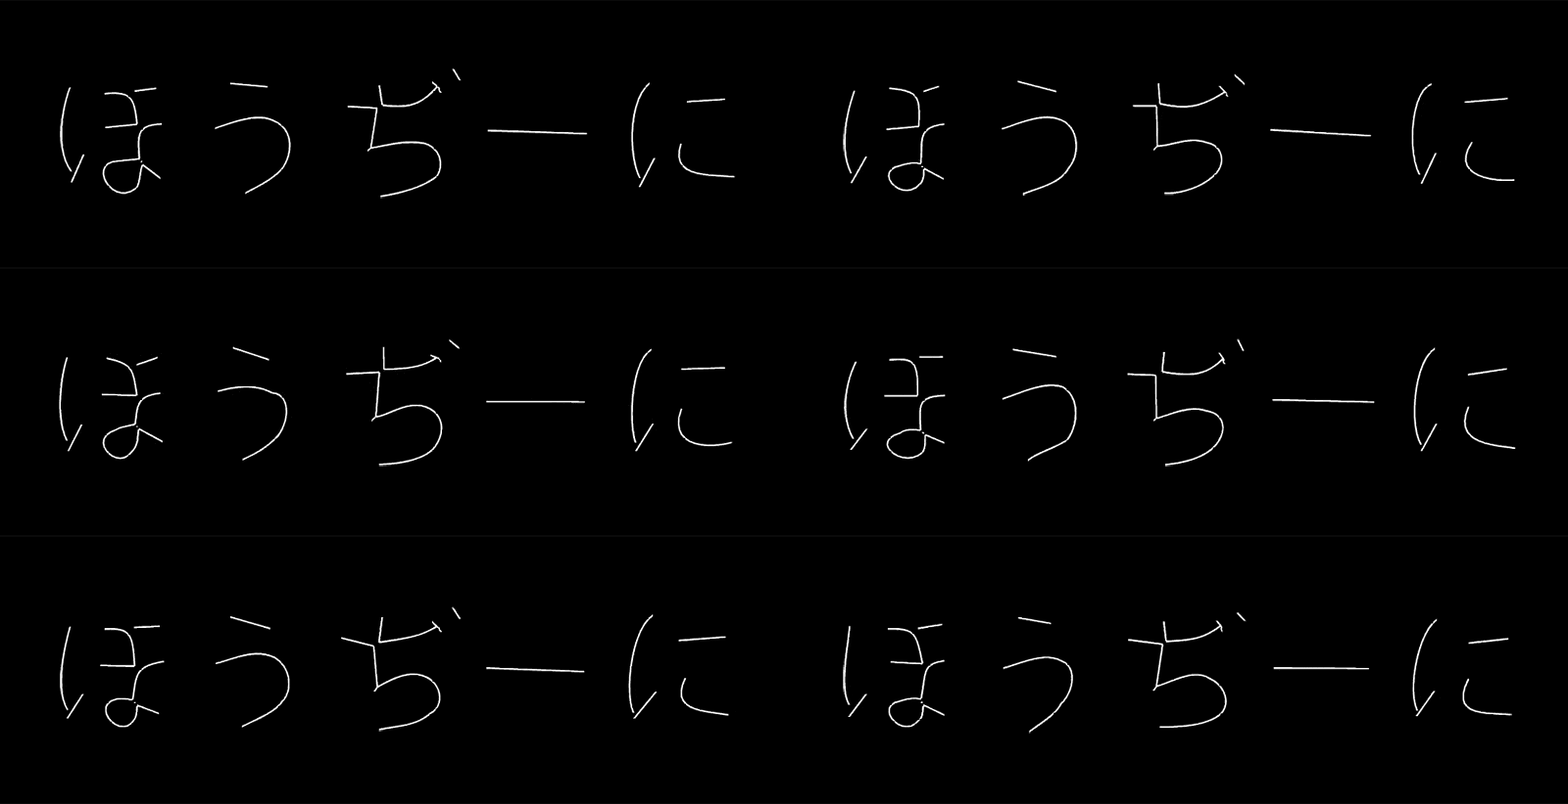
これをベジェ曲線に変換して、あとはCurve SOPなりAttribute Noise SOPなりを使ってプロシージャルに編集ができるようになります。
まとめ
- 画像をトレースしてベクトルデータを生成するソフトにpotrace、autotraceがあるよ

- Python SOPを使用するとインタラクティブなノードが作成できるよ。これが他のDCCと比にならないくらい魅力的

検証環境
Houdini19.5.435Python3.9
