コア機能作成のために、ゴールと実装に必要な要件を書き出しました。以下の内容に沿って実装を進めていきます。
【ゴール】
メイン機能のみをローカルで動かせること

【実装予定ファイル】
- [ ] index.html
- [ ] style.css
- [ ] app.js

【実装予定外部要件】
- [ ] Bootstrap

【実装期間】
2025/10/13~2025/10/26
目次
- [0]前提
- [1]ファイル作成
- 1-1、ブランチ作成
- 1-2、ファイル作成
- [2HTML実装
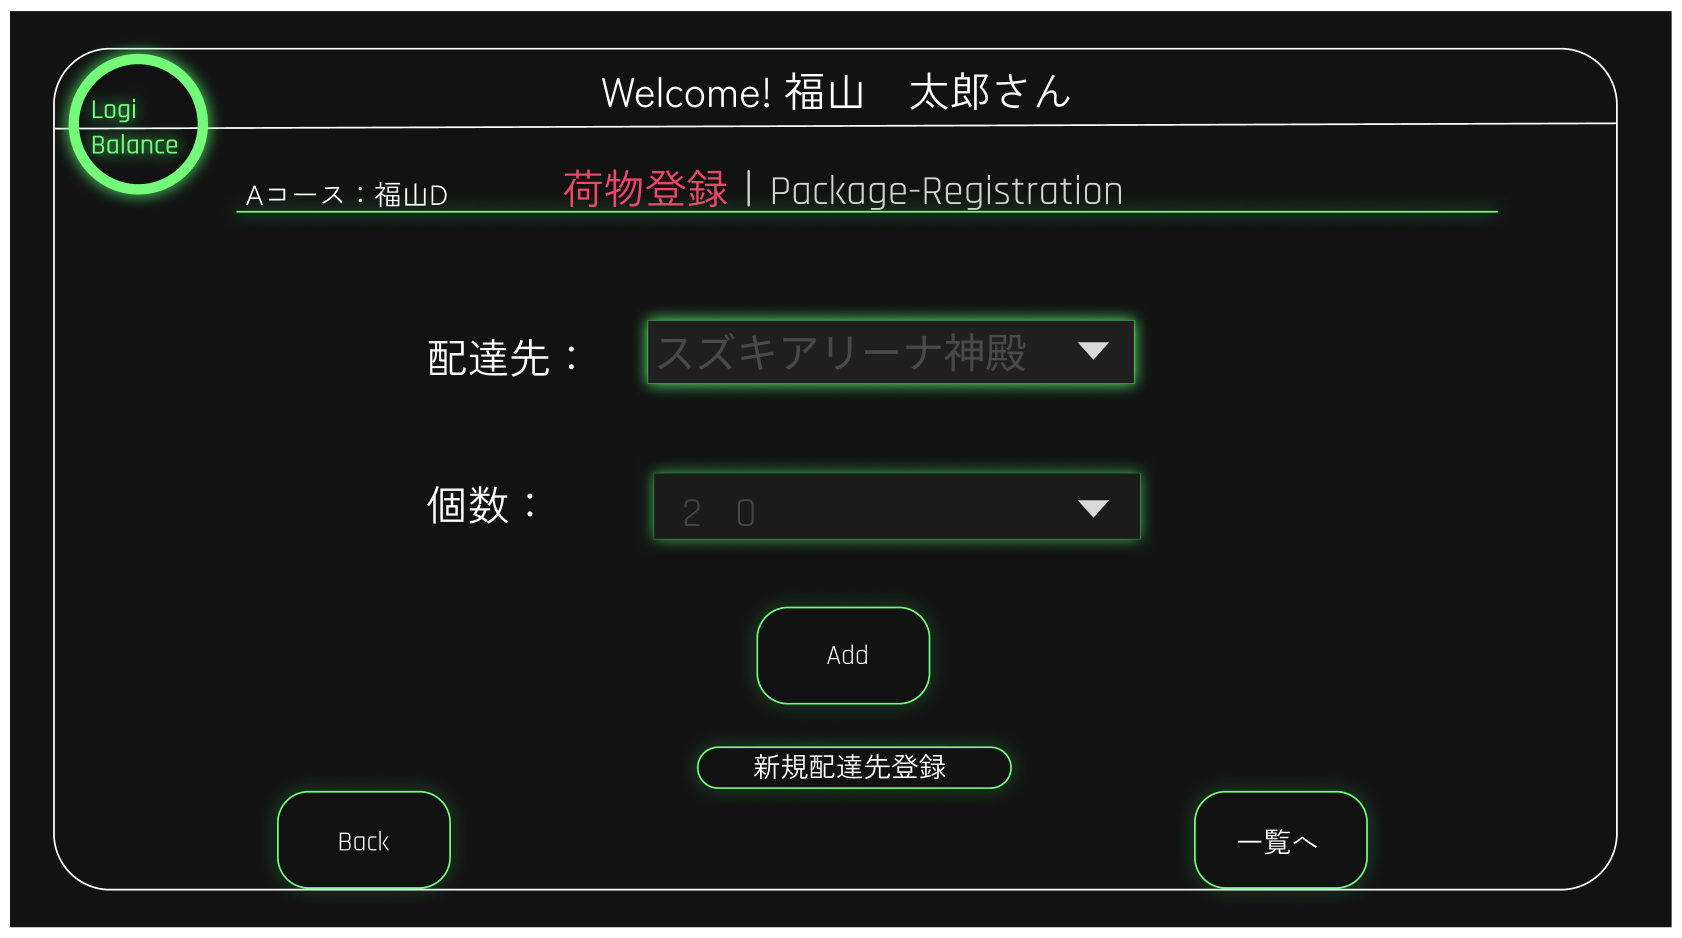
- 2-1、目標とする画面を確認する
- 2-2、上から順番に書き起こす
- [3]Bootstrap導入
- 3-1、index.htmlにBootstrapのCDNを貼る。
- [4]CSS実装
- 4-1、CSSのlinkタグ配置
- 4-2、remを使いこなしたい!
- 4-3、en=Rajdhani,ja="zen kaku gothic new"に指定
- 4-4、背景色を黒(#121212)、文字を白(#ffffff)に指定
--これ以上のCSS追加はJavaScriptが実装できてから--
- 4-5、CSS実装を終えた途中経過画像
[0]前提
- GitHub連携済み
- Bootstrapとは、デザインの初期構築を時短するためのCSS&JSフレームワークです。
- CDN(Content Delivery Network)とは、
Webページでライブラリを使うときlinkやscriptで 外部URL を指すのがCDN利用です。 - Bootstrapで使用されるコードは事前に調べたものを使用しています。
[1]ファイル作成
1-1、ブランチ作成
作業用レポジトリ最上部層にいる状態で新しいブランチを作成。
1-2、ファイル作成
touch index.html
touch style.css
touch app.js
を作成。
[2]HTML実装
2-1、目標とする画面を確認する
2-2、上から順番に書き起こす
<body>
  <div class="container">
    <h1>Welcome!福山 太郎さん</h1>
      <div>
        <p>Aコース:福山D</p>
        <p>荷物登録</p><p>|Package-Registration</p>
      </div>
        <div>
          <p>配達先:</p>
          <form action="index.html" method="post">
            <input type="text" name="address" size="40" maxlength="100">
          <p>個数:</p>
            <form action="index.html" method="post">
            <input type="text" name="address" size="40" maxlength="100">
        </div>
        <div>
          <button type="submit">Add</button>
          <button type="submit">新規配達先登録</button>
        </div>
        <div>
          <button type="submit">戻る</button>
          <button type="submit">一覧へ</button>
        </div>
  </div>
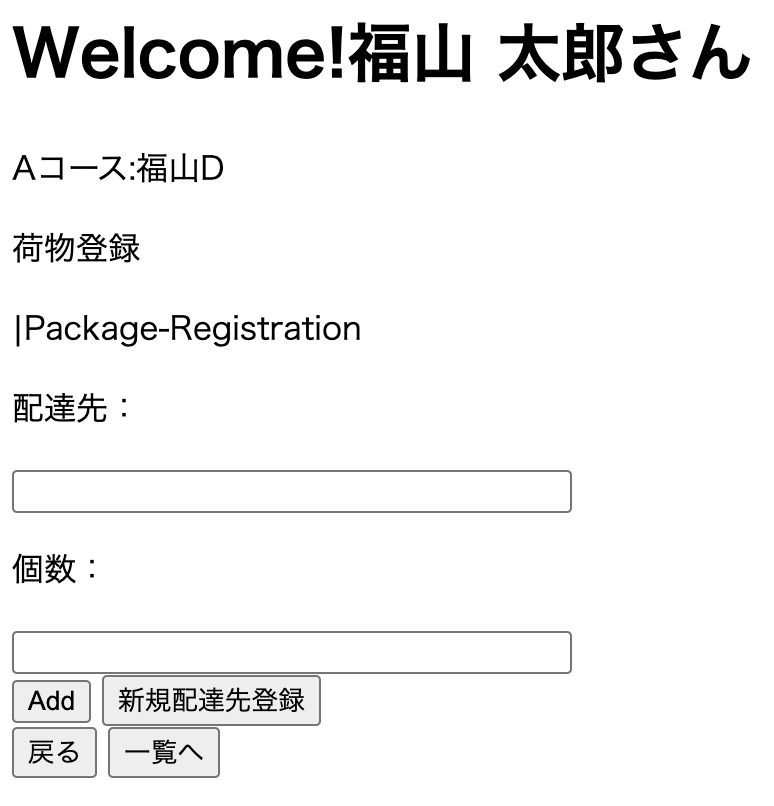
ブラウザで見たらこんな感じ
[3]Bootstrap導入
3-1、index.htmlにBootstrapのCDNを貼る。
<head></head>タグ内に<link>と</body>直前に<script>コードを置くだけ。
<!DOCTYPE html>
<html lang="en">
<head>
  <meta charset="UTF-8">
  <meta name="viewport" content="width=device-width, initial-scale=1.0">
  <title>Package-Register</title>

  <!-- Bootstrap -->
  <link
    href="https://cdn.jsdelivr.net/npm/bootstrap@5.3.3/dist/css/bootstrap.min.css"
    rel="stylesheet"
    integrity="sha384-QWTKZyjpPEjISv5WaRU9OFeRpok6YctnYmDr5pNlyT2bRjXh0JMhjY6hW+ALEwIH"
    crossorigin="anonymous">
</head>

<body>
  <div class="container">
    <h1>Welcome!福山 太郎さん</h1>
      <div>
        <p>Aコース:福山D</p>
        <p>荷物登録</p><p>|Package-Registration</p>
      </div>
        <div>
          <p>配達先:</p>
          <form action="index.html" method="post">
            <input type="text" name="address" size="40" maxlength="100">
          <p>個数:</p>
            <form action="index.html" method="post">
            <input type="text" name="address" size="40" maxlength="100">
        </div>
        <div>
          <button type="submit">Add</button>
          <button type="submit">新規配達先登録</button>
        </div>
        <div>
          <button type="submit">戻る</button>
          <button type="submit">一覧へ</button>
        </div>
  </div>

    <!-- Bootstrap -->
  <script
    src="https://cdn.jsdelivr.net/npm/bootstrap@5.3.3/dist/js/bootstrap.bundle.min.js"
    integrity="sha384-YvpcrYf0tY3lHB60NNkmXc5s9fDVZLESaAA55NDzOxhy9GkcIdslK1eN7N6jIeHz"
    crossorigin="anonymous"></script>
</body>
</html>
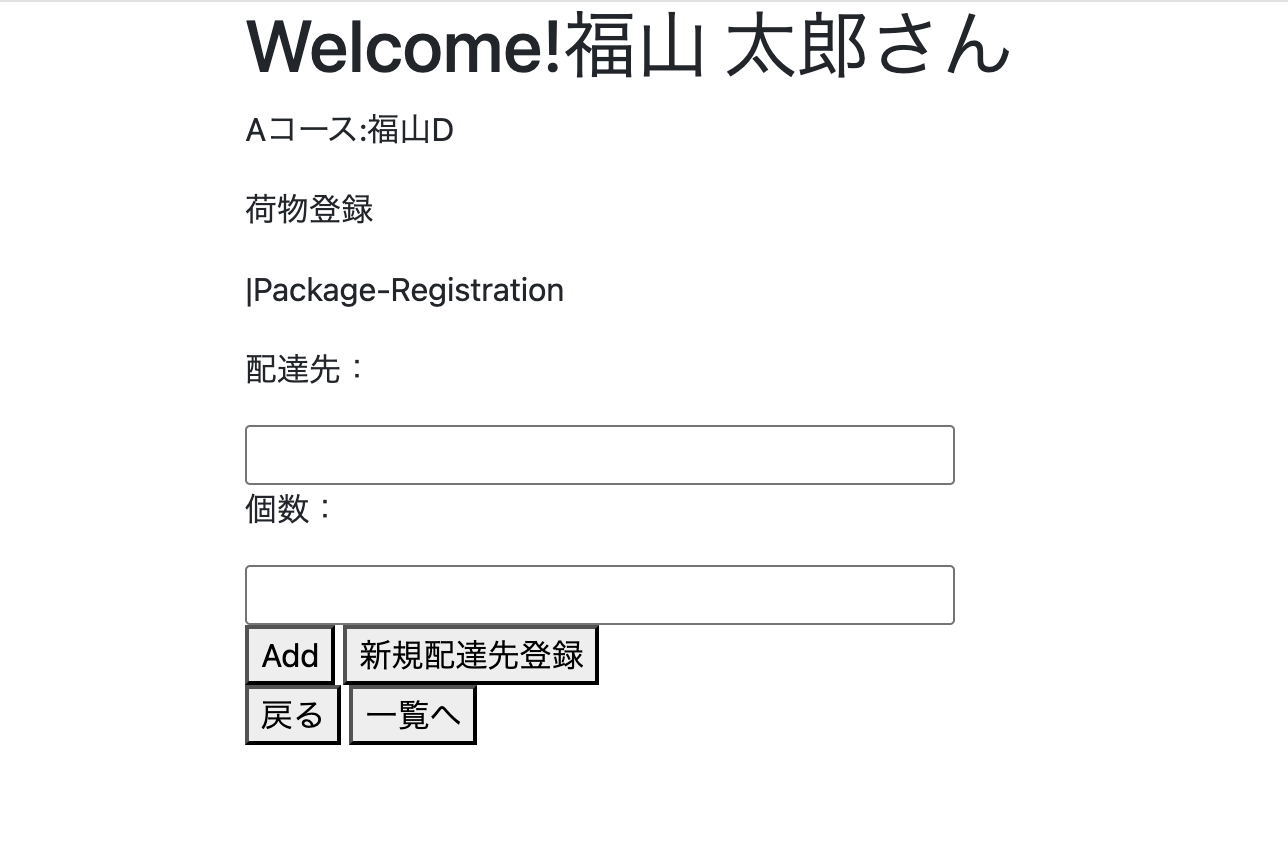
試しに<div class="container"></div>を実装してみたところ、以下の様に編集できていました。すごい!(中央寄せ)
[4]CSS導入
4-1、CSSの<link>タグ配置
<header>タグ内、bootstrapの<link>より上にCSSのリンクを配置。
<!DOCTYPE html>
<html lang="ja">
<head>
  <meta charset="UTF-8">
  <meta name="viewport" content="width=device-width, initial-scale=1.0">
  <title>Package-Register</title>
  <link rel="stylesheet" href="./style.css">

  <!-- Bootstrap -->
  <link
    href="https://cdn.jsdelivr.net/npm/bootstrap@5.3.3/dist/css/bootstrap.min.css"
    rel="stylesheet"
    integrity="sha384-QWTKZyjpPEjISv5WaRU9OFeRpok6YctnYmDr5pNlyT2bRjXh0JMhjY6hW+ALEwIH"
    crossorigin="anonymous">
</head>
4-2、remを使いこなしたい!
remを理解するために参考にしたQiita記事↓
Qiita
remはルートのフォントサイズを1(100%)とした相対的なサイズということでした。
つまり、
ルートでフォントサイズを 10px(=100%) に指定されている時、
実際の<h1>を20pxに指定したければ、2remで表現できる。というわけ。
しかし、
ルートでフォントサイズ未指定の場合、デフォルトで16pxと設定されている。
自分でわざわざルートに指定を書かない限りは規定の16pxが100%である認識を持たないといけない。
というわけで、私は既定の16px=1remとしてCSSを書きました!
4-3、en=Rajdhani,ja="zen kaku gothic new"に指定
font指定で工夫した事一覧です↓
- CSSで指定するだけでは使用したいフォントがブラウザで反映されなかった為、htmlに
<link>を読み込ませました。 - 英語と日本語でフォントを変更したいけど、いちいち指定するのは面倒なので、CSSに一括で設定するように書きました。
-
順番がめっちゃ重要!
1:コンピューターが日本語のfontを探す時、Rajdhaniは英語のみで日本語には適用されず、第2位のZen Kaku Gothic Newが反映されます。
2:BootstrapよりCSSを下に置く!
逆転させてると、Bootstrapに負けfontの指定が効きませんでした。
html
<!DOCTYPE html>
<html lang="en">
<head>
  <meta charset="UTF-8">
  <meta name="viewport" content="width=device-width, initial-scale=1.0">
  <title>Package-Register</title>

  <!-- Google Fonts -->
  <link rel="preconnect" href="https://fonts.googleapis.com">
  <link rel="preconnect" href="https://fonts.gstatic.com" crossorigin>
  <link href="https://fonts.googleapis.com/css2?family=Rajdhani:wght@300;400;600;700&family=Zen+Kaku+Gothic+New:wght@300;400;500;700&display=swap" rel="stylesheet">

  <!-- Bootstrap -->
  <link
    href="https://cdn.jsdelivr.net/npm/bootstrap@5.3.3/dist/css/bootstrap.min.css"
    rel="stylesheet"
    integrity="sha384-QWTKZyjpPEjISv5WaRU9OFeRpok6YctnYmDr5pNlyT2bRjXh0JMhjY6hW+ALEwIH"
    crossorigin="anonymous">

  <!-- Custom CSS -->
  <link rel="stylesheet" href="./style.css">
CSS
html, body {
  font-family: "Rajdhani", "Zen Kaku Gothic New",
               system-ui, -apple-system, "Segoe UI",
               "Hiragino Kaku Gothic ProN", "Yu Gothic", Meiryo, sans-serif;
  font-weight: 300;
}
.header {
  text-align: center;
  padding: 2rem 0;
  font-size: 3rem;
}
4-4、背景色を黒(#121212)、文字を白(#ffffff)に指定
CSSで指定すればいいだけなので、以下のようになりました。
html, body {
  font-family: "Rajdhani", "Zen Kaku Gothic New",
               system-ui, -apple-system, "Segoe UI",
               "Hiragino Kaku Gothic ProN", "Yu Gothic", Meiryo, sans-serif;
  font-weight: 300;
  background-color: #121212;
  color:#ffffff
}
.header {
  text-align: center;
  padding: 2rem 0;
  font-size: 3rem;
}
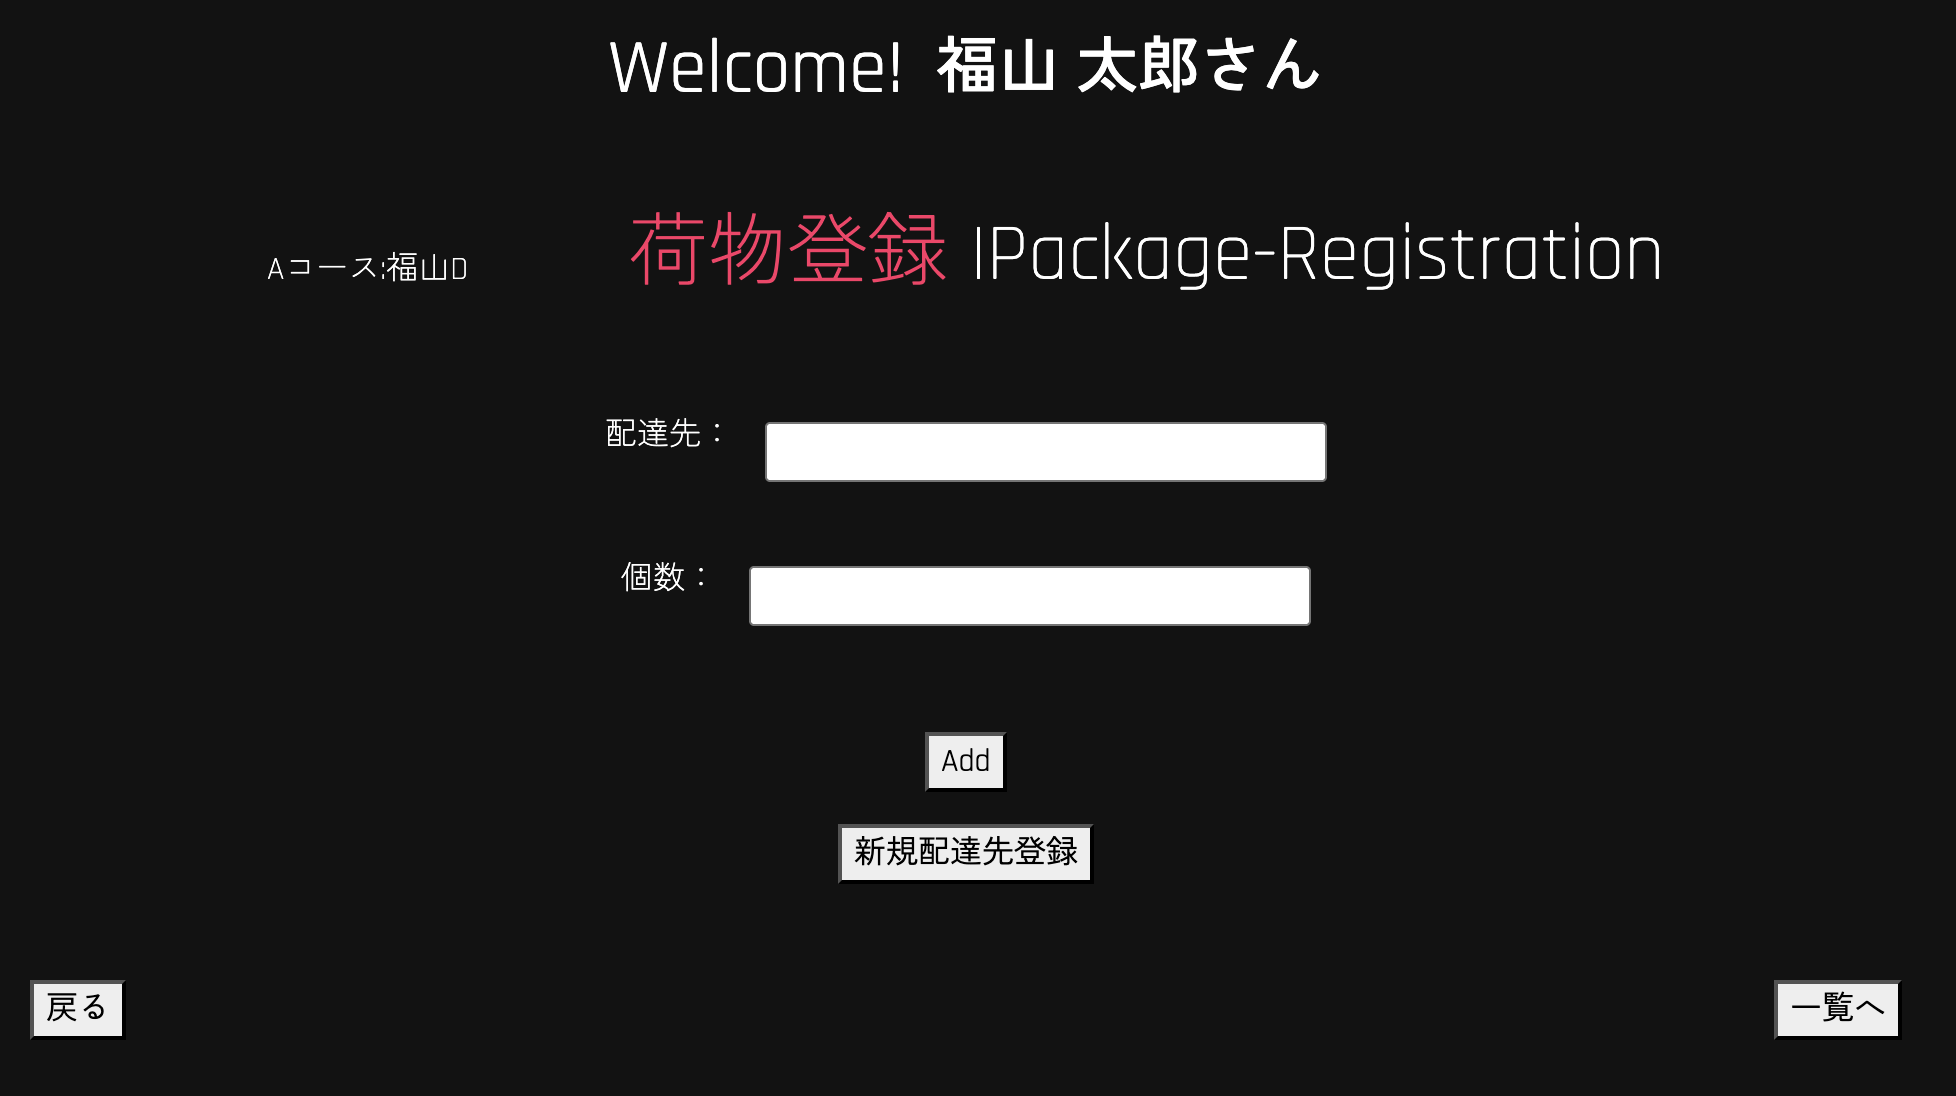
4-5、CSS実装を終えた途中経過画像
その他最低限のCSSを整えた途中経過の画面とCSSコードです。
html, body {
  font-family: "Rajdhani", "Zen Kaku Gothic New",
               system-ui, -apple-system, "Segoe UI",
               "Hiragino Kaku Gothic ProN", "Yu Gothic", Meiryo, sans-serif;
  font-weight: 300;
  background-color: #121212;
  color:#ffffff
}
.header {
  text-align: center;
  display: flex; /*横並び */
  justify-content: center;  /*中央寄せ */
  align-items: center;  /*下揃え */
  gap: 1rem;  /*要素間の隙間 */
  padding: 2rem 0;
  font-size: 3rem;
}
.title-group {
  text-align: center;
  display: flex; /*横並び */
  justify-content: center;  /*中央寄せ */
  align-items: baseline;  /*下揃え */
  gap: 5rem;  /*要素間の隙間 */
  margin-bottom: 3rem;
}
.title {
  font-size: 2.5rem;
}
.title p2 {
  color: #FF3366;
}
.form-group {
  text-align: center;
  margin-bottom: 3rem;
}
.address {
  display: flex; /*横並び */
  justify-content: center;  /*中央寄せ */
  align-items: center;  /*下揃え */
  gap: 1rem;  /*要素間の隙間 */
  margin-bottom: 2rem;
}
.count {
  display: flex; /*横並び */
  justify-content: center;  /*中央寄せ */
  align-items: center;  /*下揃え */
  gap: 1rem;  /*要素間の隙間 */
  margin-bottom: 2rem;
}
.button-group {
  text-align: center;
  display: flex;
  flex-direction: column; /*縦並び */
  align-items: center;  /*中央寄せ */
  gap: 1rem;  /*要素間の隙間 */
  margin-bottom: 3rem;
}
.nav-button-group {
  text-align: center;
  display: flex; /*横並び */
  justify-content: space-between; /*両端寄せ */
}
fontを効かせるためにBotstrapより下にCSSlinkを置いたせいでBootstrap効いてるのか分からなくなっちゃいました^^;
-----Memo-----
display:flex;
はデフォルトで横並び!!!縦並びにしたい場合は、
display:flex
flex-direction:colum;
で指定するとOK👍
今回はここまでです。
次回は「Add」ボタンを押すとリストが増えていくJavaScriptを実装します。
次回もよろしくお願いします☺️
注意
私はプログラミング学習歴1年未満の初学者です。
この記事は自身の備忘録用として掲載しております。
間違いがあるかと思いますので、今後の学習のためにコメントにご指摘を頂けますと幸いです。