概要
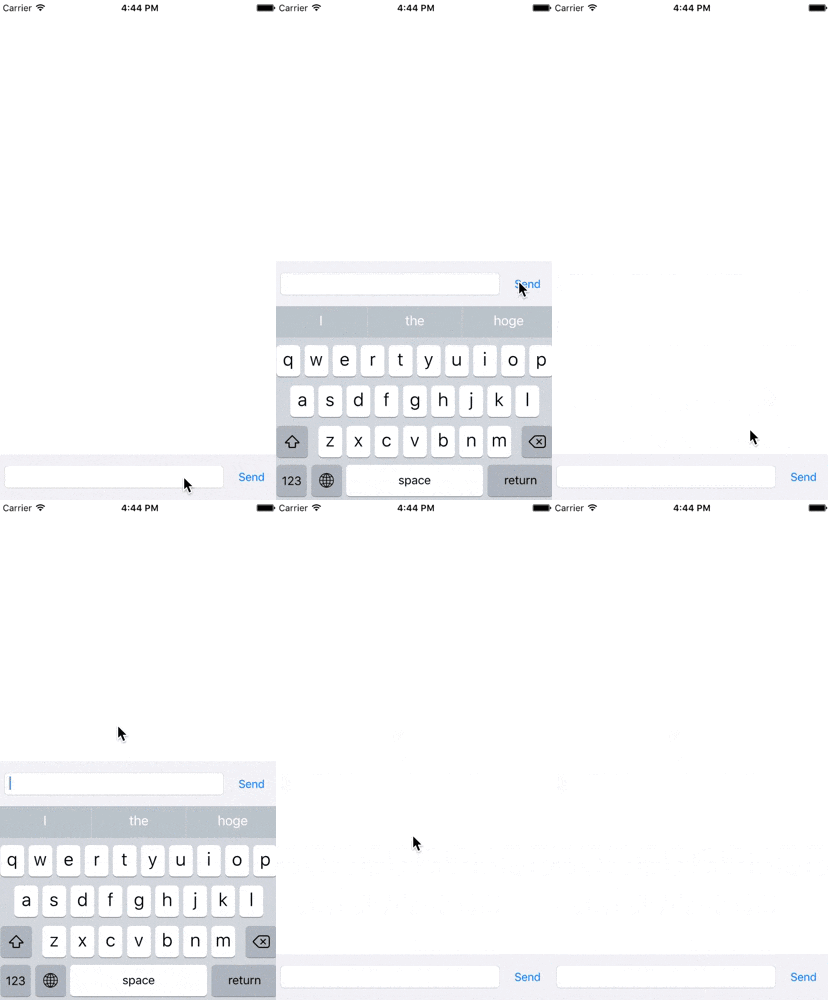
下の完成図のものを作ります。
画面下にTextFieldが配置されていてキーボード表示とともにTextFieldも移動するように実装します。チャットのUIでよく見るあれです。
StorybordからUIを作る
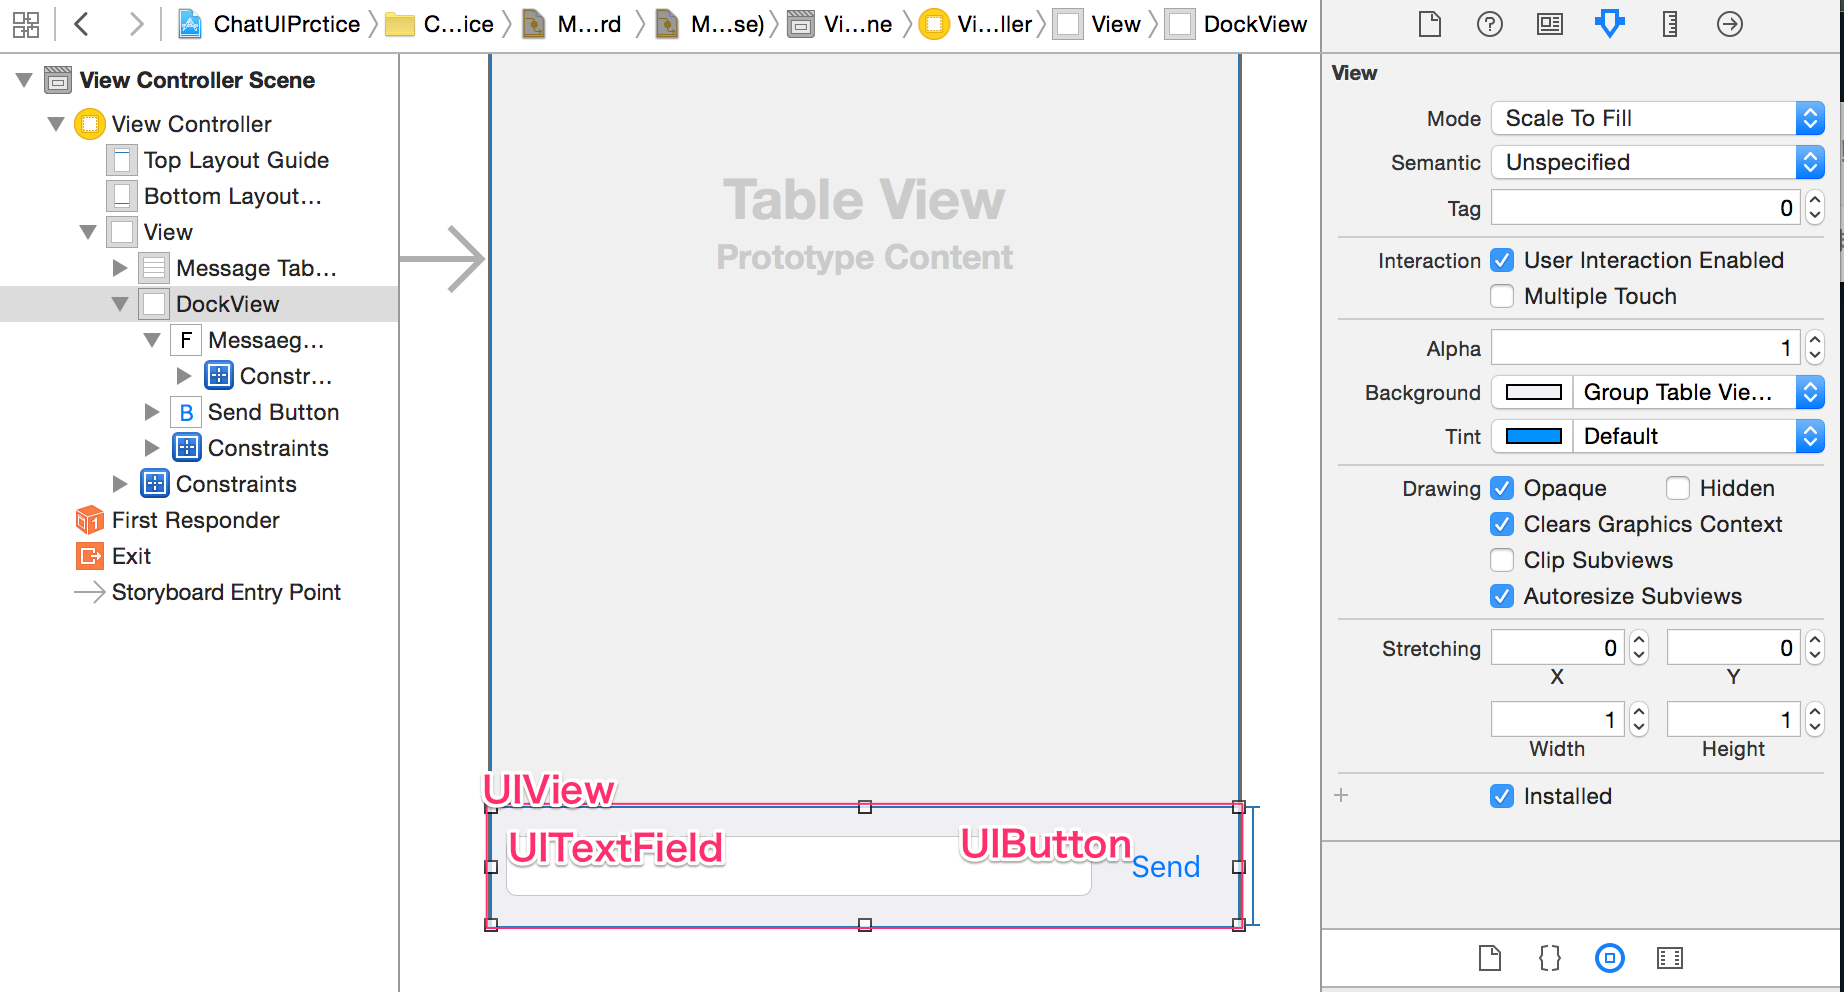
部品を配置する
Auto Layoutを設定する
配置したUIView, UITextField, UIButtonにそれぞれ以下のようなAuto Layoutを設定します。
| UIViewの制約 | 値 |
|---|---|
| 高さ | 60px |
| 下左右の余白 | 0px |
| UIButtonの制約 | 値 |
|---|---|
| 高さ | 30px |
| 幅 | 60px |
| 上の余白 | 150px |
| 右の余白 | 8px |
| UITextFieldの制約 | 値 |
|---|---|
| 上の余白 | 15px |
| 左右の余白 | 8px |
UIViewの高さを60pxと固定して、UITextFieldとUIButtonの位置(y方向)を上からの余白で指定するのがポイントです。
関連付けをする
3つの部品をそれぞれ以下の名前で関連付けしました。
| 関連付ける部品 | 名前 |
|---|---|
| UIView | dockView |
| UITextField | messageTextField |
| UIButton(Outlet) | sendButton |
| UIButton(Action) | sendButtonTap |
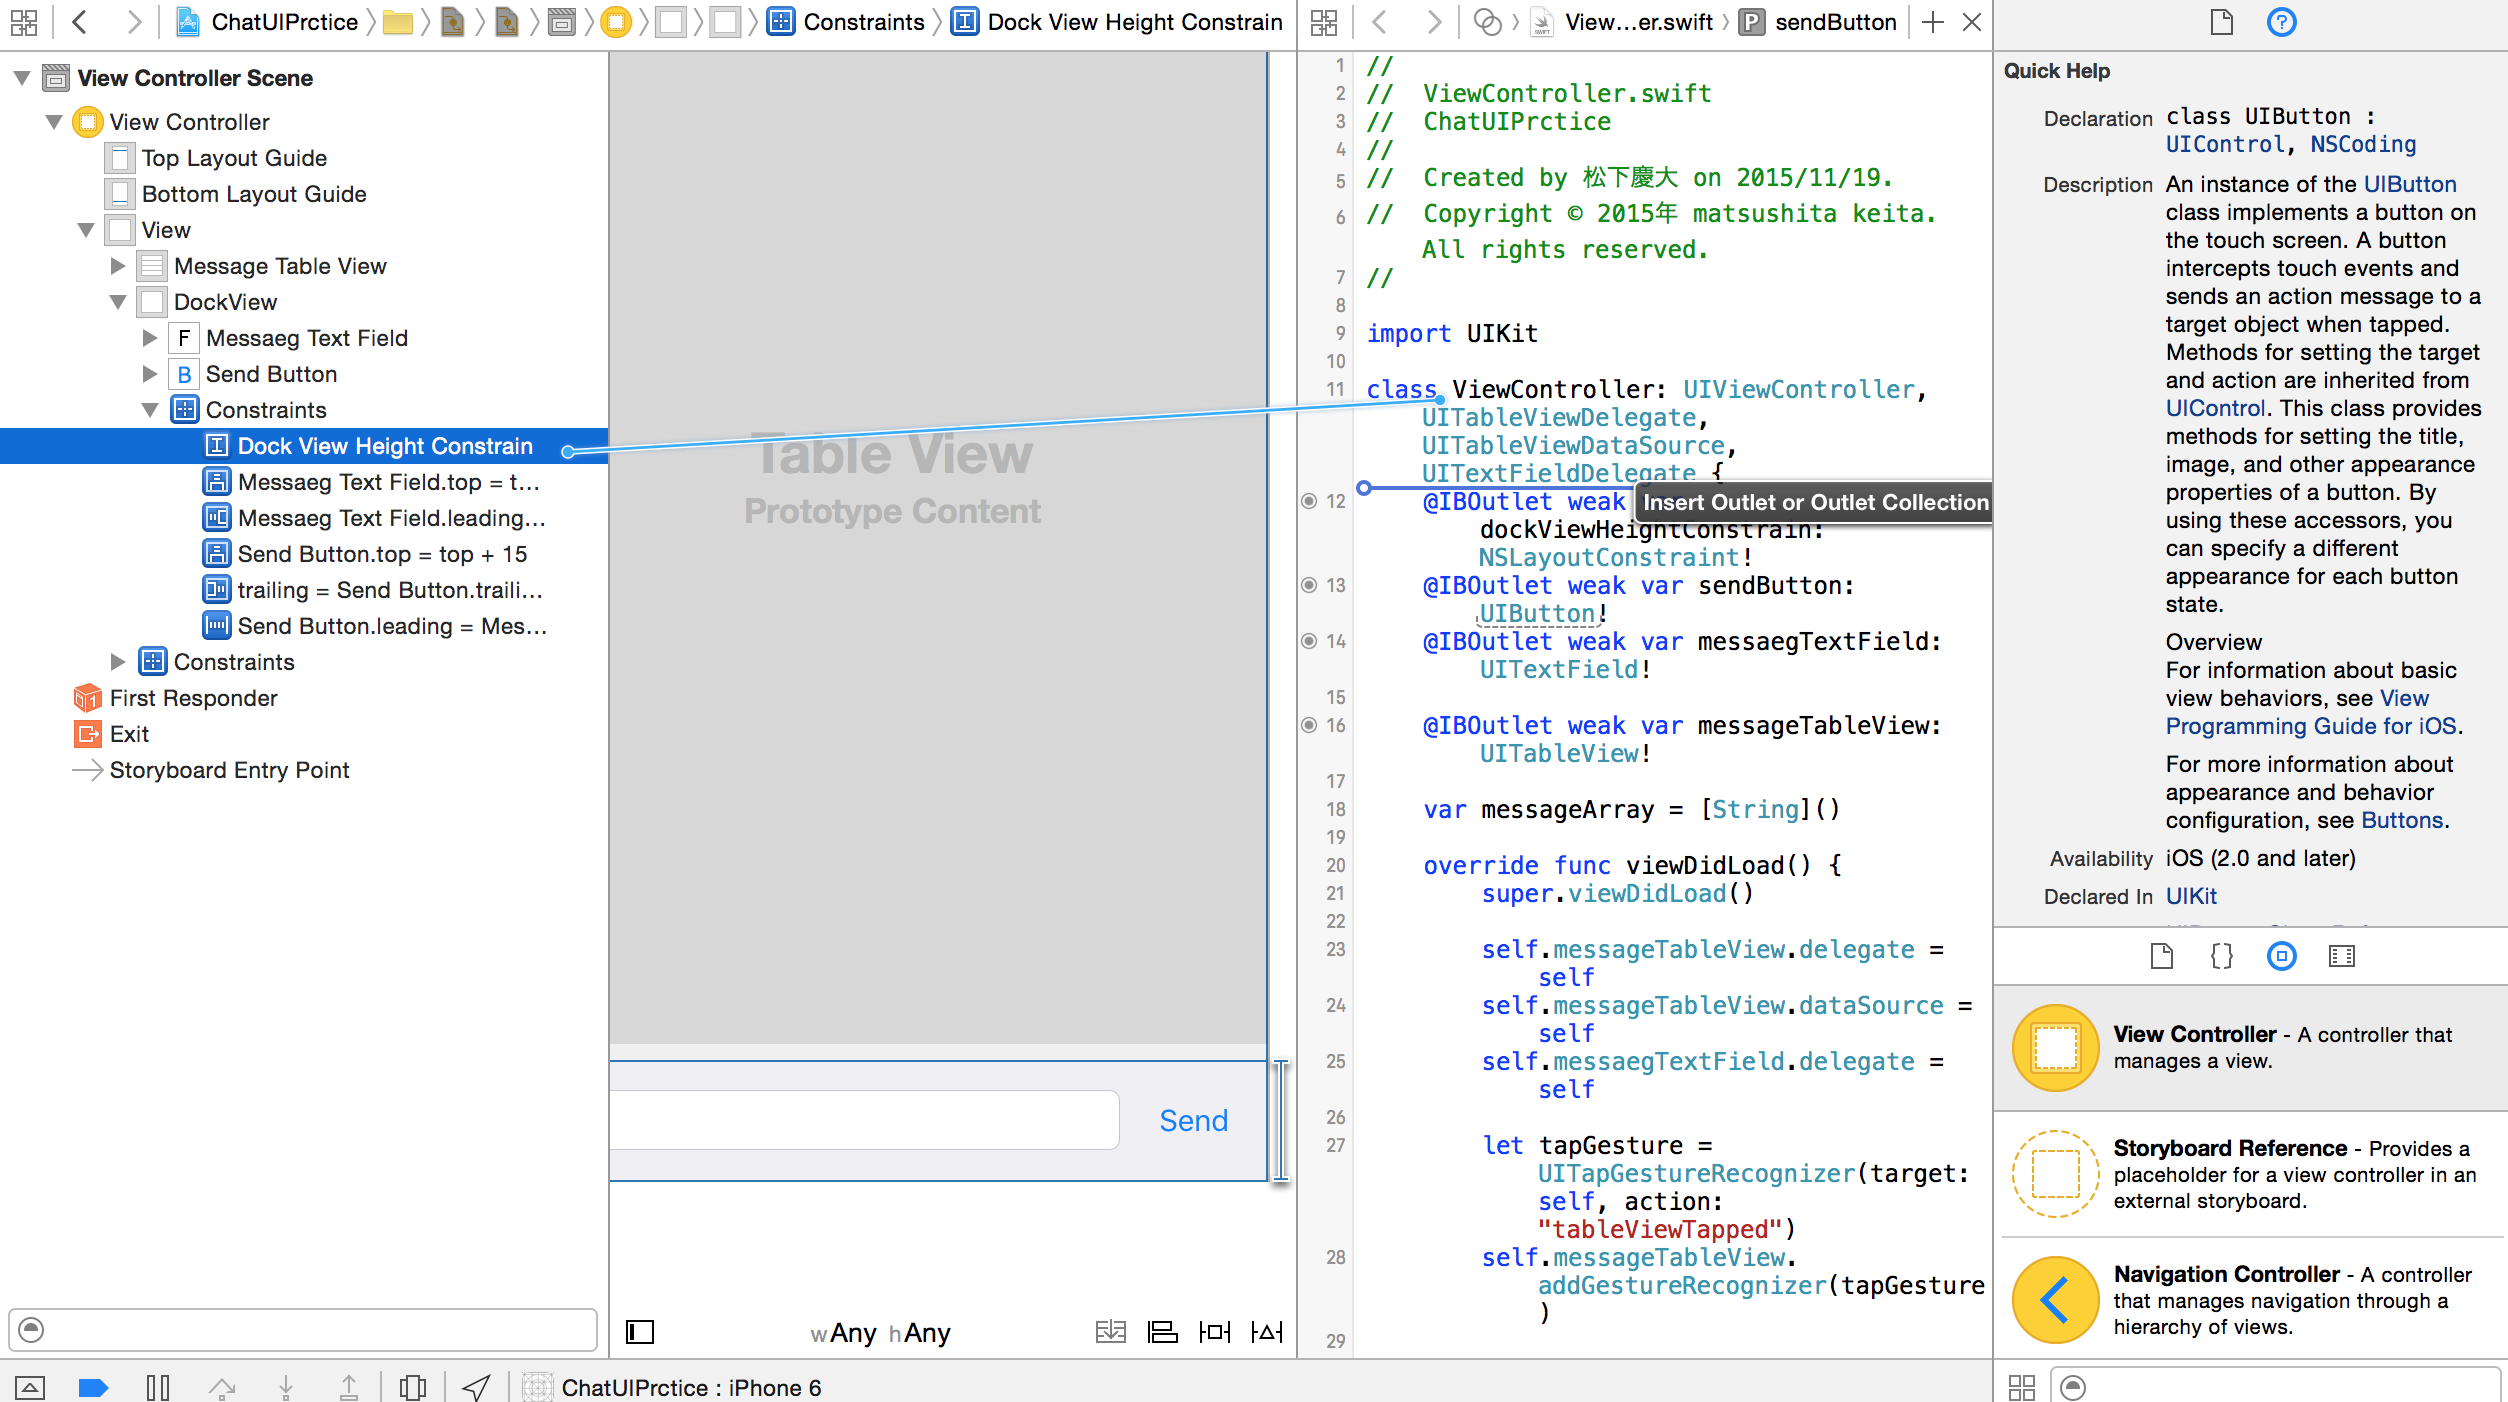
UI部品に加えAuto Layoutの制約もOutlet接続します。
UIViewの高さの制約である[Hight Constrains]を引っ張って関連付けします。
名前はdockViewHeightConstrainとします。
ソースコードで実装する
ViewController.swift
import UIKit

class ViewController: UIViewController {

    @IBOutlet weak var dockViewHeightConstrain: NSLayoutConstraint!
    @IBOutlet weak var sendButton: UIButton!
    @IBOutlet weak var messaegTextField: UITextField!

    override func viewDidLoad() {
        super.viewDidLoad()

		 //画面のタップ検出するジェスチャーを設定
        let tapGesture = UITapGestureRecognizer(target: self, action: "tableViewTapped")
        self.view.addGestureRecognizer(tapGesture)

        //NSNotificationCenterにてキーボードの表示/非表示の通知を登録
        let notificationCenter = NSNotificationCenter.defaultCenter()
        notificationCenter.addObserver(self, selector: "showKeyboard:", name: UIKeyboardWillShowNotification, object: nil)
        notificationCenter.addObserver(self, selector: "hideKeyboard:", name: UIKeyboardWillHideNotification, object: nil)

    }

    override func didReceiveMemoryWarning() {
        super.didReceiveMemoryWarning()
        // Dispose of any resources that can be recreated.
    }

    //キーボード表示される寸前
    func showKeyboard(notification: NSNotification) {

    	 //キーボードの大きさを取得
        let keyboardRect = notification.userInfo?[UIKeyboardFrameEndUserInfoKey]?.CGRectValue
        UIView.animateWithDuration(0.25, animations: {

        	 //キーボードの高さの分DockViewの高さをプラス
            self.dockViewHeightConstrain.constant = (keyboardRect?.size.height)! + 60
            self.view.layoutIfNeeded()
            }, completion: nil)
    }

    //キーボードが隠れる寸前
    func hideKeyboard(notification: NSNotification) {
        UIView.animateWithDuration(0.25, animations: {

           //DockViewの高さを元の高さに戻す
            self.dockViewHeightConstrain.constant = 60
            self.view.layoutIfNeeded()
            }, completion: nil)
    }

    @IBAction func sendButtonTap(sender: UIButton) {
        self.messaegTextField.endEditing(true)
    }

    func tableViewTapped() {
        self.messaegTextField.endEditing(true)
    }

}
以上でやんす。


