こんにちは!Rails5.2がリリースされましたね!
ということで今回はActionCableを試してみましょう。
…ActiveStorageだと思った人はごめんなさいm(_ _)m
振り返ってみると個人的にActionCable使った実装ってやったことなかったり、そもそも必要性なくて触ってなかったという方も多いのではないか(直感)ということで、このタイミングであえてActionCableに触れます!
作るもの
今回作るのは簡単なチャットアプリです!
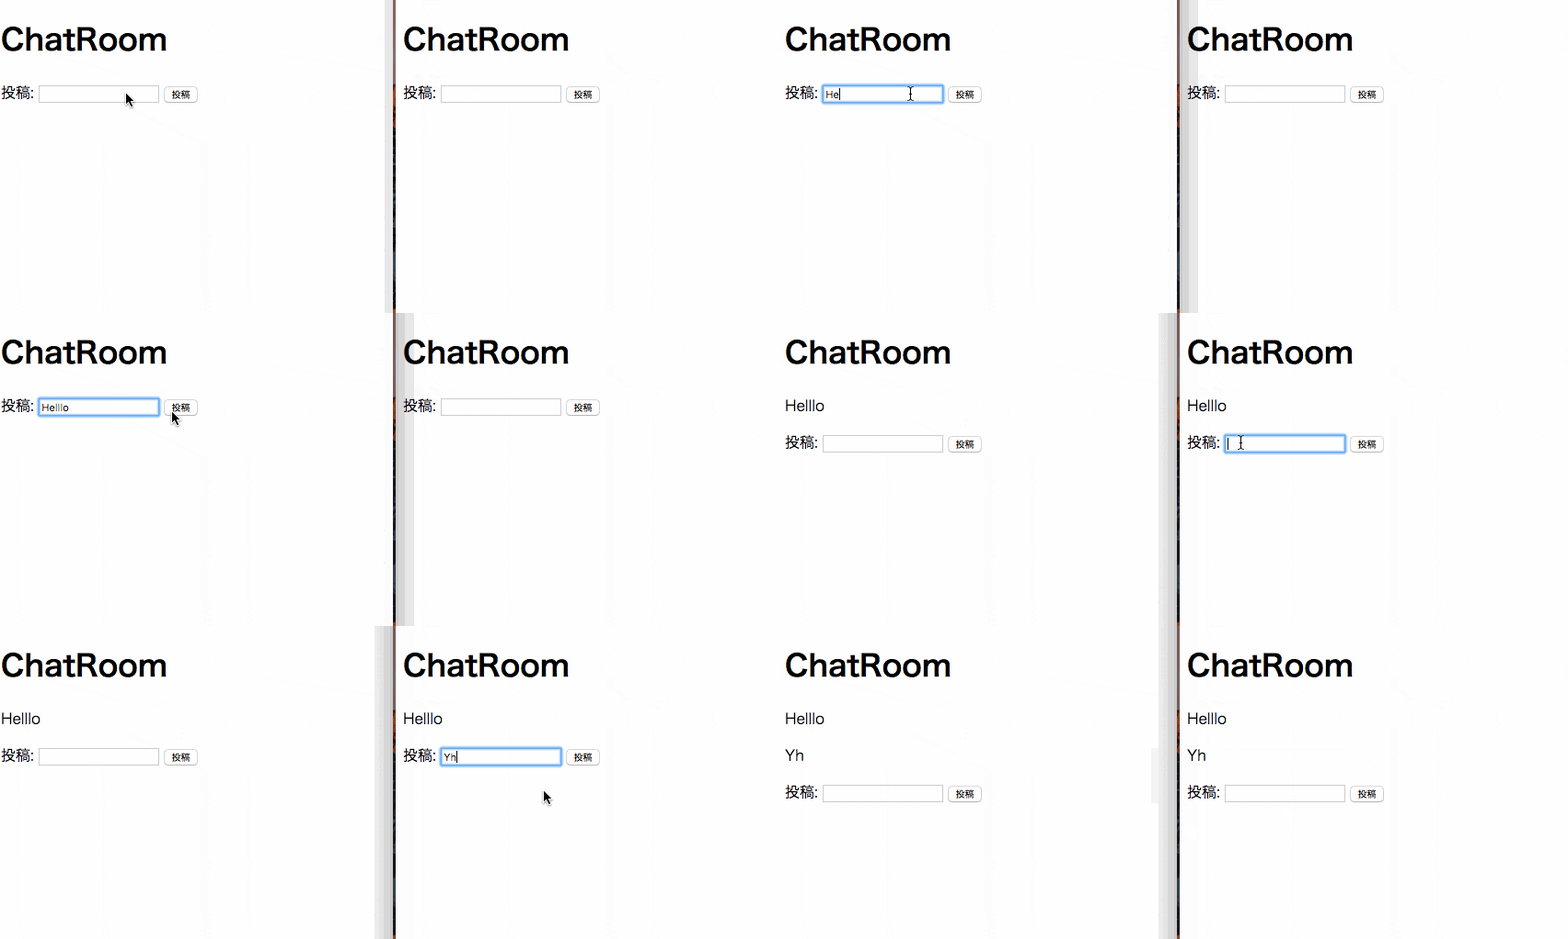
イメージ的にはこんな感じ
複数のブラウザを立ち上げて、一つのブラウザで投稿したらリアルタイムで別のブラウザにも反映されるようなものを作りたいと思います!
この記事を書くにあたって
https://qiita.com/jnchito/items/aec75fab42804287d71b
こちらを参考にいたしました。(わかりやすくまとまっていてスムーズに試せました!)
ともあれ導入
とりあえずrails newですね!
$ rails new action_cable_sample --skip-turbolinks -d postgresql
turbolinksは邪魔な子になりそうだったので退場してもらいます。
rails newが終わったらrails db:createもやって準備万端にしておきましょう。
チャットに必要になりそうなコントローラーとmodelも作っておきます。
$ rails g controller chat_rooms show
$ rails g model chat_message content:text
$ rails db:migrate
一通りコマンドを実行して役者を揃えておきます。
作ったcontrollerとviewを整えておきます。
class ChatRoomsController < ApplicationController
  def show
    @chat_messages = ChatMessage.all
  end
end
<div id="chat">
  <% @chat_messages.each do |chat_message| %>
    <p><%= chat_message.content %></p>
  <% end %>
</div>
今回は試しなのでチャットルームへはルートにアクセスしたら飛べるようにします。
Rails.application.routes.draw do
  root 'chat_rooms#show'
end
channelを作成する
ここからwebsocket通信を行うために必要になるActionCableのファイルを作成していきます。
といってもやることは簡単でコマンドを実行するだけです!
$ rails g channel chat_room speak
すると以下2つのファイルが作成されます。
class ChatRoomChannel < ApplicationCable::Channel
  def subscribed
    # stream_from "some_channel"
  end

  def unsubscribed
    # Any cleanup needed when channel is unsubscribed
  end

  def speak
  end
end
App.chat_room = App.cable.subscriptions.create("ChatRoomChannel", {
  connected: function() {
    // Called when the subscription is ready for use on the server
  },

  disconnected: function() {
    // Called when the subscription has been terminated by the server
  },

  received: function(data) {
    // Called when there's incoming data on the websocket for this channel
  },

  speak: function() {
    return this.perform('speak');
  }
});
次にActionCable用のルーティングを準備します。
mount ActionCable.server => '/cable' # 追記
ここまできたらActionCableを使う準備は完了です!
ひとまず動作確認
ActionCableと繋がっているかを確認します。
rails sを立ち上げてhttp://localhost:3000にアクセスします。
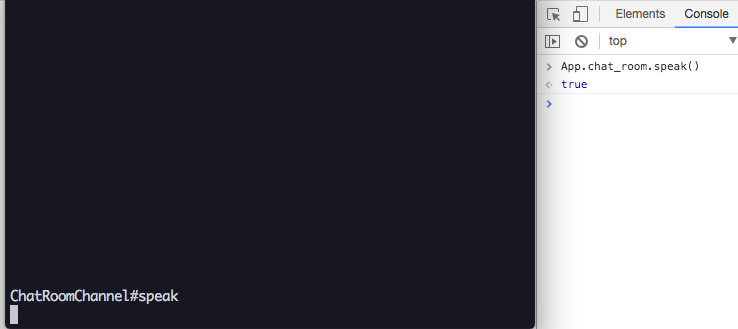
アクセスしたらchromeの検証ツールを開いてApp.chat_room.speak()を実行してみます。
app/assets/javascripts/channels/chat_room_channel.jsでApp.chat_roomにActionCableのオブジェクトを代入しているのでApp.chat_room.speak()が呼べるようになります!
とはいえまだコード的なものは全然書いていませんが、ActionCableへのつなぎこみはこれで完了です!
まずはリアルタイムでalertをあげてみる
手始めにApp.chat_room.speak('Hello')とコンソールで実行したら起動しているブラウザにalertをあげるようにしていきます。
まずはapp/channels/chat_room_channel.rbを以下のように修正します。
subscribedでどのchannel(今回はchat_room_channelとします)を購読するかを指定します。
speakでは購読しているチャンネルにメッセージを配信するというような記載をします。
class ChatRoomChannel < ApplicationCable::Channel
  def subscribed
    stream_from 'chat_room_channel'
  end

  # 変更ないので省略

  def speak(data)
    ActionCable.server.broadcast 'chat_room_channel', message: data['message']
  end
end
変更したら次にapp/assets/javascripts/channels/chat_room.jsを以下のように修正します。
App.chat_room = App.cable.subscriptions.create("ChatRoomChannel", {
  // 変更ないので省略

  // 購読側が受け取る内容
  received: function(data) {
    alert(data['message']);
  },

  // App.chat_room.speak(message)で配信する
  speak: function(message) {
    return this.perform('speak', { message: message });
  }
});
speakに引数を追加します。
performに追加した引数を渡すように記載します(オブジェクト形式で書く)。
receivedは購読しているチャンネルから配信があった場合にどうするかを記載します。
今回はalertをあげたいのでalert(data['message'])と記載します。
配信されてきた情報はdataオブジェクトに乗って入ってきます!
messageはActionCable.server.broadcast 'chat_room_channel', message: data['message']のmessage: data['message']で指定されています。
ここまでやるとコンソールでApp.chat_room.speak('Hello')を実行するとalertでHelloが表示されるのが確認できます。
チャットっぽくしてみる
ここからチャット風に変えていきます!
まずはapp/views/chat_rooms/show.html.erbに投稿するための以下を末尾に追記します。
<form>
  投稿: <input type="text" />
  <input type="submit" value="投稿" onClick="postChatMessage()" />
</form>
投稿ボタンがクリックされたらpostChatMessage()という関数を発火させるようにしておきます。
postChatMessage()はこんな感じに実装しておきます。
一旦、app/assets/javascripts/application.jsの末尾にでも記載してください。
function postChatMessage() {
  event.preventDefault();
  var element = document.querySelector('input[type="text"]');
  App.chat_room.speak(element.value);
  element.value = '';
}
投稿ボタンが押されたら今までコンソールでチクチク実行していたApp.chat_room.speakを実行するようにしています。
channelのspeakにDBに登録する処理を追記する。
単純にcreate処理を追記するだけです!
def speak(data)
  chat_message = ChatMessage.create!(content: data['message']) # 追記
  ActionCable.server.broadcast 'chat_room_channel', message: chat_message.content
end
それができたら、チャットが投稿されたら画面に反映されるようreceivedにDOMを操作する処理を書いておきます。
alertを消して以下の記述に変更します。
received: function(data) {
  var chat = document.getElementById('chat');
  var newMessage = document.createElement('p');
  newMessage.innerText = data['message'];
  chat.appendChild(newMessage);
},
配信を受け取ったらid="chat"のDOM内に投稿内容を記載したpタグを追加するようにしています!
こうすることで冒頭に見せたチャットっぽいものが動くようになります!
さいごに
ActionCableなんだかんだ触ったことがなかったので新鮮でした!
ActionCableはRailsだけでなくJSも絡んでくるので割と混乱しやすい機能なのかなあとも感じたりします…
次はちゃんとActiveStorageにでも触れよう

