2020.10.05 [修正]
修正前: text.value = '0';
数値として扱わないといけないところを、''をつけて文字列としてしまっていたので修正しました。
はじめに
HTML、CSS、JavaScriptのDOM操作までを学習した初心者が、アウトプットのために一から作成してみました。
(間違いなどありましたら、ご指摘いただけると幸いです!)
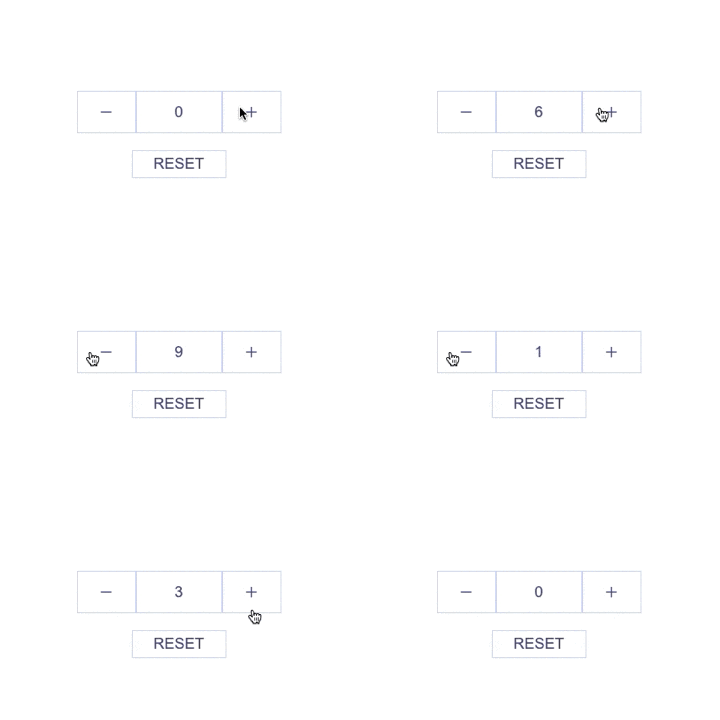
できあがったもの
機能
- プラスボタンを押すとカウントアップ
- マイナスボタンを押すとカウントダウン
- RESETボタンでカウントが0になる
- マイナスボタンを押し続けても0以下にはならない
HTMLとCSSを記述する
HTML
<body>
<div class="container">

  <div class="field">
    <button class="button" id="down">-</button>
    <input type="text" value="0" class="inputtext" id="textbox">
    <button class="button" id="up">+</button>
  </div>

   <button class="button resetbtn" id="reset">RESET</button>

</div>
  <script src="main.js"></script>
</body>
マイナスボタンと数字が表示されるカウンターとプラスボタン、
そしてリセットボタンの4つの構成です。
最後にJavaScriptの読み込みをしています。
CSS
body {
  margin: 0;
  width: 100%;
}

.container {
  width: 300px;
  margin: 200px auto 0;
}

.field {
  display: flex;
}

.inputtext {
  color:rgba(43, 32, 32, 0.76) ;
  font-size: 18px;
  border-left: 0;
  border-right: 0;
  width: 80px;
  line-height: 3rem;
  text-align: center;
  border: 1px solid #D7DBDD;
  padding: 0 10px;
}

.button {
  color:rgba(43, 32, 32, 0.76) ;
  font-size: 18px;
  cursor: pointer;
  padding: 5px 25px;
  background-color: white;
  border: 1px solid #D7DBDD;
  border-radius: 0;
  outline: 0;
}

.resetbtn {
  margin: 20px 0 0 65px;
}
ショッピングサイトによくある商品数を変更するようなボタンを意識しました。
JavaScriptを記述する
(() => {
  //HTMLのid値を使って以下のDOM要素を取得
  const downbutton = document.getElementById('down');
  const upbutton = document.getElementById('up');
  const text = document.getElementById('textbox');
  const reset = document.getElementById('reset');

  //ボタンが押されたらカウント減
  downbutton.addEventListener('click', (event) => {
  //0以下にはならないようにする
  if(text.value >= 1) {
    text.value--;
  }
  });

  //ボタンが押されたらカウント増
  upbutton.addEventListener('click', (event) => {
    text.value++;
  })

  //ボタンが押されたら0に戻る
  reset.addEventListener('click', (event) => {
    text.value = 0;
  })

})();
詳しく説明
(() => {
  const downbutton = document.getElementById('down');
  const upbutton = document.getElementById('up');
  const text = document.getElementById('textbox');
  const reset = document.getElementById('reset');
まず最初にDOM操作に必要なIdを取得します
今回必要なのは
- マイナスボタン→buttonタグのId
down - プラスボタン→buttonタグのId
up - 数字が表示されるカウンター部分→inputタグのId
textbox - リセットボタン→buttonタグのId
reset
なので、この4つを取得しました。
補足
一番上にある (() => { これは即時関数といいます
上部分だけピックアップしてますが、全体で見ると
 (() => {
   console.log('実行する内容');
 })();
このような形で使われています。
上記はアロー関数を使っており、functionだと以下のようになります。していることは同じです。
(function () {
  console.log('実行する内容');
})();
これをすることで、関数の定義と実行が同時に行えるのと
スコープ範囲を限定するという意味があります。
  downbutton.addEventListener('click', (event) => {
  if(text.value >= 1) {
    text.value--;
  }
  });
addEventListener でdownbuttonをクリックしたときの挙動を設定します。
処理内容は、text.valueでカウンターに表示される数字の値を取得して、
その値が1以上のときのみカウントダウンする とします。
  upbutton.addEventListener('click', (event) => {
    text.value++;
  })
  reset.addEventListener('click', (event) => {
    text.value = 0;
  })
プラスボタンとRESETボタンも同様に設定します。
以上で完成です!
さいごに
完成してみると説明する部分もないくらい簡単な実装でしたが、1からつくることで記述したこと以上の学びがありました!
これからも色々アウトプットしていこうと思います。
読んでいただきありがとうございました!
参考にさせて頂いた記事:
- [DOM操作を使った簡易的なtodoリストアプリを作ってみた] (https://qiita.com/atlansien/items/c582fe2c6d5af943e55c)
- [JavaScriptで「コマ移動ゲーム(横移動のみ)」を作ってみた]
(https://qiita.com/yuya_yuzen/items/9f8642e21f9b4f67610c)
