CIS に関する理解
CIS の Proxy 設定が ON のときの挙動
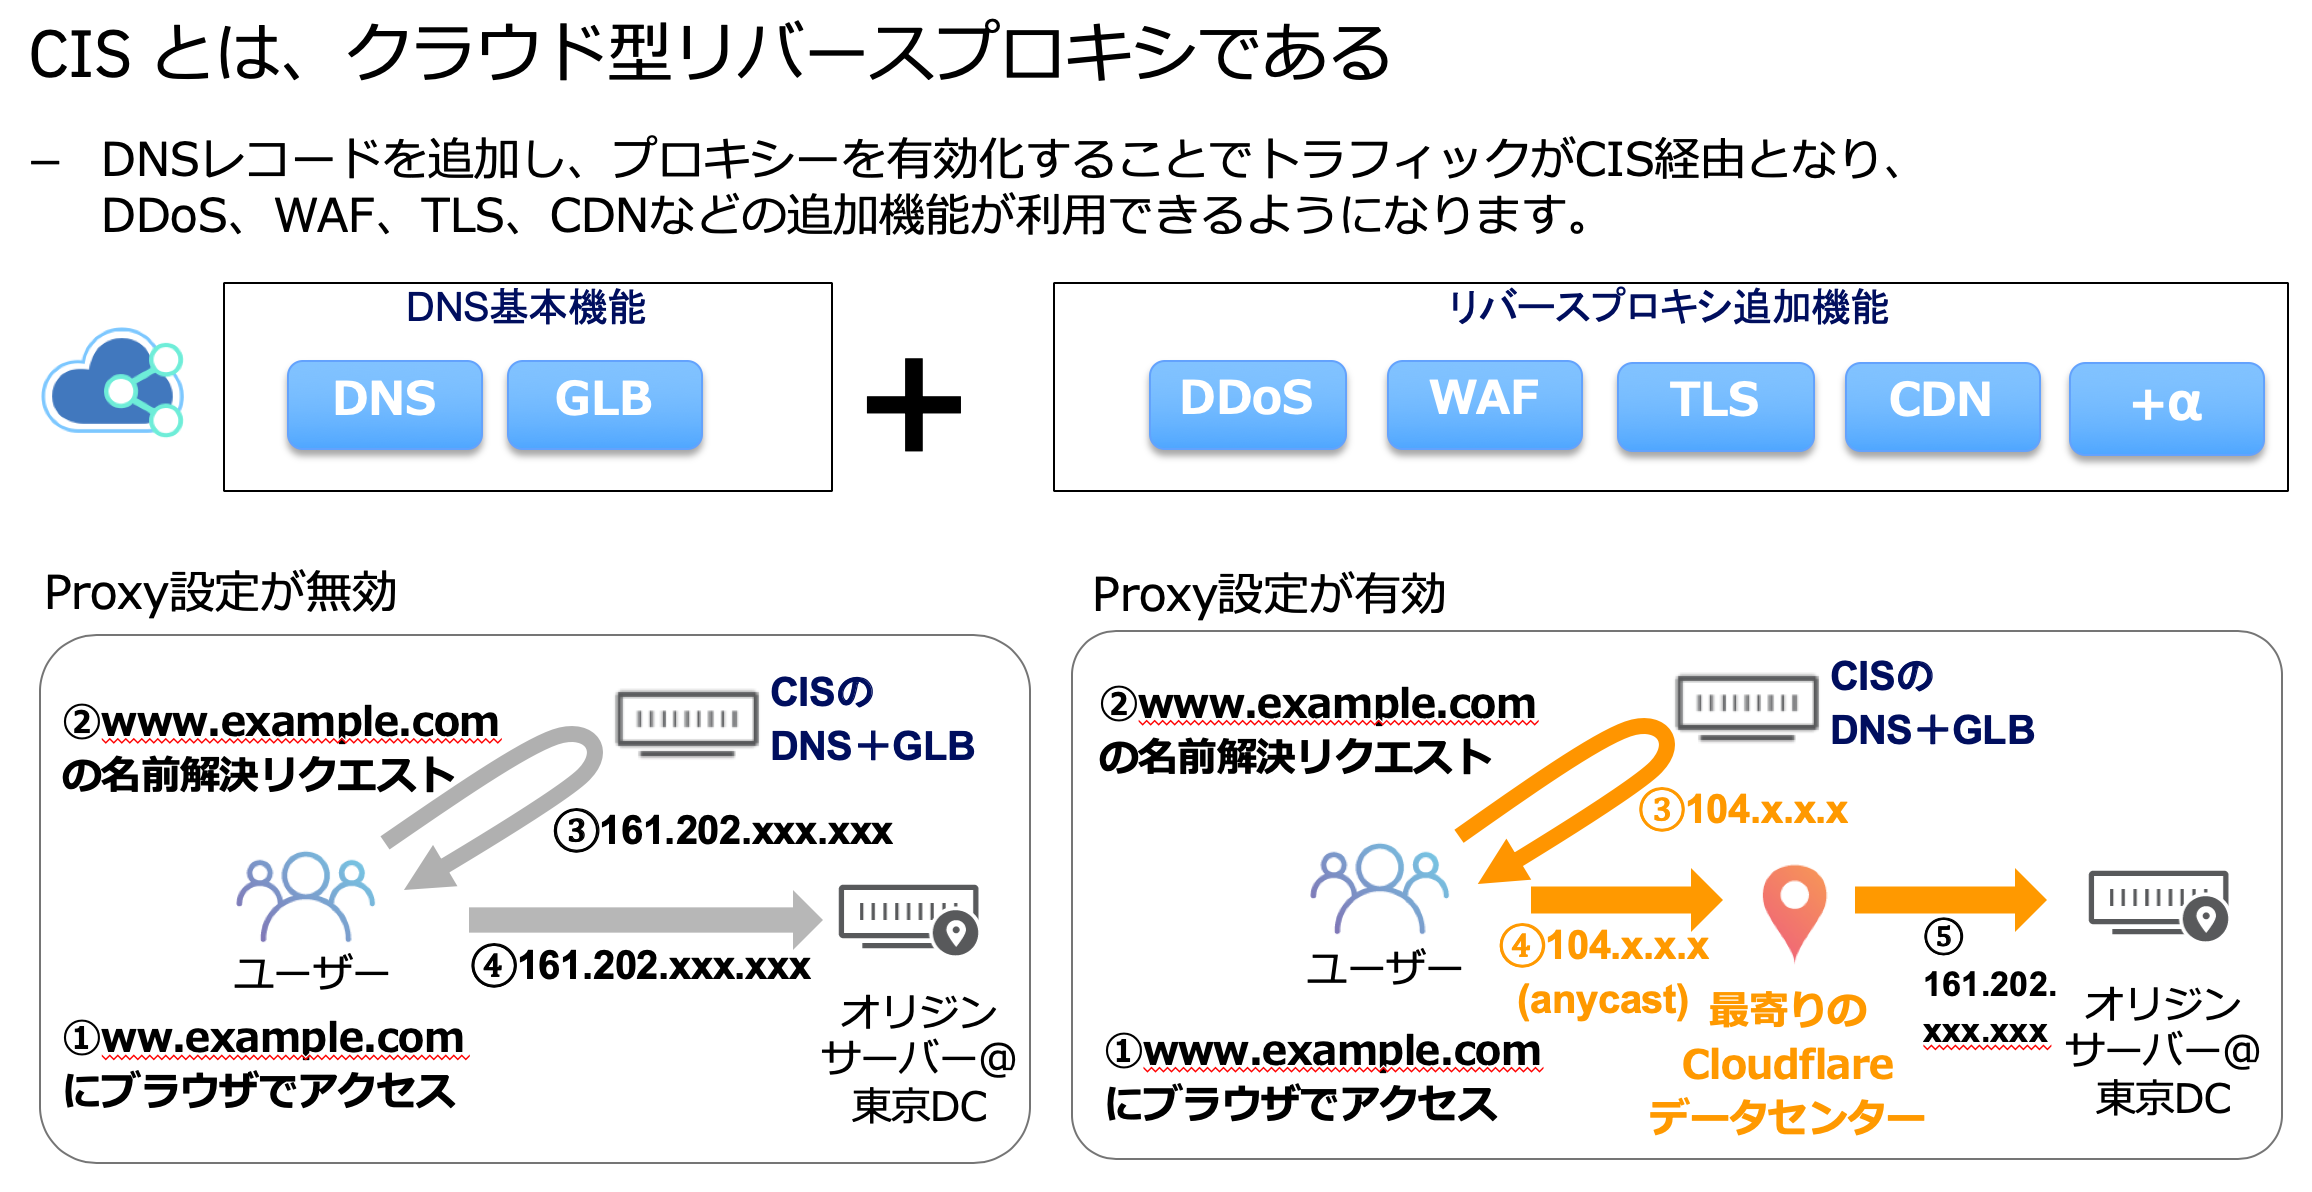
CIS は Proxy 設定を ON にすることで様々な追加機能が利用できますが、オリジンサーバーからみたときのソース IP は CIS (Cloudflare) の IP アドレス(104.x.x.x など)になります。
オリジンサーバーに対する対策
CIS では、名前解決(DNS)を経由した Web アクセスに対しては上記のアクセスルートとなります。
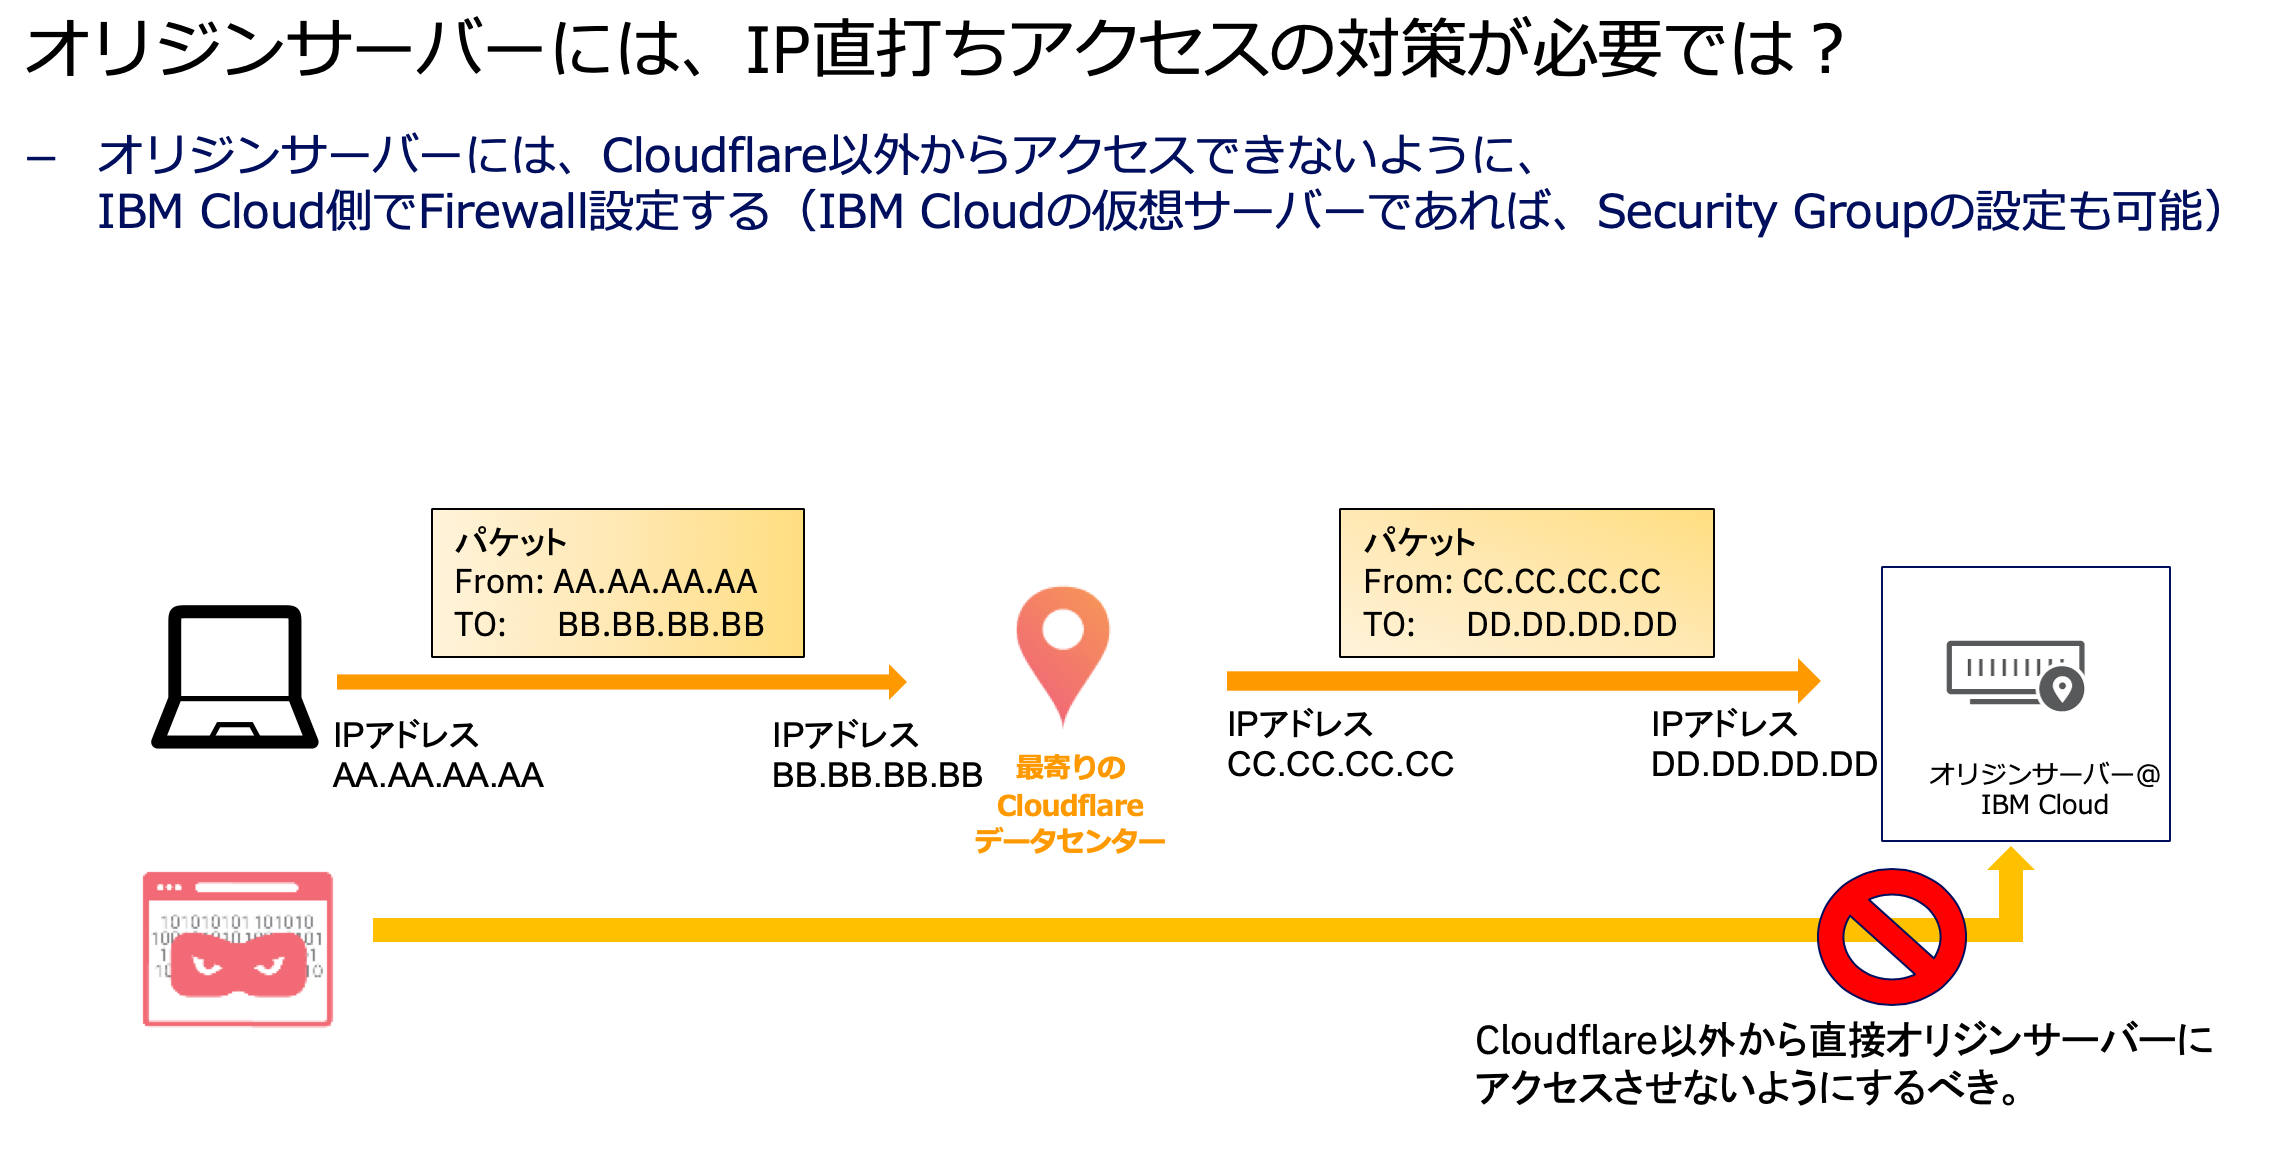
ただし、オリジンサーバーへの IP 直打ちアクセスは CIS を経由しないため、ファイアウォールなどでセキュリティ対策が必要です。
CIS (Cloudflare) の IP アドレス
CIS (Cloudflare) の IP アドレス一覧は、以下のドキュメントを参照してください。
オリジンサーバーには、こちらの IP アドレスからのみアクセス可能にしておくようにします。
IBM Cloud CIS whitelisted IP addresses
https://cloud.ibm.com/docs/infrastructure/cis/whitelisted-ips.html
JSON 形式での取得が可能ですが、Shell では jq を駆使して処理します。
$ curl https://api.cis.cloud.ibm.com/v1/ips | jq -r .result
{
  "ipv4_cidrs": [
    "173.245.48.0/20",
    "103.21.244.0/22",
    "103.22.200.0/22",
    "103.31.4.0/22",
    "141.101.64.0/18",
    "108.162.192.0/18",
    "190.93.240.0/20",
    "188.114.96.0/20",
    "197.234.240.0/22",
    "198.41.128.0/17",
    "162.158.0.0/15",
    "104.16.0.0/12",
    "172.64.0.0/13",
    "131.0.72.0/22"
  ],
  "ipv6_cidrs": [
    "2400:cb00::/32",
    "2606:4700::/32",
    "2803:f800::/32",
    "2405:b500::/32",
    "2405:8100::/32",
    "2a06:98c0::/29",
    "2c0f:f248::/32"
  ],
  "etag": "fb21705459fea38d23b210ee7d67b753"
}
事前準備
slcli のインストール・セットアップが必要なため、以下のリンクにしたがって準備してください。
Security Group を Shell で作成する
こちらのスクリプトで作成できます。
# !/bin/bash

# IP を変数に格納
ipsv4=$(curl https://api.cis.cloud.ibm.com/v1/ips | jq -r .result.ipv4_cidrs)
ipsv6=$(curl https://api.cis.cloud.ibm.com/v1/ips | jq -r .result.ipv6_cidrs)

# 長さを変数に格納
lenv4=$(echo $ipsv4 | jq length)
lenv6=$(echo $ipsv6 | jq length)

# CLI コマンドで Security Group を作成
slcli securitygroup create -n allow_cis_ips -d "Allow all ingress traffic from IBM Cloud Internet Services"

# 作成した Security Group の ID を変数に格納
sgid=$(slcli --format json sg list | jq '.[] | select (.name=="allow_cis_ips") | .id')

# 作成した Security Group に IPv4 のルールを追加
for i in $( seq 0 $(($lenv4 - 1)) ); do
  row=$(echo $ipsv4 | jq -r .[$i])
  slcli sg rule-add $sgid --remote-ip $row --ethertype IPv4 --direction ingress
done

# 作成した Security Group に IPv6 のルールを追加
for i in $( seq 0 $(($lenv6 - 1)) ); do
  row=$(echo $ipsv6 | jq -r .[$i])
  slcli sg rule-add $sgid --remote-ip $row --ethertype IPv6 --direction ingress
done
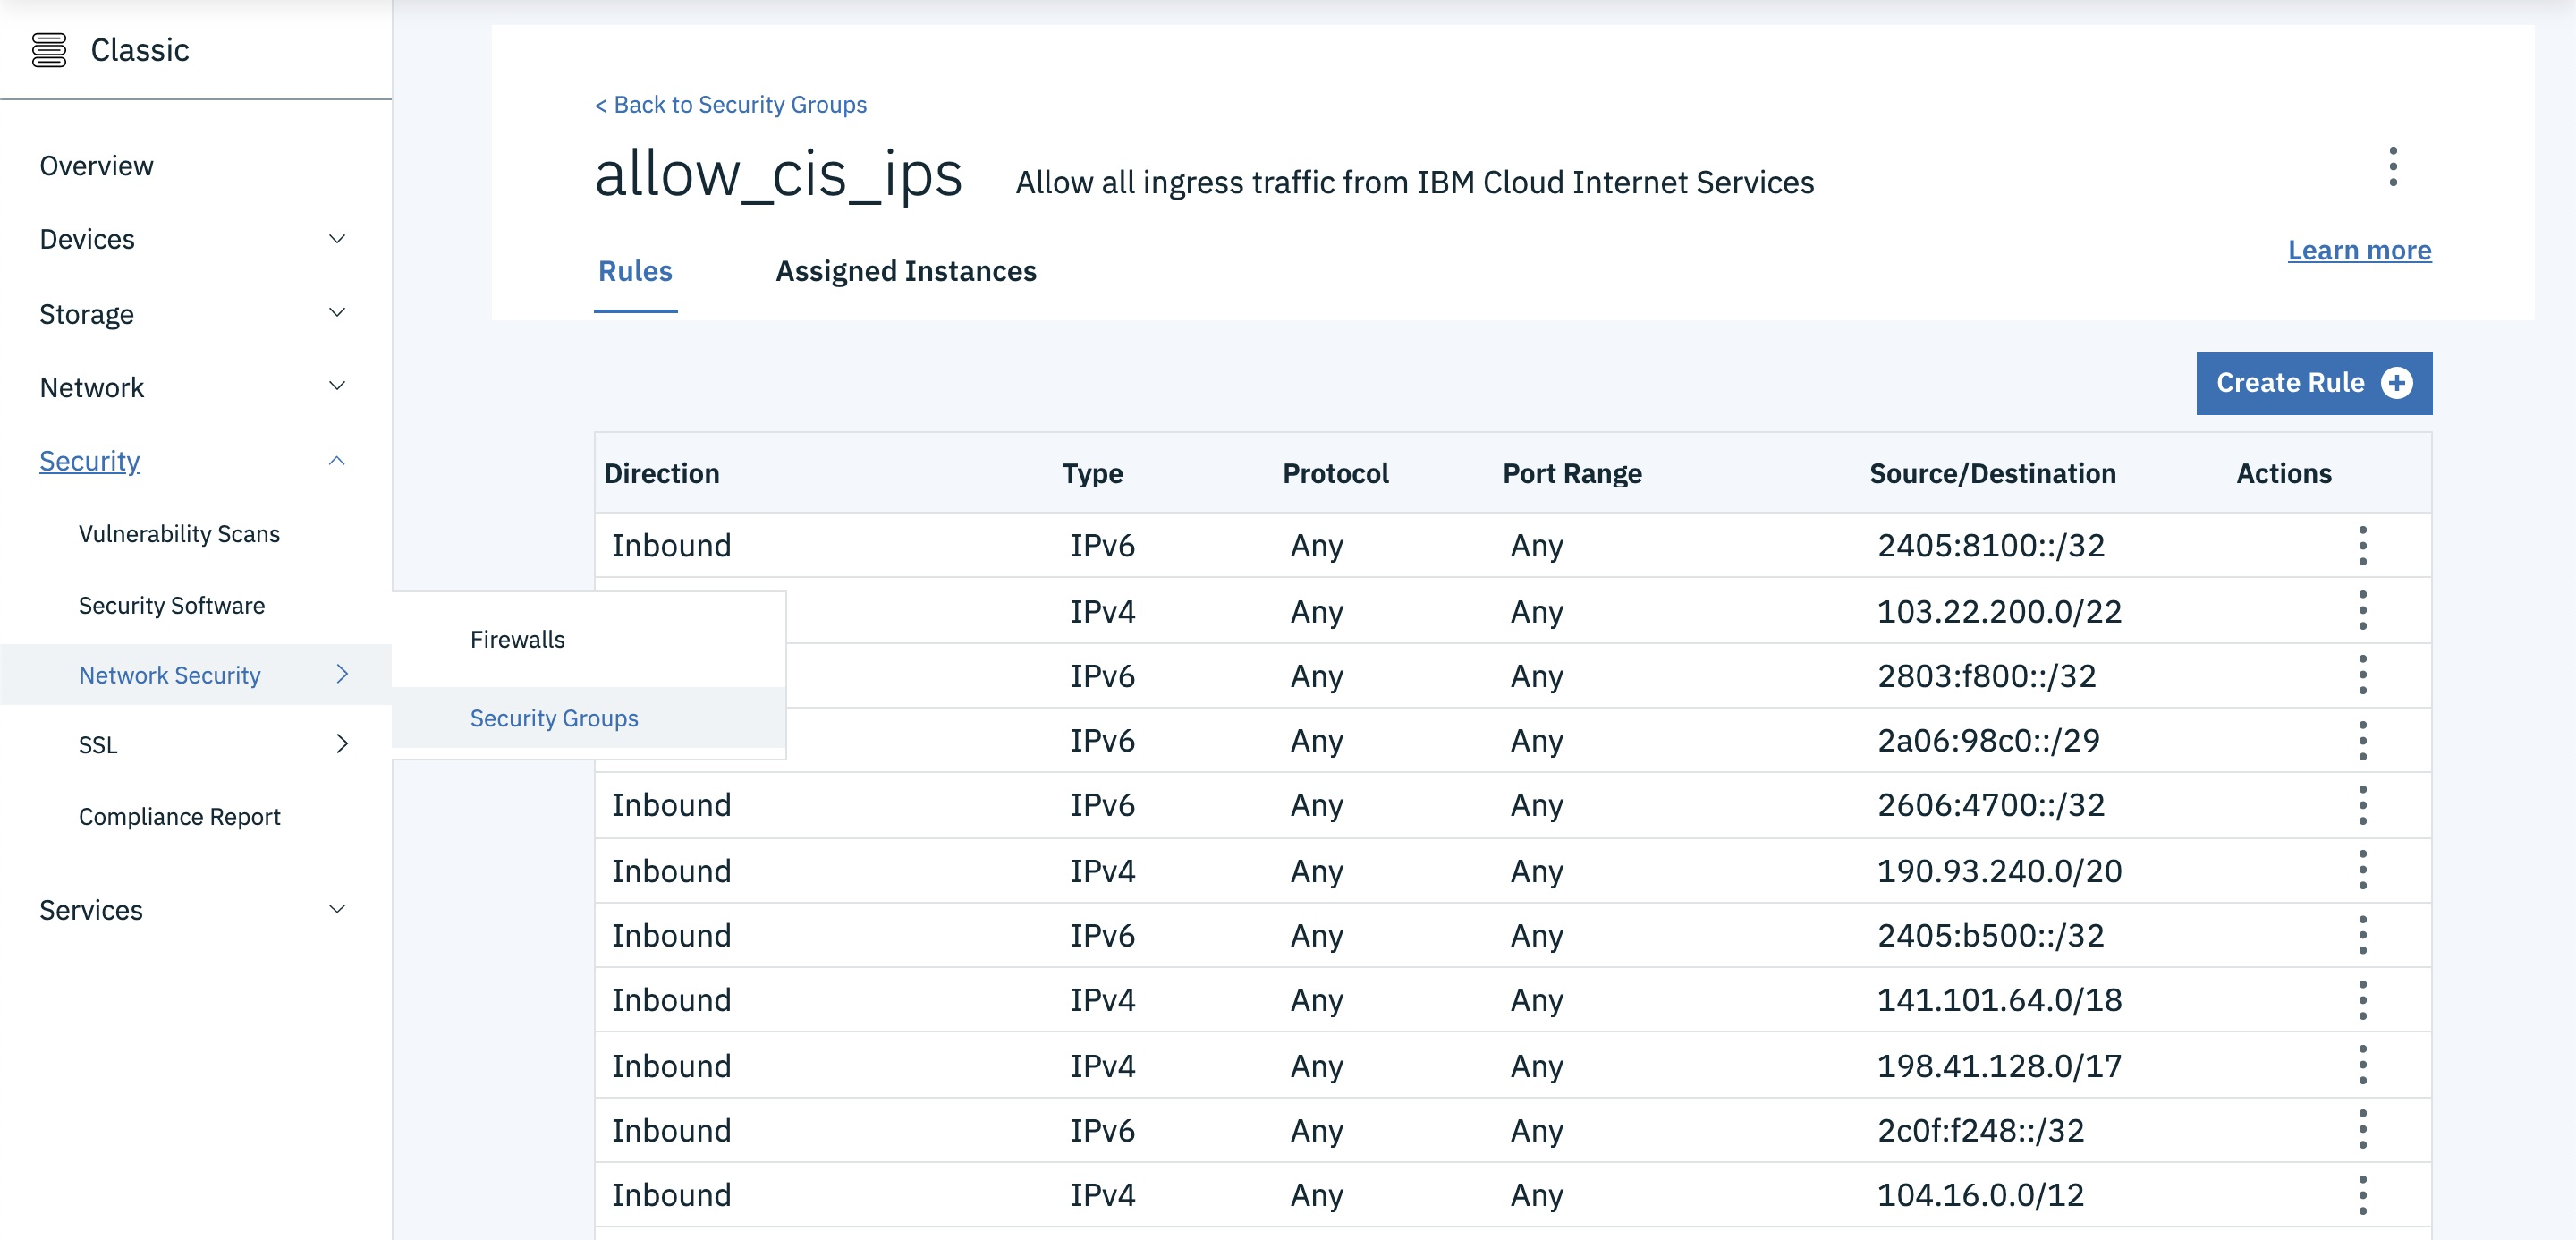
作成後画面
コンソール画面からみても作成されたことが確認できます。
さいごに
作成した Security Group を適用するためには、忘れずに仮想インスタンスをアタッチしてください。
Security Group に関する詳細はこちらか最新のドキュメントをご参照ください。


