PythonでRemote Debugをする手順を記す。
https://wiki.python.org/moin/PythonDebuggingTools に様々な、Pythonのデバッグツールがあるが、軟弱者なのでGUIで使える、Visual Studio Codeを利用する。
Notes:
有名なIDEとしてPyCharmもあるが、残念ながら、Remote debug機能は有料版のみのサポートで、無料であるCommunity Editionでは、 サポートされていない。
https://www.jetbrains.com/help/pycharm/remote-debugging-with-product.html
リモート、ローカルの定義から。
- リモートマシン : デバッグされるpythonプログラムを実行するマシン。
- ローカルマシン : リモートマシンで動作するpythonプログラムをデバッグするマシン
デバッグ対象となるpythonスクリプト
# !/usr/bin/env python
# -*- coding: utf-8 -*-

def main():
    msg = "hello world"
    print(msg)

if __name__ == '__main__':
    main()
リモートマシンでの作業
ptvsdのインストール
% pip install ptvsd

$ pip list | grep ptvsd
ptvsd        4.1.4
デバッグ対象Pythonスクリプトの実行
デバッグ対象Pythonスクリプトを、外部からのアタッチを可能にするには、Pythonスクリプトを修正する方法と修正しない方法の2種類がある。
Option 1: Pythonスクリプトを修正する方法
以下を追加する。
import ptvsd
ptvsd.enable_attach()
ptvsd.wait_for_attach()
修正したPythonスクリプト
# !/usr/bin/env python
# -*- coding: utf-8 -*-

def main():

    import ptvsd
    ## リモートマシンからの接続を許可する。 デフォルトでは、0.0.0.0:5678にbind
    ptvsd.enable_attach()
    ## デバッガの接続を待つ。
    ptvsd.wait_for_attach()

    msg = "hello world"
    print(msg)

if __name__ == '__main__':
    main()
修正したPythonスクリプトを通常に実行
$ python hello.py
起動後、ptvsd.wait_for_attach()まで実行し、デバッガからの接続を待つ。
デバッガからの接続をまたなくても良い場合は、ptvsd.wait_for_attach()は不要。
Option 2: Pythonスクリプトを修正しない方法
Pythonスクリプトの実行
$ python -m ptvsd --host 0.0.0.0 --port 5678 --wait -m hello
--waitは、 ptvsd.wait_for_attach()と同じ。
ローカルマシンでの作業
ptvsdのインストール
$ pip install ptvsd


$ pip list | grep ptvsd
ptvsd        4.1.4
Visual Studio Codeのインストール
https://code.visualstudio.com/ からVisual Studio Codeをインストール
Visual Studio Codeでのデバッグ開始
Option 1: Pythonスクリプトを修正する方法 を採用した場合、修正したPythonスクリプトをローカルマシンに置いておくこと。
Visual Studio Codeを起動し、
- File - Open で、hello.pyがあるディレクトリを開く。
- View - Debug で、Debug Viewを開く。
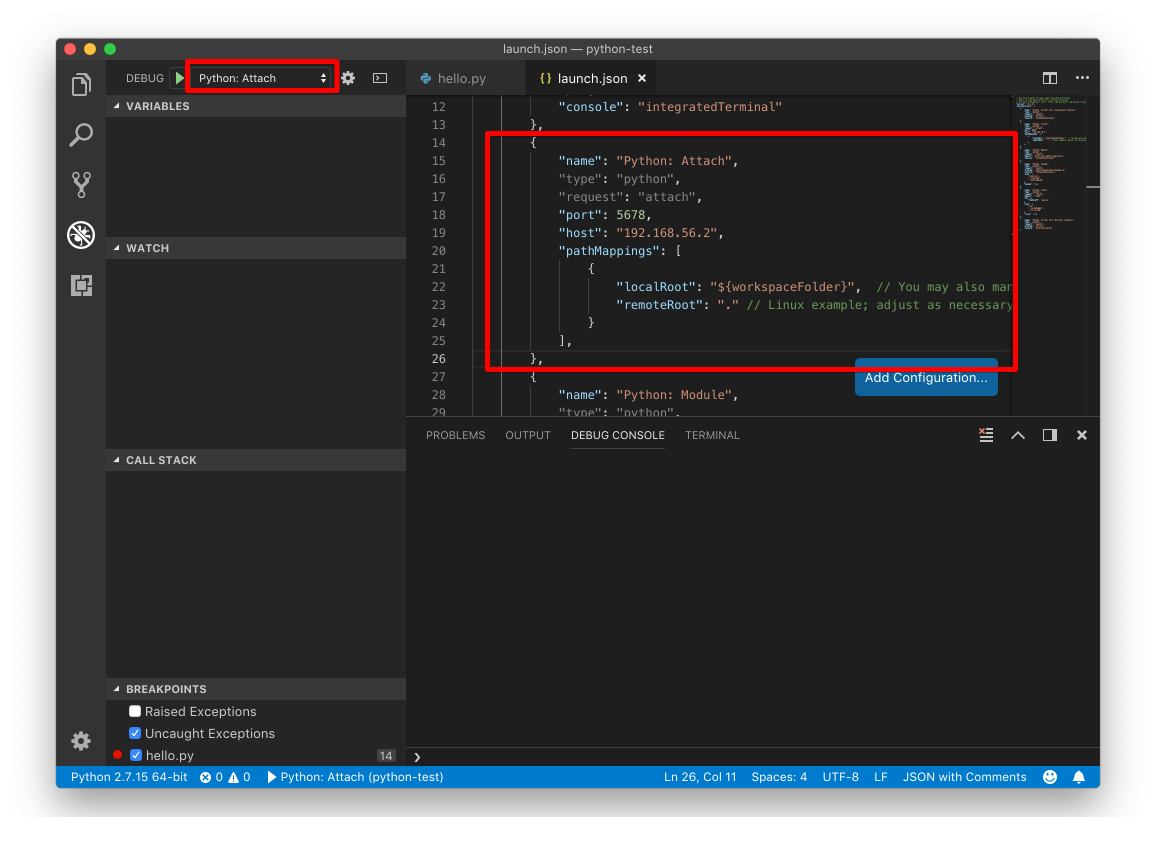
- Debug - Open Configurations で、launch.jsonを表示。
- launch.json の Python: Attach セクションを次のように修正する。 hostには、リモートマシンのIPアドレスを指定。
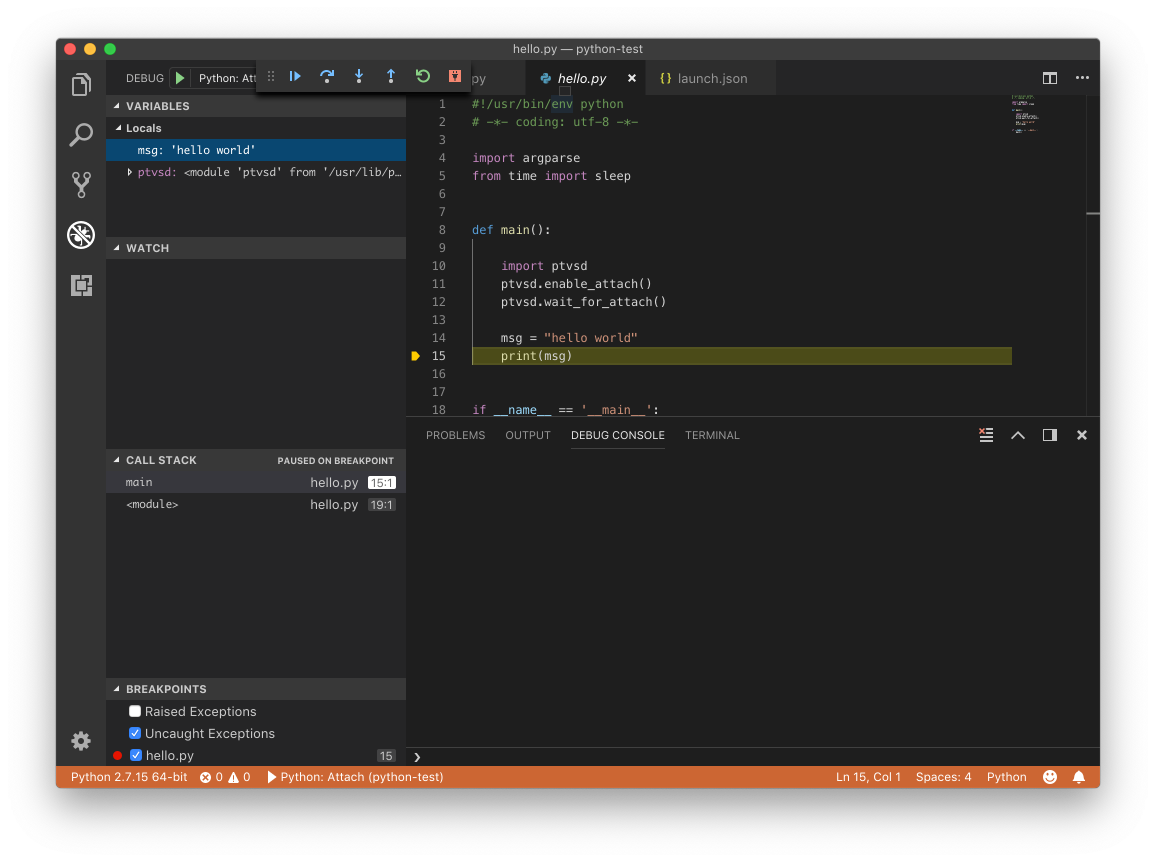
- Debug configurationsからPython attachを選択して、Debug開始。
        {
            "name": "Python: Attach",
            "type": "python",
            "request": "attach",
            "port": 5678,
            "host": "192.168.56.2",
            "pathMappings": [
                {
                    "localRoot": "${workspaceFolder}",
                    "remoteRoot": "."
                }
            ],
        },
launch.json編集中、及び、Debug configurationsからPython attachを選択中画面

