前回まで
ArduinoとNode.jsで室内温度計を作るまで、、vol.01
http://qiita.com/kenjiSpecial@github/items/5d18f7851613d6e05a6a
Arduinoで温度計を動かして、node.js上で温度表記が可能になりました。
今回やったこと
- 取得した数値をmongoDBに保存する。
- mongoDBで保存したデータをAngular.jsを使って表として表示する。
リポジトリ: https://github.com/kenjiSpecial/ArduinoTemperatureProject
取得した数値をmongoDBに保存
mongoDBにアクセスするライブラリとしてmongooseを使用。
http://mongoosejs.com/index.html
mongooseとセットアップ。
app.js以外のファイルからでもいちいち定義しなくて使えるようにglobalとして定義しました。
var mongoose = require("mongoose");
var uri = 'mongodb://localhost/test-case1';
global.db = mongoose.createConnection(uri);
mongooseではSchema インスタンスを通して mongoose.model を利用してModelを定義します。
var Schema = require("mongoose").Schema;
var tempSchema = Schema({ temp : Number, date: Number });

module.exports = db.model('tem', tempSchema);
vol.01で作成した温度計測モジュールで温度が計測するたびにmongoDBに数値を保存します。
// data from Serial port
sp.on('data', function(input) {

    var buffer = new Buffer(input, 'utf8');

    var jsonData;
    try {
        jsonData = JSON.parse(buffer);
        console.log("temp: " + jsonData.temp);
        console.log("date: " + +new Date());

		// 温度と時間をmongoDBに保存する。
        model.create({temp: jsonData.temp, date: + new Date()}, function(err, doc){
        })
    } catch(e) {
        //console.log("error");
        // データ受信がおかしい場合無視する
        return;
    }
});
mongoDBで保存したデータをAngular.jsを使って表として表示
まずnode.js側では/modelというディレクトリにgetメソッドがきたら、jsonを返すようにします。
router.route('/models').get(function(req, res){

    model.find(function (err, docs) {
        if (err) return next(err);
        res.send(docs);
    });

});
AngularJSアプリを作成します。
AngularJSアプリのindex.ejsを作成します。
app.jsとcontrollers/main.jsでフロントエンド部分を実装します。
<!DOCTYPE html>
<html>

<meta name="viewport" content="width=device-width, initial-scale=1">

<link rel="stylesheet" href="/components/bootstrap/dist/css/bootstrap.css"/>

<script src="/components/angular/angular.min.js"></script>
<script src="/components/angular-resource/angular-resource.js"></script>
<script src="/components/angular-cookies/angular-cookies.js"></script>
<script src="/components/angular-sanitize/angular-sanitize.js"></script>
<script src="/components/angular-route/angular-route.js"></script>

<script src="/js/app.js"></script>
<script src="/js/controllers/main.js"></script>

<body ng-app="mainApp">
    <div class="container">
        <div class="row">
             <ng-view id="container"></ng-view>
        </div>
    </div>
</body>

</html>
app.jsではコンフィグを作成します。
templateUrlはテンプレートのURLをcontrollerはMainCtrlを使用します。
MainCtrlというコントローラはcontrollers/main.jsで作成しました。
(function () {
    'use strict';

    angular
        .module('mainApp', [
            'ngCookies',
            'ngResource',
            'ngSanitize',
            'ngRoute'
        ])
        .config(function ($routeProvider) {
            $routeProvider
                .when('/', {
                    templateUrl: '/templates/main.html',
                    controller: 'MainCtrl'
                })
                .otherwise({
                    redirectTo: '/'
                });
        });

})();
controllers/main.jsでは$httpサービスを使用し、mongoDBに保存されたデータからJSONを受け取ります。
受け取ったJSONをアプリ内のデータとして保存します。
(function() {
    'use strict';

    angular.module('mainApp')
        .controller('MainCtrl', ['$scope', '$http', function ($scope, $http) {
            $scope.tempDatas = [];

            $http.get('/models').success(function (data) {
                $scope.tempDatas = data;
            });
        }]);
})();
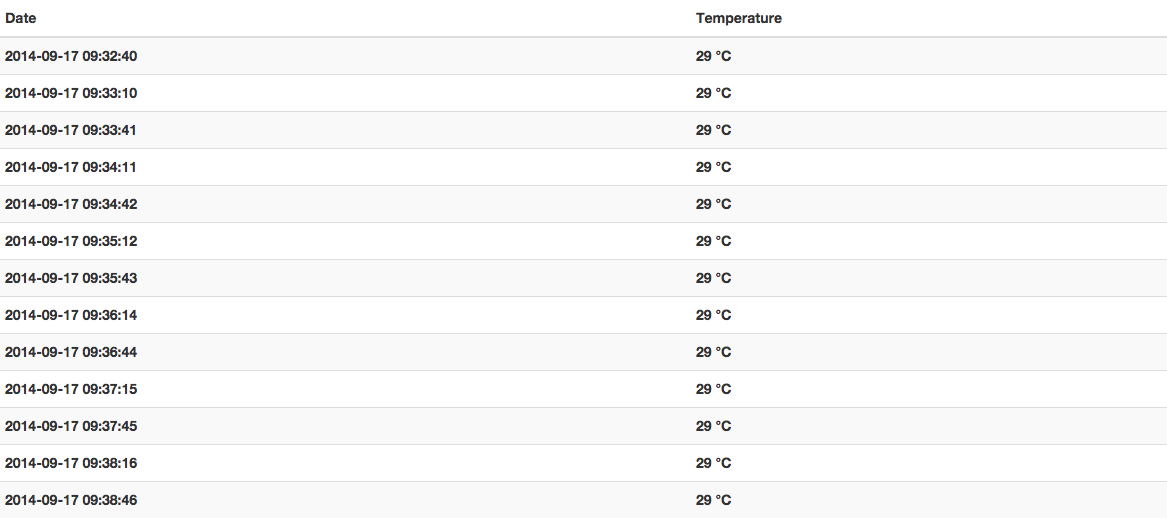
受け取ったデータをHTMLで表示します。
<table class="table table-striped">
<thead>
<tr>
<th>Date</th>
<th>Temperature</th>
</tr>
</thead>
<tbody>
<tr ng-repeat="data in tempDatas">
<th>
{{ data.date | date:'yyyy-MM-dd HH:mm:ss' }}
</th>
<th>
{{ data.temp }} °C
</th>
</tr>
</tbody>
</table>
結果
今回書いたコードはGitHub上にあります。
https://github.com/kenjiSpecial/ArduinoTemperatureProject
今後にむけて
なんとかデータは表示されるようになりました。
今は文字情報だけの表示なので、今後はビジュアル的に表示するようにしようと思います。
