ボットこそグローバル対応ということで、今回はボットの多言語化を行います。やり方はいくつかありますが、この記事ではリソースファイルを使った方法をまず見ていきます。
多言語化を行う方法
多言語化を行う場合、いくつか考える事があります。
- ユーザーから受信するメッセージ
- フリーテキスト
- プロンプトのボタンをクリックした返信
- ボットから送信するメッセージ
- ユーザーに任意で言語を選択させるか、自動判定ロジックをいれて言語を設定するか
ユーザーから受信するメッセージ
LUIS を使っている場合や、テキストプロンプトで応答を受け取る場合、結果を特定言語に翻訳する必要があります。翻訳については次回見ていきます。
ボットから送信するメッセージ
ユーザーが設定した言語でボットからメッセージを送信するには、以下の方法があります。
- リソースファイルを使う
- 開発者が全言語を用意するため、結構面倒
- 全てのラベルにおいて、コントロールができる
- Visual Studio で作らないと厳しい
- 翻訳サービスを使う
- 開発者は 1 言語だけでよく、サービスが提供する全ての言語が使える
- 自動翻訳のため、細かいコントロールが出来ない
- ヒーローカードなど複数の箇所にテキストがある場合、翻訳する場所が増える
この記事ではリソースファイルを使った方法を見ていきます。
使用言語の選択
まずはユーザーが言語を設定できるようにします。
1. UserProfile.cs に Language プロパティを追加。
public string Language { get; set; }
2. Dialogs フォルダに SelectLanguageDialog.cs を追加して、コードを差し替え。
using System;
using System.Linq;
using System.Collections.Generic;
using System.Threading;
using System.Threading.Tasks;
using Microsoft.Bot.Builder;
using Microsoft.Bot.Builder.Dialogs;
using Microsoft.Bot.Builder.Dialogs.Choices;
using Microsoft.Bot.Schema;

public class SelectLanguageDialog : ComponentDialog
{
    private MyStateAccessors accessors;
    private static Dictionary<string, string> languages = new Dictionary<string, string>(){
        { "日本語", "ja-JP" },
        { "English", "en-US" }
    };
    public SelectLanguageDialog(MyStateAccessors accessors) : base(nameof(SelectLanguageDialog))
    {
        this.accessors = accessors;

        // ウォーターフォールのステップを定義。処理順にメソッドを追加。
        var waterfallSteps = new WaterfallStep[]
        {
            AskLangugage,
            SaveLangugageChoice
        };

        // ウォーターフォールダイアログと各種プロンプトを追加
        AddDialog(new WaterfallDialog("selectlangugae", waterfallSteps));
        AddDialog(new ChoicePrompt("choice"));
    }

    private async Task<DialogTurnResult> AskLangugage(WaterfallStepContext stepContext, CancellationToken cancellationToken)
    {
        // Choice プロンプトで言語選択を表示
        return await stepContext.PromptAsync(
            "choice",
            new PromptOptions
            {
                Prompt = MessageFactory.Text("言語を選択してください。Select your language"),
                Choices = ChoiceFactory.ToChoices(languages.Select(x=>x.Key).ToList()),
            },
            cancellationToken);
    }

    private async Task<DialogTurnResult> SaveLangugageChoice(WaterfallStepContext stepContext, CancellationToken cancellationToken)
    {
        // 選択した言語をプロファイルに保存
        var languageChoice = (FoundChoice)stepContext.Result;
        var userProfile = await accessors.UserProfile.GetAsync(stepContext.Context, () => new UserProfile(), cancellationToken);
        userProfile.Language = languages[languageChoice.Value];
        // プロファイルを保存
        await accessors.UserProfile.SetAsync(stepContext.Context, userProfile, cancellationToken);
        return await stepContext.EndDialogAsync(true);
    }
}
3. WelcomeDialog.cs に言語選択を追加するため、以下のコードと差し替え。
using System;
using System.Collections.Generic;
using System.Threading;
using System.Threading.Tasks;
using Microsoft.Bot.Builder;
using Microsoft.Bot.Builder.Dialogs;
using Microsoft.Bot.Builder.Dialogs.Choices;
using Microsoft.Bot.Schema;

public class WelcomeDialog : ComponentDialog
{
    private MyStateAccessors accessors;

    public WelcomeDialog(MyStateAccessors accessors) : base(nameof(WelcomeDialog))
    {
        this.accessors = accessors;

        // ウォーターフォールのステップを定義。処理順にメソッドを追加。
        var waterfallSteps = new WaterfallStep[]
        {
            CheckLanguageAsync,
            SendWelcomeHeroCardAsync,
            CheckProfileAsync
        };
        // ウォーターフォールダイアログと各種プロンプトを追加
        AddDialog(new WaterfallDialog("welcome", waterfallSteps));
        AddDialog(new TextPrompt("checkStatus"));
        AddDialog(new ProfileDialog(accessors));
        AddDialog(new SelectLanguageDialog(accessors));
    }

    private async Task<DialogTurnResult> CheckLanguageAsync(WaterfallStepContext stepContext, CancellationToken cancellationToken)
    {
        var userProfile = await accessors.UserProfile.GetAsync(stepContext.Context, () => new UserProfile(), cancellationToken);
        // 言語設定がない場合は言語を選択
        if(string.IsNullOrEmpty(userProfile.Language))
            return await stepContext.BeginDialogAsync(nameof(SelectLanguageDialog), cancellationToken: cancellationToken);
        else
            return await stepContext.NextAsync(cancellationToken);
    }

    private async Task<DialogTurnResult> SendWelcomeHeroCardAsync(WaterfallStepContext stepContext, CancellationToken cancellationToken)
    {
        // カルーセルを作成。ここでは 1 つだけ Attachment を設定するため
        // カルーセル形式にはならない。ボタンには imBack を設定
        var activity = MessageFactory.Carousel(
            new Attachment[]
            {
                new HeroCard(
                    title: "ようこそ My Bot へ!プロファイル登録をしますか?",
                    images: new CardImage[] { new CardImage(url: "https://picsum.photos/300/200/?image=433") },
                    buttons: new CardAction[]
                    {
                        new CardAction(title:"はい", type: ActionTypes.PostBack, value: "はい"),
                        new CardAction(title: "スキップ", type: ActionTypes.ImBack, value: "スキップ"),
                        new CardAction(title: "詳細を見る", type: ActionTypes.OpenUrl, value: "https://dev.botframework.com"),
                    })
                .ToAttachment(),
                new AnimationCard(
                    title: "アニメーションサンプル",
                    image: new ThumbnailUrl("https://docs.microsoft.com/en-us/bot-framework/media/how-it-works/architecture-resize.png"),
                    media: new List<MediaUrl>() { new MediaUrl(url: "http://i.giphy.com/Ki55RUbOV5njy.gif") }
                   ).ToAttachment(),
            });

        // TextPrompt を指定して文字列が返ること期待
        return await stepContext.PromptAsync("checkStatus", new PromptOptions
        {
            Prompt = (Activity)activity
        });
    }

    private async Task<DialogTurnResult> CheckProfileAsync(WaterfallStepContext stepContext, CancellationToken cancellationToken)
    {
        // 返事の内容によってプロファイル登録するか決定
        if (stepContext.Result.ToString() == "はい")
            return await stepContext.BeginDialogAsync(nameof(ProfileDialog), cancellationToken: cancellationToken);

        // 登録しない場合は匿名として設定
        var userProfile = await accessors.UserProfile.GetAsync(stepContext.Context, () => new UserProfile(), cancellationToken);
        userProfile.Name = "匿名";
        return await stepContext.EndDialogAsync(true);
    }
}
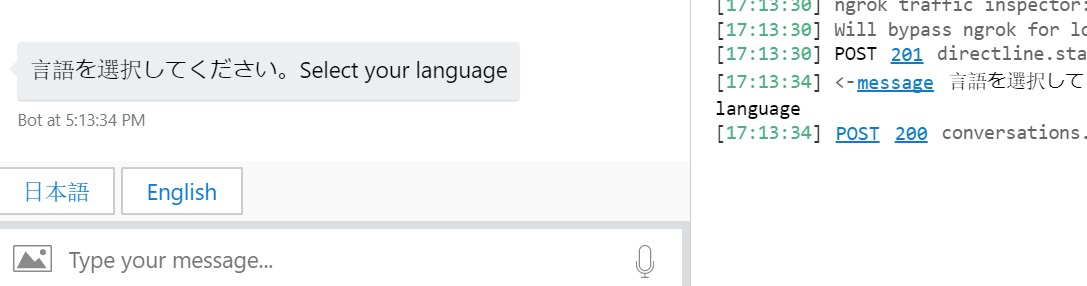
4. F5 キーを押下してデバッグ実行。エミュレーターで接続。初回に言語を聞かれるので「English」を選択。
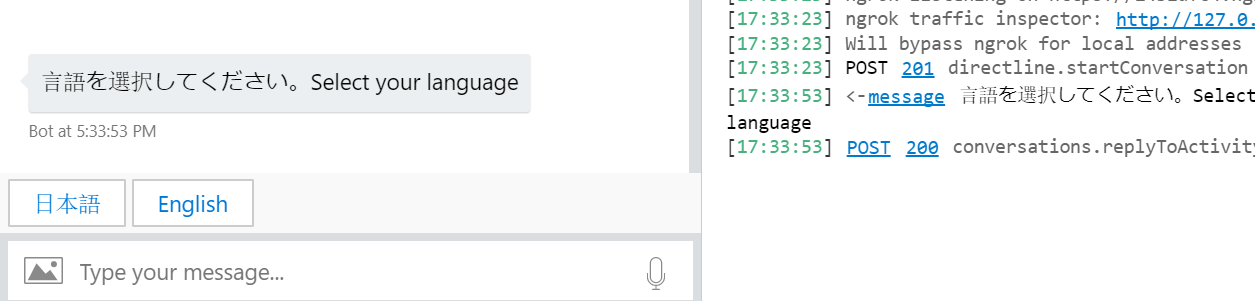
5. ようこそカードが出たら「Restart conversation」をクリックして接続し直す。既に言語選択は完了しているため言語選択が行われないことを確認。
言語は選択できるようになりましたが、ボットからのメッセージは日本語のままのため、次にリソースファイルを使って選択した言語で表示できるようにします。
ASP.NET Core ローカライゼーション
Bot の実装は純粋な ASP.NET Core のため、ローカライゼーションも同じ方法を使います。ここでは以下の作業を行います。
- ユーザーの言語設定はボット自体の役目ではないため、ミドルウェアに外出し
- 管理性を考え、リソースファイルはクラスごとにそれぞれ用意
- 各ダイアログも IoC 化する
言語指定ミドルウェアの作成
1. Middlewares フォルダを作成し、SetLanguageMiddleware.cs を追加。
using System;
using System.Globalization;
using System.Threading;
using System.Threading.Tasks;
using Microsoft.Bot.Builder;
using Microsoft.Bot.Schema;

public class SetLanguageMiddleware : IMiddleware
{
    // ユーザープロファイルへのプロパティアクセサー
    private readonly IStatePropertyAccessor<UserProfile> userProfile;

    public SetLanguageMiddleware( IStatePropertyAccessor<UserProfile> userProfile)
    {
        this.userProfile = userProfile;
    }
    public async Task OnTurnAsync(ITurnContext turnContext, NextDelegate next, CancellationToken cancellationToken = default(CancellationToken))
    {
        // ユーザーの言語設定によって CurrentCulture を設定
        var profile = await userProfile.GetAsync(turnContext, () => new UserProfile(), cancellationToken);

        if(!string.IsNullOrEmpty(profile.Language))
        {
            Thread.CurrentThread.CurrentCulture = new CultureInfo(profile.Language);
            Thread.CurrentThread.CurrentUICulture = new CultureInfo(profile.Language);
        }

        await next.Invoke(cancellationToken);
    }
}
2. Startup.cs でミドルウェアを追加。services.AddBot 内の最後に以下を追加。引数としてユーザープロファイルへのプロパティアクセサーを渡す。
options.Middleware.Add(new SetLanguageMiddleware(
    userState.CreateProperty<UserProfile>("UserProfile")
));
リソースファイルの利用
1. Startup.cs でローカライゼーションを使うための設定を ConfigureServices メソッドの最後に追加。
// リソースファイルが存在するフォルダの相対パス
services.AddLocalization(o => o.ResourcesPath = "Resources");
// ローカライゼーションの設定
services.Configure<RequestLocalizationOptions>(options =>
{
    var supportedCultures = new[]
    {
        new CultureInfo("en-US"),
        new CultureInfo("ja-JP"),
    };
    // 既定とサポートされるカルチャーの設定
    options.DefaultRequestCulture = new RequestCulture("ja-JP", "ja-JP");
    options.SupportedCultures = supportedCultures;
    options.SupportedUICultures = supportedCultures;
});
2. Resources フォルダを追加。

3. フォルダ内に、まず WelcomeDialog.ja.resx を追加
- RESX ファイルは Visual Studio を使って作成
<?xml version="1.0" encoding="utf-8"?>
<root>
  <xsd:schema id="root" xmlns="" xmlns:xsd="http://www.w3.org/2001/XMLSchema" xmlns:msdata="urn:schemas-microsoft-com:xml-msdata">
    <xsd:import namespace="http://www.w3.org/XML/1998/namespace" />
    <xsd:element name="root" msdata:IsDataSet="true">
      <xsd:complexType>
        <xsd:choice maxOccurs="unbounded">
          <xsd:element name="metadata">
            <xsd:complexType>
              <xsd:sequence>
                <xsd:element name="value" type="xsd:string" minOccurs="0" />
              </xsd:sequence>
              <xsd:attribute name="name" use="required" type="xsd:string" />
              <xsd:attribute name="type" type="xsd:string" />
              <xsd:attribute name="mimetype" type="xsd:string" />
              <xsd:attribute ref="xml:space" />
            </xsd:complexType>
          </xsd:element>
          <xsd:element name="assembly">
            <xsd:complexType>
              <xsd:attribute name="alias" type="xsd:string" />
              <xsd:attribute name="name" type="xsd:string" />
            </xsd:complexType>
          </xsd:element>
          <xsd:element name="data">
            <xsd:complexType>
              <xsd:sequence>
                <xsd:element name="value" type="xsd:string" minOccurs="0" msdata:Ordinal="1" />
                <xsd:element name="comment" type="xsd:string" minOccurs="0" msdata:Ordinal="2" />
              </xsd:sequence>
              <xsd:attribute name="name" type="xsd:string" use="required" msdata:Ordinal="1" />
              <xsd:attribute name="type" type="xsd:string" msdata:Ordinal="3" />
              <xsd:attribute name="mimetype" type="xsd:string" msdata:Ordinal="4" />
              <xsd:attribute ref="xml:space" />
            </xsd:complexType>
          </xsd:element>
          <xsd:element name="resheader">
            <xsd:complexType>
              <xsd:sequence>
                <xsd:element name="value" type="xsd:string" minOccurs="0" msdata:Ordinal="1" />
              </xsd:sequence>
              <xsd:attribute name="name" type="xsd:string" use="required" />
            </xsd:complexType>
          </xsd:element>
        </xsd:choice>
      </xsd:complexType>
    </xsd:element>
  </xsd:schema>
  <resheader name="resmimetype">
    <value>text/microsoft-resx</value>
  </resheader>
  <resheader name="version">
    <value>2.0</value>
  </resheader>
  <resheader name="reader">
    <value>System.Resources.ResXResourceReader, System.Windows.Forms, Version=4.0.0.0, Culture=neutral, PublicKeyToken=b77a5c561934e089</value>
  </resheader>
  <resheader name="writer">
    <value>System.Resources.ResXResourceWriter, System.Windows.Forms, Version=4.0.0.0, Culture=neutral, PublicKeyToken=b77a5c561934e089</value>
  </resheader>
  <data name="anonymous" xml:space="preserve">
    <value>匿名</value>
  </data>
  <data name="checkDetail" xml:space="preserve">
    <value>詳細を見る</value>
  </data>
  <data name="skip" xml:space="preserve">
    <value>スキップ</value>
  </data>
  <data name="title" xml:space="preserve">
    <value>ようこそ My Bot へ!プロファイル登録をしますか?</value>
  </data>
  <data name="yes" xml:space="preserve">
    <value>はい</value>
  </data>
</root>
4. 続いて WelcomeDialog.en.resx を追加。
<?xml version="1.0" encoding="utf-8"?>
<root>
  <xsd:schema id="root" xmlns="" xmlns:xsd="http://www.w3.org/2001/XMLSchema" xmlns:msdata="urn:schemas-microsoft-com:xml-msdata">
    <xsd:import namespace="http://www.w3.org/XML/1998/namespace" />
    <xsd:element name="root" msdata:IsDataSet="true">
      <xsd:complexType>
        <xsd:choice maxOccurs="unbounded">
          <xsd:element name="metadata">
            <xsd:complexType>
              <xsd:sequence>
                <xsd:element name="value" type="xsd:string" minOccurs="0" />
              </xsd:sequence>
              <xsd:attribute name="name" use="required" type="xsd:string" />
              <xsd:attribute name="type" type="xsd:string" />
              <xsd:attribute name="mimetype" type="xsd:string" />
              <xsd:attribute ref="xml:space" />
            </xsd:complexType>
          </xsd:element>
          <xsd:element name="assembly">
            <xsd:complexType>
              <xsd:attribute name="alias" type="xsd:string" />
              <xsd:attribute name="name" type="xsd:string" />
            </xsd:complexType>
          </xsd:element>
          <xsd:element name="data">
            <xsd:complexType>
              <xsd:sequence>
                <xsd:element name="value" type="xsd:string" minOccurs="0" msdata:Ordinal="1" />
                <xsd:element name="comment" type="xsd:string" minOccurs="0" msdata:Ordinal="2" />
              </xsd:sequence>
              <xsd:attribute name="name" type="xsd:string" use="required" msdata:Ordinal="1" />
              <xsd:attribute name="type" type="xsd:string" msdata:Ordinal="3" />
              <xsd:attribute name="mimetype" type="xsd:string" msdata:Ordinal="4" />
              <xsd:attribute ref="xml:space" />
            </xsd:complexType>
          </xsd:element>
          <xsd:element name="resheader">
            <xsd:complexType>
              <xsd:sequence>
                <xsd:element name="value" type="xsd:string" minOccurs="0" msdata:Ordinal="1" />
              </xsd:sequence>
              <xsd:attribute name="name" type="xsd:string" use="required" />
            </xsd:complexType>
          </xsd:element>
        </xsd:choice>
      </xsd:complexType>
    </xsd:element>
  </xsd:schema>
  <resheader name="resmimetype">
    <value>text/microsoft-resx</value>
  </resheader>
  <resheader name="version">
    <value>2.0</value>
  </resheader>
  <resheader name="reader">
    <value>System.Resources.ResXResourceReader, System.Windows.Forms, Version=4.0.0.0, Culture=neutral, PublicKeyToken=b77a5c561934e089</value>
  </resheader>
  <resheader name="writer">
    <value>System.Resources.ResXResourceWriter, System.Windows.Forms, Version=4.0.0.0, Culture=neutral, PublicKeyToken=b77a5c561934e089</value>
  </resheader>
  <data name="anonymous" xml:space="preserve">
    <value>Anonymous</value>
  </data>
  <data name="checkDetail" xml:space="preserve">
    <value>See the detail</value>
  </data>
  <data name="skip" xml:space="preserve">
    <value>Maybe later</value>
  </data>
  <data name="title" xml:space="preserve">
    <value>Welcome to My Bot! Do you want to register?</value>
  </data>
  <data name="yes" xml:space="preserve">
    <value>Yes!</value>
  </data>
</root>
5. 追加したファイルをコンパイルするよう、myfirstbot.csproj に以下項目を追加。
<ItemGroup>
  <EmbeddedResource Update="Resources\WelcomeDialog.en.resx">
    <Generator>PublicResXFileCodeGenerator</Generator>
  </EmbeddedResource>
  <EmbeddedResource Update="Resources\WelcomeDialog.ja.resx">
    <Generator>PublicResXFileCodeGenerator</Generator>
  </EmbeddedResource>
</ItemGroup>
6. WelcomeDialog.cs でローカライザーを使うようにコードを変更。
- IStringLocalizer localizer は IoC により自動解決される。
- 利用されるリソースファイルは指定したリソースフォルダに型名とロケールを加えたデータを探す。
- ロケールがに日本語の場合は WelcomeDialog.ja-JP.resx。存在しない場合、WelcomeDialog.ja.resx.
- 表示には localizer["key"] を指定
- 値には localizer["key"].Value を指定
using System;
using System.Globalization;
using System.Threading;
using System.Threading.Tasks;
using Microsoft.Bot.Builder;
using Microsoft.Bot.Builder.Dialogs;
using Microsoft.Bot.Schema;
using Microsoft.Extensions.Localization;

public class WelcomeDialog : ComponentDialog
{
    private MyStateAccessors accessors;
    // WelcomeDialog 用のローカライザーを作成
    private IStringLocalizer<WelcomeDialog> localizer;

    public WelcomeDialog(MyStateAccessors accessors, IStringLocalizer<WelcomeDialog> localizer) : base(nameof(WelcomeDialog))
    {
        this.accessors = accessors;
        this.localizer = localizer;

        // ウォーターフォールのステップを定義。処理順にメソッドを追加。
        var waterfallSteps = new WaterfallStep[]
        {
            CheckLanguageAsync,
            SendWelcomeHeroCardAsync,
            CheckProfileAsync
        };
        // ウォーターフォールダイアログと各種プロンプトを追加
        AddDialog(new WaterfallDialog("welcome", waterfallSteps));
        AddDialog(new TextPrompt("checkStatus"));
        AddDialog(new ProfileDialog(accessors));
        AddDialog(new SelectLanguageDialog(accessors));
    }

    private async Task<DialogTurnResult> CheckLanguageAsync(WaterfallStepContext stepContext, CancellationToken cancellationToken)
    {
        var userProfile = await accessors.UserProfile.GetAsync(stepContext.Context, () => new UserProfile(), cancellationToken);
        if(string.IsNullOrEmpty(userProfile.Language))
            return await stepContext.BeginDialogAsync(nameof(SelectLanguageDialog), cancellationToken: cancellationToken);
        else
            return await stepContext.NextAsync(cancellationToken);
    }

    private async Task<DialogTurnResult> SendWelcomeHeroCardAsync(WaterfallStepContext stepContext, CancellationToken cancellationToken)
    {
        var userProfile = await accessors.UserProfile.GetAsync(stepContext.Context, () => new UserProfile(), cancellationToken);
        // このタイミングではミドルウェアが呼ばれていないため、明示的に設定
        Thread.CurrentThread.CurrentCulture = new CultureInfo(userProfile.Language);
        Thread.CurrentThread.CurrentUICulture = new CultureInfo(userProfile.Language);

        // カルーセルを作成。ここでは 1 つだけ Attachment を設定するため
        // カルーセル形式にはならない。ボタンには imBack を設定
        var activity = MessageFactory.Carousel(
            new Attachment[]
            {
                new HeroCard(
                    title: localizer["title"],
                    images: new CardImage[] { new CardImage(url: "https://picsum.photos/300/200/?image=433") },
                    buttons: new CardAction[]
                    {
                        new CardAction(title:localizer["yes"], type: ActionTypes.PostBack, value: localizer["yes"].Value),
                        new CardAction(title: localizer["skip"], type: ActionTypes.ImBack, value: localizer["skip"].Value),
                        new CardAction(title: localizer["checkDetail"], type: ActionTypes.OpenUrl, value: "https://dev.botframework.com"),
                    })
                .ToAttachment(),
            });

        // TextPrompt を指定して文字列が返ること期待
        return await stepContext.PromptAsync("checkStatus", new PromptOptions
        {
            Prompt = (Activity)activity
        });
    }

    private async Task<DialogTurnResult> CheckProfileAsync(WaterfallStepContext stepContext, CancellationToken cancellationToken)
    {
        // 返事の内容によってプロファイル登録するか決定
        if (stepContext.Result.ToString() == localizer["yes"])
            return await stepContext.BeginDialogAsync(nameof(ProfileDialog), cancellationToken: cancellationToken);

        // 登録しない場合は匿名として設定
        var userProfile = await accessors.UserProfile.GetAsync(stepContext.Context, () => new UserProfile(), cancellationToken);
        userProfile.Name = localizer["anonymous"];
        return await stepContext.EndDialogAsync(true);
    }
}
ダイアログの IoC
現在各種ダイアログは MyBot.cs のコンストラクタで明示的に作成していますが、ダイアログによっては引数が増えてきたため、このタイミングで IoC 化してしまいます。
1. Startup.cs の ConfigureServices メソッドの最後に、以下のコードを追加。
// ダイアログも IoC に登録
services.AddScoped<LoginDialog, LoginDialog>();
services.AddScoped<MenuDialog, MenuDialog>();
services.AddScoped<PhotoUpdateDialog, PhotoUpdateDialog>();
services.AddScoped<ProfileDialog, ProfileDialog>();
services.AddScoped<ScheduleDialog, ScheduleDialog>();
services.AddScoped<SelectLanguageDialog, SelectLanguageDialog>();
services.AddScoped<WeatherDialog, WeatherDialog>();
services.AddScoped<WelcomeDialog, WelcomeDialog>();
2. MyBot.cs のコンストラクタを変更して、IoC を利用。
public MyBot(MyStateAccessors accessors, LuisRecognizer luisRecognizer, IServiceProvider serviceProvider)
{
    this.accessors = accessors;
    this.luisRecognizer = luisRecognizer;
    this.dialogs = new DialogSet(accessors.ConversationDialogState);

    // コンポーネントダイアログを追加
    dialogs.Add((WelcomeDialog)serviceProvider.GetService(typeof(WelcomeDialog)));
    dialogs.Add((ProfileDialog)serviceProvider.GetService(typeof(ProfileDialog)));
    dialogs.Add((MenuDialog)serviceProvider.GetService(typeof(MenuDialog)));
    dialogs.Add((WeatherDialog)serviceProvider.GetService(typeof(WeatherDialog)));
    dialogs.Add((ScheduleDialog)serviceProvider.GetService(typeof(ScheduleDialog)));
    dialogs.Add((PhotoUpdateDialog)serviceProvider.GetService(typeof(PhotoUpdateDialog)));
}
3. 他のダイアログのコンストラクタも併せて変更。例えば WelcomeDialog の場合は以下の様に変更。
public WelcomeDialog(MyStateAccessors accessors, IStringLocalizer<WelcomeDialog> localizer, IServiceProvider serviceProvider) : base(nameof(WelcomeDialog))
{
    this.accessors = accessors;
    this.localizer = localizer;

    // ウォーターフォールのステップを定義。処理順にメソッドを追加。
    var waterfallSteps = new WaterfallStep[]
    {
        CheckLanguageAsync,
        SendWelcomeHeroCardAsync,
        CheckProfileAsync
    };
    // ウォーターフォールダイアログと各種プロンプトを追加
    AddDialog(new WaterfallDialog("welcome", waterfallSteps));
    AddDialog(new TextPrompt("checkStatus"));
    AddDialog((ProfileDialog)serviceProvider.GetService(typeof(ProfileDialog)));
    AddDialog((SelectLanguageDialog)serviceProvider.GetService(typeof(SelectLanguageDialog)));
}
テスト
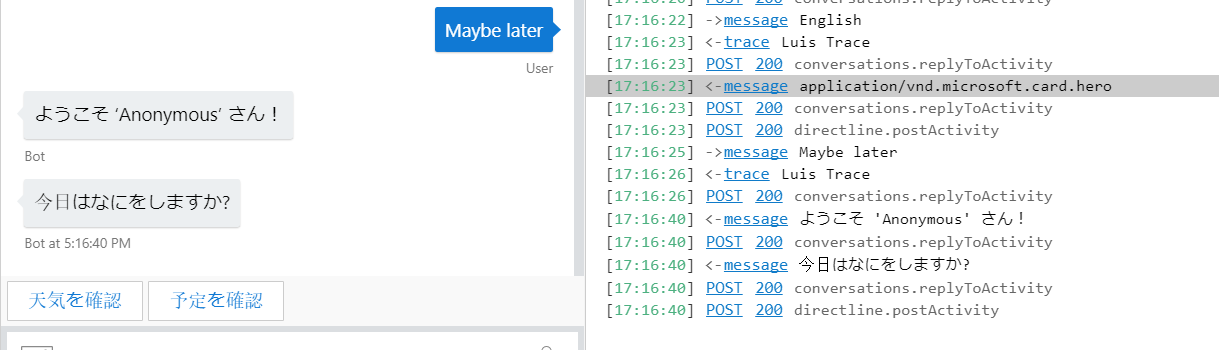
1. F5 キーを押下してデバッグ実行。エミュレータから接続。「English」を選択。
2. 英語でヒーローカードが出ることを確認。「Maybe Later」を選択。
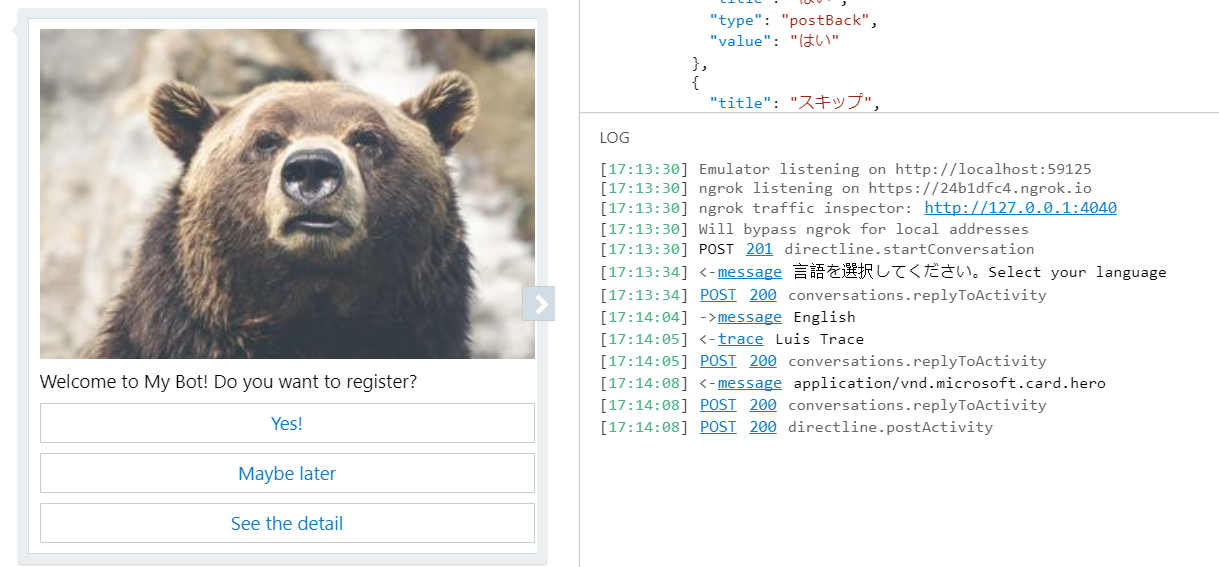
3. まだ言語対応していない箇所は日本語のままだが動作することを確認。
まとめ
今回はリソースファイルを使った多言語サポートを見ていきました。RESX ファイルを作るのに Visual Studio を使ったり、ダイアログの IoC 化を行ったりと作業が多かったですが、イメージはつかめたと思います。
次回は残りのダイアログの多言語化とアダプティブカードの翻訳をします。
参照
Dependency injection in ASP.NET Core
Globalization and localization in ASP.NET Core