前回 は LUIS を使ったエンティティの取得と利用について見ていきました。今回は外部のサービスを HTTP リクエストで呼び出す方法を見ていきます。
HTTP リクエスト
Bot Framework Composer には HTTP リクエストアクションがあり、外部サービスを簡単に呼び出せるようになっています。
今回は Qiita.com の API を利用して情報を取得してみます。
今回は特定ユーザーの最近記事 3 件取る URL
https://qiita.com/api/v2/users/:user_id/items?page=1&per_page=3
および以下の形式で返る結果を使います。
[
    {
        "rendered_body": "...",
        "coediting": false,
        "comments_count": 0,
        "created_at": "2020-03-27T17:34:01+09:00",
        "group": null,
        "id": "ba22b09ad587fa259e0a",
        "likes_count": 0,
        "private": false,
        "reactions_count": 0,
        "tags": [
            {
                "name": "Composer",
                "versions": []
            },
            {
                "name": "BotFramework",
                "versions": []
            }
        ],
        "title": "Bot Framework Composer でボット開発 : その 7 エンティティの取得",
        "updated_at": "2020-03-27T17:34:01+09:00",
        "url": "https://qiita.com/kenakamu/items/ba22b09ad587fa259e0a",
        "user": {
            "description": "",
            "facebook_id": "kenichiro.nakamura.5249",
            "followees_count": 5,
            "followers_count": 193,
            "github_login_name": "kenakamu",
            "id": "kenakamu",
            "items_count": 225,
            "linkedin_id": "kenakamu108",
            "location": "",
            "name": "",
            "organization": "Microsoft ",
            "permanent_id": 214116,
            "profile_image_url": "https://avatars2.githubusercontent.com/u/9940668?v=4",
            "team_only": false,
            "twitter_screen_name": "kenakamu108",
            "website_url": "http://github.com/kenakamu"
        },
        "page_views_count": null
    },
    {
        ...
    },
    {
        ...
    }
]
lg 関数
今回は結果をカルーセルで返します。その際に lg (Language Generation) 関数をいくつか使います。
また事前に定義されている関数が提供されており、サンプルでもよく使うため、どんなことができるか把握しておくと便利です。
カードを送る方法については、公式のドキュメント も併せて参照してください。
記事取得ダイアログの追加
では Qiita API を使った記事取得のダイアログを追加してみましょう。
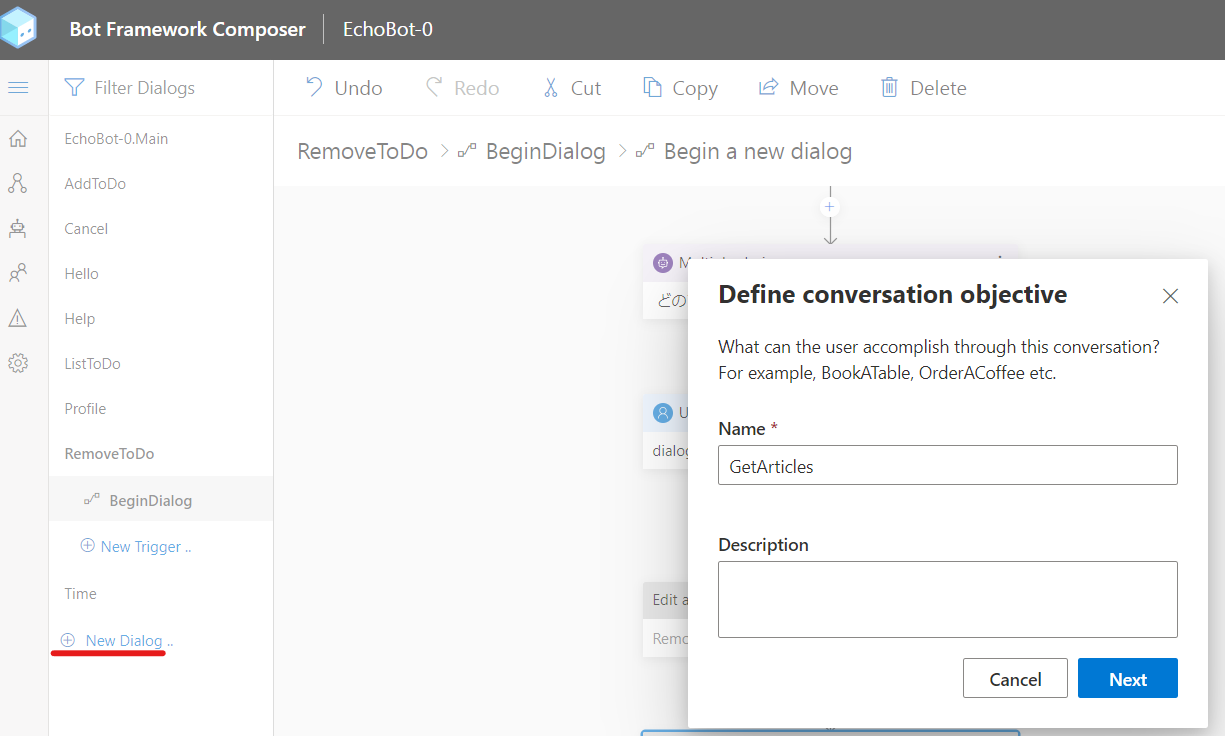
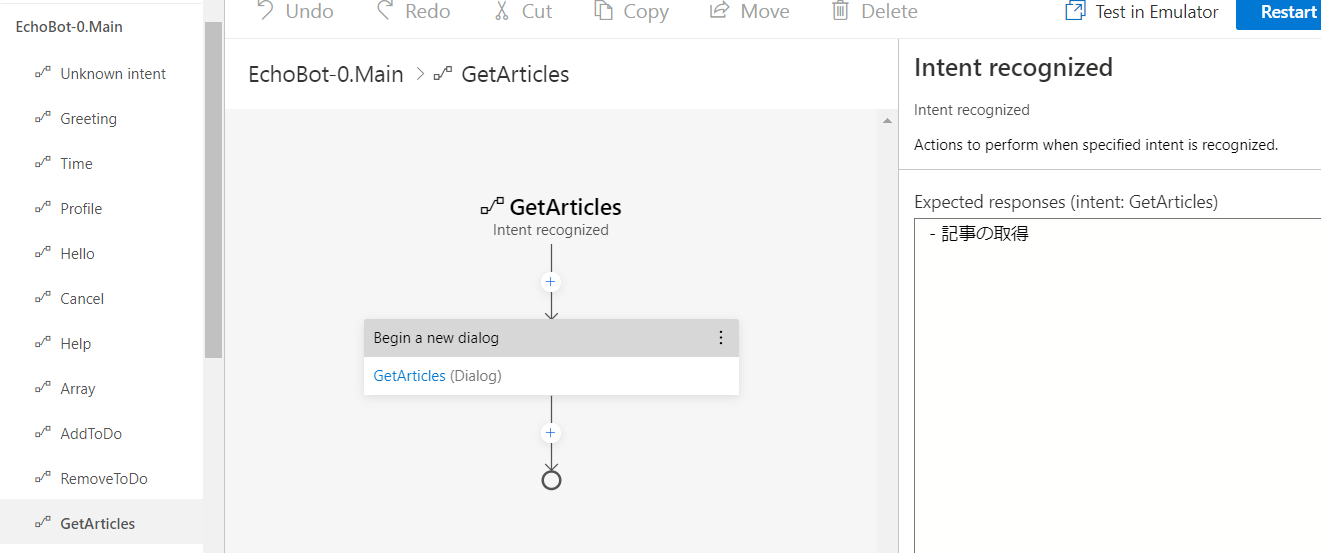
1. 新規ダイアログより GetArticles ダイアログを追加。
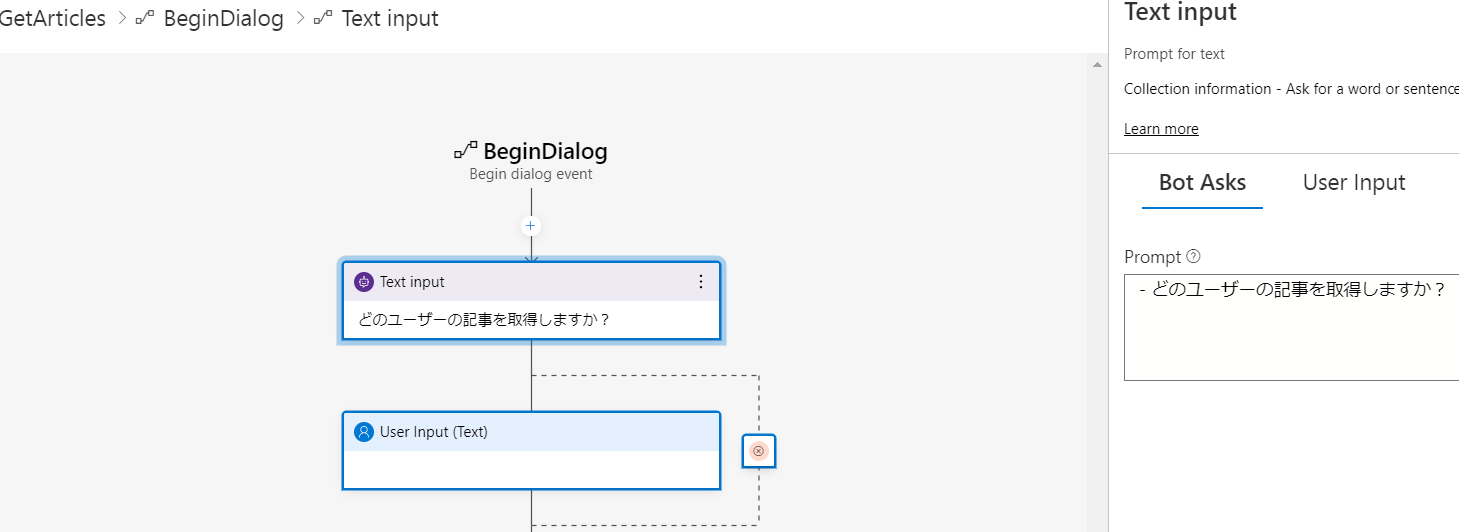
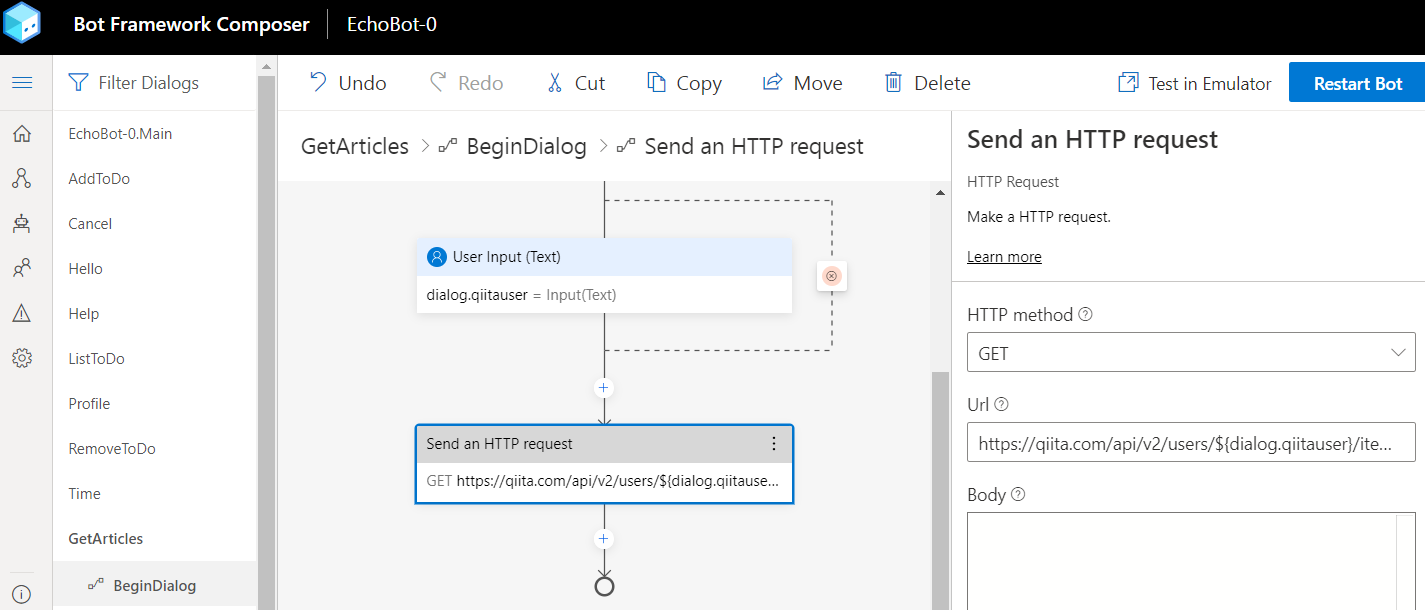
2.「Text Input」アクションを追加。Qiita ユーザー名を聞く。
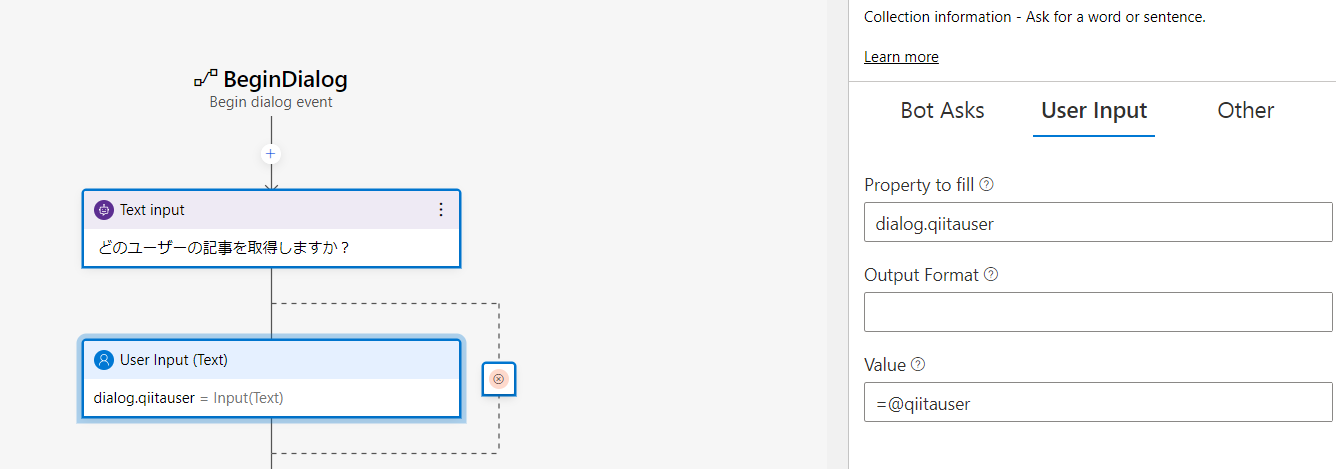
3. ユーザー入力を以下のように設定。ユーザー名はエンティティでも取得できるようにする。
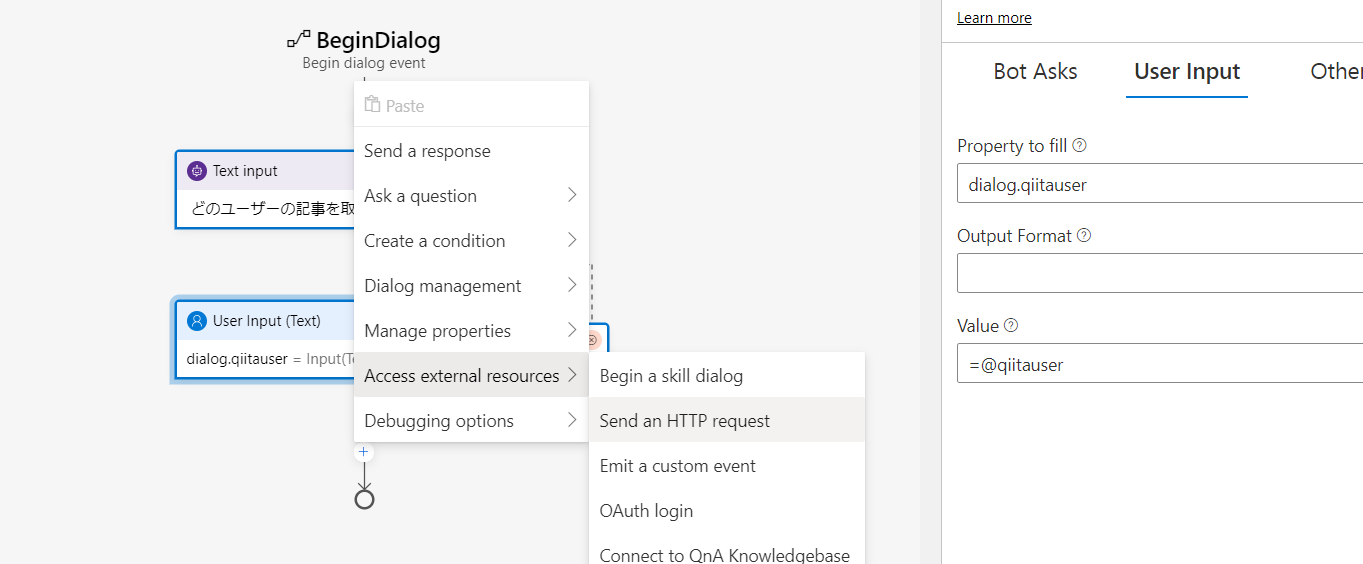
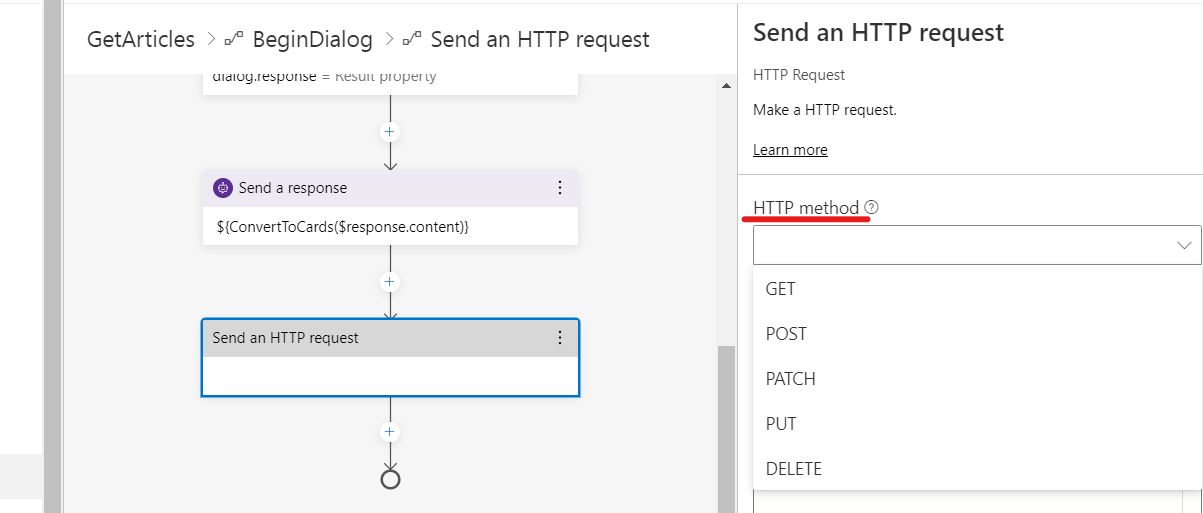
4.「Access external resources」より「Send an HTTP request」を選択。
5. Get メソッドを指定し、アドレスに https://qiita.com/api/v2/users/${dialog.qiitauser}/items?page=1&per_page=3 を入力。
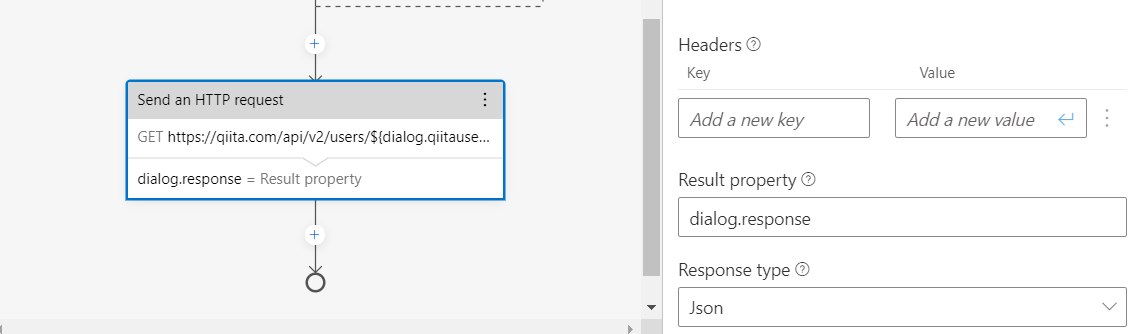
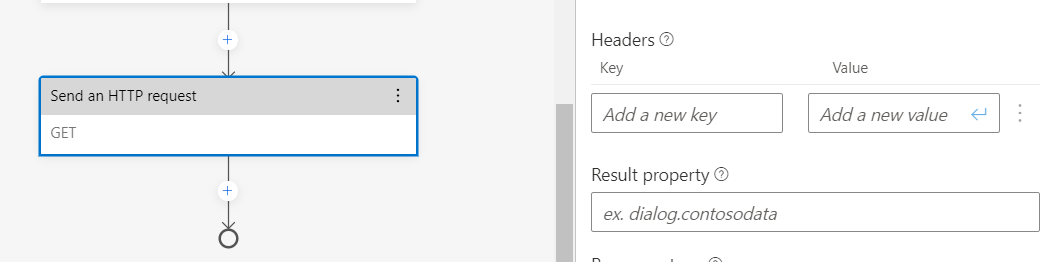
6. プロパティペイン下部にある「Result Property」と「Response type」を設定。この場合、結果はそれぞれ以下のパスでアクセス可能。ショートカットについては、以前の記事 を参照。
- ステータスコード: dialog.response.statusCode または $response.statusCode
- コンテンツ: dialog.response.content または $response.content
- ヘッダー: dialog.response.headers または $response.headers
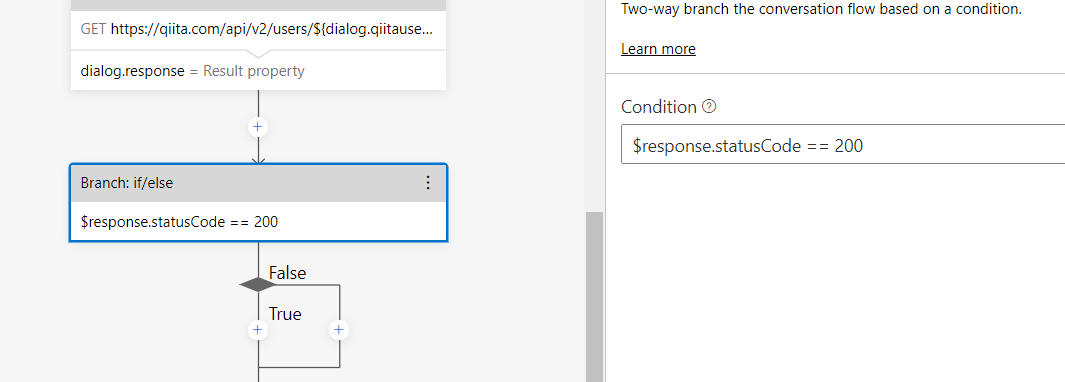
7. If/Else 分岐を追加。条件に $response.statusCode == 200 を設定。
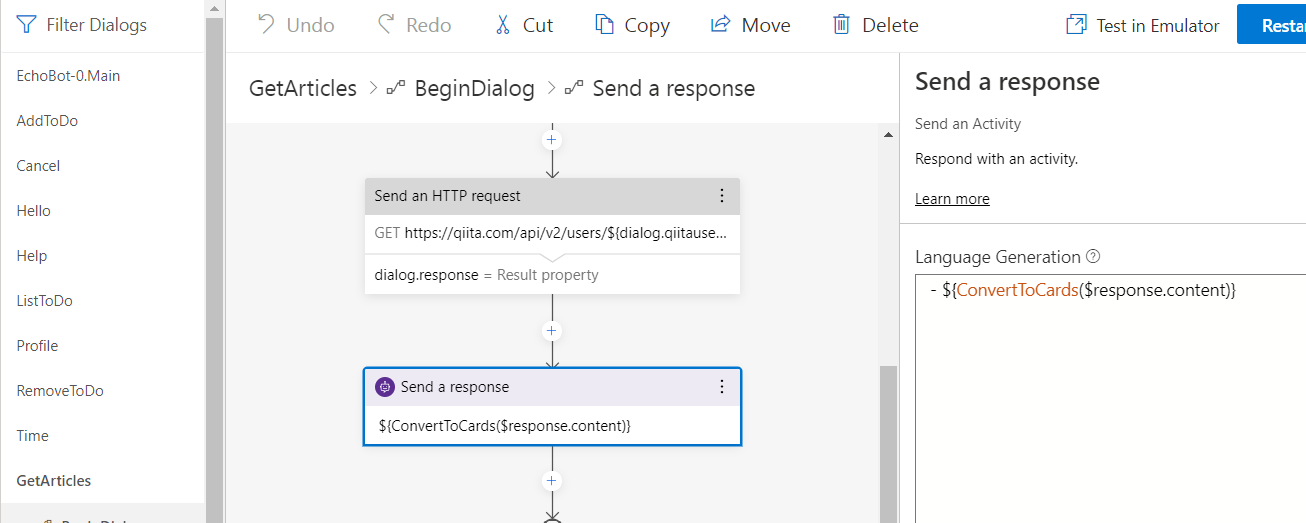
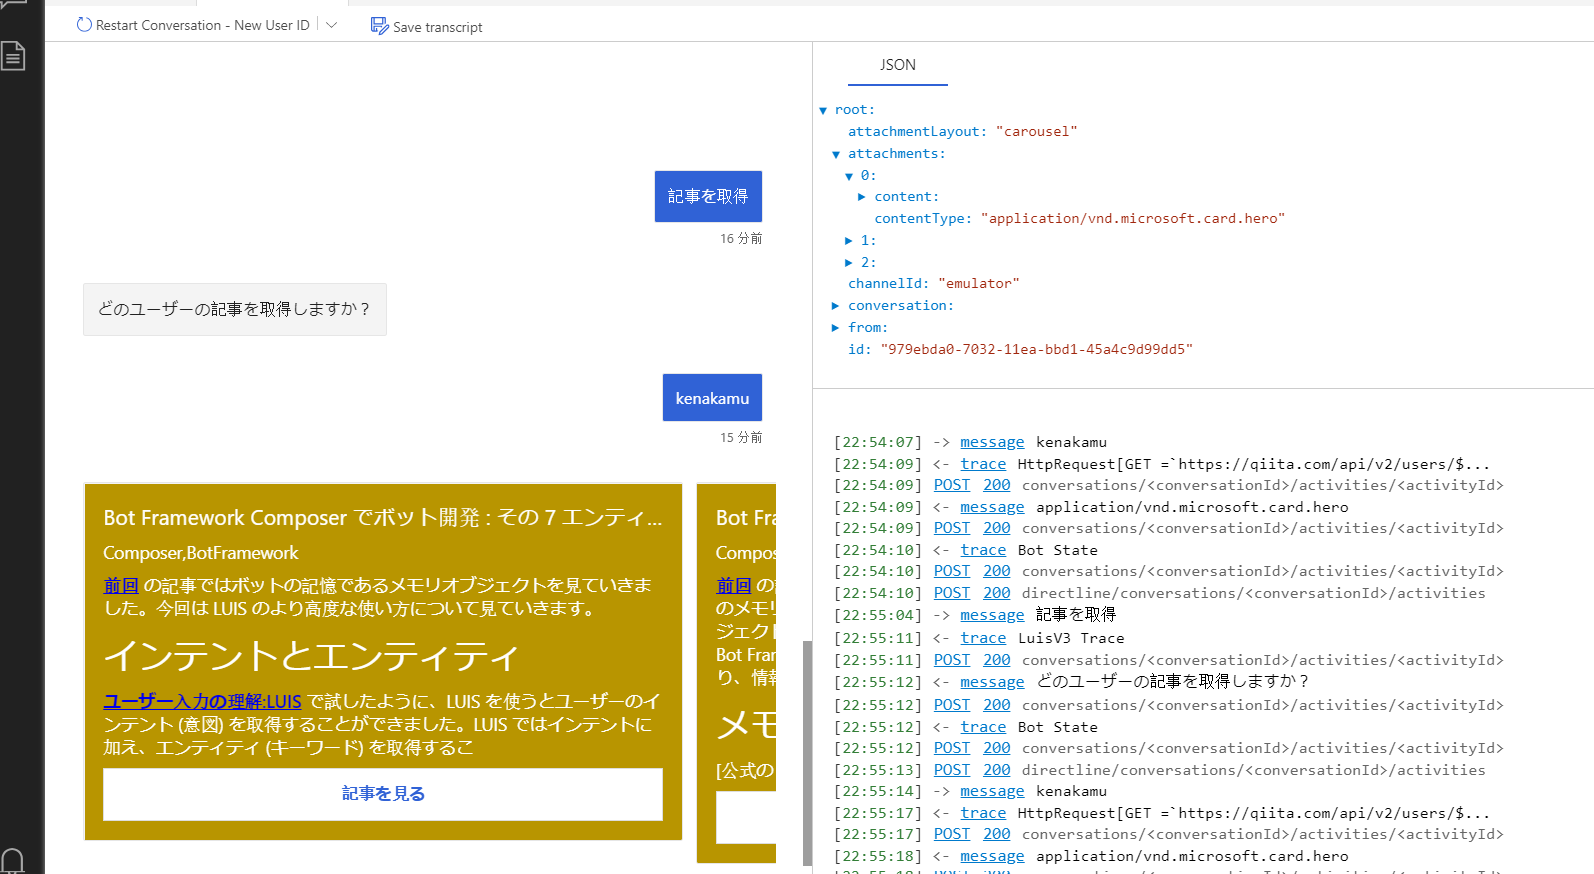
8.「Send a respose」アクションを追加して、-${ConvertToCards($response.content)} を指定。まだ関数がないためエラーになるが無視。
9. メニューより「Bot Responses」を選択。GetArticles に関数を追加。
- ConvertToCards で Activity をカルーセルとして定義
- Attachments はリストを受け取るため、foreach で HeroCard を順次作成
- ボタンはインラインでも定義できるが、ここでは CardAction 関数として作成
# ConvertToCards(articles)
[Activity
    Attachments = ${foreach(articles, article, Herocard(article))}
    AttachmentLayout = carousel
]

# Herocard (article)
[HeroCard
    title=${article.title}
    subtitle =  ${join(foreach(article.tags, article, article.name),',')}
    text = ${substring(article.body, 0, 300)}
    buttons=${Cardaction('openUrl', '記事を見る', article.url)}
]

# Cardaction(type, title, value)
[CardAction
    Type = ${if(type == null, 'imBack', type)}
    Title = ${title}
    Value = ${value}
    Text = ${title}
]
10. メインダイアログでトリガーを作成。GetArticles ダイアログの開始アクションを追加。
11. ボットを再起動して、エミュレーターで検証。
GET 以外の処理やヘッダーの付与
HTTP リクエストアクションは、GET 以外にも以下の HTTP メソッドをサポートします。
またヘッダーも自由自在です。
当然メモリオブジェクトを利用した動的な値をサポートするため、大体の要件は満たします。
まとめ
今回は HTTP リクエストの使い方を見ていきました。応答の処理は少し慣れが必要ですが、多くのサービスが同じような動作をするため、一度使い方を覚えると後は大丈夫です。
次回は作成したボットを公開してみます。