Navigation、ViewModel、Roomに続き、今回はRecyclerViewの実装方法をまとめていきます。
この記事の内容
公式のドキュメントやトレーニング「Android Kotlin の基礎」のレッスン7「RecyclerView」を参考に実装のポイントとエッセンスをまとめていきます。
今回は長いので第一回、第二回の2回に分けて解説していきます。
前提知識
- kotlinの基礎的な文法
- AndroidStudioの使い方/アプリの作り方
- 画面や画面部品の配置方法
-
Navigationの実装方法(こちらの記事参照) -
ViewModelの実装方法(こちらの記事参照) -
Roomの実装方法(こちらの記事参照)
開発環境
- Windows 10 Home
- Android Studio 4.2.1
作成するサンプル
代り映えしなくて恐縮ですが今回も単語帳のアプリを作成します。
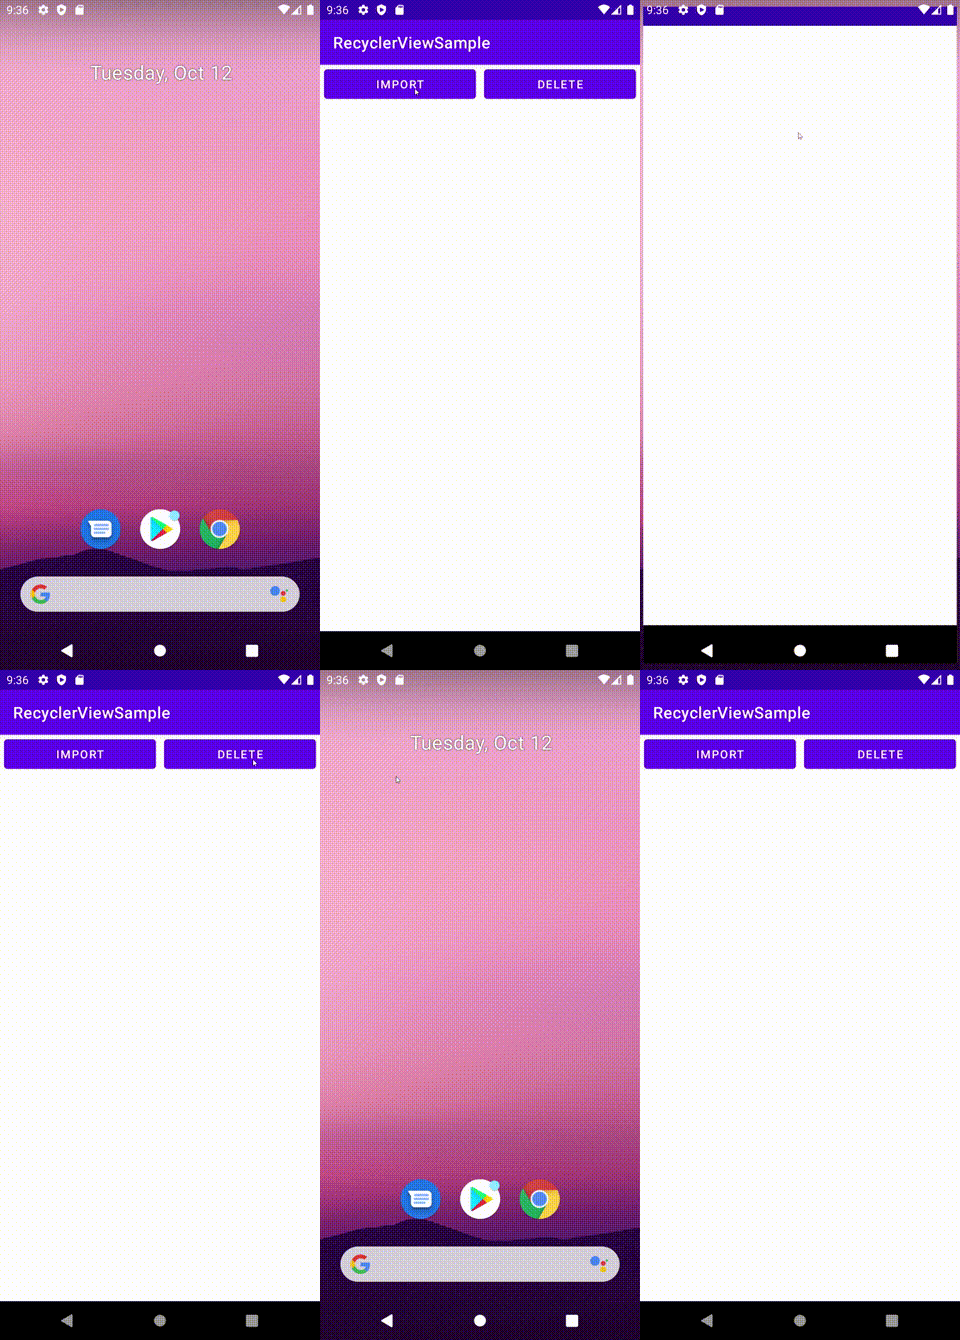
Importボタンのクリックで単語一覧を内部で生成し、DBに登録するとともにRecyclerViewに登録します。Deleteボタンで削除。
Roomを使っているのでアプリを再起動してもちゃんと表示する内容が保持されていますね。

このサンプルだとあんまりRecyclerViewのメリットが伝わりませんね……。その辺は次回。
RecyclerViewの作成
それではRecyclerViewを実装していきます。
build.gradel(app)ファイルの更新
RecyclerView用のimplementationをdependenciesブロックに追加。
dependencies {
    // (略)
    // RecyclerView
    implementation 'androidx.recyclerview:recyclerview:1.0.0'
}
RecyclerViewの配置
FragmentかActivityにRecyclerViewを配置します。
layoutManagerの設定が必要ですが、今回はオーソドックスにLinearLayoutを指定します。
<?xml version="1.0" encoding="utf-8"?>
<layout xmlns:android="http://schemas.android.com/apk/res/android"
    xmlns:app="http://schemas.android.com/apk/res-auto"
    xmlns:tools="http://schemas.android.com/tools">
    <LinearLayout/>
        <!--略-->
        <androidx.recyclerview.widget.RecyclerView
            android:id="@+id/word_list"
            android:layout_width="match_parent"
            android:layout_height="match_parent"
            app:layoutManager="androidx.recyclerview.widget.LinearLayoutManager"/>
    </LinearLayout>
</layout>
ListItemの作成
RecyclerView内に表示するListItemを作成します。
新規にレイアウトファイルを作ります。今回は単語の名前と品詞のアイコン、お気に入り登録されているかの有無を表すアイコンで構成された画面部品を使用します。
<?xml version="1.0" encoding="utf-8"?>
<LinearLayout
    xmlns:android="http://schemas.android.com/apk/res/android"
    android:orientation="horizontal"
    android:layout_width="match_parent"
    android:layout_height="50dp">

    <TextView
        android:id="@+id/word_name_text"
        android:layout_width="0dp"
        android:layout_height="25dp"
        android:layout_weight="1"
        android:layout_marginLeft="10dp"
        android:layout_marginTop="15dp"
        android:layout_marginBottom="15dp"
        android:textSize="16sp"/>

    <ImageView
        android:id="@+id/word_speech_image"
        android:layout_width="0dp"
        android:layout_weight="0.15"
        android:layout_height="25dp"
        android:layout_marginTop="15dp"
        android:layout_marginBottom="15dp"/>

    <ImageView
        android:id="@+id/word_favorite_image"
        android:layout_width="0dp"
        android:layout_weight="0.15"
        android:layout_height="25dp"
        android:layout_marginTop="15dp"
        android:layout_marginBottom="15dp"
        android:layout_marginRight="10dp"/>
</LinearLayout>
ViewHolderクラスを作成。
ListItemのViewHolderクラスを作成。後述のAdapterクラスの内部に作成します。
    // ViewHolderクラス
    class ViewHolder(itemView: View) : RecyclerView.ViewHolder(itemView) {
        val wordNameText: TextView = itemView.findViewById(R.id.word_name_text)
        val wordSpeechImage: ImageView = itemView.findViewById(R.id.word_speech_image)
        val wordFavoriteImage: ImageView = itemView.findViewById(R.id.word_favorite_image)
    }
Adapterクラスの作成
表示元のデータオブジェクトをRecyclerViewに設定するためのAdapterクラスを作成します。
Adapterクラスでは以下の定義が必要です。
-
RecyclerViewに表示するデータオブジェクト - 表示対象データの要素数を返す**getItemCount()**のオーバーライド
- RecyclerViewの所定の位置に所定のデータを表示する**onBindViewHolder()**のオーバーライド
- ViewHolderを生成する**onCreateViewHolder()**のオーバーライド
あわせてViewHolderクラスを拡張します。
class WordDataAdapter: RecyclerView.Adapter<WordDataAdapter.ViewHolder>() {

    // RecyclerViewに表示するデータオブジェクト
    var data = listOf<WordData>()
        set(value) {
            field = value
            // データ変更時に自動で再描画するための設定
            notifyDataSetChanged()
        }

    // 表示対象データの要素数を返す
    override fun getItemCount() = data.size

    // RecyclerViewの所定の位置に所定のデータを表示するためのメソッド
    override fun onBindViewHolder(holder: ViewHolder, position: Int) {
        val item = data[position]
        holder.bind(item)
    }

    // ViewHolderを生成するメソッド
    override fun onCreateViewHolder(parent: ViewGroup, viewType: Int): ViewHolder {
        return ViewHolder.from(parent)
    }

    // ViewHolderクラス
    class ViewHolder private constructor(itemView: View) : RecyclerView.ViewHolder(itemView) {
        val wordNameText: TextView = itemView.findViewById(R.id.word_name_text)
        val wordSpeechImage: ImageView = itemView.findViewById(R.id.word_speech_image)
        val wordFavoriteImage: ImageView = itemView.findViewById(R.id.word_favorite_image)

        fun bind(item: WordData) {
            // ViewHolderの各要素に値を設定
            wordNameText.text = item.word
            wordSpeechImage.setImageResource(when(item.speech) {
                // 品詞に応じて設定するアイコンを切り替え
                "助" -> { R.drawable.speech_auxiliary }
                "動" -> { R.drawable.speech_verb }
                "不" -> { R.drawable.speech_infinitive }
                "副" -> { R.drawable.speech_adverb }
                "構" -> { R.drawable.speech_syntax }
                "接" -> { R.drawable.speech_conjunction }
                "形" -> { R.drawable.speech_adjective }
                "名" -> { R.drawable.speech_noun }
                "代" -> { R.drawable.speech_pronoun }
                "前" -> { R.drawable.speech_preposition }
                "定" -> { R.drawable.speech_template }
                else -> { R.drawable.speech_none }
            })
            wordFavoriteImage.setImageResource(when(item.favorite) {
                true -> R.drawable.favorite_on
                else -> R.drawable.favorite_off
            })
        }

        companion object {
            fun from(parent: ViewGroup): ViewHolder {
                // LayoutInflaterインスタンスを作成
                val layoutInflater = LayoutInflater.from(parent.context)
                val view = layoutInflater.inflate(R.layout.list_item, parent, false)
                return ViewHolder(view)
            }
        }
    }
}
Adapterクラスの登録
RecyclerViewを使用する_Fragment.kt_ファイルで、Adapterを生成し対象のRecyclerViewに登録します。
(ついでにObserverも)
class WordDisplayFragment : Fragment() {
    // (略)
    override fun onCreateView(
        inflater: LayoutInflater,
        container: ViewGroup?,
        savedInstanceState: Bundle?
    ): View? {
        // (略)

        // Adapterインスタンスの生成
        val adapter = WordDataAdapter()
        // Bindingを設定
        binding.wordList.adapter = adapter
        // Observerの登録
        wordDisplayViewModel.words.observe(viewLifecycleOwner, Observer {
            it?.let {
                adapter.data = it
            }
        })

        return binding.root
    }
}
リファクタリング
前章まででRecyclerViewの実装は完了……というより動くものはできましたが、ベストプラクティスに則り諸々リファクタリングしていきます。
DiffUtilの使用
これまではRecylerViewのデータに変更があった場合notifyDataSetChanged()で知得していました。
これは画面表示外のデータもすべて再描画することになり、パフォーマンスに難があるため、DiffUtilの使用を検討します。
Adapterと同じファイルの末尾にDiffUtilコールバッククラスを作成。
areItemsTheSame()、**areContentsTheSame()**メソッドをオーバーライドします。
class WordDataDiffCallback: DiffUtil.ItemCallback<WordData>() {
    override fun areItemsTheSame(oldItem: WordData, newItem: WordData): Boolean {
        return oldItem.word == newItem.word
    }

    override fun areContentsTheSame(oldItem: WordData, newItem: WordData): Boolean {
        return oldItem == newItem
    }
}
Adapterクラスのリファクタリング
AdapterクラスをListAdapterに拡張します。
DiffUtilをコンストラクタに含めているため内部の変数dataに関する記述は不要となります。
同様にgetItemCount()も不要に。
onBindViewHolder()はitemの生成にListAdapterのgetItem(position)メソッドを使用します。
ちなみにListAdapterはandroidx.recyclerview.widget.ListAdapterからインポートする点に注意。
class WordDataAdapter: ListAdapter<WordData, WordDataAdapter.ViewHolder>(WordDataDiffCallback()) {

    // RecyclerViewの所定の位置に所定のデータを表示するためのメソッド
    override fun onBindViewHolder(holder: ViewHolder, position: Int) {
        val item = getItem(position)
        holder.bind(item)
    }

    // ViewHolderを生成するメソッド
    override fun onCreateViewHolder(parent: ViewGroup, viewType: Int): ViewHolder {
        return ViewHolder.from(parent)
    }

    // ViewHolderクラス
    class ViewHolder private constructor(itemView: View) : RecyclerView.ViewHolder(itemView) {
        val wordNameText: TextView = itemView.findViewById(R.id.word_name_text)
        val wordSpeechImage: ImageView = itemView.findViewById(R.id.word_speech_image)
        val wordFavoriteImage: ImageView = itemView.findViewById(R.id.word_favorite_image)

        fun bind(item: WordData) {
            // ViewHolderの各要素に値を設定
            wordNameText.text = item.word
            wordSpeechImage.setImageResource(when(item.speech) {
                // 品詞に応じて設定するアイコンを切り替え
                "助" -> { R.drawable.speech_auxiliary }
                "動" -> { R.drawable.speech_verb }
                "不" -> { R.drawable.speech_infinitive }
                "副" -> { R.drawable.speech_adverb }
                "構" -> { R.drawable.speech_syntax }
                "接" -> { R.drawable.speech_conjunction }
                "形" -> { R.drawable.speech_adjective }
                "名" -> { R.drawable.speech_noun }
                "代" -> { R.drawable.speech_pronoun }
                "前" -> { R.drawable.speech_preposition }
                "定" -> { R.drawable.speech_template }
                else -> { R.drawable.speech_none }
            })
            wordFavoriteImage.setImageResource(when(item.favorite) {
                true -> R.drawable.favorite_on
                else -> R.drawable.favorite_off
            })
        }

        companion object {
            fun from(parent: ViewGroup): ViewHolder {
                // LayoutInflaterインスタンスを作成
                val layoutInflater = LayoutInflater.from(parent.context)
                val view = layoutInflater.inflate(R.layout.list_item, parent, false)
                return ViewHolder(view)
            }
        }
    }
}
ListAdapterの導入にあわせて_Fragment.kt_のObserverの記述も下記の通りに置き換えます。
class WordDisplayFragment : Fragment() {
    // (略)
    override fun onCreateView(
    // (略)
    ): View? {
        // (略)
        wordDisplayViewModel.words.observe(viewLifecycleOwner, Observer {
            it?.let {
                adapter.submitList(it)
            }
        })
        // (略)
    }
}
RecyclerViewのDataBinding
RecyclerViewの……正確にはビュー内部に表示するListItemに対し、DataBindingを設定していきます。
まず、ListItemのレイアウトファイルでDataBindingを有効にします。
<?xml version="1.0" encoding="utf-8"?>
<layout xmlns:android="http://schemas.android.com/apk/res/android"
    xmlns:app="http://schemas.android.com/apk/res-auto">
    <data>
        <variable
            name="word"
            type="com.warpstudio.android.recyclerviewsample.database.WordData" />
    </data>
    <!--略-->
</layout>
続いてViewHolderの生成処理も変更します。**from()**メソッドを下記の通りBindingオブジェクトを生成し、返す方式に変更します。
        companion object {
            fun from(parent: ViewGroup): ViewHolder {
                // LayoutInflaterインスタンスを作成
                val layoutInflater = LayoutInflater.from(parent.context)
                val binding = ListItemBinding.inflate(layoutInflater, parent, false)
                return ViewHolder(binding)
            }
        }
このままではエラーが出てしまうので、ViewHolderクラスの宣言を下記の通り修正します。
class ViewHolder private constructor(val binding: ListItemBinding)
     : RecyclerView.ViewHolder(binding.root) {
findViewByIdに代わり、Bindingにより下記の通りインライン化することができます。
    class ViewHolder private constructor(val binding: ListItemBinding)
        : RecyclerView.ViewHolder(binding.root) {

        fun bind(item: WordData) {
            // ViewHolderの各要素に値を設定
            binding.wordNameText.text = item.word
            binding.wordSpeechImage.setImageResource(
                when (item.speech) {
                    // 品詞に応じて設定するアイコンを切り替え
                    "助" -> { R.drawable.speech_auxiliary }
                    "動" -> { R.drawable.speech_verb }
                    "不" -> { R.drawable.speech_infinitive }
                    "副" -> { R.drawable.speech_adverb }
                    "構" -> { R.drawable.speech_syntax }
                    "接" -> { R.drawable.speech_conjunction }
                    "形" -> { R.drawable.speech_adjective }
                    "名" -> { R.drawable.speech_noun }
                    "代" -> { R.drawable.speech_pronoun }
                    "前" -> { R.drawable.speech_preposition }
                    "定" -> { R.drawable.speech_template }
                    else -> { R.drawable.speech_none }
                }
            )
            binding.wordFavoriteImage.setImageResource(
                when (item.favorite) {
                    true -> R.drawable.favorite_on
                    else -> R.drawable.favorite_off
                }
            )
        }
BindingAdapterの作成
さらにリファクタリングを勧めます。ここではBindingAdapterを作成し、Entityクラスとレイアウトの画面部品を直接DataBindingで結びつけます。
まず新たに_BindingUtil.kt_というクラスを作成します(クラス名は何でもいいです)。
そしてpackage以外を全て削除し、表示先の画面部品ごとに*@BindingAdapter*のアノテーションを付与した画面部品の拡張関数を作成します。
全容は下記の通りです。
@BindingAdapter("wordNameText")
fun TextView.setWordNameText(item: WordData) {
    text = item.word
}

@BindingAdapter("speechImage")
fun ImageView.setSpeechImage(item: WordData) {
    setImageResource(
        when (item.speech) {
            // 品詞に応じて設定するアイコンを切り替え
            "助" -> { R.drawable.speech_auxiliary }
            "動" -> { R.drawable.speech_verb }
            "不" -> { R.drawable.speech_infinitive }
            "副" -> { R.drawable.speech_adverb }
            "構" -> { R.drawable.speech_syntax }
            "接" -> { R.drawable.speech_conjunction }
            "形" -> { R.drawable.speech_adjective }
            "名" -> { R.drawable.speech_noun }
            "代" -> { R.drawable.speech_pronoun }
            "前" -> { R.drawable.speech_preposition }
            "定" -> { R.drawable.speech_template }
            else -> { R.drawable.speech_none }
        }
    )
}

@BindingAdapter("favoriteImage")
fun ImageView.setFavoriteImage(item: WordData) {
    setImageResource(
        when (item.favorite) {
            true -> R.drawable.favorite_on
            else -> R.drawable.favorite_off
        }
    )
}
続いてListItemの画面部品にBindingを設定します。
        <TextView
            android:id="@+id/word_name_text"
            <!--略-->
            app:wordNameText="@{word}"/>

        <ImageView
            android:id="@+id/word_speech_image"
            <!--略-->
            app:speechImage="@{word}"/>

        <ImageView
            android:id="@+id/word_favorite_image"
            <!--略-->
            app:favoriteImage="@{word}"/>
最後に、ViewHolderクラスの**bind()**メソッドで明示的なBindingが不要となったので、下記の通り内容を改修します。
    class ViewHolder private constructor(val binding: ListItemBinding)
        : RecyclerView.ViewHolder(binding.root) {

        fun bind(item: WordData) {
            binding.word = item
            binding.executePendingBindings()
        }
        // (略)
    }
Recap
今回は以上。
あんまりRecyclerViewらしさは出せていませんが、実際には画面外はデータの描画処理を行っていないなど、裏側でのメリットは既にあったりもします。
後半へ続く。