はじめに
RecyclerView の Adapter の実装の部分を楽にしてくれるライブラリの Epoxy ですが、
どうやら Sticky Header にも対応してくれているらしいです。今回は Epoxy で Sticky Header をどのような感じで利用できるのか紹介したいと思います。
準備する
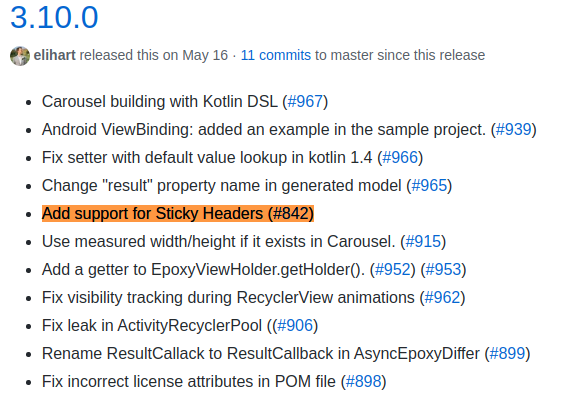
Sticky Header が利用できるようになったのは 3.10.0 からみたいです。なので次の内容を build.gradle に記述して、3.10.0 以上の Epoxy を使えるようにします。
// kapt 有効化
apply plugin: 'kotlin-kapt'

android {
      ︙
    // databinding 有効化
    dataBinding {
        enabled = true
    }
      ︙
}

dependencies {
      ︙
    def epoxy_version = "3.11.0"
    implementation "com.airbnb.android:epoxy:$epoxy_version"
    implementation "com.airbnb.android:epoxy-databinding:${epoxy_version}"
    kapt "com.airbnb.android:epoxy-processor:$epoxy_version"
      ︙
}
実装する
EpoxyModel を作成する
まずは EpoxyModel を作成していきます。今回は StickyHeader になる HeaderLayout と StickyHeader にならない ContentLayout と分けて作成していきます。
HeaderLayout
<?xml version="1.0" encoding="utf-8"?>
<layout xmlns:android="http://schemas.android.com/apk/res/android"
    xmlns:tools="http://schemas.android.com/tools">

    <data>

        <variable
            name="title"
            type="String" />
    </data>

    <androidx.appcompat.widget.LinearLayoutCompat
        android:layout_width="match_parent"
        android:layout_height="wrap_content">

        <TextView
            android:layout_width="match_parent"
            android:layout_height="wrap_content"
            android:text="@{title}"
            android:textColor="@android:color/white"
            android:textSize="32sp"
            android:background="@color/colorPrimary"
            tools:text="Sticky Header" />

    </androidx.appcompat.widget.LinearLayoutCompat>
</layout>
ContentLayout
<?xml version="1.0" encoding="utf-8"?>
<layout xmlns:android="http://schemas.android.com/apk/res/android"
    xmlns:tools="http://schemas.android.com/tools">

    <data>

        <variable
            name="title"
            type="String" />
    </data>

    <androidx.appcompat.widget.LinearLayoutCompat
        android:layout_width="match_parent"
        android:layout_height="wrap_content">

        <TextView
            android:layout_width="match_parent"
            android:layout_height="wrap_content"
            android:text="@{title}"
            tools:text="Content" />

    </androidx.appcompat.widget.LinearLayoutCompat>
</layout>
package-info.java
そしてこのままだと Epoxy は EpoxyModel を生成してくれません。ですので package-info.java を作成して Epoxy が EpoxyModel を生成してくれるようにしてやります。
@EpoxyDataBindingLayouts({R.layout.content_layout, R.layout.header_layout})
package jp.kaleidot725.sample;
import com.airbnb.epoxy.EpoxyDataBindingLayouts;
EpoxyController を作成する
次に EpoxyController を作成してやります、今回は単純に先程作成した HeaderLayout と ContentLayout を交互に表示する StickyHeaderController というクラスを作成してやります。
data class Content(val uuid: String, val value: String)
data class Header(val uuid: String,val value: String)

class StickyHeaderController : Typed2EpoxyController<List<Header>, List<Content>>() {
    override fun buildModels(headers: List<Header>, contents: List<Content>) {
        headers.forEach { header ->
            headerLayout {
                id(header.uuid)
                title(header.value)
            }

            contents.forEach { content ->
                contentLayout {
                    id(content.uuid)
                    title(content.value)
                }
            }
        }
    }
}
EpoxyRecyclerView をセットアップする
あとは EpoxyRecyclerView を定義してセットアップしてやります。
MainActivity
<?xml version="1.0" encoding="utf-8"?>
<androidx.constraintlayout.widget.ConstraintLayout xmlns:android="http://schemas.android.com/apk/res/android"
    xmlns:app="http://schemas.android.com/apk/res-auto"
    xmlns:tools="http://schemas.android.com/tools"
    android:layout_width="match_parent"
    android:layout_height="match_parent"
    tools:context=".MainActivity">

    <com.airbnb.epoxy.EpoxyRecyclerView
        android:id="@+id/epoxy_recycler_view"
        android:layout_width="match_parent"
        android:layout_height="match_parent"/>

</androidx.constraintlayout.widget.ConstraintLayout>
class MainActivity : AppCompatActivity() {

    override fun onCreate(savedInstanceState: Bundle?) {
        super.onCreate(savedInstanceState)
        setContentView(R.layout.activity_main)

        val stickyHeaderController = StickyHeaderController()
        epoxy_recycler_view.adapter = stickyHeaderController.adapter
        stickyHeaderController.setData(createHeaders(10), createContents(100))
    }

    private fun randomUUIDString(): String {
        return UUID.randomUUID().toString()
    }

    private fun createHeaders(max: Long): List<Header> {
        return (0..max).map { count -> Header(randomUUIDString(), "Header $count") }
    }

    private fun createContents(max: Long): List<Content> {
        return (0..max).map { count -> Content(randomUUIDString(), "Content $count") }
    }
}
ここまで実装したものだと通常の Epoxy と同じで StickyHeader の動作になりません。 StickyHeader として使うには次の実装を追加してやる必要があります。
StickyHeader として動作するようにする
StickyHeader として動作させるには次の 2つの実装を追加してやります。
- EpoxyRecyclerView の layoutManager として StickyHeaderLinearLayoutManager をセットしてやる
- EpoxyRecyclerView の adpter としてセットされる EpoxyController の isStickyHeader を override してやる
EpoxyRecyclerView の layoutManager として StickyHeaderLinearLayoutManager をセットしてやる
StickyHeader を利用するにはまず RecyclerView の layoutManager に StickyHeaderLinearLayoutManager をセットしてやる必要があります。この StickyHeaderLinearLayoutManager が StickyHeader である EpoxyModel を見つけてくれるようになっていて、RecyclerView のスクロール状況に応じて StickyHeader を貼り付けてくれます。
class MainActivity : AppCompatActivity() {
    override fun onCreate(savedInstanceState: Bundle?) {
        super.onCreate(savedInstanceState)
        setContentView(R.layout.activity_main)

        val stickyHeaderController = StickyHeaderController()
        epoxy_recycler_view.adapter = stickyHeaderController.adapter
        epoxy_recycler_view.layoutManager = StickyHeaderLinearLayoutManager(applicationContext)
        stickyHeaderController.setData(createHeaders(10), createContents(100))
    }
}
EpoxyRecyclerView の adpter としてセットされる EpoxyController の isStickyHeader を override してやる
StickyHeaderLinearLayoutManager では EpoxyController の isStickyHeader を利用して StickyHeader を識別するような仕組みになっています。ですので isStickyHeader を override して自身が定義した EpoxyModel を StickyHeader として認識されるようにします。(isStickyHeader の引数として Position が渡されます、なので Position にある EpoxyModel のクラスを取得して、StickyHeaderとして扱いたいクラスであるか判定してやります。)
class StickyHeaderController : Typed2EpoxyController<List<Header>, List<Content>>() {
        ︙
    override fun isStickyHeader(position: Int): Boolean {
        return adapter.getModelAtPosition(position)::class == HeaderLayoutBindingModel_::class
    }
}
この実装を加えると EpoxyModel が StickyHeader として扱われ RecyclerView に StickyHeader が表示されるようになります。
おわりに
という感じで Epoxy でも StickyHeader が使えるようになっているらしいです。使い方をまとめると次のようになりますね。
- 通常の利用方法と同じで EpoxyModel と EpoxyController を実装してやる
- RecyclerView の adapter に EpoxyController.Adapter、layoutManager に StickyHeaderLinearLayoutManager をセットしてやる
- StickyHeaderLinearLayoutManager が StickyHeader である EpoxyModel を識別できるように EpoxyController.isStickyHeader を実装してやる。
参考文献
StickyHeader は現時点(2020/07/12)でまだドキュメントが整備されていないので、詳しく知りたい方は次のリンクを見てみると良いかなと思います。


