##0. はじめに
前回(その② 静止画コラ作成)からの続きです。
前回行った静止画の顔へのオーバレイを動画に適用します。
以下のサイトを参考にしました。
【シリーズ】「pythonとOpenCVを用いたCVプログラミング 」第9回: OpenCV-python② 動画の入出力とhighGUIでのマウス、キーボードコールバック
##1. 動画の入出力
まず始めに動画の入出力をしてみます。
単純に動画を読み込んでそのまま出力するだけです。
以下がコードです
#coding=utf-8

import cv2

def export_movie():


    # 入力する動画と出力パスを指定。
    target = "target/test_input.mp4"
    result = "result/test_output.m4v"

    # 動画の読み込みと動画情報の取得
    movie = cv2.VideoCapture(target)
    fps    = movie.get(cv2.CAP_PROP_FPS)
    height = movie.get(cv2.CAP_PROP_FRAME_HEIGHT)
    width  = movie.get(cv2.CAP_PROP_FRAME_WIDTH)

    # 形式はMP4Vを指定
    fourcc = cv2.VideoWriter_fourcc('m', 'p', '4', 'v')

    # 出力先のファイルを開く
    out = cv2.VideoWriter(result, int(fourcc), fps, (int(width), int(height)))

    # 最初の1フレームを読み込む
    if movie.isOpened() == True:
        ret,frame = movie.read()
    else:
        ret = False

    # フレームの読み込みに成功している間フレームを書き出し続ける
    while ret:

        # 読み込んだフレームを書き込み
        out.write(frame)

        # 次のフレームを読み込み
        ret,frame = movie.read()


if __name__ == '__main__':
    export_movie()
超簡単
##2. 結果
容量が3倍近くなりましたが出力された動画を再生できました。
この辺はきちんとコーデックを導入しなければならないようです。
あと音は入っていません。
##3. 雑コラ動画作成
動画の入出力には成功したのでいよいよ雑コラ動画を作成します。
と言っても動画の出力前に顔認識、オーバレイをするだけです。
動画ファイルから読み込んだフレームは画像ファイルと同じように扱えます。
あと、overlayOnPart関数の最後が戻り値の画像にアルファチャンネル(透過)を含まないように変わっています。
以下、コードです。
#coding=utf-8

import cv2
import datetime
import numpy as np
from PIL import Image

def overlay_movie():

    # 入力する動画と出力パスを指定。
    target = "target/test_input.mp4"
    result = "result/test_output.m4v"  #.m4vにしないとエラーが出る

    # 動画の読み込みと動画情報の取得
    movie = cv2.VideoCapture(target)
    fps    = movie.get(cv2.CAP_PROP_FPS)
    height = movie.get(cv2.CAP_PROP_FRAME_HEIGHT)
    width  = movie.get(cv2.CAP_PROP_FRAME_WIDTH)

    # 形式はMP4Vを指定
    fourcc = cv2.VideoWriter_fourcc('m', 'p', '4', 'v')

    # 出力先のファイルを開く
    out = cv2.VideoWriter(result, int(fourcc), fps, (int(width), int(height)))

    # カスケード分類器の特徴量を取得する
    cascade_path = "haarcascades/haarcascade_frontalface_alt.xml"
    cascade = cv2.CascadeClassifier(cascade_path)

    # オーバーレイ画像の読み込み
    ol_imgae_path = "target/warai_otoko.png"
    ol_image = cv2.imread(ol_imgae_path,cv2.IMREAD_UNCHANGED)

    # 最初の1フレームを読み込む
    if movie.isOpened() == True:
        ret,frame = movie.read()
    else:
        ret = False

    # フレームの読み込みに成功している間フレームを書き出し続ける
    while ret:

        # グレースケールに変換
        frame_gray = cv2.cvtColor(frame, cv2.COLOR_BGR2GRAY)

        # 顔認識の実行
        facerecog = cascade.detectMultiScale(frame_gray, scaleFactor=1.1, minNeighbors=1, minSize=(1, 1))

        if len(facerecog) > 0:
            # 認識した顔に画像を上乗せする
            for rect in facerecog:

                # 認識範囲にあわせて画像をリサイズ
                resized_ol_image = resize_image(ol_image, rect[2], rect[3])

                # オーバレイ画像の作成
                frame = overlayOnPart(frame, resized_ol_image, rect[0],rect[1])

        # 読み込んだフレームを書き込み
        out.write(frame)

        # 次のフレームを読み込み
        ret,frame = movie.read()

        # 経過を確認するために100フレームごとに経過を出力
        if movie.get(cv2.CAP_PROP_POS_FRAMES)%100 == 0:
            date = datetime.datetime.now().strftime("%Y/%m/%d %H:%M:%S")
            print(date + '  現在フレーム数:'+str(int(movie.get(cv2.CAP_PROP_POS_FRAMES))))

        # 長いので途中のフレームまでで終了する
#        if movie.get(cv2.CAP_PROP_POS_FRAMES) > 1000:
#            break

    print("完了")


def resize_image(image, height, width):

    # 元々のサイズを取得
    org_height, org_width = image.shape[:2]

    # 大きい方のサイズに合わせて縮小
    if float(height)/org_height > float(width)/org_width:
        ratio = float(height)/org_height
    else:
        ratio = float(width)/org_width

    resized = cv2.resize(image,(int(org_height*ratio),int(org_width*ratio)))

    return resized

# PILを使って画像を合成
def overlayOnPart(src_image, overlay_image, posX, posY):

    # オーバレイ画像のサイズを取得
    ol_height, ol_width = overlay_image.shape[:2]

    # OpenCVの画像データをPILに変換
    # BGRAからRGBAへ変換
    src_image_RGBA = cv2.cvtColor(src_image, cv2.COLOR_BGR2RGB)
    overlay_image_RGBA = cv2.cvtColor(overlay_image, cv2.COLOR_BGRA2RGBA)

    # PILに変換
    src_image_PIL=Image.fromarray(src_image_RGBA)
    overlay_image_PIL=Image.fromarray(overlay_image_RGBA)

    # 合成のため、RGBAモードに変更
    src_image_PIL = src_image_PIL.convert('RGBA')
    overlay_image_PIL = overlay_image_PIL.convert('RGBA')

    # 同じ大きさの透過キャンパスを用意
    tmp = Image.new('RGBA', src_image_PIL.size, (255, 255,255, 0))
    # 用意したキャンパスに上書き
    tmp.paste(overlay_image_PIL, (posX, posY), overlay_image_PIL)
    # オリジナルとキャンパスを合成して保存
    result = Image.alpha_composite(src_image_PIL, tmp)

    # COLOR_RGBA2BGRA から COLOR_RGBA2BGRに変更。アルファチャンネルを含んでいるとうまく動画に出力されない。
    return  cv2.cvtColor(np.asarray(result), cv2.COLOR_RGBA2BGR)

if __name__ == '__main__':
    overlay_movie()
だんだん長くなってきました。
##4. 結果
2016/03/11 21:57:04現在フレーム数:100.0
2016/03/11 21:57:16現在フレーム数:200.0
2016/03/11 21:57:28現在フレーム数:300.0
・
・
・
2016/03/11 22:08:59現在フレーム数:7100.0
完了
フレームサイズ718×480、24fps、5:00の動画に対してCore i5-4670 3.40GHz メモリ16GBの環境で実行しました。
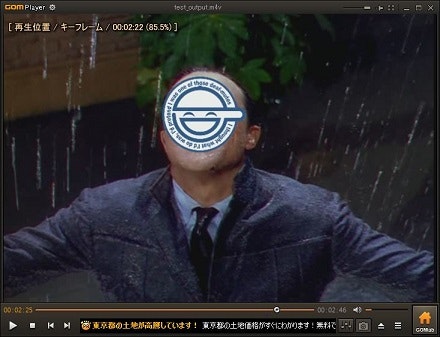
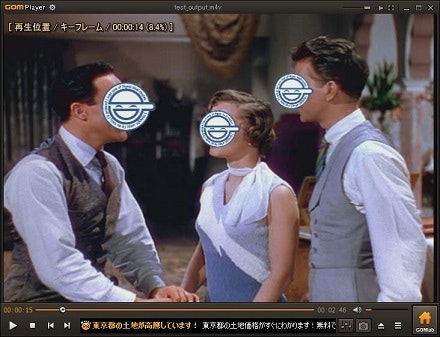
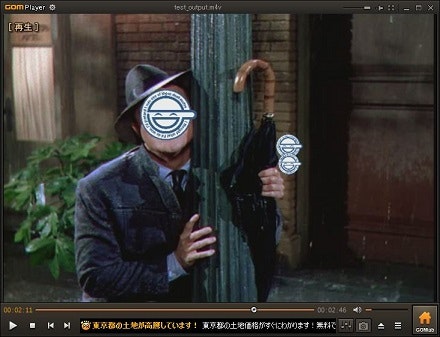
結構時間がかかりましたが、雑コラ動画を出力できました。

##5. 最後に
が、これでは不完全です。
複数の顔があると全てに上書きしたり、

次回はこの問題の解決を目指します。
Python + OpenCV で雑コラ動画を作成する④ 課題への対処
