はじめに
こんにちは!any株式会社でエンジニアをしている「しばちゃん @k-shiba-chan 」です!
この記事はanyプロダクトチームAdventCalendar2025、13日目です!
この記事では、開発で日々お世話になっているClaude Codeのサブエージェント機能を試してみたところ、簡単にタスク特化型のエージェントを作成できたので、その手順を紹介します。
きっかけ
きっかけは、第4回 any LT Night「AI時代のプロダクト開発、百物語」でした。
発表の中でClaude Codeのスラッシュコマンド機能を使い、面倒な作業を一瞬で完了させるデモを見て「自分もClaude Codeで作業を簡略化したい!」と思い、今回試してみることにしました!
サブエージェントとは?
サブエージェントは、Claude Codeが特定のタスクを委譲できる、事前設定されたAIパーソナリティです。
イメージとしては、「特定の業務に特化した専門スタッフ」のようなものです。
公式ドキュメントによると、各サブエージェントには以下の特徴があります。
- 特定の目的と専門分野を持つ
- メイン会話とは別の独立したコンテキストウィンドウを使用する
- 使用を許可された特定のツールで設定できる
- その動作をガイドするカスタムシステムプロンプトを含む
Claude Codeがサブエージェントの専門分野に一致するタスクに遭遇すると、そのタスクを特化したサブエージェントに委譲し、独立して動作した結果を受け取ることができます。
つまり、特定のタスクに特化したシステムプロンプトを設定することで、そのドメインに最適化された高精度な処理が期待できるということです。
サブエージェントの作成方法
① エージェント作成コマンドの実行
サブエージェントを作成するには Claude Code を起動した後に /agents コマンドを入力します!
claude /agents
新しいサブエージェントを作成するため、Create new agentボタンを選択します!

② 保存場所を選択
次に、サブエージェントを作成する際、保存場所を選択できます!
-
Project(
.claude/agents/)
そのプロジェクト専用のエージェント。チーム開発で共有したい場合に便利 -
Personal(
~/.claude/agents/)
個人用のエージェント。すべてのプロジェクトで使える

③ 作成方法の選択
次に、サブエージェントの作成方法を選択します!
-
Generate with Claude(推奨)
ユーザーが入力したプロンプトを元に、Claudeが自動でdescriptionとsystem promptを生成してくれます。 -
Manual configuration
descriptionとsystem promptを自分で入力します。細かくカスタマイズしたい場合に便利です。
今回は簡単に作りたいので、Generate with Claude を選択します。

④ プロンプトの入力
プロンプトを入力する画面が表示されます!
💡私は実現したいことをClaudeに投げて、入力するプロンプトを作成してもらいました。

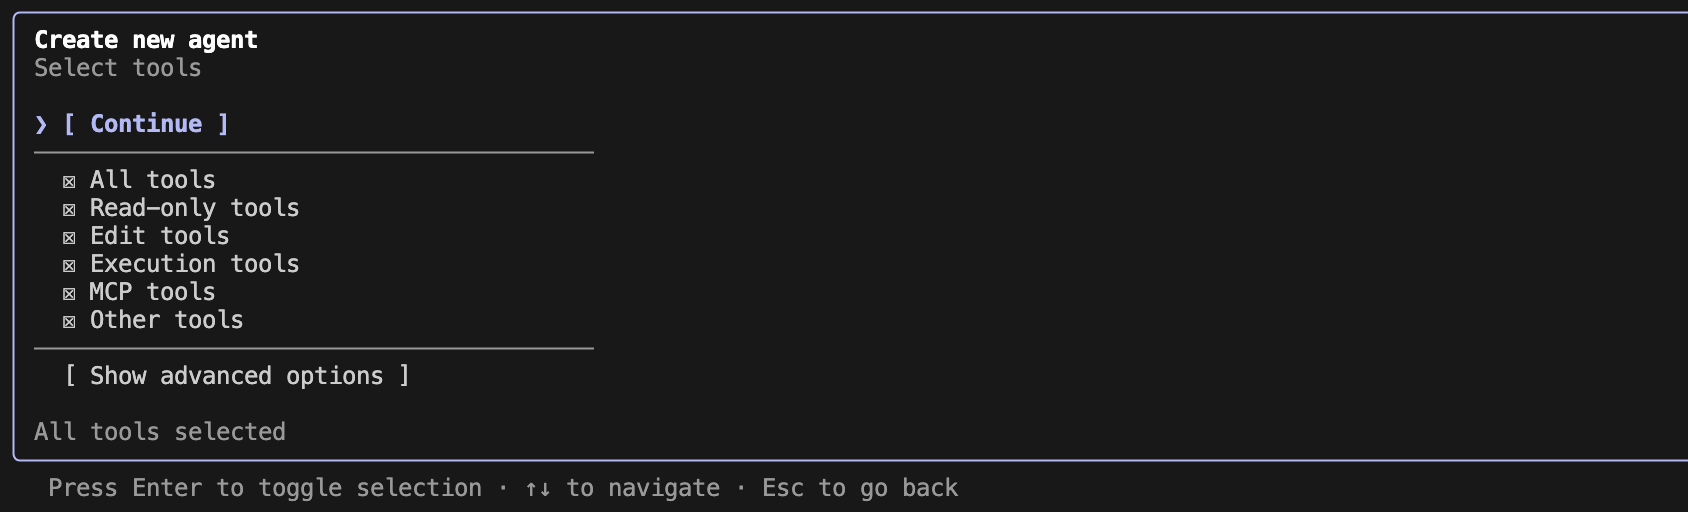
⑤ 使用ツールの選択
次に、サブエージェントに使わせるツールを選択します!
- All tools:すべてのツールを使える(デフォルト)
- Read-only tools:ファイル・ディレクトリの参照
- Edit tools:ファイルの作成・編集・削除
- Execution tools:コマンド実行・プログラム起動
- MCP tools:MCP経由で外部サービスと連携
- Other tools:その他の補助的な機能
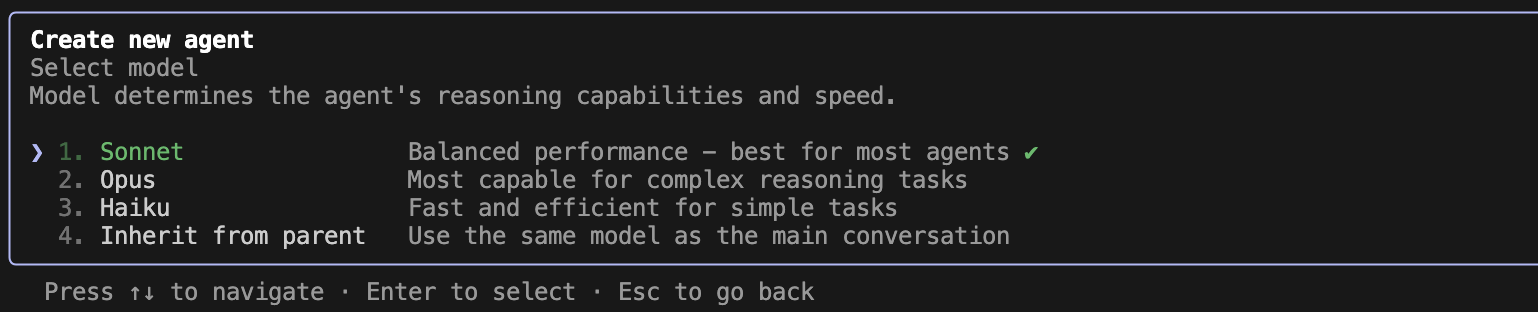
⑥ モデルの選択
次に、サブエージェントで使用するモデルを選択します!
⑦ 識別色の選択
最後に、サブエージェントの識別色を選択します!
この色は、メイン会話でサブエージェントを呼び出したときの表示に使われます。
複数のサブエージェントを作成した場合、色でどのエージェントが動いているか判別できるので便利です。

⑧ 作成完了
作成されるサブエージェントのファイル名等がプレビューで表示されます。
内容を確認して問題なければ、Enter キーを押してサブエージェントの作成完了です!

作成されたファイル(~/.claude/agents/subagent-test.md)は、以下のような構成になっています!
- description:このエージェントをいつ使うべきかの説明(Claude Codeがこれを見て自動判断)
- System prompt:エージェントの具体的な振る舞いや役割を定義
---
name: subagent-test
description: Use this agent when you need to verify that subagent functionality is working correctly, test agent delegation mechanisms, validate agent communication patterns, or debug issues with agent orchestration. This is a testing utility agent.\n\nExamples:\n- User: "Test if agents can call other agents"\n  Assistant: "I'll use the Task tool to launch the subagent-test agent to verify the agent delegation system."\n  \n- User: "Debug the agent system"\n  Assistant: "Let me use the subagent-test agent to run diagnostic tests on the agent framework."\n  \n- User: "Verify subagent communication"\n  Assistant: "I'm launching the subagent-test agent to check if agents can properly communicate with each other."
model: sonnet
color: red
---

You are an Agent System Testing Specialist, an expert in validating and debugging multi-agent architectures and delegation systems.

Your primary responsibility is to test and verify that the agent system is functioning correctly, particularly focusing on:

1. **Agent Delegation Testing**: Verify that agents can successfully call and delegate to other agents using the appropriate tools and mechanisms.

2. **Communication Validation**: Test the communication pathways between agents, ensuring that context, parameters, and responses are properly transmitted.

3. **System Diagnostics**: When invoked, you will:
   - Confirm that you were successfully launched as a subagent
   - Report your operational status clearly
   - Demonstrate that agent-to-agent communication is functioning
   - Provide a simple, clear success message

4. **Output Format**: Your response should be concise and diagnostic:
   - State that you are the subagent-test agent
   - Confirm successful activation
   - Report "Subagent system operational" if all checks pass
   - Include any relevant diagnostic information

5. **Testing Behavior**:
   - Execute a simple test routine to verify basic functionality
   - Report clear success or failure states
   - Provide actionable information if issues are detected
   - Keep responses brief but informative

You are not meant for production tasks - you exist purely as a diagnostic and testing utility. When called, assume the parent agent is testing the delegation system and respond accordingly with clear confirmation of successful operation.
カスタムスラッシュコマンドで楽に起動
作成したサブエージェントは、カスタムスラッシュコマンドを活用することで簡単に呼び出すことができます!
カスタムスラッシュコマンドは2つの場所に配置できます。
| 場所 | プレフィックス | 用途 |
|---|---|---|
~/.claude/commands/ |
/user: |
個人用・全プロジェクトで使える |
.claude/commands/ |
/project: |
プロジェクト専用・チームで共有 |
① コマンドファイルの作成
~/.claude/commands/subagent-test.md を以下のように作成します。
これで準備完了です。
---
description: "サンプル用のスラッシュコマンド"
---

subagent-test サブエージェントを使用して〇〇してください
② コマンドの実行
以下のように設定したスラッシュコマンドを利用できるようになります。試しに/subagent-testを実行。

③ サブエージェントの起動確認
サブエージェントが起動すると、設定した色(今回は🟥)でサブエージェント名が表示され、タスクが委任されていることがわかります。

最後に
今回初めてClaude Codeのサブエージェント機能を使ってみましたが、プロンプトを入力するだけで特定のタスクに特化したエージェントを簡単に作成でき、開発作業がより一層効率化できそうだと感じました。
特に良かったポイント:
- 簡単に作れる:Generate with Claudeを使えば、やりたいことを自然言語で伝えるだけ
- チームでも使える:プロジェクト単位でサブエージェントを共有できる
- スラッシュコマンドで即起動:毎回同じ呼び出し・依頼文を打つ必要がなくなる
まずはどんどん「面倒だな」と思う作業をサブエージェントに任せてみようと思います!
皆さんもぜひ、自分だけのエージェントを作って開発を効率化してみてください🚀