皆さんこんにちは、本格的な勉強会に参加したら???になった私です。
今までの開発記録はこちらへ
胡蝶蘭を捨てるくらいならワイが欲しいので、サービス開発する編
公式ドキュメントの言う通り、パッケージをインストールされたら、Inertia.jsが導入されて???になった編
マルチログインを作ってみた編
デザインをtailwindcssに丸投げする編
いよいよユーザー画面を作る
今回の目的はユーザーのプロフィール画面
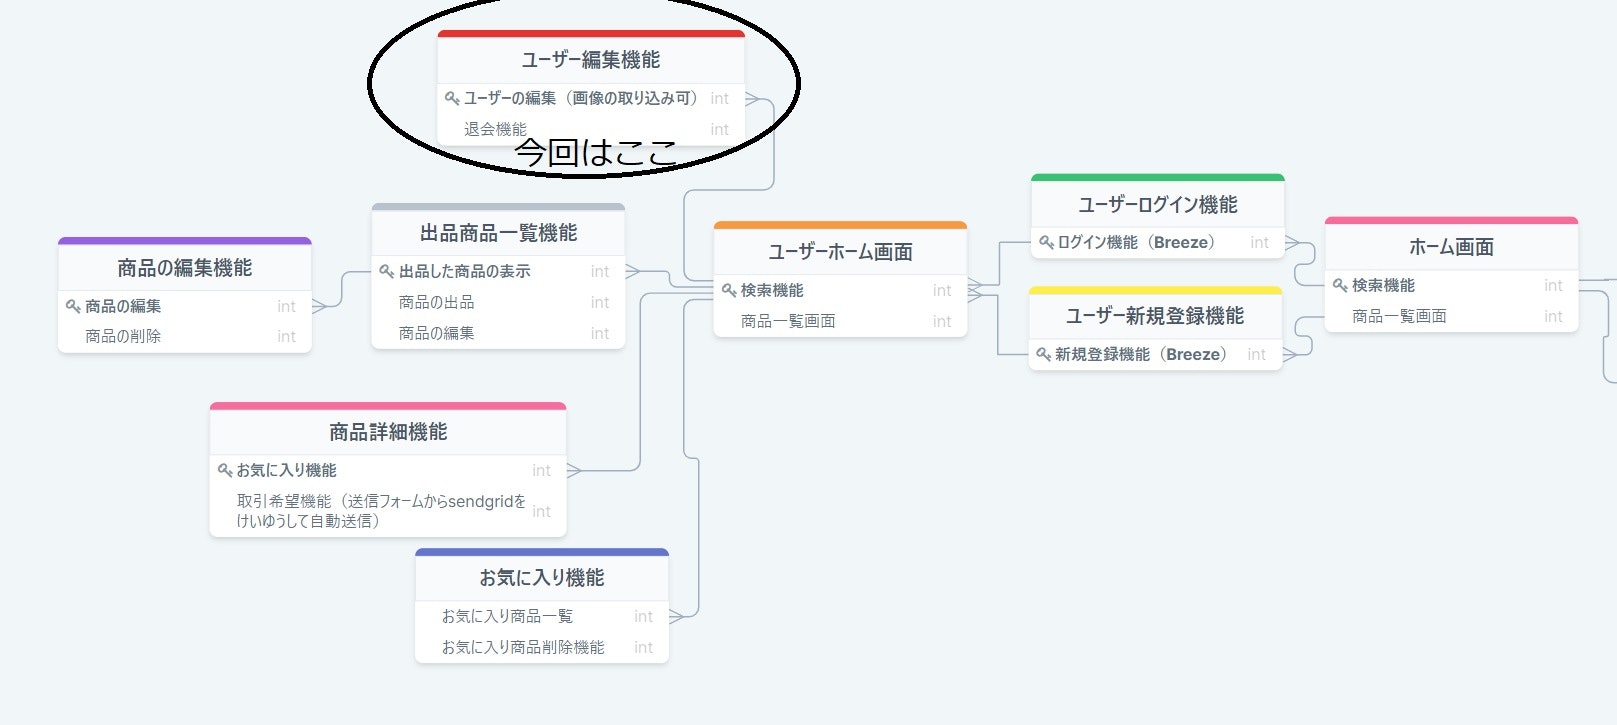
そのために必要なものは
- ユーザー詳細表示機能
- ユーザー編集機能(Adminでやったひな型を使いまわす)
- 画像取り込み機能
- 退会機能
まずはユーザー詳細機能を作っていく
ルートはresourceを利用してもよかったが今回は普通に作成
Route::prefix('profiles')->middleware(['auth:users'])->group(function () {
    Route::get('show/{profile}', [ProfileController::class, 'show'])->name('profiles.show');
    Route::get('edit/{profile}', [ProfileController::class, 'edit'])->name('profiles.edit');
    Route::post('update/{profile}', [ProfileController::class, 'update'])->name('profiles.update');
    Route::get('destroy/{profile}', [ProfileController::class, 'destroy'])->name('profiles.destroy');
    Route::post('destroy/{profile}', [ProfileController::class, 'destroy'])->name('profiles.destroy');
});
コントローラー側
namespace App\Http\Controllers\User;

use App\Http\Controllers\Controller;
use Illuminate\Http\Request;
use App\Models\User;
use App\Models\Review;
use App\Models\Product;
use Illuminate\Support\Facades\DB;
use Illuminate\Support\Facades\Hash;
use Illuminate\Support\Facades\Auth;
use App\Http\Requests\UploadImageRequest;
use App\Services\ImageService;
use Illuminate\Validation\Rules\Password;

class ProfileController extends Controller
{

    public function show($id)
    {
        $userProfile=User::findOrFail($id);
        return view('user.profiles.show', compact('userProfile'));
    }

    public function edit(Request $request, $id) //リクエスト入れる
    {
        $id=$request->route()->parameter('profile');
        if (!is_null($id)) {
            $userId=User::findOrFail($id)->id;
            $currentUserId=(int)$userId;
            $authId=Auth::id();
            if ($currentUserId!==$authId) {
                abort(404);
            }
        }
        $userProfile = User::findOrFail($id);

        return view('user.profiles.edit', compact('userProfile'));
    }

    public function update(UploadImageRequest $request, $id)
    {
        $id=$request->route()->parameter('profile');
        if (!is_null($id)) {
            $userId=User::findOrFail($id)->id;
            $currentUserId=(int)$userId;
            $authId=Auth::id();
            if ($currentUserId!==$authId) {
                abort(404);
            }
        }
        $request->validate([
            'name' => ['required', 'string', 'max:255'],
            'comment' => [ 'string', 'max:200'],
            'password' => ['required', 'confirmed','string', Password::defaults()],
            'prefecture' => ['string', 'max:50'],
            'comment' => ['string', 'max:100'],
        ]);
        $userProfile = User::findOrFail($id);
        $imageFile=$request->image;
        if (!is_null($imageFile)&&$imageFile->isValid()) {
            // Storage::putFile('public/profiles', $imageFile);//リサイズなし
            $fileNameToStore=ImageService::upload($imageFile, 'profiles');
        }
        $user=User::findOrFail($id);
        $user->name=$request->name;
        $user->comment=$request->comment;
        $user->prefecture=$request->prefecture;
        $user->password=Hash::make($request->password);
        if (!is_null($imageFile)&&$imageFile->isValid()) {
            $user->img=$fileNameToStore;
        }

        $user->save();

        return redirect()
        ->route('user.profiles.show', ['profile' => $userProfile->id])
    }

    public function destroy(Request $request,$id)
    {
        $this->middleware('auth:users');
        //直接別ユーザーにアクセスするとはじくシステム
        $this->middleware(function ($request, $next) {
            $id=$request->route()->parameter('profile');
            if (!is_null($id)) {
                $userId=User::findOrFail($id)->id;
                $currentUserId=(int)$userId;
                $authId=Auth::id();
                if ($currentUserId!==$authId) {
                    abort(404);
                }
            }
            return $next($request);
        });
        try {
            DB::transaction(function () use ($id) {
                Product::select('id', )
                ->where('user_id', Auth::id())->delete();

                User::select('id', 'name')
                ->where('id', Auth::id())->delete();
            }, 2); //試行する回数
        } catch (Throwable $e) {
            Log::error($e);
            throw $e;
        }
        Auth::guard('users')->logout();
        return redirect('/');
    }
}
Adminのコントローラーの使いまわしだけれど、ところどころそうではない部分があるので一つずつ説明
showメゾット
Userテーブルから、入力されたidの情報を取り出して終わり
editメゾット
ユーザー情報詳細はほかの人からも見られてもいいけれど、ユーザー編集、削除は本人以外からのアクセスをはじくようにする。
最初は、__constructに記述したが、それだとユーザー情報表示も見られなくなっちゃうので、edit,update,deleteのメゾットに書いたのがこれ。
       $id=$request->route()->parameter('profile');
        if (!is_null($id)) {
            $userId=User::findOrFail($id)->id;
            $currentUserId=(int)$userId;
            $authId=Auth::id();
            if ($currentUserId!==$authId) {
                abort(404);
            }
        }
このコードが何を示しているかというと、ユーザーがアクセスしようとしているIDとログイン中のIDを照合して一致していれば、次の処理進み、そうでない場合は404ではじき返す仕組みです。
もう少し中身を見ていくと
まずはddヘルパーを利用して、$request->route()を入力すると。
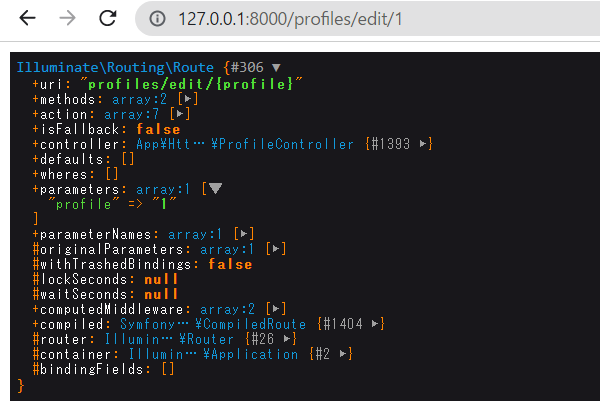
このような画面が出ます
parametersのところに"1"がありますね。
$request->route()->parameter('profile')で"1"を取得しましょう。
その後、Userテーブルから、そのidを取得
ただし、このidは文字列で、照合したいAuth::id()は数字だから一致しません。
そのためidを数字に変換
あとはif文で照合させるだけです
画像の取り込み
webサイトには必須な機能ですね!
ただ画像をアップロードして表示するのだったら、素でもできますが、

と怒られそうなので、画像のリサイズをするためにInterventionImageを利用します
composer require intervention/image
インストールが終わったらconfig/app.phpへ
    'providers' => [
        Intervention\Image\ImageServiceProvider::class,
    ],

    'aliases' => [
        'InterventionImage'=>Intervention\Image\Facades\Image::class
    ],
を追記して php artisan cache:clearを押しましょう。
あとはuse InterventionImageで利用できる。
このサイトでも、ユーザーの画像、商品画像には画像をアップロードさせるシステムを作る必要がある。
そうなると2つの問題点が出てくる
- 画像名が重複せずにどうやって保存するか
- どこに保存するか
一つ目の問題について、アップロードした画像名をランダムに変更するプログラムを作る
二つ目の問題については、laravelのstorageフォルダに保存する
コードが多くなるのと商品投稿のコントローラーとも共有したいので、UploadImageRequestとImageServiceに切り分けて作成
    public function authorize()
    {
        return true; //falseになっているのでtrueに切り替える
    }
    public function rules()
    {
        return [
            'image' => 'image|mimes:jpg,jpeg,png|max:2048',
        ];
    }
public function message()
    {
        return [
            'image' => '指定されたファイルが画像ではありません',
            'mines' => '指定された拡張子(jpg/jpeg/png)ではありません',
            'max' => 'ファイルサイズは2MB以内にしてください',
        ];
    }
class ImageService
{
    public static function upload($imageFile, $folderName)
    {
            $fileName=uniqid(rand().'_'); //ファイル名をランダムに生成
            $extension=$imageFile->extension(); //拡張子を判別
            $fileNameToStore=$fileName.'.'.$extension; //上二つの文字列をつなげる
            $resizedImage=InterventionImage::make($imageFile)->resize(400, 400)->encode();
            //InterventionImageがリサイズしてくれる
            Storage::put('public/'.$folderName.'/'.$fileNameToStore, $resizedImage);
            //storageフォルダのpublicフォルダに$folderNameを作成(今回はProfiles)して保存
        return $fileNameToStore;
    }
}
準備は整ったのでコントローラーにも追記
        if (!is_null($imageFile)&&$imageFile->isValid()) {
           $fileNameToStore=ImageService::upload($imageFile, 'profiles');//ImageServiceに画像ファイルとフォルダ名の情報を送る
        }

        if (!is_null($imageFile)&&$imageFile->isValid()) {
            $user->img=$fileNameToStore; //データベースに生成されたランダム名を書き込む
        }
これで画像の保存はOKです

よし、これで大量の画像があっても重複せずに処理ができるぞい!
herokuに上げても大丈夫や!

あのお・・・herokuのストレージの画像は一定時間で消えますよ

えええええええ!!
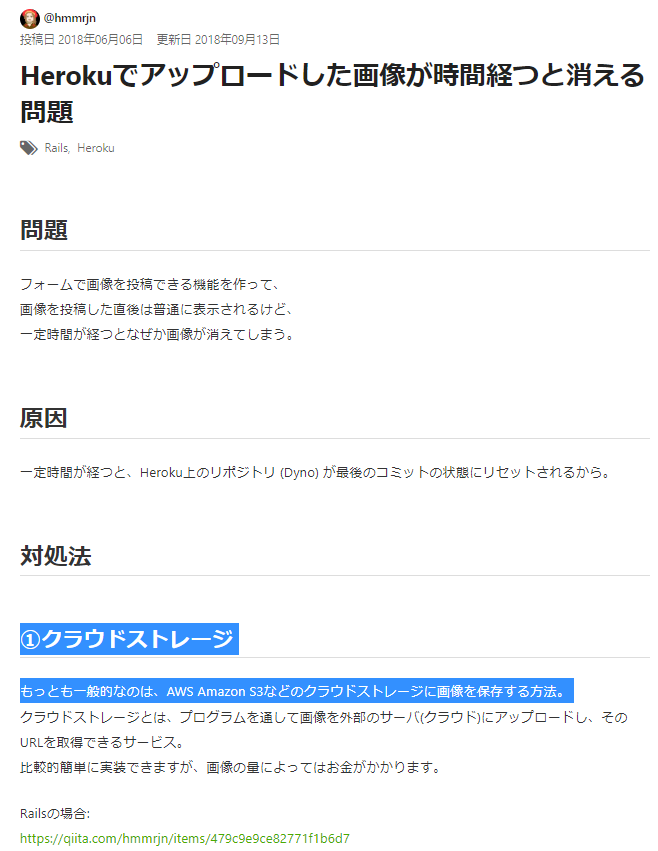
対処法AWS使うのかよ・・・
今回で終わらなくてごめんなさい
次回はAWSに挑んできます