はじめに
Raspberry Pi 5(Ubuntu OS)のファン動作温度をraspi-configで設定しました。
ファン制御の目的
CPUはトランジスタの動作によって発熱します。特に、大規模な演算やコンパイルなどの高負荷な処理を実行すると発熱量が増加し、熱暴走やエラーなどを引き起こすおそれがあります。
そのため、CPUの温度上昇を検知すると、クロック数を下げる(サーマルスロットリング)や、内部の熱を放散させるといった対策がとられます。
ヒートシンクやファンを取り付けて制御するのは、この放熱を効率的に行うことが目的です。
CPU温度の確認
Raspberry Pi 5ではターミナルのコマンドでCPUの温度を確認できます。
$ sudo vcgencmd measure_temp
temp=47.2'C
thermal_zoneのファイルから情報を引くことでも確認できます。
こちらは1000で割ると°Cになります。
$ cat /sys/class/thermal/thermal_zone0/temp
47950
筆者の環境ではthermal_zoneは0のみでtypeはcpu-thermalでした。複数の点で測定している場合は、zoneが複数存在するようです。
$ cat /sys/class/thermal/thermal_zone0/type
cpu-thermal
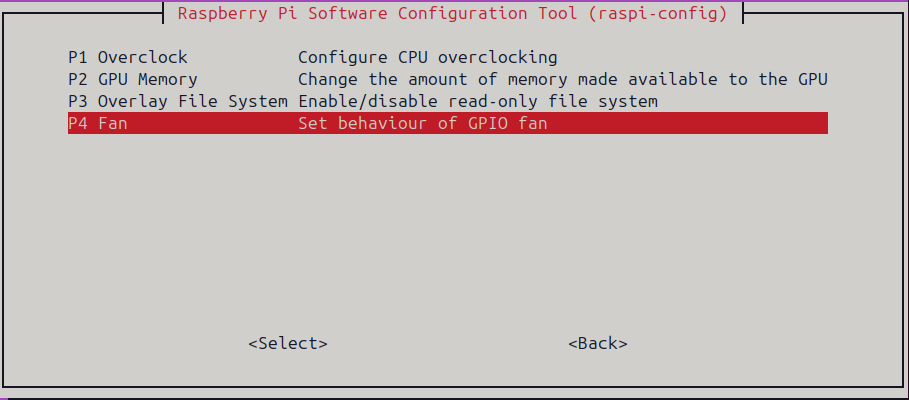
raspi-configでのファン動作温度設定
raspi-configはRaspberry Piの基本設定をするための設定ツールです。ターミナルからUIを呼び出すことができ、OSを直接変更せずに簡単に設定変更できます。
raspi-configをインストールし、ターミナルから起動します。
$ sudo apt install -y raspi-config
$ sudo raspi-config
ターミナル画面でツールが立ち上がるので、キーボードで操作して設定します。
4 Performance Optionsを選択

P4 Fanを選択
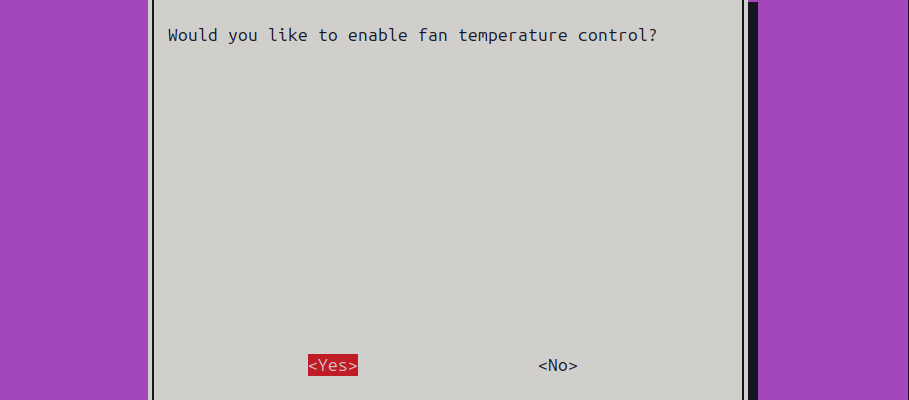
ファンの温度制御を有効にするか -> Yes
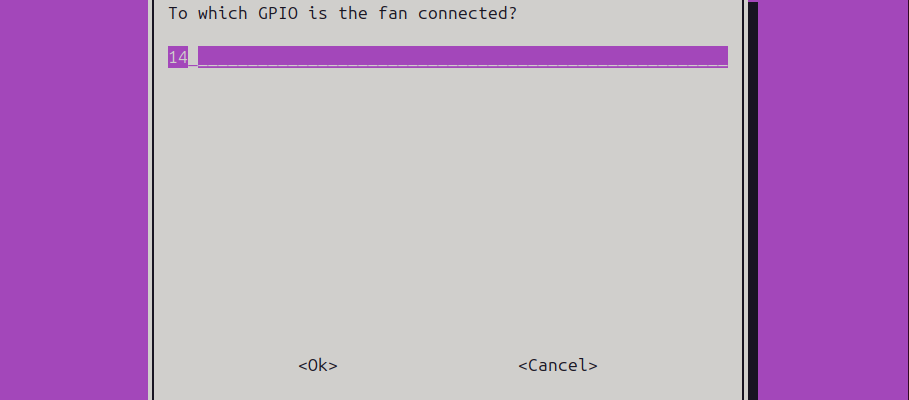
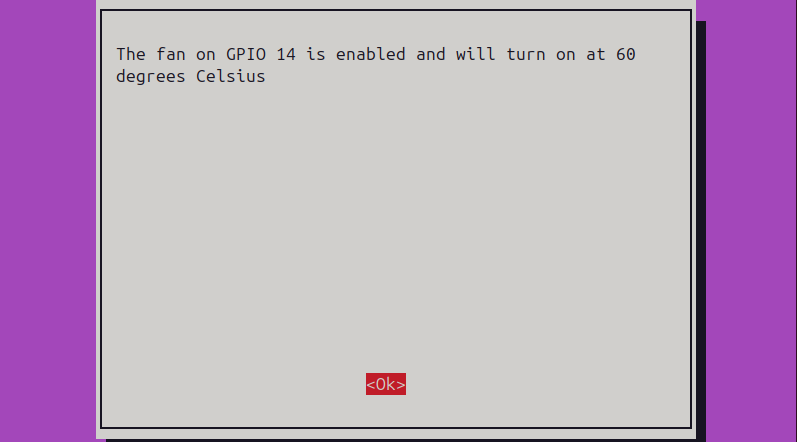
ファンが接続されたGPIOのピン配置 -> デフォルトで14を設定しています。
ファンが起動するCPU温度を設定します。
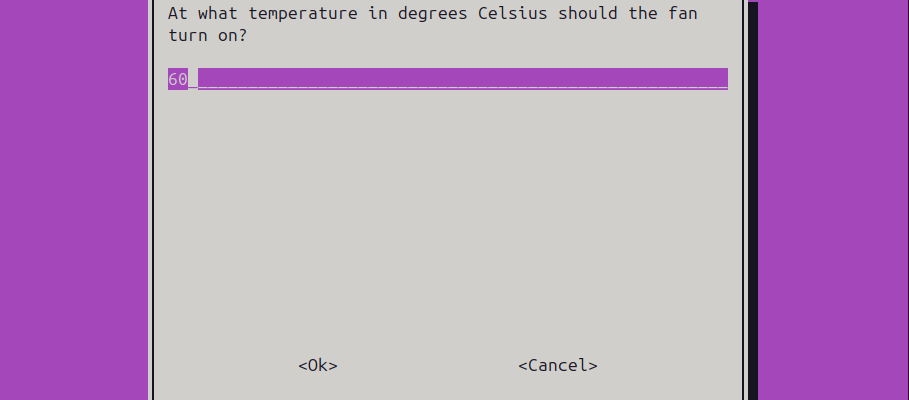
これで確認画面し、OKを押してから再起動します。
実際には4コア使わないとなかなか温度上昇はしませんでしたが、60°Cを超えるとファンが動作することを確認できました。
読んでいただきありがとうございました。
環境
Raspberry Pi 5 (Cortex-A76, 2.4GHz)
OS: Ubuntu 24.04 LTS
Fan: Smraza Official Active Cooler