はじめに
今更ですが,タイトル通りSingle Shot Multibox Detector(SSD)をPyTorchで実装してみました(https://github.com/jjjkkkjjj/pytorch_SSD)ただ,ssd.pytorch等と比べると計算が遅いです(あとで,原因調べます).1ただ抽象化は頑張ったので,カスタマイズ性は高いと思います.(使い方をちゃんと文書化できるかわかりませんが...).SSDの実装なんて調べればたくさん出てくるのですが,今回は,
- 自由にカスタマイズしたかった
- 実装することでSSDを理解したかった
- コロナ関連で暇だった
という理由で実装してみました.わかりやすい説明(参考)もたくさんの記事でなされているのですが,頭の中を整理するためにも僕なりにまとめてみたいと思います.
で,今回はデータセットまわりについてまとめたいと思います.
PyTorch
まず初めに今回使用したディープラーニングのフレームワークPyTorchについて,軽く触れます.実はSSDを実装しようと試みた当初はTensorflowを使用していました.しかし,
- デバッグしづらい
- なんか似たような関数が多すぎる(
compat.v1,compat.v2とか?)
というのでなかなか実装が進みませんでした.特に,「デバッグがしづらい」は僕にとって致命的で,よく訳がわからなくなってしまいました.まあ,Tensorflowを理解できていなかっただけで,ちゃんと使い方を学べば便利だとは思いますが...
このままでは,一生完成しないと思ったので,Numpyと似たような操作ができるという特徴をもつPytorchに変更しました.PyTorchに変更すると,Tensorflowで感じてた「デバッグのしづらさ」はかなり改善され,実装はサクサク進みました.まあNumpyの操作はMatft(https://github.com/jjjkkkjjj/Matft,SwiftでN次元行列演算ライブラリMatftを作ってみた)やMILES(https://github.com/jjjkkkjjj/MIL)の実装で慣れていたので,PyTorchは僕にぴったりでした.
SSDとは
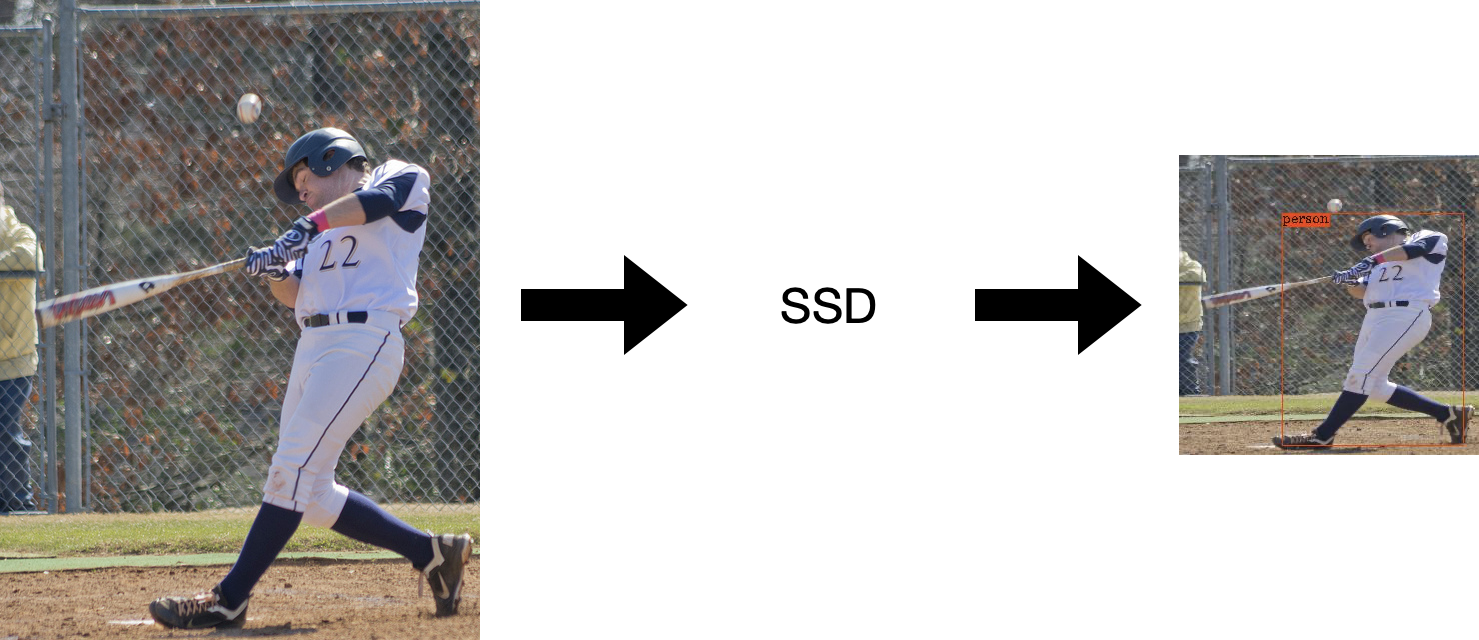
そもそもSSDとは何か,を軽く触れてから詳しくまとめていきたいと思います.SSDは物体検出のアルゴリズムで,End-to-endで物体の位置・ラベルを予測することができます.適当な図ですが,こんな感じで入力画像を与えたらSSDが物体の位置・ラベルを一気に出力してくれるイメージです.
このモデルがすること・なすことは以下のようになります.順を追って説明します.
- データセット
- 入力データ
- 正規化済みの$[0,1]$のRGB画像(今回はここまで.Transform参照)
- 予測するもの
- Default Boxとのオフセット値→バウンディングボックスの位置
- ラベル
- 学習の流れ
- Default Boxの作成
- 画像,正解ラベルを入力
- 正解ラベルのバウンディングボックスをDefault Boxに割り当て(matching strategy)
- 正解ラベルの正規化!!
- localization lossとconfidence loss(hard negative mining)の計算
- テストの流れ
- Default Boxの作成
- 画像を入力
- Default Boxとのオフセット値とラベルを予測
- 余分なBoxを除去(Non maximum suppression)
VOCデータセットの読み込み
SSDの原論文では,データセットとしてPASCAL VOC2007,PASCAL VOC2012,COCO2014を用いています.COCOについては未実装なので,VOCデータセットについて説明していきます.まずはVOCデータセットについて説明します.
構造
ディレクトリの構造は,基本的に統一されていて,以下のような感じです.
$ tree -I '*.png|*.xml|*.jpg|*.txt'
└── VOCdevkit
    └── VOC20**
        ├── Annotations
        ├── ImageSets
        │   ├── Action
        │   ├── Layout
        │   ├── Main
        │   └── Segmentation
        ├── JPEGImages
        ├── SegmentationClass
        └── SegmentationObject
物体検出で必要なのは,VOC20**直下のAnnotations,JPEGImages,ImageSets/Mainです.
それぞれ,以下のようになっています.
- Annotations
- アノテーションデータの
.xmlファイルが入っています.JPEGImagesの.jpegファイルと1体1になっています.
- アノテーションデータの
- JPEGImages
- 画像の
.jpegファイルが入っています.Annotationsの.xmlファイルと1体1になっています.
- 画像の
- ImageSets/Main
- データセット集合の情報を表す
.txtファイルが入っています.集合の要素となるAnnotationとJPEGImagesのファイル名が記述されています.
- データセット集合の情報を表す
Annotaionデータ(.xmlファイル)
Annotaionsディレクトリ配下にある.xmlファイルは以下のようになっています.
<annotation>
	<folder>VOC2007</folder>
	<filename>000005.jpg</filename>
	<source>
		<database>The VOC2007 Database</database>
		<annotation>PASCAL VOC2007</annotation>
		<image>flickr</image>
		<flickrid>325991873</flickrid>
	</source>
	<owner>
		<flickrid>archintent louisville</flickrid>
		<name>?</name>
	</owner>
	<size>
		<width>500</width>
		<height>375</height>
		<depth>3</depth>
	</size>
	<segmented>0</segmented>
	<object>
		<name>chair</name>
		<pose>Rear</pose>
		<truncated>0</truncated>
		<difficult>0</difficult>
		<bndbox>
			<xmin>263</xmin>
			<ymin>211</ymin>
			<xmax>324</xmax>
			<ymax>339</ymax>
		</bndbox>
	</object>
	<object>
		<name>chair</name>
		<pose>Unspecified</pose>
		<truncated>0</truncated>
		<difficult>0</difficult>
		<bndbox>
			<xmin>165</xmin>
			<ymin>264</ymin>
			<xmax>253</xmax>
			<ymax>372</ymax>
		</bndbox>
	</object>
        ...
</annotation>
重要なのは,以下です.
-
<filename>- このアノテーションデータが対応する
.jpegファイル
- このアノテーションデータが対応する
-
<object>-
<name>- ラベル名
-
<truncated>- 物体が全体が写っている(
0)か,部分的に写っている(1)かどうか.
- 物体が全体が写っている(
-
<difficult>- 難しい(
1)かそうでない(0)か
- 難しい(
-
<bndbox>- バウンディングボックス(物体の位置).corners表記
-
実装
データセットの実装には,Datasetクラスを継承する必要があります.そして,データセット数を返す__len__,データセット数の範囲内のindexに対する入力データと正解ラベルを返す__getitem__を実装する必要があります.
以下の実装でやっていることは,
-
self._annopathsにAnnotations直下にある.xmlファイルのパスをリストで保存 -
__getitem__で与えられたindexからself._annopaths[index]に対する画像とバウンディングボックスを取得する- 画像はOpenCVで読み込み,**RGBオーダー※**で返す(入力データ)
- バウンディングボックスは画像の幅,高さで正規化する
- バウンディングボックスとラベルは
concatenateして返す(正解ラベル)
です.
※RGBオーダーにするのは,PyTorchが配布しているVGGのPre-Trainedモデルを使うからです.PyTorchのPre-TrainedモデルはRGBオーダー,mean=(0.485, 0.456, 0.406),std=(0.229, 0.224, 0.225)で正規化された画像を入力として学習させています.(参考)
class ObjectDetectionDatasetBase(_DatasetBase):
    def __init__(self, ignore=None, transform=None, target_transform=None, augmentation=None):

省略

    def __getitem__(self, index):
        """
        :param index: int
        :return:
            img : rgb image(Tensor or ndarray)
            targets : Tensor or ndarray of bboxes and labels [box, label]
            = [xmin, ymin, xmamx, ymax, label index(or relu_one-hotted label)]
            or
            = [cx, cy, w, h, label index(or relu_one-hotted label)]
        """
        img = self._get_image(index)
        bboxes, linds, flags = self._get_bbox_lind(index)

        img, bboxes, linds, flags = self.apply_transform(img, bboxes, linds, flags)

        # concatenate bboxes and linds
        if isinstance(bboxes, torch.Tensor) and isinstance(linds, torch.Tensor):
            if linds.ndim == 1:
                linds = linds.unsqueeze(1)
            targets = torch.cat((bboxes, linds), dim=1)
        else:
            if linds.ndim == 1:
                linds = linds[:, np.newaxis]
            targets = np.concatenate((bboxes, linds), axis=1)

        return img, targets

    def apply_transform(self, img, bboxes, linds, flags):
        """
        IMPORTATANT: apply transform function in order with ignore, augmentation, transform and target_transform
        :param img:
        :param bboxes:
        :param linds:
        :param flags:
        :return:
            Transformed img, bboxes, linds, flags
        """
        # To Percent mode
        height, width, channel = img.shape
        # bbox = [xmin, ymin, xmax, ymax]
        # [bbox[0] / width, bbox[1] / height, bbox[2] / width, bbox[3] / height]
        bboxes[:, 0::2] /= float(width)
        bboxes[:, 1::2] /= float(height)

        if self.ignore:
            bboxes, linds, flags = self.ignore(bboxes, linds, flags)

        if self.augmentation:
            img, bboxes, linds, flags = self.augmentation(img, bboxes, linds, flags)

        if self.transform:
            img, bboxes, linds, flags = self.transform(img, bboxes, linds, flags)

        if self.target_transform:
            bboxes, linds, flags = self.target_transform(bboxes, linds, flags)

        return img, bboxes, linds, flags
VOC_class_labels = ['aeroplane', 'bicycle', 'bird', 'boat',
    'bottle', 'bus', 'car', 'cat', 'chair',
    'cow', 'diningtable', 'dog', 'horse',
    'motorbike', 'person', 'pottedplant',
    'sheep', 'sofa', 'train', 'tvmonitor']
VOC_class_nums = len(VOC_class_labels)
class VOCSingleDatasetBase(ObjectDetectionDatasetBase):
    def __init__(self, voc_dir, focus, ignore=None, transform=None, target_transform=None, augmentation=None, class_labels=None):
        """
        :param voc_dir: str, voc directory path above 'Annotations', 'ImageSets' and 'JPEGImages'
                e.g.) voc_dir = '~~~~/trainval/VOCdevkit/voc2007'
        :param focus: str, image set name. Assign txt file name under 'ImageSets' directory
        :param ignore: target_transforms.Ignore
        :param transform: instance of transforms
        :param target_transform: instance of target_transforms
        :param augmentation:  instance of augmentations
        :param class_labels: None or list or tuple, if it's None use VOC_class_labels
        """
        super().__init__(ignore=ignore, transform=transform, target_transform=target_transform, augmentation=augmentation)

        self._voc_dir = voc_dir
        self._focus = focus
        self._class_labels = _check_ins('class_labels', class_labels, (list, tuple), allow_none=True)
        if self._class_labels is None:
            self._class_labels = VOC_class_labels

        layouttxt_path = os.path.join(self._voc_dir, 'ImageSets', 'Main', self._focus + '.txt')
        if os.path.exists(layouttxt_path):
            with open(layouttxt_path, 'r') as f:
                filenames = f.read().splitlines()
                filenames = [filename.split()[0] for filename in filenames]
                self._annopaths = [os.path.join(self._voc_dir, 'Annotations', '{}.xml'.format(filename)) for filename in filenames]
        else:
            raise FileNotFoundError('layout: {} was invalid arguments'.format(focus))

    @property
    def class_nums(self):
        return len(self._class_labels)
    @property
    def class_labels(self):
        return self._class_labels

    def _jpgpath(self, filename):
        """
        :param filename: path containing .jpg
        :return: path of jpg
        """
        return os.path.join(self._voc_dir, 'JPEGImages', filename)

    def __len__(self):
        return len(self._annopaths)

    """
    Detail of contents in voc > https://towardsdatascience.com/coco-data-format-for-object-detection-a4c5eaf518c5

    VOC bounding box (xmin, ymin, xmax, ymax)
    """
    def _get_image(self, index):
        """
        :param index: int
        :return:
            rgb image(ndarray)
        """
        root = ET.parse(self._annopaths[index]).getroot()
        img = cv2.imread(self._jpgpath(_get_xml_et_value(root, 'filename')))
        # pytorch's image order is rgb
        img = cv2.cvtColor(img, cv2.COLOR_BGR2RGB)
        return img.astype(np.float32)

    def _get_bbox_lind(self, index):
        """
        :param index: int
        :return:
            list of bboxes, list of bboxes' label index, list of flags([difficult, truncated,...])
        """
        linds = []
        bboxes = []
        flags = []

        root = ET.parse(self._annopaths[index]).getroot()
        for obj in root.iter('object'):
            linds.append(self._class_labels.index(_get_xml_et_value(obj, 'name')))

            bndbox = obj.find('bndbox')

            # bbox = [xmin, ymin, xmax, ymax]
            bboxes.append([_get_xml_et_value(bndbox, 'xmin', int), _get_xml_et_value(bndbox, 'ymin', int), _get_xml_et_value(bndbox, 'xmax', int), _get_xml_et_value(bndbox, 'ymax', int)])

            flags.append({'difficult': _get_xml_et_value(obj, 'difficult', int) == 1})#,
                          #'partial': _get_xml_et_value(obj, 'truncated', int) == 1})

        return np.array(bboxes, dtype=np.float32), np.array(linds, dtype=np.float32), flags
COCOデータセットの読み込み
構造
ディレクトリの構造は,アノテーションと画像に分かれている点(annotationsとimages/{train or val}20**)はVOCと同じですが,アノテーションの扱いが少し違います.
├── annotations
│   ├── captions_train2014.json
│   ├── captions_val2014.json
│   ├── instances_train2014.json
│   ├── instances_val2014.json
│   ├── person_keypoints_train2014.json
│   └── person_keypoints_val2014.json
└── images
    ├── train2014
    └── val2014
ご覧のようにVOCと違って,アノテーションは1つのファイルにすべて書き込まれています.
そして,物体検出で必要なのはinstances_{train or val}20**.jsonファイルです.
フォーマットは公式に詳細にかかれています.そして,COCOにはpython apiが用意されているので,物体検出のAnnotationファイルはinstances_{train or val}20**.jsonということがわかれば,正直中身はあまり理解しなくても大丈夫です.
念の為,フォーマットを確認するとこんな感じらしいです.
- instances_{train or val}20**.json
- 以下のようなフォーマットで情報が記述されています.
{
  "info": info,
  "images": [image],
  "annotations": [annotation],
  "licenses": [license],
}

info{
  "year": int,
  "version": str,
  "description": str,
  "contributor": str,
  "url": str,
  "date_created": datetime,
}

image{
  "id": int,
  "width": int,
  "height": int,
  "file_name": str,
  "license": int,
  "flickr_url": str,
  "coco_url": str,
  "date_captured": datetime,
}

license{
  "id": int,
  "name": str,
  "url": str,
}
物体検出のannotationとcatecoriesは以下のようになっています.
annotation{
  "id": int,
  "image_id": int,
  "category_id": int,
  "segmentation": RLE or [polygon],
  "area": float, "bbox": [x,y,width,height],
  "iscrowd": 0 or 1,
}

categories[{
  "id": int,
  "name": str,
  "supercategory": str,
}]
実装
VOC同様に実装するだけです.APIのCOCOオブジェクト経由で,必要情報を取得しています.
COCO_class_labels = ['person', 'bicycle', 'car', 'motorcycle', 'airplane', 'bus',
                    'train', 'truck', 'boat', 'traffic light', 'fire hydrant',
                    'stop sign', 'parking meter', 'bench', 'bird', 'cat', 'dog',
                    'horse', 'sheep', 'cow', 'elephant', 'bear', 'zebra',
                    'giraffe', 'backpack', 'umbrella', 'handbag', 'tie',
                    'suitcase', 'frisbee', 'skis', 'snowboard', 'sports ball',
                    'kite', 'baseball bat', 'baseball glove', 'skateboard',
                    'surfboard', 'tennis racket', 'bottle', 'wine glass', 'cup',
                    'fork', 'knife', 'spoon', 'bowl', 'banana', 'apple',
                    'sandwich', 'orange', 'broccoli', 'carrot', 'hot dog', 'pizza',
                    'donut', 'cake', 'chair', 'couch', 'potted plant', 'bed',
                    'dining table', 'toilet', 'tv', 'laptop', 'mouse', 'remote',
                    'keyboard', 'cell phone', 'microwave', 'oven', 'toaster', 'sink',
                    'refrigerator', 'book', 'clock', 'vase', 'scissors',
                    'teddy bear', 'hair drier', 'toothbrush']
COCO_class_nums = len(COCO_class_labels)

COCO2014_ROOT = os.path.join(DATA_ROOT, 'coco', 'coco2014')
class COCOSingleDatasetBase(ObjectDetectionDatasetBase):
    def __init__(self, coco_dir, focus, ignore=None, transform=None, target_transform=None, augmentation=None, class_labels=None):
        """
        :param coco_dir: str, coco directory path above 'annotations' and 'images'
                e.g.) coco_dir = '~~~~/coco2007/trainval'
        :param focus: str or str, directory name under images
                e.g.) focus = 'train2014'
        :param ignore: target_transforms.Ignore
        :param transform: instance of transforms
        :param target_transform: instance of target_transforms
        :param augmentation:  instance of augmentations
        :param class_labels: None or list or tuple, if it's None use VOC_class_labels
        """
        super().__init__(ignore=ignore, transform=transform, target_transform=target_transform, augmentation=augmentation)

        self._coco_dir = coco_dir
        self._focus = focus

        self._class_labels = _check_ins('class_labels', class_labels, (list, tuple), allow_none=True)
        if self._class_labels is None:
            self._class_labels = COCO_class_labels

        self._annopath = os.path.join(self._coco_dir, 'annotations', 'instances_' + self._focus + '.json')
        if os.path.exists(self._annopath):
            self._coco = COCO(self._annopath)
        else:
            raise FileNotFoundError('json: {} was not found'.format('instances_' + self._focus + '.json'))


        # remove no annotation image
        self._imageids = list(self._coco.imgToAnns.keys())

    @property
    def class_nums(self):
        return len(self._class_labels)
    @property
    def class_labels(self):
        return self._class_labels

    def _jpgpath(self, filename):
        """
        :param filename: path containing .jpg
        :return: path of jpg
        """
        return os.path.join(self._coco_dir, 'images', self._focus, filename)

    def __len__(self):
        return len(self._imageids)

    """
    Detail of contents in voc > https://towardsdatascience.com/coco-data-format-for-object-detection-a4c5eaf518c5

    VOC bounding box (xmin, ymin, xmax, ymax)
    """
    def _get_image(self, index):
        """
        :param index: int
        :return:
            rgb image(ndarray)
        """

        """
        self._coco.loadImgs(self._imageids[index]): list of dict, contains;
            license: int
            file_name: str
            coco_url: str
            height: int
            width: int
            date_captured: str
            flickr_url: str
            id: int
        """
        filename = self._coco.loadImgs(self._imageids[index])[0]['file_name']
        img = cv2.imread(self._jpgpath(filename))
        # pytorch's image order is rgb
        img = cv2.cvtColor(img, cv2.COLOR_BGR2RGB)
        return img.astype(np.float32)

    def _get_bbox_lind(self, index):
        """
        :param index: int
        :return:
            list of bboxes, list of bboxes' label index, list of flags([difficult, truncated,...])
        """
        linds = []
        bboxes = []
        flags = []

        # anno_ids is list
        anno_ids = self._coco.getAnnIds(self._imageids[index])

        # annos is list of dict
        annos = self._coco.loadAnns(anno_ids)
        for anno in annos:
            """
            anno's  keys are;
                segmentation: list of float
                area: float
                iscrowd: int, 0 or 1
                image_id: int
                bbox: list of float, whose length is 4
                category_id: int
                id: int
            """
            """
            self._coco.loadCats(anno['category_id']) is list of dict, contains;
                supercategory: str
                id: int
                name: str
            """
            cat = self._coco.loadCats(anno['category_id'])[0]

            linds.append(self.class_labels.index(cat['name']))

            # bbox = [xmin, ymin, w, h]
            xmin, ymin, w, h = anno['bbox']
            # convert to corners
            xmax, ymax = xmin + w, ymin + h
            bboxes.append([xmin, ymin, xmax, ymax])

            """
            flag = {}
            keys = ['iscrowd']
            for key in keys:
                if key in anno.keys():
                    flag[key] = anno[key] == 1
                else:
                    flag[key] = False
            flags.append(flag)
            """
            flags.append({'difficult': anno['iscrowd'] == 1})

        return np.array(bboxes, dtype=np.float32), np.array(linds, dtype=np.float32), flags
Augmentation
Augmentationについては,必ずしも必要ではないですが,原論文でも
Data augmentation is crucial
のように言及されていますので重要そうです.原論文では,具体的な方法は割愛されていますが,Augmentationの方法は大きく2種類あります.
- Geometric Distortions
- Photometric Distortions
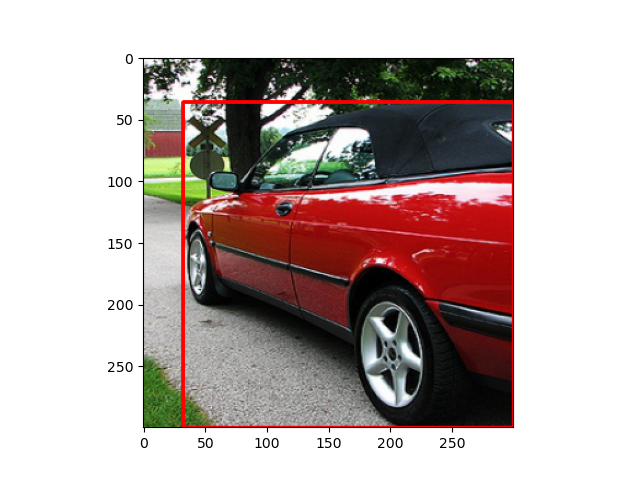
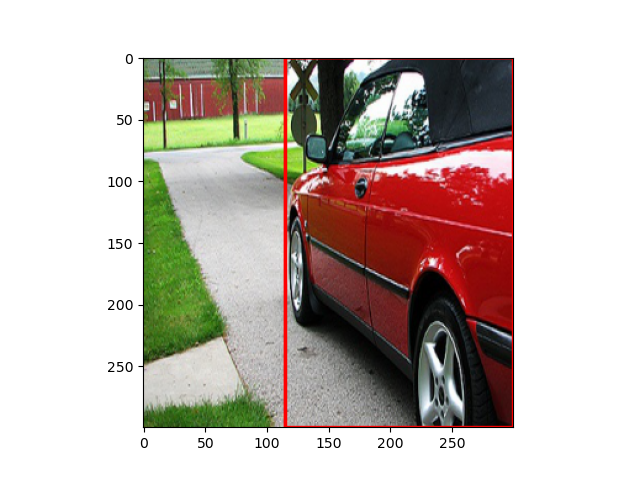
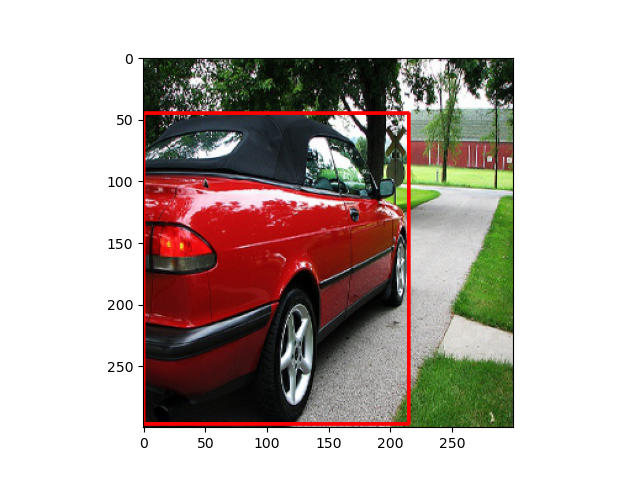
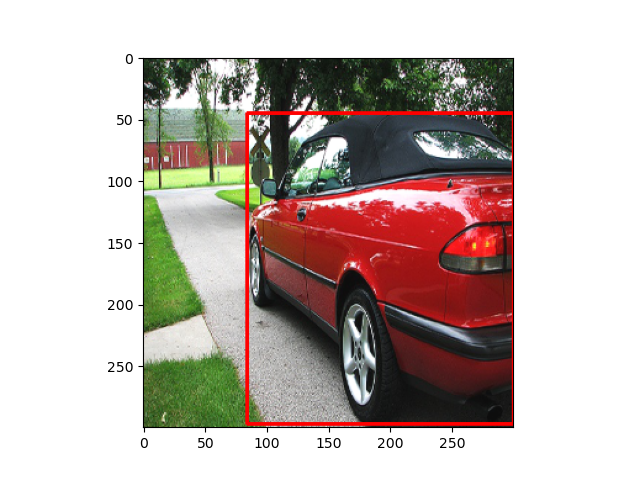
以下では,この元画像がどのようにAugmentationされるかについて書いていきます.
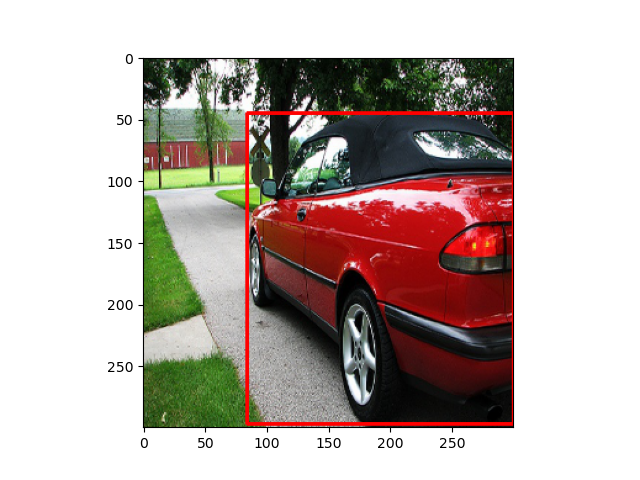
Geometric Distortions
Geometric Distortionsでは,以下の3つの方法があります.
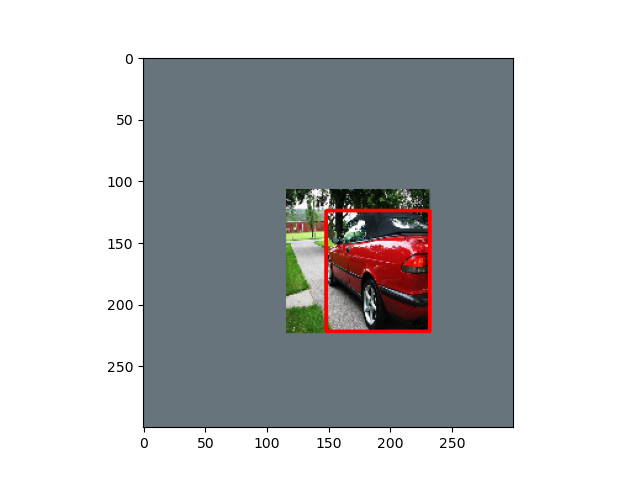
-
Random Expand
- その名の通り,ランダムにサイズを拡大します.
- サイズ拡大の際の余白は,正規化で使われる平均値
rgb_mean=(103.939, 116.779, 123.68)で埋めます.
-
Random Sample
- ランダムにサンプルします.
- その際,サンプルした画像とバウンディングボックスの重なり度合い(IoU値)の閾値をランダムに決めます.
-
(0.1,0.3,0.5,0.7,0.9,None)のどれか -
Noneは閾値なし.ただし,重なりなしのIoU=0は除外
-
- 閾値を超えたサンプル画像になるまで繰り返します.
- Random Flip
- ランダムに反転します.
実装はちょっと省略します.具体的にはここです.その他の画像例はここを参照してください.
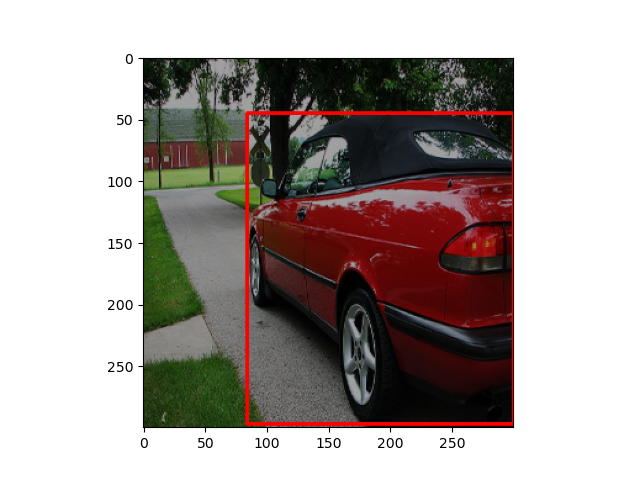
Photometric Distortions
Photometric Distortionsでは,以下の5つの方法があります.
- Random Brightness
- RGB値に$[-32,32]$の範囲でランダムに選ばれた値を足します
- Random Contrast
- RGB値に$[0.5,1.5]$の範囲でランダムに選ばれた値をかけます
- Random Hue
- 画像をHSV空間に変換し,Hue値に$[-18,18]$の範囲でランダムに選ばれた値を足します
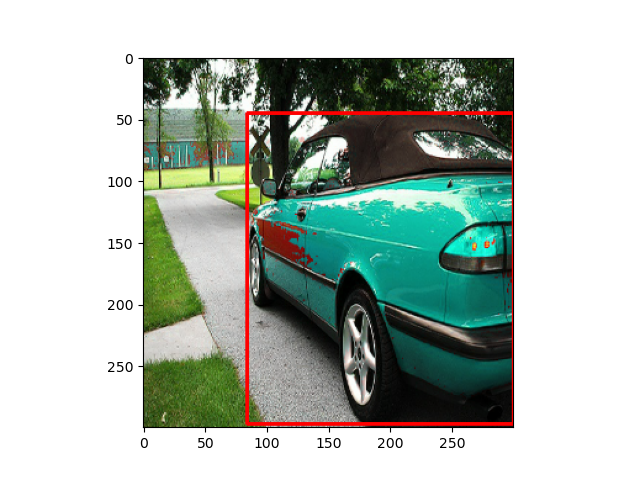
- Random Saturation
- 画像をHSV空間に変換し,Saturation値に$[0.5,1.5]$の範囲でランダムに選ばれた値をかけます
- バグかもしれん...
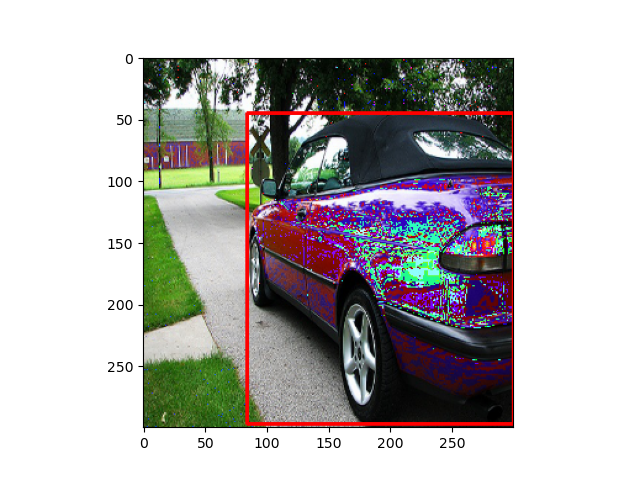
- Random Lighting Noise
- ランダムにChannelの値を入れ替えます
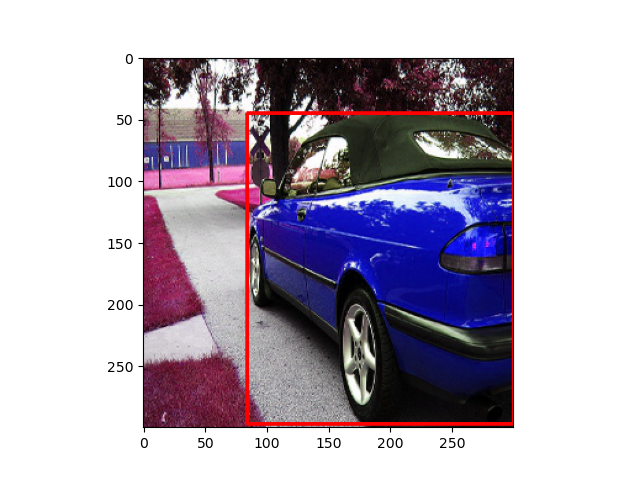
実装はちょっと省略します.具体的にはここです.その他の画像例はここを参照してください.
Transform
入力画像の前処理
入力画像の前処理です.
- Resize(300x300,512x512等)
- RGBの入力画像
ndarrayをtorch.Tensorに変換 - $[0,255]$から$[0,1]$に変換
- **正規化!!!!※**←個人的には重要だと思ってます
※正規化しないとうまく収束しません.正規化は
$$x_{norm}=\frac{x-x_{mean}}{x_{std}}$$
で平均0,分散1に変換する処理です.画像の平均,分散はそれぞれ,rgb_means(0.485, 0.456, 0.406), rgb_stds=(0.229, 0.224, 0.225)を用いるのが一般的です.(忘れましたが,VGGのデータセットの平均と分散?)
実装
↑での処理を以下のように実装しています.PyTorchには前処理入力画像に対する処理関数transformsが,用意されているのですが,PIL画像用の関数なので,Opencv用に自作しました.transformsを自作する場合は,上述のデータセットのクラスメソッド内での処理と対応させる必要があります.今回は,_apply_transformメソッドで以下のようにimg,bboxes,linds,flagsつまり,画像,バウンディングボックス,ラベル,difficult等のフラグ情報を引数として渡しています.(※ちなみに省略しましたが,augmentationも同様の実装方法になります.)
if self.ignore:
    bboxes, linds, flags = self.ignore(bboxes, linds, flags)

if self.augmentation:
    img, bboxes, linds, flags = self.augmentation(img, bboxes, linds, flags)

if self.transform:
    img, bboxes, linds, flags = self.transform(img, bboxes, linds, flags)

if self.target_transform:
    bboxes, linds, flags = self.target_transform(bboxes, linds, flags)
したがって,__call__(self, img, bboxes, linds, flags)メソッドを実装すれば良いです.
torch.Tensorに変換するToTensorクラスは,OpenCVのオーダー(h,w,c)からPyTorchのConv2dの入力画像のオーダーが(b,c,h,w)に変換しています.
class Compose(object):
    def __init__(self, transforms):
        self.transforms = transforms

    def __call__(self, img, bboxes, labels, flags):
        for t in self.transforms:
            img, bboxes, labels, flags = t(img, bboxes, labels, flags)
        return img, bboxes, labels, flags

    def __repr__(self):
        format_string = self.__class__.__name__ + '('
        for t in self.transforms:
            format_string += '\n'
            format_string += '    {0}'.format(t)
        format_string += '\n)'
        return format_string

class ToTensor(object):
    """
    Note that convert ndarray to tensor and [0-255] to [0-1]
    """
    def __call__(self, img, *args):
        # convert ndarray into Tensor
        # transpose img's tensor (h, w, c) to pytorch's format (c, h, w). (num, c, h, w)
        img = np.transpose(img, (2, 0, 1))
        return (torch.from_numpy(img).float() / 255., *args)

class Resize(object):
    def __init__(self, size):
        """
        :param size: 2d-array-like, (height, width)
        """
        self._size = size

    def __call__(self, img, *args):
        return (cv2.resize(img, self._size), *args)


class Normalize(object):
    #def __init__(self, rgb_means=(103.939, 116.779, 123.68), rgb_stds=(1.0, 1.0, 1.0)):
    def __init__(self, rgb_means=(0.485, 0.456, 0.406), rgb_stds=(0.229, 0.224, 0.225)):
        self.means = np.array(rgb_means, dtype=np.float32).reshape((-1, 1, 1))
        if np.any(np.abs(self.means) > 1):
            logging.warning("In general, mean value should be less than 1 because img's range is [0-1]")

        self.stds = np.array(rgb_stds, dtype=np.float32).reshape((-1, 1, 1))

    def __call__(self, img, *args):
        if isinstance(img, torch.Tensor):
            return ((img.float() - torch.from_numpy(self.means)) / torch.from_numpy(self.stds), *args)
        else:
            return ((img.astype(np.float32) - self.means) / self.stds, *args)
使用例
from data import transforms
transform = transforms.Compose(
        [transforms.Resize((300, 300)),
         transforms.ToTensor(),
         transforms.Normalize(rgb_means=(0.485, 0.456, 0.406), rgb_stds=(0.229, 0.224, 0.225))]
    )
Target transform
バウンディングボックス,ラベルの変換
バウンディングボックス,ラベルの変換です.
- バウンディングボックスをcorners表現からcentroids表現に変換
- ラベルをOnehotベクトルに変換
-
ndarrayからtorch.Tensorに変換- バウンディングボックスとラベルを
concatenateする(shape=(box num, 4=(cx,cy,w,h)+class_nums+1=(背景)))
- バウンディングボックスとラベルを
バウンディングボックスの表現法
3つあります.
-
centroids表現
- 中心座標$(c_x,c_y)$と幅・高さ$(w,h)$を使います.
$$bbox = (c_x,c_y,w,h)$$
- 中心座標$(c_x,c_y)$と幅・高さ$(w,h)$を使います.
-
corners表現
- 左上の座標$(x_{min},y_{min})$と右下の座標$(x_{max},y_{max})$を使います.
$$bbox = (x_{min},y_{min},x_{max},y_{max})$$
- 左上の座標$(x_{min},y_{min})$と右下の座標$(x_{max},y_{max})$を使います.
-
minmax表現
- 左上の座標$(x_{min},y_{min})$と右下の座標$(x_{max},y_{max})$を使います.
- corners表記と順番が違うだけです.
$$bbox = (x_{min},x_{max},y_{min},y_{max})$$
-
中心座標$(c_x,c_y)$と幅・高さ$(w,h)$,左上の座標$(x_{min},y_{min})$と右下の座標$(x_{max},y_{max})$の関係
\begin{align}
(c_x,c_y) &= (\frac{x_{min}+x_{max}}{2},\frac{y_{min}+y_{max}}{2}) \\
(w,h) &= (x_{max}-x_{min},y_{max}-y_{min})
\end{align}
実装
↑の処理を以下のように実装してます.物体検出用の正解ラベルの処理target_transformsはPyTorchにはないので,target_transformsも自作する必要があります.再掲ですが,_apply_transformメソッドで以下のようにbboxes,linds,flagsつまり,バウンディングボックス,ラベル,difficult等のフラグ情報を引数として渡しています.
if self.ignore:
    bboxes, linds, flags = self.ignore(bboxes, linds, flags)

if self.augmentation:
    img, bboxes, linds, flags = self.augmentation(img, bboxes, linds, flags)

if self.transform:
    img, bboxes, linds, flags = self.transform(img, bboxes, linds, flags)

if self.target_transform:
    bboxes, linds, flags = self.target_transform(bboxes, linds, flags)
したがって,__call__(self, bboxes, linds, flags)メソッドを実装すれば良いです.
class ToTensor(object):
    def __call__(self, bboxes, labels, flags):
        return torch.from_numpy(bboxes), torch.from_numpy(labels), flags

class ToCentroids(object):
    def __call__(self, bboxes, labels, flags):
        # bbox = [xmin, ymin, xmax, ymax]
        bboxes = np.concatenate(((bboxes[:, 2:] + bboxes[:, :2]) / 2,
                                 (bboxes[:, 2:] - bboxes[:, :2])), axis=1)

        return bboxes, labels, flags

class ToCorners(object):
    def __call__(self, bboxes, labels, flags):
        # bbox = [cx, cy, w, h]
        bboxes = np.concatenate((bboxes[:, :2] - bboxes[:, 2:]/2,
                                 bboxes[:, :2] + bboxes[:, 2:]/2), axis=1)

        return bboxes, labels, flags

class OneHot(object):
    def __init__(self, class_nums, add_background=True):
        self._class_nums = class_nums
        self._add_background = add_background
        if add_background:
            self._class_nums += 1

    def __call__(self, bboxes, labels, flags):
        if labels.ndim != 1:
            raise ValueError('labels might have been already relu_one-hotted or be invalid shape')

        labels = _one_hot_encode(labels.astype(np.int), self._class_nums)
        labels = np.array(labels, dtype=np.float32)

        return bboxes, labels, flags
使用例
target_transform = target_transforms.Compose(
        [target_transforms.ToCentroids(),
         target_transforms.OneHot(class_nums=datasets.VOC_class_nums, add_background=True),
         target_transforms.ToTensor()]
    )
おわりに
データセットの処理はこんな感じです.例によって途中だれましたが,データセットの処理はあまり記事もないと思うので,参考になれば幸いです.
参考
- code
- Dataset
- 解説
- 論文
- Pretrained model
-
DataLoaderの初期化引数のnum_workersを設定していないだけでした...現在はssd.pytorchと同等の速度出てます. ↩