はじめに
Google cloud vision APIと連携したOCR業務効率化ツールを作成しました.
これを作った理由は,親が自営業をしておりまして,紙に印刷された表を手動で入力していたのを知ったからです(しかも1回15分くらい!).さすがにそれは大変そうなので,Google cloud vision APIを使って,OCR業務効率化ツールを作成しようという考えに至った次第です.
ただ,メンテナンスが面倒そうなので,公開はしていません.(需要有りそうなら公開しようかな...)
公開しました!(github)
結構時間がかかったのでここでしっかり成仏させて1回区切りをつけたいと思います.
機能詳細
大きく分けると3つあって,以下の機能を実装しました.
できるだけ使いやすさを意識しました.
OCR
まずは,Google cloud vision APIを使ったOCR機能です.
公式サイトの通りに,Vision APIを有効にして,鍵ファイルとなるJsonをダウンロードしてあげればこのアプリ経由でOCRをしてくれます.

修正機能
Google cloud vision APIの予測結果の文字・バウンディングボックスの修正ができます.

ファイル出力
予測・修正結果をファイルに出力する機能も実装しました.
ファイルの種類は,表形式のファイルフォーマット(CSV,EXCEL,TSV,PSV)(アルゴリズムは後述)と,後々自前のモデルで学習できるようにVOCフォーマット(自前のモデルは面倒なので,たぶんやらない.)を用意しました.

出力したファイルはこんな感じ.修正するといい感じで出力されますね.(最終行は面倒なので,未修正です.)
| 地番 | 216 | 日本測地系座標 | ||
|---|---|---|---|---|
| 1 | 112461 | -4784.179 | 41217.032 | 8.178 |
| 2 | 12454 | -4777.181 | 41212.8 | 2.478 |
| 3 | 12455 | -4775.917 | 41214.931 | 1.701 |
| 4 | 12456 | -4775.131 | 41216.439 | 0.772 |
| 5 | 12457 | -4774.801 | 41217.137 | 1.574 |
| 6 | 12458 | -4774.199 | 41218.591 | 39.712 |
| 7 | 13039 | -4759.888 | 41255.635 | 4.532 |
| 8 | 13040 | -4758.257 | 41259.863 | 4.873 |
| 9 | 13041 | -4756.552 | 41264.428 | 3.677 |
| 10 | 13042 | -4755.372 | 41267.911 | 3.357 |
| 11 | 13043 | -4754.371 | 41271.115 | 9.893 |
| 12 | 13044 | -4751.649 | 41280.626 | 1.999 |
| 13 | 13045 | -4751.053 | 41282.534 | 3.474 |
| 14 | 19065 | -4750.011 | 41285.848 | 1.655 |
| 15 | 13047 | -4749.428 | 41287.397 | 3.562 |
| 16 | 13048 | -4748.238 | 41290.754 | 4.71 |
| 17 | 13049 | -4746.461 | 41295.116 | 15.709 |
| 18 | 13050 | -4740.073 | 41309.468 | 4.289 |
| 19 | 13034 | -4744.046 | 41311.085 | 8.493 |
| 20 | 13032 | -4751.758 | 41314.642 | 6.414 |
| 21 | 13030 | -4757.723 | 41316.999 | 101.984 |
| 22 | 12463 | -4792.484 | 41221.122 | 9.257 |
| 算 | 積 | H | 貝 | 1894.1588275m' |
VOCフォーマットの出力はこんな感じです.
<annotation>
  <folder>image</folder>
  <filename>20200619173238005.jpg</filename>
  <size>
    <width>2235</width>
    <height>1415</height>
    <depth>3</depth>
  </size>
  <object>
    <difficult>0</difficult>
    <content>###</content>
    <name>日本</name>
    <bndbox>
      <x1>832</x1>
      <y1/>
      <x2>972</x2>
      <y2/>
      <x3>972</x3>
      <y3>47</y3>
      <x4>832</x4>
      <y4>47</y4>
    </bndbox>
  </object>
  <object>
    <difficult>0</difficult>
    <content>###</content>
    <name>測</name>
    <bndbox>
      <x1>973</x1>
      <y1/>
      <x2>1036</x2>
      <y2/>
      <x3>1036</x3>
      <y3>47</y3>
      <x4>973</x4>
      <y4>47</y4>
    </bndbox>
  </object>

...
技術詳細
Google Cloud Vision API
Google Cloud Vision APIのPython版を使っています.
APIを使うには,まず鍵登録をして,その鍵ファイルとなるJsonファイルを指定してあげる必要があります.
from google.cloud import vision
from google.auth.exceptions import DefaultCredentialsError
import io, os, json, cv2

os.environ["GOOGLE_APPLICATION_CREDENTIALS"] = path
try:
    client = vision.ImageAnnotatorClient()
    return True
except DefaultCredentialsError: # Pathが正しくないとErrorを吐く
    return False
Jsonファイルを指定できれば,あとは画像を指定して,Detectionメソッド(画像ファイルから予測する場合は,text_detection,文書から予測する場合はdocument_text_detectionが良さげ)を呼ぶとGoogleさんが答えを返してくれます.
with open(imgpath, 'rb') as image_file:
    content = image_file.read()
image = vision.Image(content=content)
# https://googleapis.dev/python/vision/1.0.0/gapic/v1/api.html#google.cloud.vision_v1.ImageAnnotatorClient.text_detection
response = client.text_detection(image=image) # またはclient.document_text_detection
results = parse_response(response, w, h, imgpath)
帰ってきた答えは,AnnotateImageResponseObjectとなっているので,レファレンス通りに取り出していけばよいです.
def parse_response(response, w, h, imgpath):
    # type is AnnotateImageResponse
    texts = response.text_annotations  # EntityAnnotation sequence
    # vision.InputConfig()

    """
    texts will be list of Product which is a predicted result
    See https://googleapis.dev/python/vision/latest/vision_v1/types.html for more details
    text
        description: str, predicted text
        bounding_poly: A bounding annotation for the detected image annotation.
            vertices: vertex sequence
                x: int
                y: int
            normalized_vertices: normalized vertex sequence
                x: float
                y: float

    """
    results = {}
    prediction = []

    # print('Texts:')
    for text in texts:
        ret = {}
        ret['text'] = text.description
        ret['bbox'] = [[vertex.x / w, vertex.y / h] for vertex in text.bounding_poly.vertices]
        prediction += [ret]
        """
        print('\n"{}"'.format(text.description))

        vertices = (['({},{})'.format(vertex.x, vertex.y)
                     for vertex in text.bounding_poly.vertices])

        print('bounds: {}'.format(','.join(vertices)))
        """
    results["info"] = {"width": int(w), "height": int(h), "path": imgpath}
    results["prediction"] = prediction

    # save results as json file
    with open(os.path.join('.', '.tda', 'tmp', 'result.json'), 'w') as f:
        json.dump(results, f)

    if response.error.message:
        raise PredictionError(
            '{}\nFor more info on error messages, check: '
            'https://cloud.google.com/apis/design/errors'.format(
                response.error.message))

    return results
PySide2 (PyQt)
GUIとしたかったので,PySide2で実装しました.(PyQt5だとライセンスがGPLなので,LGPLのPySide2にしました.)
結構大規模なプログラムになったので,デザインパターンとしてMVCパターンを採用しました.
https://qiita.com/s_emoto/items/975cc38a3e0de462966aより.

詳細は余力があれば別記事に書こうと思いますが,あまりPyside(PyQt)のMVCパターンについての詳細がなかったので,僕なりの解釈で実装しました.
Model
まずはModelクラスを作成します.ここで重要なのは,以下の通りです.
- このクラスは様々な役割を担うMixinを継承してひとまとめにしたクラスである.
Pythonは多重継承可能なので,こうすることでモデルの各役割を分割できます.
class Model(FileModelMixin, ViewerModelMixin, PredictionModelMixin, AnnotationModelMixin, _BaseModel):
    """
    Singleton class
    """
    config = Config()

    def __init__(self):
        FileModelMixin.__init__(self)
        ViewerModelMixin.__init__(self)
        PredictionModelMixin.__init__(self)
        AnnotationModelMixin.__init__(self)
個人的には,同じファイルに別の役割のクラスを書きたくないので,別ファイルに書きました.
そうすることで,大規模なプロジェクトでもどこに実装したのかの管理が非常に楽になると思います.
class PredictionModelMixin(ModelAbstractMixin):
    client: vision.ImageAnnotatorClient
    results: dict

    def __init__(self):
        self.client = None

    @property
    def credentialJsonpath(self):
        return self.config.credentialJsonpath

    @property
    def isExistCredPath(self):
        return self.config.credentialJsonpath is not None

    def check_credentialJsonpath(self, path):
        # export GOOGLE_APPLICATION_CREDENTIALS as environmental path
        os.environ["GOOGLE_APPLICATION_CREDENTIALS"] = path
        try:
            vision.ImageAnnotatorClient()
            return True
        except DefaultCredentialsError:
            return False

...この後も長いコードが続く...
View
次にViewを実装していきます.ポイントは2つあります.
- 上図の②に該当する処理が,カスタム
Signalで実装している.- デフォルトでは,PySide(PyQt)はViewのイベントクラスをOverrideして書く使用になっている.このせいで,FatなViewになる気がします.
- 先ほどの
Modelをインスタンス変数で保持している.- 上図の⑤で命令を受け取ったら,
self.modelで⑥,⑦を,あとはViewの状態を変更してあげれば⑧の処理を実現したことになります. - 下のコードでは以下のような流れになります
- 後述の
ViewControllerから⑤:imageView.update() -
paintEvent呼び出し - ⑥,⑦:
self.modelでアクセス - ⑧:状態を変更
- 後述の
- 上図の⑤で命令を受け取ったら,
class ImageView(QLabel):
    ### Signal ###
    rightClicked = Signal(QContextMenuEvent)
    mousePressed = Signal(QMouseEvent)
    mouseMoved = Signal(QMouseEvent)
    mouseReleased = Signal(QMouseEvent)
    mouseDoubleClicked = Signal(QMouseEvent)

    # model
    model: Model
    def __init__(self, model: Model, parent=None):
        super().__init__(parent)

        self.model = check_instance('model', model, Model)

        self.moveActionState = MoveActionState.CREATE

        # context menu
        self.contextMenu = ImgContextMenu(self.model, self)

        # mouseMoveEvent will be fired on pressing any button
        self.setMouseTracking(True)

    ##########
    ここが上図の②にあたる
    ##########
    def contextMenuEvent(self, e):
        self.rightClicked.emit(e)

    def mousePressEvent(self, e: QMouseEvent):
        # Note that this method is called earlier than contextMenuEvent
        self.mousePressed.emit(e)

    def mouseMoveEvent(self, e: QMouseEvent):
        # Note that this method is called earlier than contextMenuEvent
        if isinstance(e, QContextMenuEvent):
            return
        self.mouseMoved.emit(e)

    def mouseReleaseEvent(self, e: QMouseEvent):
        self.mouseReleased.emit(e)

    def mouseDoubleClickEvent(self, e: QMouseEvent):
        self.mouseDoubleClicked.emit(e)

    ##########
    ここが上図の⑥~⑧にあたる
    ##########
    def paintEvent(self, event):
        if not self.pixmap():
            return super().paintEvent(event)

        # painter
        painter = QPainter(self)
        painter.drawPixmap(self.rect(), self.pixmap())

        # pen
        pen = QPen(QColor(255, 0, 0))
        pen.setWidth(3)

        # set
        painter.setPen(pen)

        if not self.model.isPredicted:
            if self.model.areamode == AreaMode.RECTANGLE:
                self.model.rectangle.paint(painter)
            elif self.model.areamode == AreaMode.QUADRANGLE:
                self.model.quadrangle.paint(painter)
            return

        # predicted
        self.model.predictedArea.paint(painter)
        if self.model.showingmode == ShowingMode.SELECTED:
            self.model.annotations.paint(painter, True)
            return

        # predicted and Entire mode
        if self.model.areamode == AreaMode.RECTANGLE:
            self.model.annotations.paint(painter, True)
        elif self.model.areamode == AreaMode.QUADRANGLE:
            self.model.annotations.paint(painter, False)
ViewController
最後にViewControllerです.ポイントは4点あります.
- このクラスは様々な役割を担うMixinを継承してひとまとめにしたクラスである.
- Modelと同じです.
-
QMainWindowを最後に継承している. - ここで
modelを初期化している- ここで初期化したモデルをインスタンス変数にもち,
initUIでViewを初期化する際にこのModelを渡している.
- ここで初期化したモデルをインスタンス変数にもち,
class MainViewController(LeftDockVCMixin, CentralVCMixin, RightDockVCMixin, QMainWindow):
    debug = False
    saveForDebug = False
    def __init__(self, parent=None):
        super().__init__(parent=parent)

        # create model
        self.model = Model()
        self.initModel()
        self.initUI()
        self.establish_connection()

    @property
    def leftdock(self):
        return self.main.leftdock
    @property
    def central(self):
        return self.main.central
    @property
    def rightdock(self):
        return self.main.rightdock

    def initUI(self):
        self.main = MainView(self.model, self)
        self.setCentralWidget(self.main)

        self.menu = MenuBar(self.model, self)
        self.setMenuBar(self.menu)

    def updateAllUI(self):
        self.leftdock.updateUI()
        self.central.updateUI()
        self.rightdock.updateUI()
        self.menu.updateUI()

    def establish_connection(self):
        LeftDockVCMixin.establish_connection(self)
        CentralVCMixin.establish_connection(self)
        RightDockVCMixin.establish_connection(self)
- 上図の②の受け取りと③のModelの更新を実装している.
class CentralVCMixin(VCAbstractMixin):

    @property
    def imageView(self):
        return self.central.imageView

    def establish_connection(self):
        self.central.label_savefilename.enterEvent = lambda e: self.savefilename_mouseover(e, True)
        self.central.label_savefilename.leaveEvent = lambda e: self.savefilename_mouseover(e, False)
        self.central.label_savefilename.mouseDoubleClickEvent = self.savefilename_doubleClicked
        self.imageView.rightClicked.connect(lambda e: self.rightClicked(e))
        self.imageView.mouseReleased.connect(lambda e: self.mouseReleased(e))
        self.imageView.mousePressed.connect(lambda e: self.mousePressed(e))
        self.imageView.mouseMoved.connect(lambda e: self.mouseMoved(e))
        self.imageView.mouseDoubleClicked.connect(lambda e: self.mouseDoubleClicked(e))

    def rightClicked(self, e: QContextMenuEvent):
        if not self.model.isPredicted:
            return

        contextMenu = self.imageView.contextMenu
        contextMenu.updateUI()
        action = contextMenu.exec_(self.imageView.mapToGlobal(e.pos()))
        if action == contextMenu.action_remove_annotation:
            self.model.annotations.remove_selectedAnnotation()
        elif action == contextMenu.action_duplicate_annotation:
            self.model.annotations.duplicate_selectedAnnotation()
        elif action == contextMenu.action_remove_point:
            self.model.annotations.remove_selectedAnnotationPoint()
        elif action == contextMenu.action_duplicate_point:
            self.model.annotations.duplicate_selectedAnnotationPoint()

        self.updateModel()
        self.updateAllUI()


    def mousePressed(self, e: QMouseEvent):
        if self.model.isPredicted:
            self.model.annotations.mousePress(e.pos(), self.predictedParentQSize)

        else:
            if self.model.areamode == AreaMode.RECTANGLE:
                self.model.mousePress_rectmode(e.pos(), self.imageView.size())

            elif self.model.areamode == AreaMode.QUADRANGLE:
                self.model.mousePress_quadmode(e.pos(), self.imageView.size())

        self.modelUpdateAftermouseEvent()

...この後も長いコードが続く...
Pyinstaller
実行ファイルの作成には,Pyinstallerを使いました.コマンドに引数を与えることでで実行ファイルを作成してもよいのですが,Specファイルに記述して,pyinstaller **.specで実行ファイルを作成できるようにしました.
注意点としては,Google cloud vision APIを取り込むためのhook?を指定してあげないといけないらしいです.
from PyInstaller.utils.hooks import collect_data_files
datas = collect_data_files('grpc')
releaseモード
コメントを参照してください.
# -*- mode: python ; coding: utf-8 -*-
# filename = cldvis.spec
import os, glob

spec_root = os.path.abspath(os.path.join(SPECPATH, '..')) # プロジェクトのRootを指定.SPECPATHはこのspecファイルのパス
datas = glob.glob(os.path.join('..', 'tda_mvc', 'icon', '*'))# 追加の外部ファイル(アイコン)などのパスを指定,Specファイル自体はPythonなので,osやglobが使える.
datas = [(path, 'tda_mvc\\icon') for path in datas]

block_cipher = None
a = Analysis(['..\\app_mvc.py'],
             pathex=[spec_root],
             binaries=[],
             datas=datas,
             hiddenimports=['PySide.QtXml'],
             hookspath=['.\\hooks\\'],
             runtime_hooks=[],
             excludes=[],
             win_no_prefer_redirects=False,
             win_private_assemblies=False,
             cipher=block_cipher,
             noarchive=False)
pyz = PYZ(a.pure, a.zipped_data,
             cipher=block_cipher)
exe = EXE(pyz,
          a.scripts,
          a.binaries,
          a.datas,
          exclude_binaries=False,
          name='cldvis',
          debug=False,
          bootloader_ignore_signals=False,
          strip=False,
          upx=True,
          console=False,
          icon='..\\tda_mvc\\icon\\icon.ico')
coll = COLLECT(exe,
               a.binaries,
               a.zipfiles,
               a.datas,
               strip=False,
               upx=True,
               upx_exclude=[],
               name='cldvis')
debugモード
上記のspecファイルで,EXEのdebugとconsoleをTrueにすればよいと思います.
exe = EXE(pyz,
          a.scripts,
          a.binaries,
          a.datas,
          exclude_binaries=False,
          name='cldvis',
          debug=True,
          bootloader_ignore_signals=False,
          strip=False,
          upx=True,
          console=True,
          icon='..\\tda_mvc\\icon\\icon.ico')
あとはコマンド上で,exeを実行すると,
pyinstaller debug.spec
dist\cldvis\cldvis.exe
ログが出力されます.
...
[13560] LOADER: extracted pyimod02_archive
[13560] LOADER: callfunction returned...
[13560] LOADER: extracted pyimod03_importers
[13560] LOADER: callfunction returned...
[13560] LOADER: Installing PYZ archive with Python modules.
[13560] LOADER: PYZ archive: PYZ-00.pyz
[13560] LOADER: Running pyiboot01_bootstrap.py
[13560] LOADER: Running pyi_rth_pyside2.py
[13560] LOADER: Running pyi_rth_pkgres.py
[13560] LOADER: Running pyi_rth_certifi.py
[13560] LOADER: Running pyi_rth_multiprocessing.py
[13560] LOADER: Running app_mvc.py
...
Inno Setup
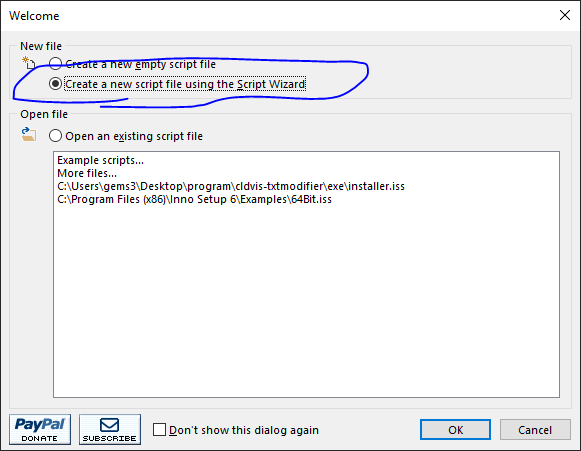
どうせなら,Installerも作ったれということで,InstallerをInno Setupを使って作成しました.
create a new script file using the Script Wizardで作成すると自動でInstaller用のスクリプトを出力してくれるので,便利です.
詳細はこちらがわかりやすいので,参照してください.
CSV変換アルゴリズム
予測結果(文字,四角形の頂点)をCSVへ変換する方法は,スマートではないですが以下のようにしました.(何かスマートな方法がある場合はご教示いただけますと幸いです.)
- まず,四角形の頂点を時計回りにソートします.
- ソートの方法は単純で,四角形の重心を求め,その重心から各頂点の角度($-\pi \leq \theta \leq \pi$)を算出し,その角度を大きい順に並べるだけです.
- これにより,top-left,top-right,bottom-right,bottom-leftの順に並び変えることができます.
def sort_clockwise(a):
    """
    Sort corners points (x1, y1, x2, y2, ... clockwise from topleft), shape = (*, 2)
    :ref https://gist.github.com/flashlib/e8261539915426866ae910d55a3f9959
    :param a: ndarray, shape is (points nums, 2=(x,y))
    :return a: ndarray, shape is (points nums... clockwise from topleft, 2=(x,y))
    """

    # get centroids, shape=(1,2=(cx,cy))
    center = a.mean(axis=0).reshape((1, 2))

    sorted_inds = np.argsort(np.arctan2(a[:, 1]-center[:, 1], a[:, 0]-center[:, 0]))

    return np.take(a, sorted_inds, axis=0)
- ループ(A)
- 並び変えた四角形の頂点でtop-leftのy座標を小さい順にソートします.
- ソートしたy座標が最初の四角形(
target_poly)のtop-leftのy座標から,指定した誤差(model.config.export_sameRowY)以内の四角形(line_polys)を取得します.- この
line_polysが1行分になります.
- この
-
line_polysのx座標を小さい順にソートします. - ループ(B)
- ソートした
line_polysのx座標の小さい順から指定した距離(model.config.export_sameColX)以内のものを結合する -
model.config.export_sameColXを超える場合は,その文字を使います.- この文字が1列分になります.
- ソートした
def parse_annotations_forFile_basedTopLeft(model):
    from ..model import Model
    model: Model
    polys = np.array([anno.pts for anno in model.annotations], dtype=int)
    texts = np.array([anno.text for anno in model.annotations])

    ret = []
    while polys.shape[0] > 0:
        # target_poly: shape = (1, points_num, 2=(x, y))
        # target_text: shape = (1,)
        target_poly = polys[:1]
        target_text = texts[:1]

        # polys: shape = (cand_num, points_num, 2=(x, y))
        # texts: shape = (cand_num,)
        polys = polys[1:]
        texts = texts[1:]

        # extract the values with top-left y within the error for target_poly's one
        # shape = (cand_num,)
        line_bindices = np.abs(polys[:, 0, 1] - target_poly[:, 0, 1]) < model.config.export_sameRowY

        # line_polys: shape = (column_num, points_num, 2=(x,y))
        # line_texts: shape = (column_num,)
        line_polys = np.concatenate((target_poly, polys[line_bindices]), axis=0)
        line_texts = np.concatenate((target_text, texts[line_bindices]), axis=0)

        polys = polys[np.logical_not(line_bindices)]
        texts = texts[np.logical_not(line_bindices)]
        if line_polys.shape[0] == 0:
            break

        # sort top-left x with ascending order
        tlx_indices = np.argsort(line_polys[:, 0, 0])
        line_polys = np.take(line_polys, tlx_indices, axis=0)
        line_texts = np.take(line_texts, tlx_indices, axis=0)

        row = []
        while line_polys.shape[0] > 0:

            column_text = line_texts[0]

            # extract the values with top-left x(min) within the error for target_poly's maximum x
            concat_index = 1
            for r_index in range(1, line_polys.shape[0]):
                left_poly_maxX = line_polys[r_index - 1, :, 0].max()
                right_poly_minX = line_polys[r_index, :, 0].min()
                if np.abs(left_poly_maxX - right_poly_minX) < model.config.export_sameColX:
                    concat_index = r_index + 1
                    column_text += line_texts[r_index]
                else:
                    break

            # update
            line_polys = line_polys[concat_index:]
            line_texts = line_texts[concat_index:]

            row += [column_text]
        ret += [row]

    return ret
おわりに
OSSにするか悩んでいます.
まあ,巷にはOCRソフトはあふれていますから,OSSにしなくてもよいかなと考えいます(メンテナンス面倒そう.).
公開しました!(https://github.com/jjjkkkjjj/cldvis-txtmodifier)
#唯一のメリットはデータセット用のファイル出力(VOCフォーマット)くらいですし...
ただ,需要がありそうなら,公開するか考えたいと思います.
あと,CSV変換アルゴリズムで何かいい案あればご教示ください.
参考
Quickstart: Using client libraries
Types for Google Cloud Vision v1 API
MVCモデルについて
【InnoSetup】の使い方を理解し設定する-インストーラー作成