はじめに
AI用のPCを会社に導入し,その中にJupyterHubをインストールすることで,会社でのAI開発はリモートで開発できるようになっています.(JupyterHubを使ってAI用サーバーを構築する)
しかし,現状のJupyterhubでは,Intellisenseが効かず,コード補完ができないので,開発効率があまり良くないという問題がありました.そこで,VSCodeのRemote SSHを使って,VSCode上で会社のAI用PCにアクセスしようという話です.
SSH設定
鍵作成
まず,接続元(ローカル)でSSHの鍵を設定します.
※{hoge}は任意
cd ~/.ssh
ssh-keygen -t rsa -f id_{hoge}_rsa
# パスフレーズ設定は任意
configファイルの編集
次に,configファイルを編集します.
※{username}は自分のユーザーネーム,xxx.xxx.xxx.xxxはIPアドレス,{host}は任意.
vi ~/.ssh/config

Host {host}
  HostName xxx.xxx.xxx.xxx
  User {username}
  Port 22
  IdentityFile ~/.ssh/id_{hoge}_rsa
公開鍵の登録
できたid_{hoge}_rsa.pubを接続先にコピーします.
scp ~/.ssh/id_{hoge}_rsa.pub {host}:~
そして,接続先にSSHして,公開鍵を登録します.
ssh {host}
cat id_{hoge}_rsa.pub >> .ssh/authorized_keys
rm id_{hoge}_rsa.pub
chmod 600 .ssh/authorized_keys
確認
もう一度接続して,パスワードを聞かれなければOKです.
ssh {host}
VSCode設定
VSCodeのインストール
公式サイトからダウンロードして,インストールします.
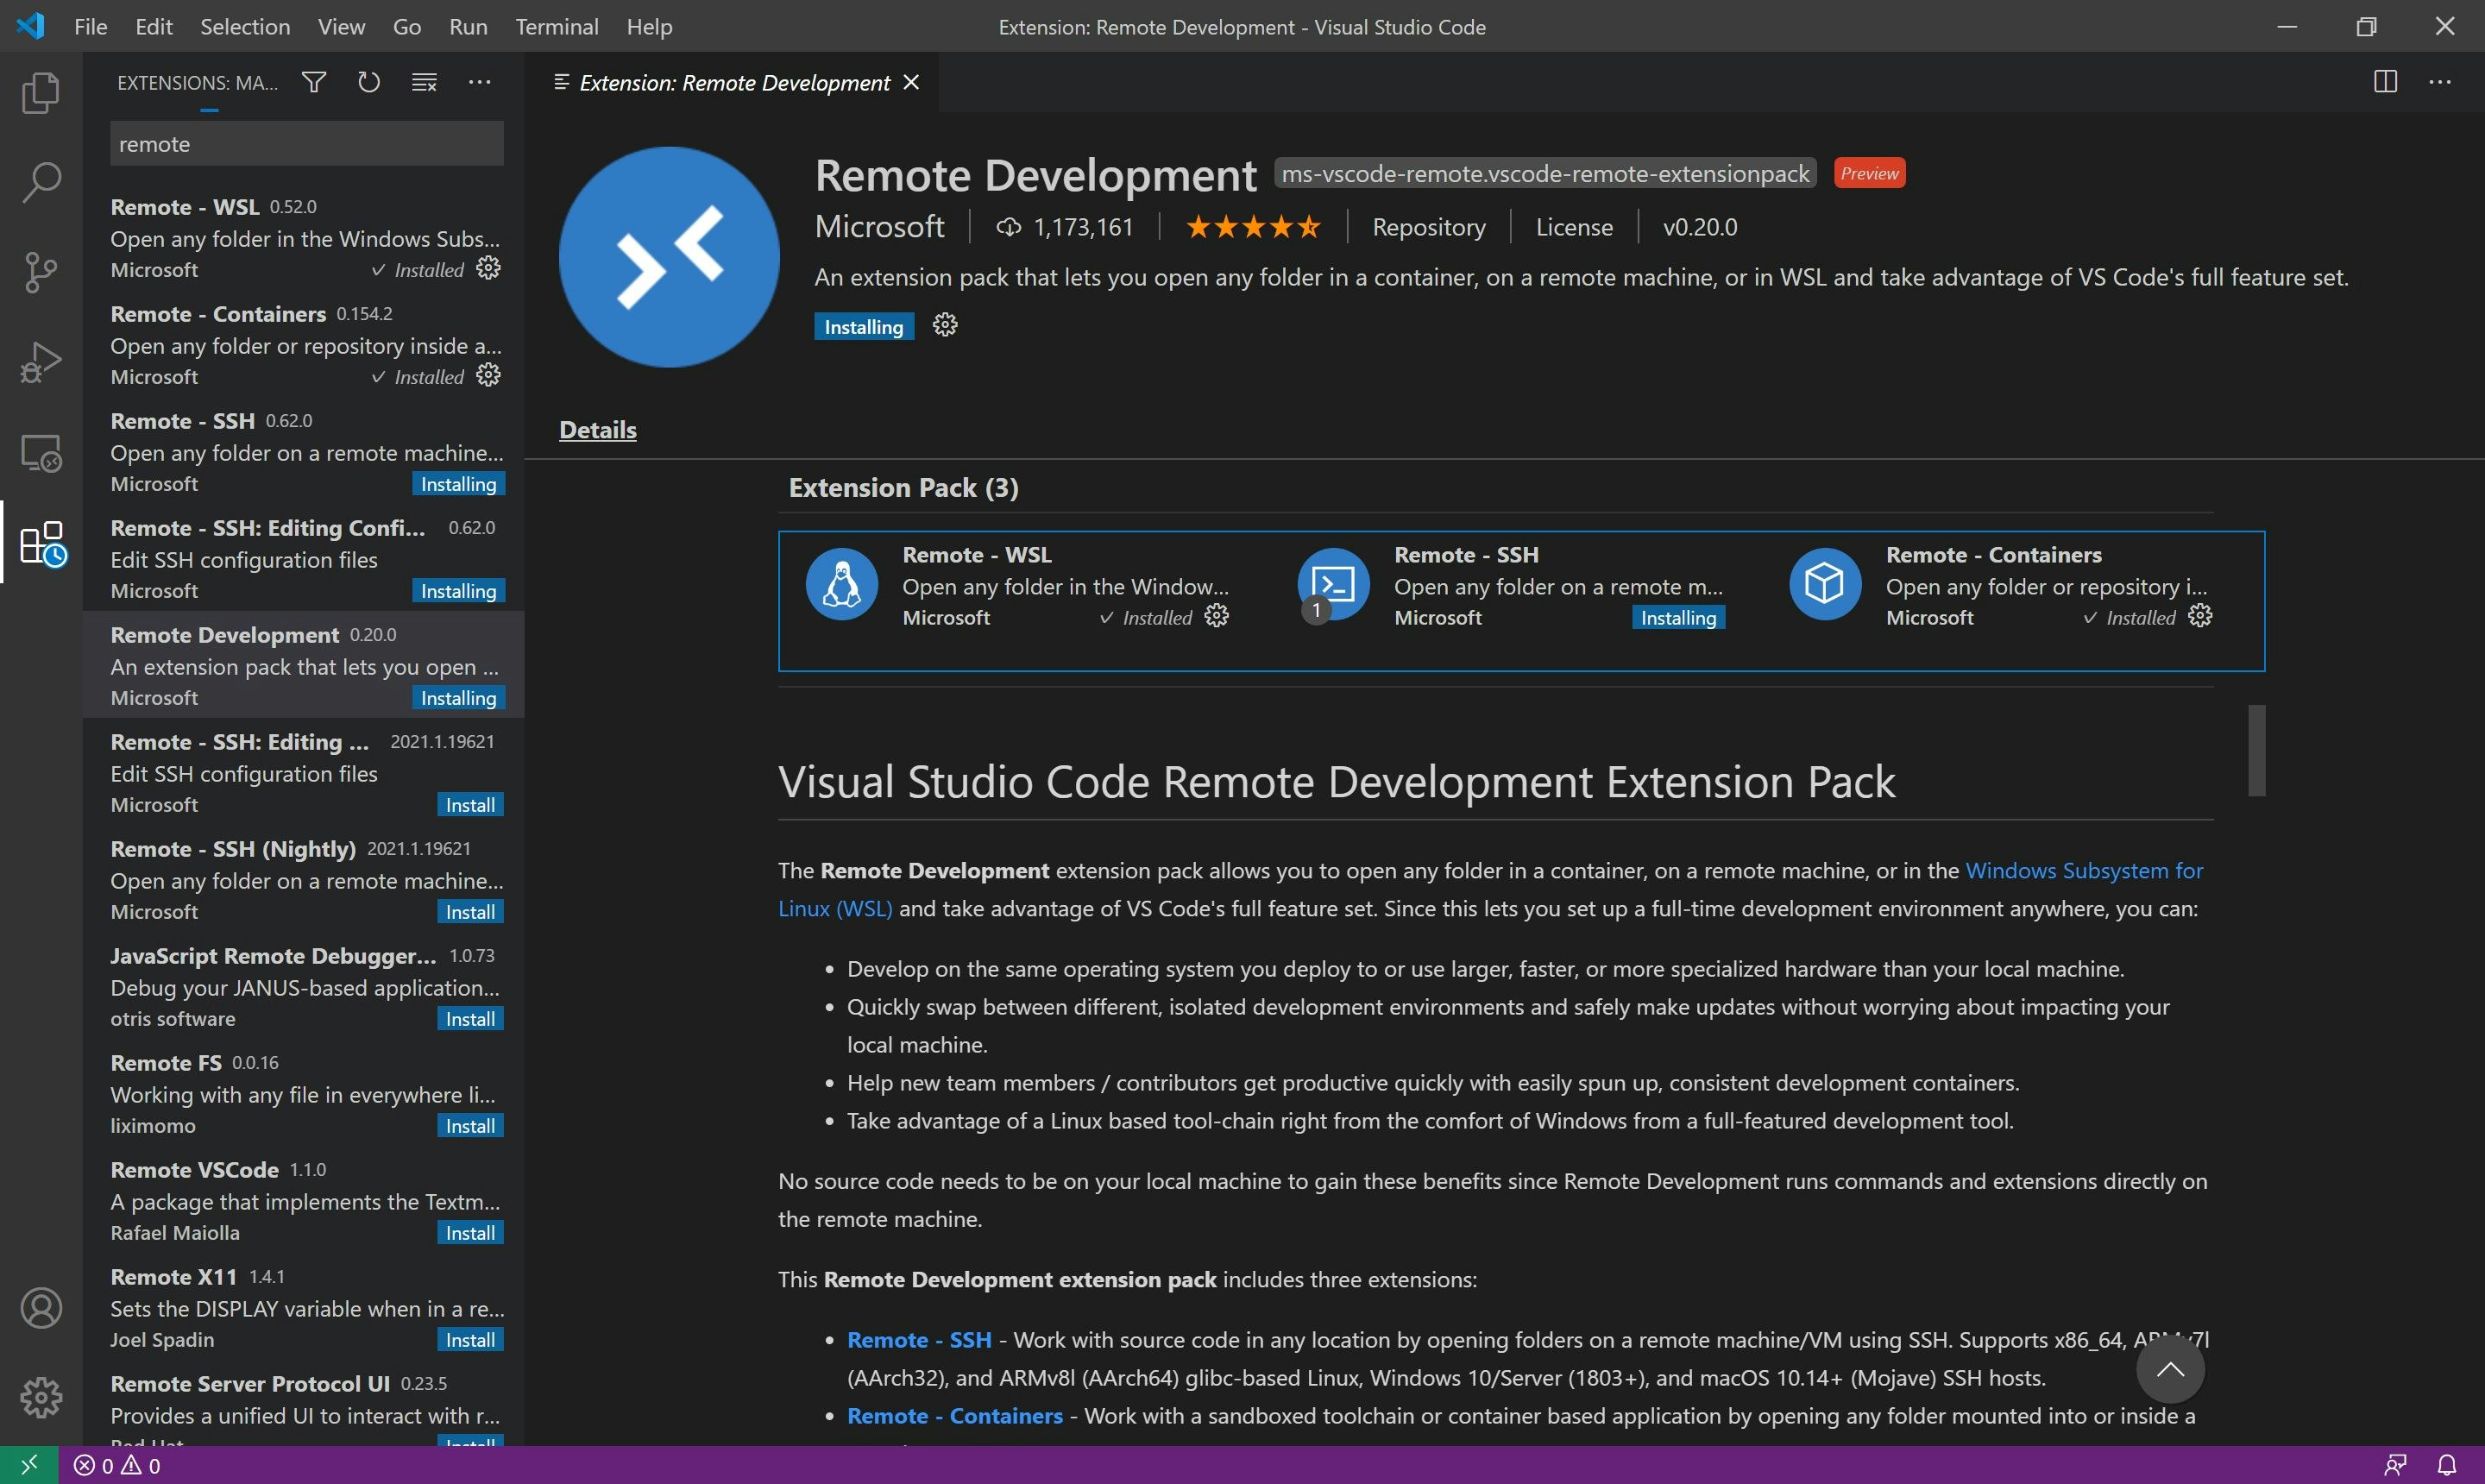
Remote Developmentインストール
Remote Developmentインストールします.(本当はRemote SSHでいいけど,せっかくなので全部インストールします)
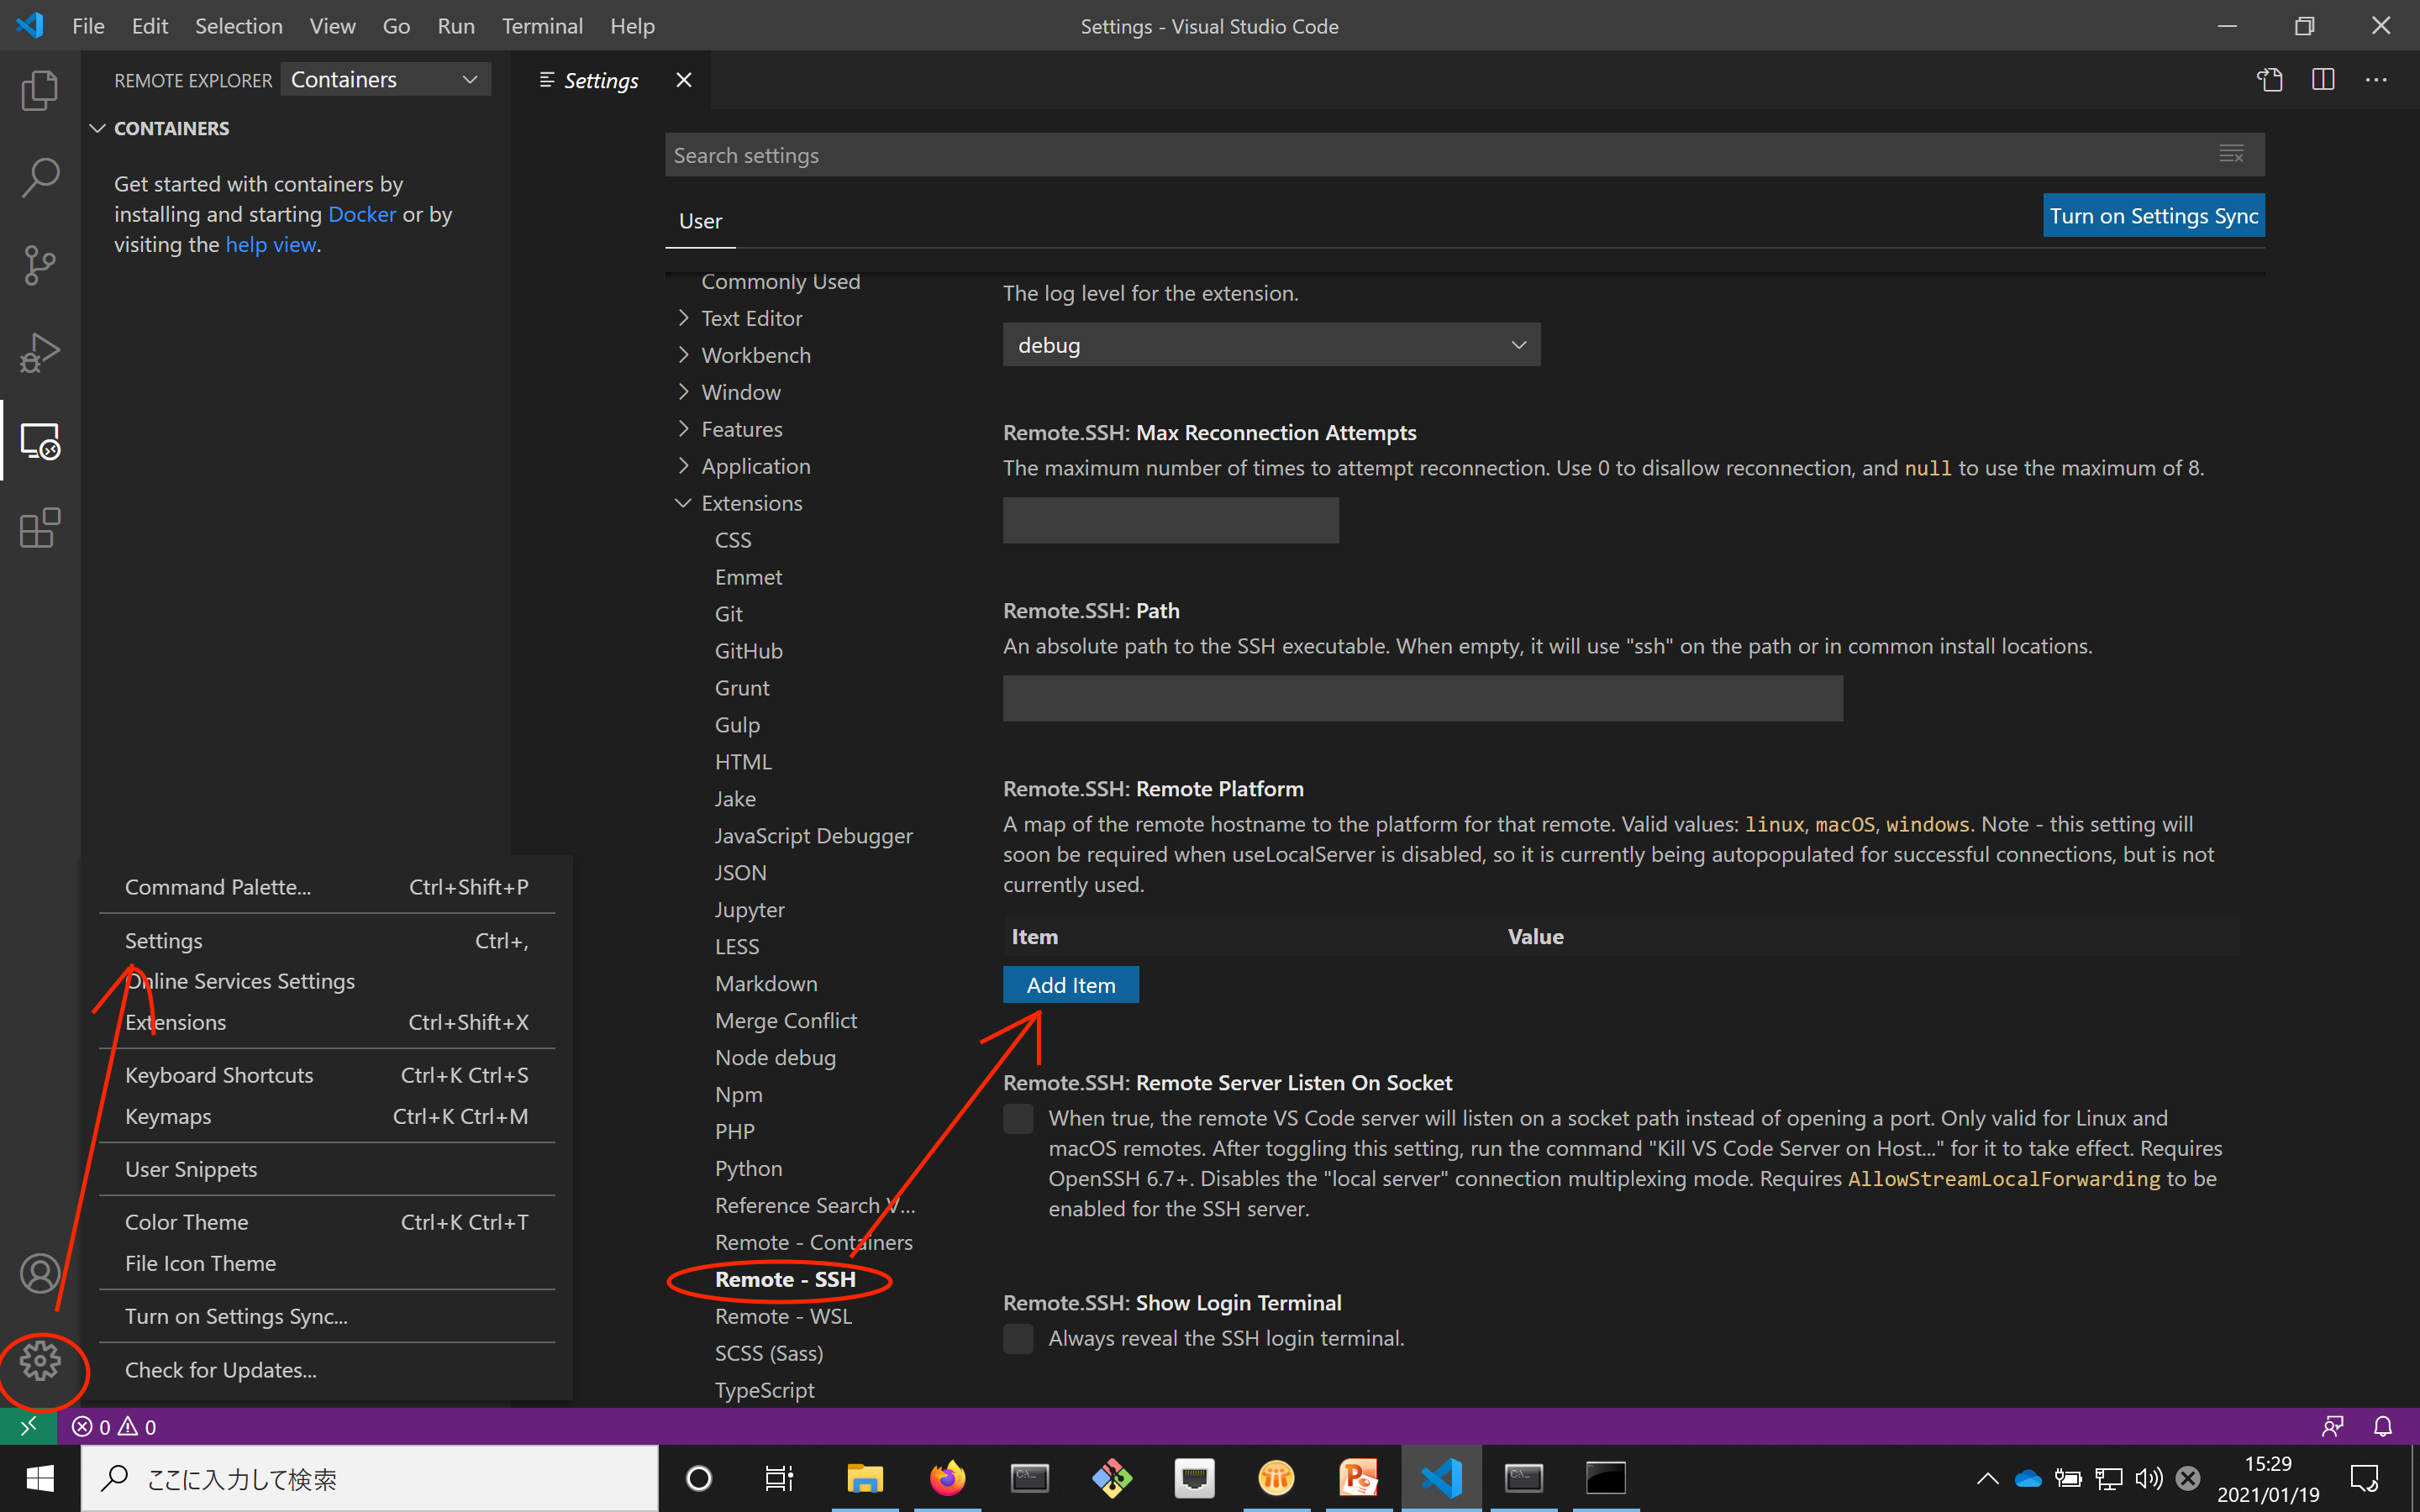
Platformの設定
歯車マーク→Settings→Extensions→Remote-SSH→Remote PlatformでPlatformを設定します.
Item:上記で設定した{host},Value:接続先のOSを設定
※これをしないと恐らく接続できないと思います.
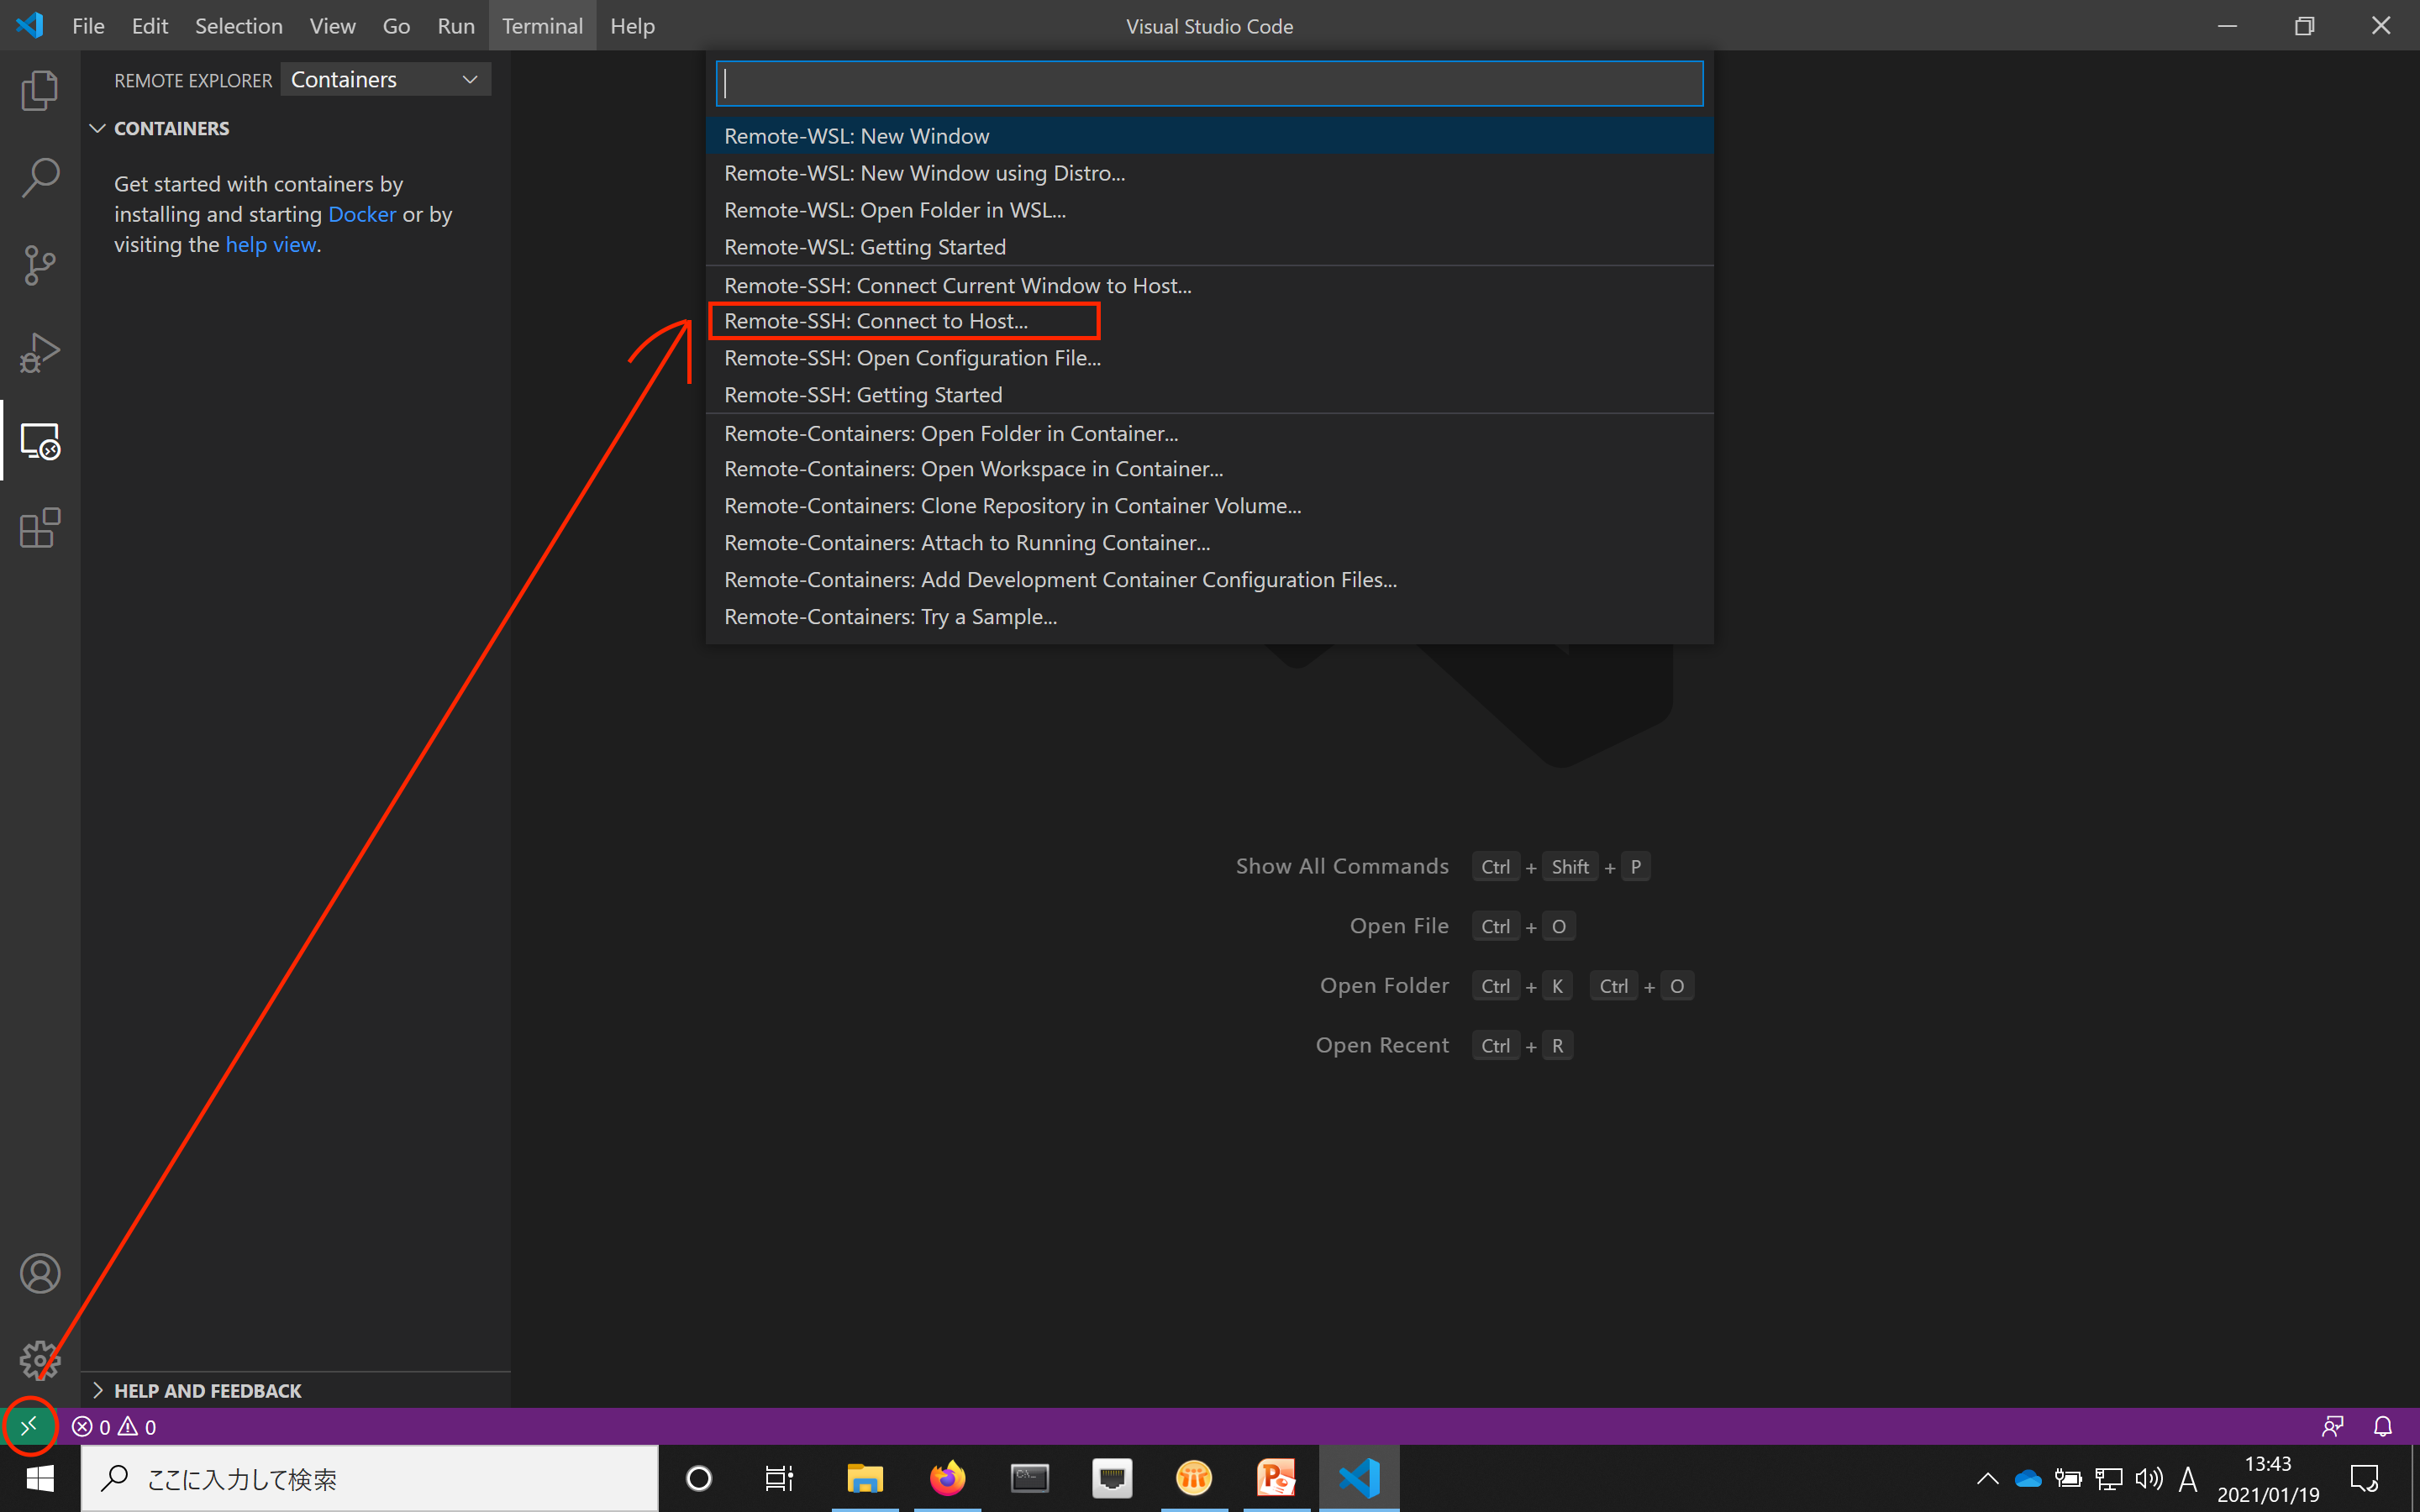
VSCode上で接続
左下の><→Remote-SSH: Connect to Host...→{host}で接続します.
新しくVSCodeのWindowが立ち上がり,エラーが出なければOKです.
例
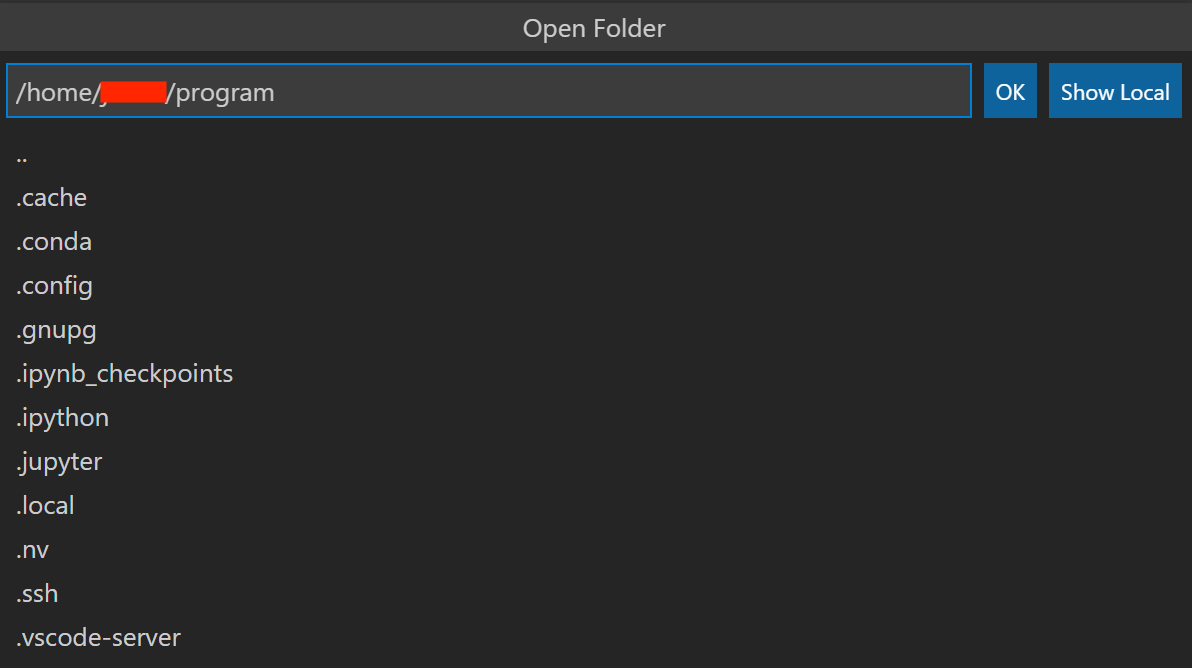
Open Folderすると...
以下のように,接続先のディレクトリを接続元のVSCodeで開けます!!
不具合関係
接続できても,Extensionが読み込めない不具合が起きる可能性があります.その場合は接続先の.vscode-serverを削除すると改善します.
ssh {host}
rm -rf .vscode-server
おまけ
autocomplete
コード補間がうまくいかなかったので,メモ.
特に,環境がAnacondaの場合は,python.languageServerがJediやPyLanceだとダメみたい.
{
    "editor.suggestSelection": "first",
    "vsintellicode.modify.editor.suggestSelection": "automaticallyOverrodeDefaultValue",
    "python.languageServer": "Microsoft",
    "terminal.integrated.inheritEnv": false
}
pythonでの画像表示
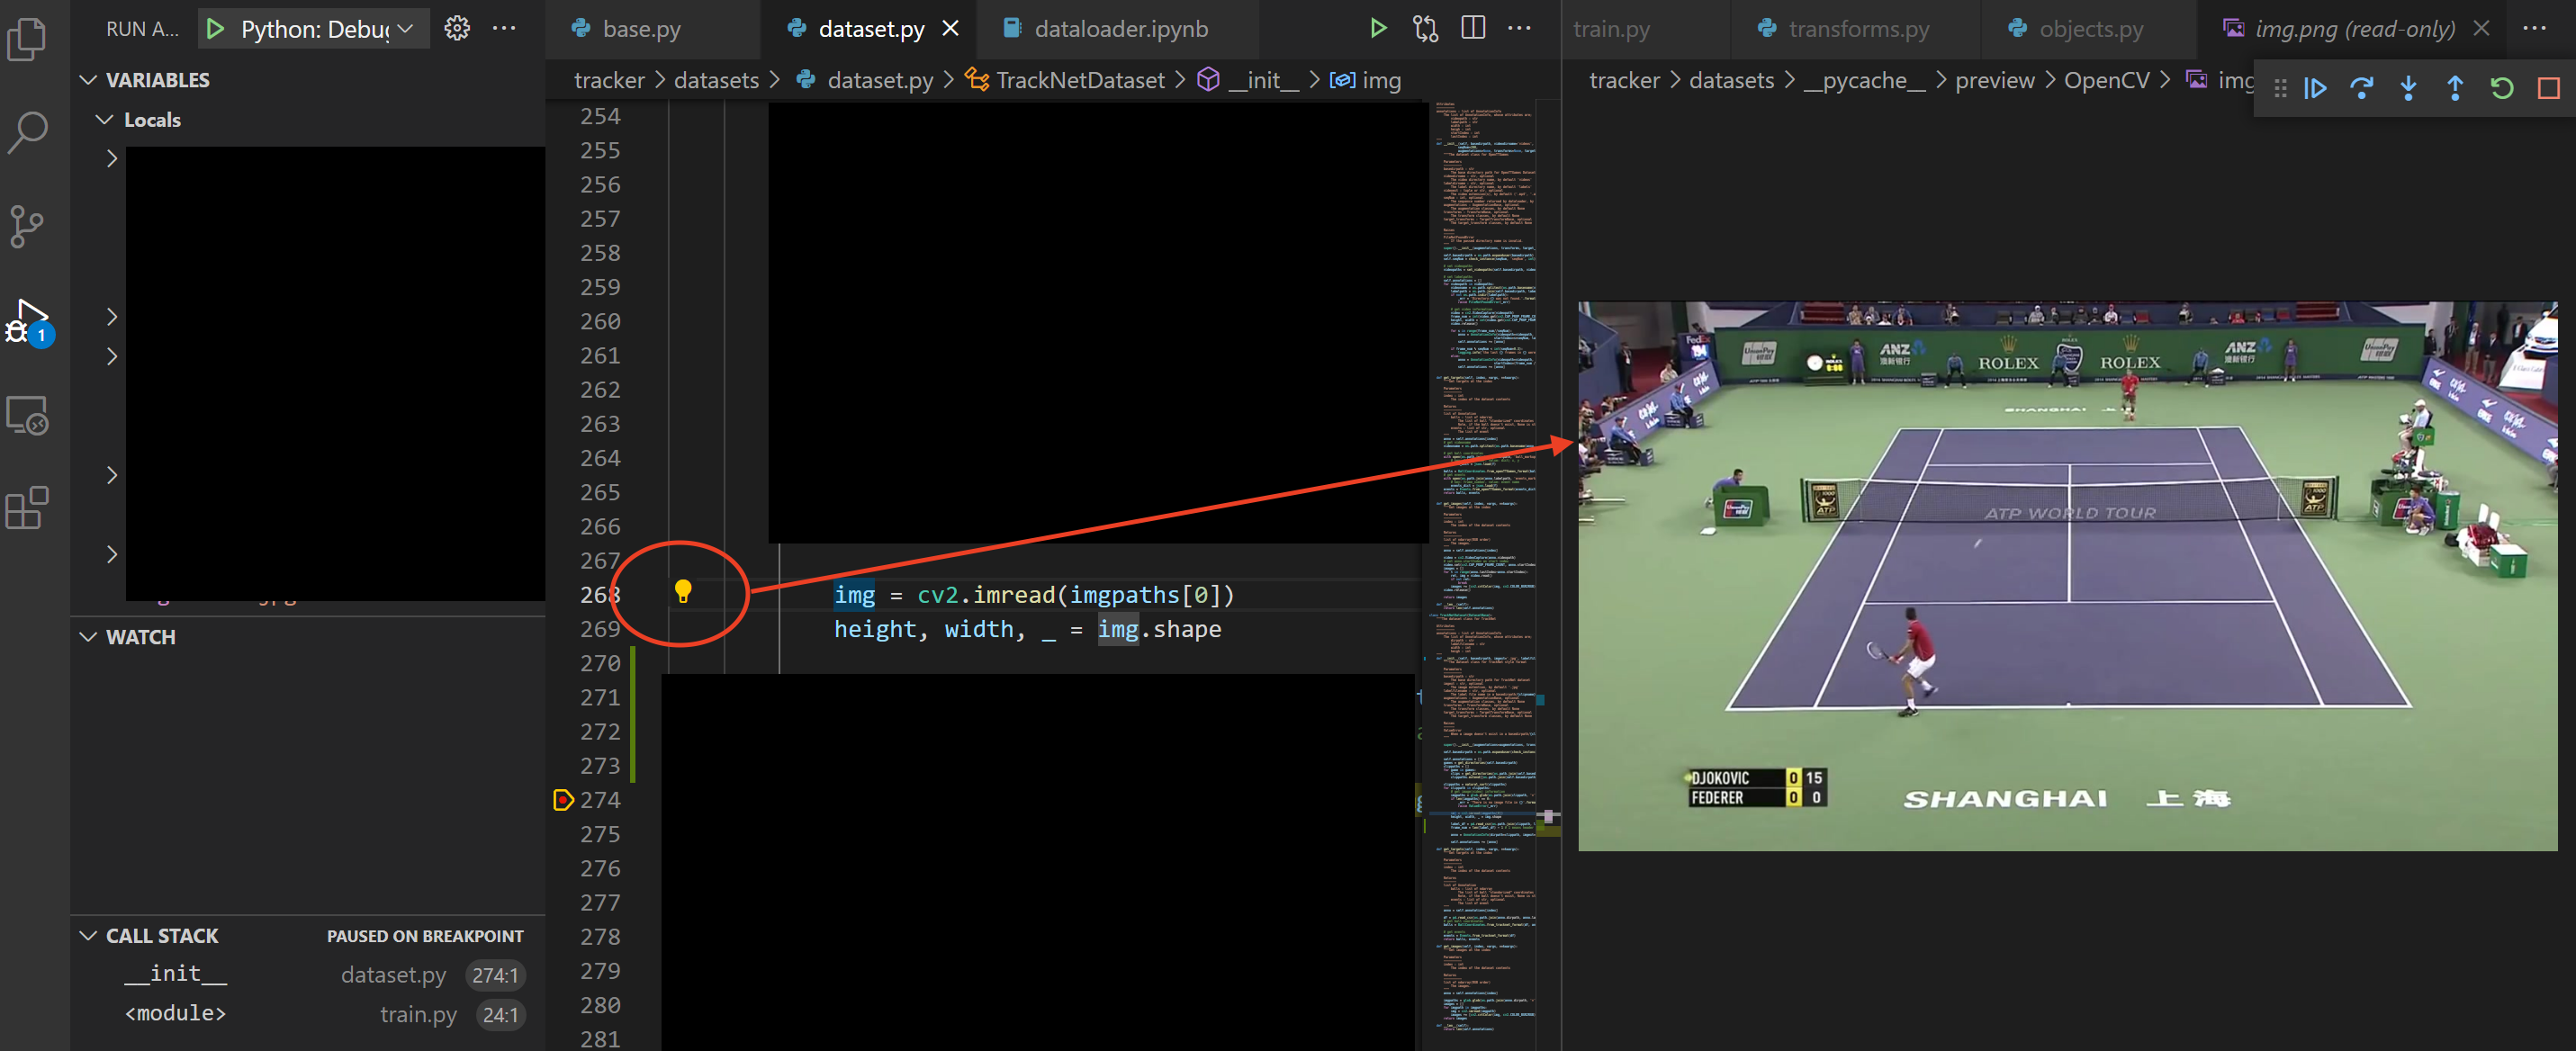
ローカル環境であれば,OpenCVで読み込んだ画像は,Windowを表示させれば確認できますが,リモート環境だとそもそもWindowを表示することができません.
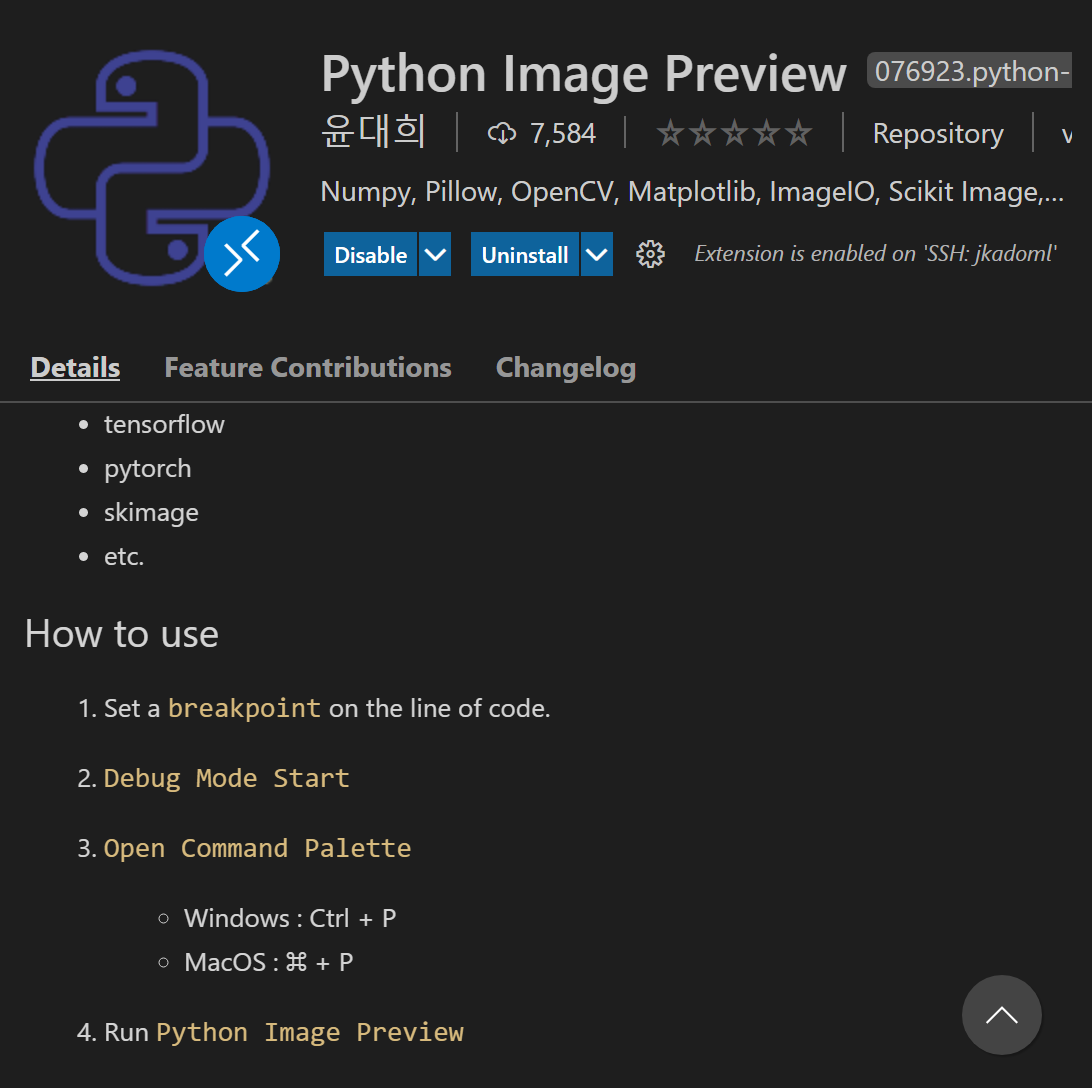
そこで,ExtensionsのPython Image Previewを使うと確認できます.
#まだ,評価等が少ないですが使ってみると便利でした.
Python Image Previewのインストールが完了したら,デバッグ中にCtrl+Pでコマンドパレットを開き,Python Image Previewを選択し,表示したい画像の横に現れるヒントマークをクリックすると,Preview画像が開かれます!
おわりに
これで,開発効率は一段と上がりました.
