はじめに
Webサーバとして非常に一般的に使われているApache httpdを利用して、HTTP/HTTPS接続のできるWebサーバを構築する練習をします。
OSはCentOS 7.4、Apacheのバージョンは2.4.6です。
HTTPサーバができるまで
Apacheのインストール
CentOSデフォルトのリポジトリに入っていますので、yumを使ってインストールしていきましょう。
# yum -y install httpd
# httpd -v
Server version: Apache/2.4.6 (CentOS)
Server built:   Oct 19 2017 20:39:16
さっそく起動
インストールできたのですぐに起動して試しましょう。
# systemctl start httpd
# systemctl is-active httpd
active
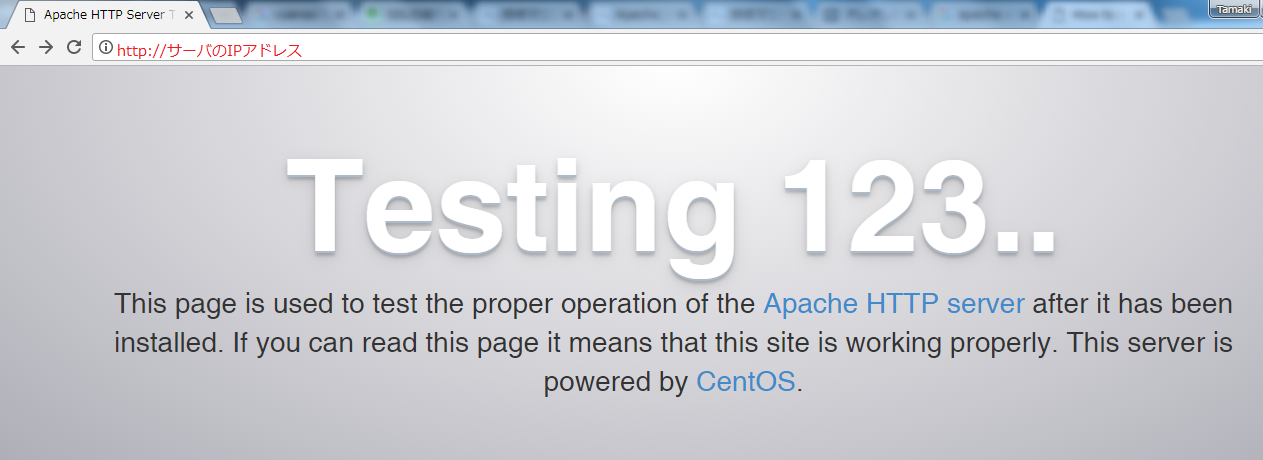
起動しているようです。ブラウザから接続してみましょう。

うまくいきましたね!
HTTPSサーバができるまで
SSLモジュールのインストール
続いてメインの、HTTPSサーバ構築です。ApacheでHTTPS機能を使うにはmod_sslというモジュールが必要になりますので、まずはこれをインストールしましょう。
# yum -y install mod_ssl
# httpd -M |grep ssl
 ssl_module (shared)
秘密鍵とサーバ証明書の作成
SSLハンドシェイクに使用する秘密鍵を作成します。秘密鍵はopenssl genrsaコマンドで作成できますので、これをリダイレクトしてkeyファイルを作ります。
# openssl genrsa > server.key
Generating RSA private key, 2048 bit long modulus
...........+++
..........................+++
e is 65537 (0x10001)
続いてCSRファイルを作成します。CSRファイルは認証局にサーバ証明書を発行してもらう時に使用するファイルで、openssl req -new -key <privatekeyfile>コマンドで作成できます。こちらもリダイレクトしてファイルに書き出しましょう。このコマンドは対話式なので本来は真面目にFQDN等を入れないといけないのですが、練習なのですべてEnterで飛ばします。
# openssl req -new -key server.key > server.csr
You are about to be asked to enter information that will be incorporated
into your certificate request.
What you are about to enter is what is called a Distinguished Name or a DN.
There are quite a few fields but you can leave some blank
For some fields there will be a default value,
If you enter '.', the field will be left blank.
-----
Country Name (2 letter code) [XX]:
State or Province Name (full name) []:
Locality Name (eg, city) [Default City]:
Organization Name (eg, company) [Default Company Ltd]:
Organizational Unit Name (eg, section) []:
Common Name (eg, your name or your server's hostname) []:
Email Address []:

Please enter the following 'extra' attributes
to be sent with your certificate request
A challenge password []:
An optional company name []:
できました。さて、最後にサーバ証明書です。本来ならこのCSRファイルを認証局に渡して署名してもらう必要があるのですが、無料でやりたいので自分で署名してしまいます。先ほど作成したCSRを入力として、以下のコマンドを実行します。
# openssl x509 -req -signkey server.key < server.csr > server.crt
Signature ok
subject=/C=XX/L=Default City/O=Default Company Ltd
Getting Private key
無事、証明書(server.crt)ができました。CSRはこの段階で削除してしまって大丈夫です。
# rm server.csr
秘密鍵とサーバ証明書の配置
作成した鍵と証明書を/etc/httpd/以下に配置していきます。どこに配置するかには明確な決まりがないようですが、/etc/httpd/conf/ssl.keyおよび/etc/httpd/conf/ssl.crt配下に置くことにします。
参考:http://www.apache.com/how-to-setup-an-ssl-certificate-on-apache/
# mkdir /etc/httpd/conf/ssl.key
# mkdir /etc/httpd/conf/ssl.crt
# mv server.key /etc/httpd/conf/ssl.key/
# mv server.crt /etc/httpd/conf/ssl.crt/
SSLモジュールの設定
/etc/httpd/conf.d/ssl.confの中に、配置した鍵と証明書のパスを設定します。
# vi /etc/httpd/conf.d/ssl.conf
以下のように修正します
# SSLCertificateFile /etc/pki/tls/certs/localhost.crt
SSLCertificateFile /etc/httpd/conf/ssl.crt/server.crt
# SSLCertificateKeyFile /etc/pki/tls/private/localhost.key
SSLCertificateKeyFile /etc/httpd/conf/ssl.key/server.key
完了したら、いよいよApacheを再起動して接続してみましょう。
# systemctl restart httpd
# systemctl is-active httpd
active
できました!
感想
初めてApacheでHTTPSサーバの設定を行いました。思ったより大変でした。opensslコマンド周辺の理解がまだ浅いので、機会があれば掘り下げてみたいと思います。
