Before All
「ホーム」=>「サブスクリプション」でサブスクリプションがちゃんと入っているかを確認します。

手順
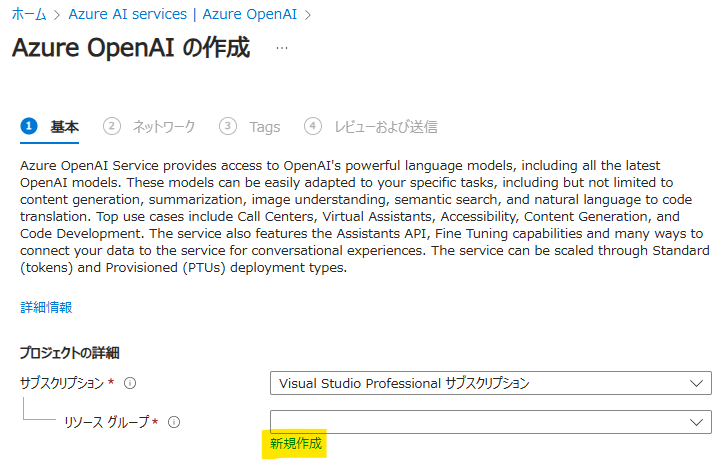
「ホーム」=>「Azure AI Services」を開き、「Azure OpenAI」=>「作成」の順でクリックします


リソースグループの作成(既にある時はスキップ)
「Azure OpenAI の作成」画面で、「プロジェクト詳細」=>「リソースグループ」の「新規作成」をクリックします。


インスタンス設定
「インスタンスの詳細」=>「リージョン」はなるべく「East US」か「East US2」にしてください。「Japan East」などを選んだ時、後ほどOpenAIのモデル選択する際、選べるモデルが少ないです。

各リージョンで使えるモデルの情報は こちら 。
ネットワーク
特段要望がなければ、デフォルト値を使います。

Tags
適当にタグを入れます

作成
設定を確認して、問題なければ「作成」ボタンをクリックします。

デプロイ
OpenAIの実行環境が展開するまでしばらく待ちます。

デプロイ完了したら、「リソースに移動」をクリックします。

ビルドインチャットGUIでテスト
先ほど作成したインスタンスにアクセスして、「Go to Azure Foundry portal」か「Explore Azure AI Foundry portal」のいずれかをクリックして、以下の画面を開きます。


モデル選択
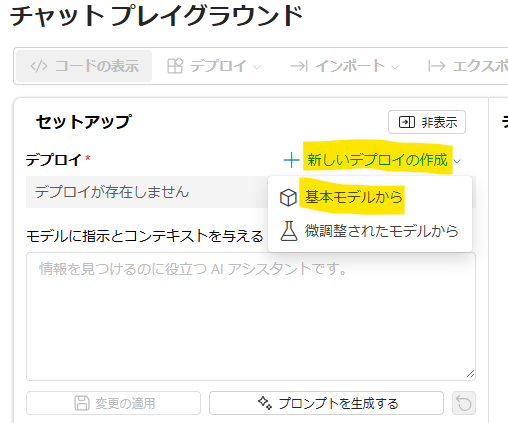
「新しいデプロイの作成」=>「基本モデルから」で適当にモデルを選び、デプロイします。もしリージョンが「US East」じゃない場合、GPT-4シリーズは使えない可能性があります。


チャットテスト
隣のチャット画面で、かのChatGPTのように会話ができます。

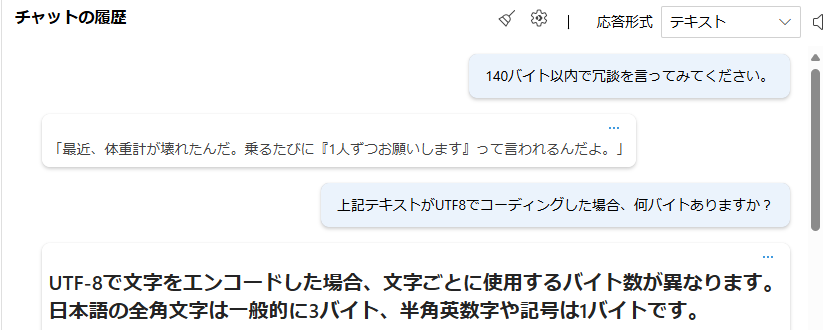
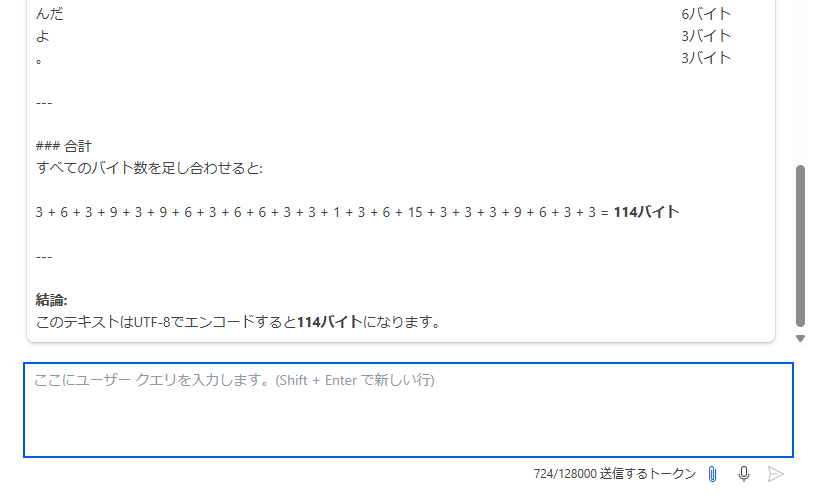
もちろん、画像やPDFの判読もできます。

APIでアクセスする
アクセス情報の確認
左上の「コードの表示」をクリックし、アクセスタイプを「JSON」に設定して、「キー認証」タブを開くと、最低限のアクセス情報が表示されます。これをもってREST APIでアクセスできます。


HTTP(REST API)でのアクセス
下記はVS CodeのhttpYacまたはREST Clientで使える.httpファイルです。
POST https://my-openai-api-demo.openai.azure.com/openai/deployments/gpt-4o/chat/completions?api-version=2024-02-15-preview
api-key: YOUR-API-KEY
Content-Type: application/json

{
  "messages": [
    {
      "role": "system",
      "content": [
        {
          "type": "text",
          "text": "情報を見つけるのに役立つ AI アシスタントです。"
        }
      ]
    }
  ],
  "temperature": 0.7,
  "top_p": 0.95,
  "max_tokens": 800
}
リスポンスはこんな感じです。
{
  "choices": [
    {
      "content_filter_results": {
        "hate": {
          "filtered": false,
          "severity": "safe"
        },
        "self_harm": {
          "filtered": false,
          "severity": "safe"
        },
        "sexual": {
          "filtered": false,
          "severity": "safe"
        },
        "violence": {
          "filtered": false,
          "severity": "safe"
        }
      },
      "finish_reason": "stop",
      "index": 0,
      "logprobs": null,
      "message": {
        "content": "こんにちは!私はAIアシスタントです。どのようなお手伝いをしましょうか?情報を探したり、質問に答えたり、何かを説明したりすることができます。お気軽にお知らせください! 😊",
        "refusal": null,
        "role": "assistant"
      }
    }
  ],
  "created": 1741752775,
  "id": "chatcmpl-BA7kdfq9LacNmMS9LNlozwlyDE3Iu",
  "model": "gpt-4o-2024-11-20",
  "object": "chat.completion",
  "prompt_filter_results": [
    {
      "prompt_index": 0,
      "content_filter_results": {}
    }
  ],
  "system_fingerprint": "fp_b705f0c291",
  "usage": {
    "completion_tokens": 53,
    "completion_tokens_details": {
      "accepted_prediction_tokens": 0,
      "audio_tokens": 0,
      "reasoning_tokens": 0,
      "rejected_prediction_tokens": 0
    },
    "prompt_tokens": 25,
    "prompt_tokens_details": {
      "audio_tokens": 0,
      "cached_tokens": 0
    },
    "total_tokens": 78
  }
}
Pythonでのアクセス
必要なPackageをインストール
pip install openai
Pythonコード
from openai import AzureOpenAI

# キーベースの認証を使用して Azure OpenAI Service クライアントを初期化する
client = AzureOpenAI(
    azure_endpoint='https://my-openai-api-demo.openai.azure.com/',
    api_key='YOUR-API-KEY',
    api_version="2024-05-01-preview",
)

response = client.chat.completions.create(
    model="gpt-4o",
    messages=[
        {"role": "system", "content": "情報を見つけるのに役立つ AI アシスタントです。"},
        {"role": "user", "content": "リトアニアの首都はどこですか?"}
    ]
)

print(response.to_json())
結果
{
  "id": "chatcmpl-BA8BpiaUyWz5at4VcAKdYpu18V8M5",
  "choices": [
    {
      "finish_reason": "stop",
      "index": 0,
      "logprobs": null,
      "message": {
        "content": "リトアニアの首都は **ヴィリニュス (Vilnius)** です。  \nバルト三国の一つであるリトアニアの最大の都市でもあり、歴史的な建築や文化遺産が豊富な場所として知られています。また、ユネスコの世界遺産にも登録された旧市街を有する美しい都市です。",
        "refusal": null,
        "role": "assistant"
      },
      "content_filter_results": {
        "hate": {
          "filtered": false,
          "severity": "safe"
        },
        "self_harm": {
          "filtered": false,
          "severity": "safe"
        },
        "sexual": {
          "filtered": false,
          "severity": "safe"
        },
        "violence": {
          "filtered": false,
          "severity": "safe"
        }
      }
    }
  ],
  "created": 1741754461,
  "model": "gpt-4o-2024-11-20",
  "object": "chat.completion",
  "system_fingerprint": "fp_b705f0c291",
  "usage": {
    "completion_tokens": 88,
    "prompt_tokens": 43,
    "total_tokens": 131,
    "completion_tokens_details": {
      "accepted_prediction_tokens": 0,
      "audio_tokens": 0,
      "reasoning_tokens": 0,
      "rejected_prediction_tokens": 0
    },
    "prompt_tokens_details": {
      "audio_tokens": 0,
      "cached_tokens": 0
    }
  },
  "prompt_filter_results": [
    {
      "prompt_index": 0,
      "content_filter_results": {
        "hate": {
          "filtered": false,
          "severity": "safe"
        },
        "jailbreak": {
          "filtered": false,
          "detected": false
        },
        "self_harm": {
          "filtered": false,
          "severity": "safe"
        },
        "sexual": {
          "filtered": false,
          "severity": "safe"
        },
        "violence": {
          "filtered": false,
          "severity": "safe"
        }
      }
    }
  ]
}