はじめに
本記事ではWindows10を対象に、快適なターミナル環境を設定します。
本環境のメリットは、以下の3つです。
- 視認性が高く、モダンなテーマ(ログインするだけでテンションが上がる)
- 強力な補完機能(Tabを連打するだけで簡単)
- 日常使いのためのエイリアス(ひたすら効率化)
環境
- Windows 10 (Version 1903,初投稿時は1603)
- Windows Subsystem for Linux
- git 2.20.1
- fish 3.0.2
- fisher 4.1.0 (2020/11/9 update!)
- Homebrew 2.0.0 (2019/2/2 update!)
- ConEmu (version: 190526)
本記事では、Windows10 Version 1709で正式機能となったWindows Subsystem for Linuxで環境を作っていきます。(Version 1703以前の場合には以下の記事が参考になりました。)
参考:Bash on Ubuntu on Windowsをインストールしてみよう!
1.fishのインストール
fish-shellです。apt-get でサクッと入ります。
$ sudo apt-add-repository ppa:fish-shell/release-2
$ sudo apt-get update
$ sudo apt-get install fish
使い方は、少し古いですが以下が参考になります。
尚、fish 3.0.0から&&や||が公式対応し、非常に使いやすくなりました。
参考:fish2.4日本語ドキュメント:すぐ使える25の便利機能と実例
2.fisherのインストール
fish用プラグインマネージャです。
公式に従って、以下のコマンドで入ります。
$ curl -sL https://git.io/fisher | source && fisher install jorgebucaran/fisher
3.agnosterのインストール
カッコいいfishのテーマです。以下のコマンドで入ります。
$ fisher install oh-my-fish/theme-agnoster
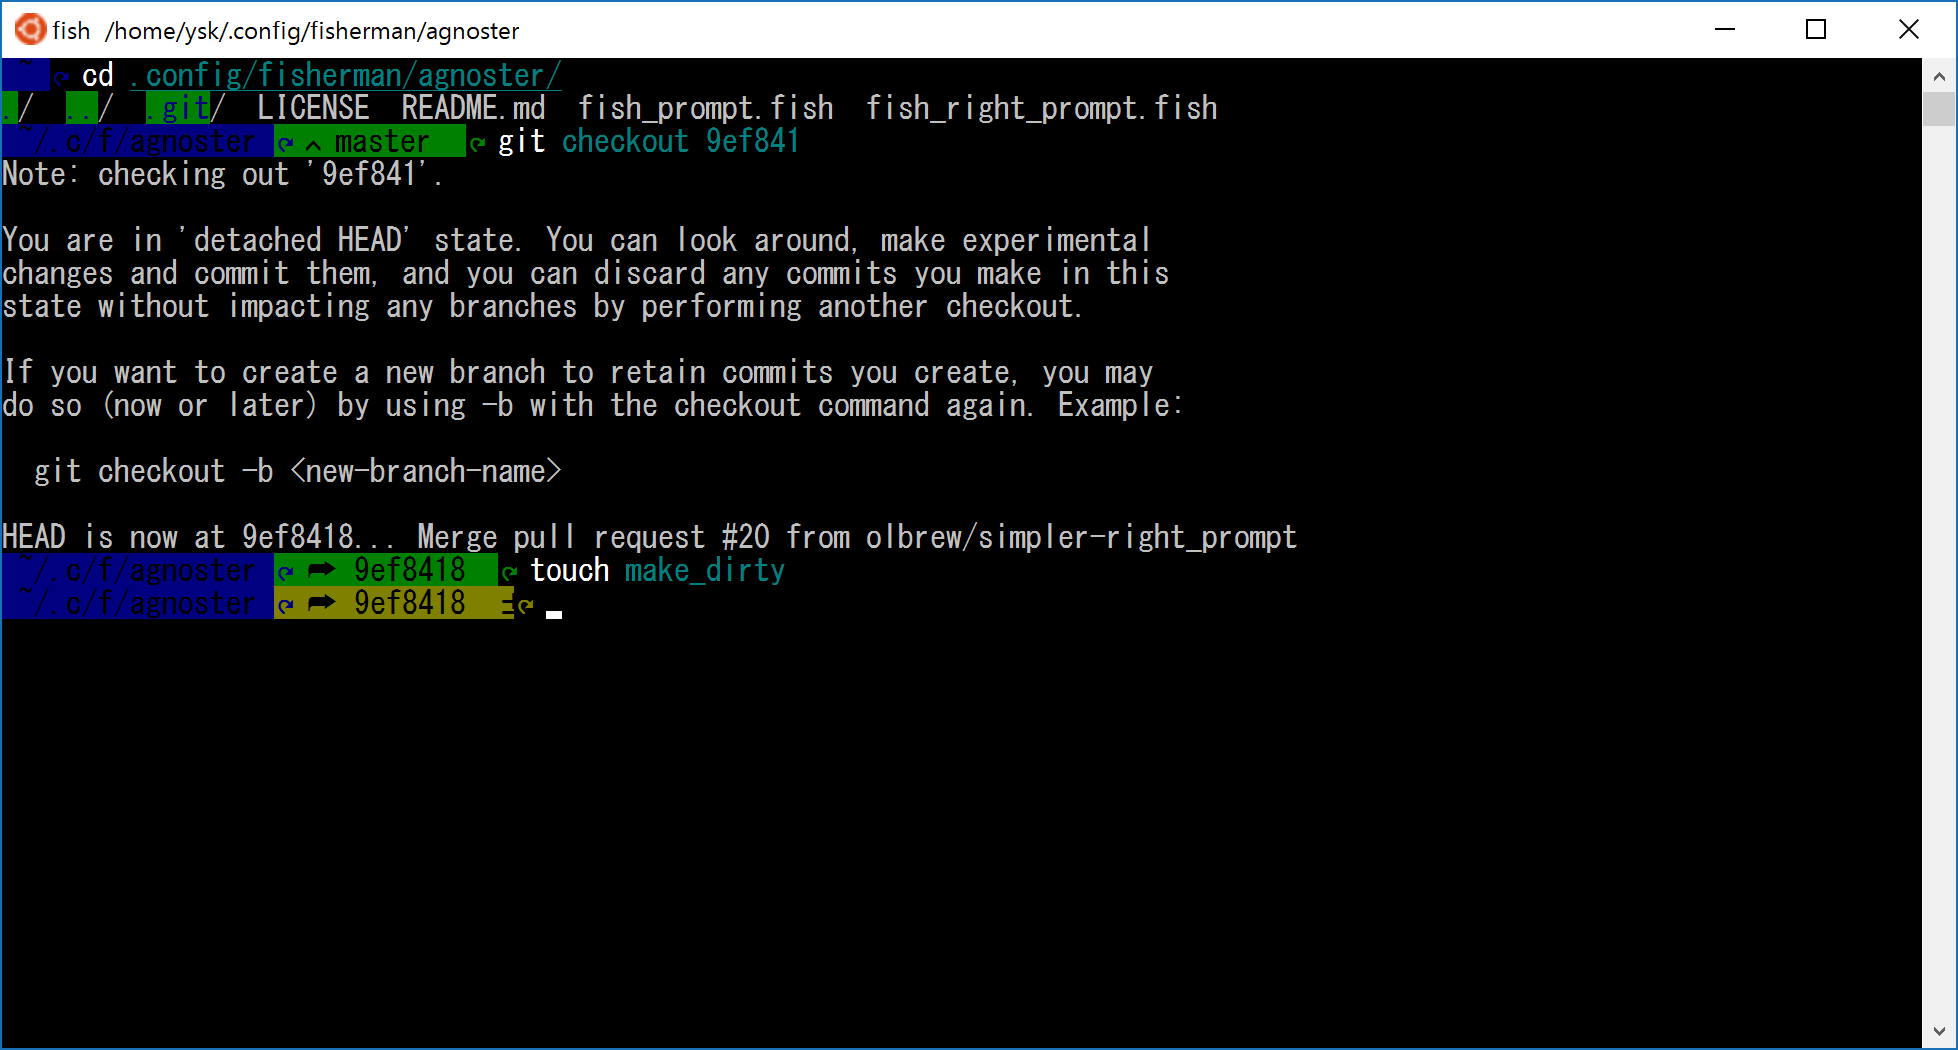
...見辛い、とても見辛い。この辺りがWSL版bashの限界ですね。
フォントとターミナルカラーを設定しましょう。
4.Powerline fontのインストール
本記事では、視認性が高く、agnosterテーマが文字化けしないSauce Code Powerlineフォントをインストールします。
$ git clone https://github.com/powerline/fonts.git
$ mv fonts /mnt/c/
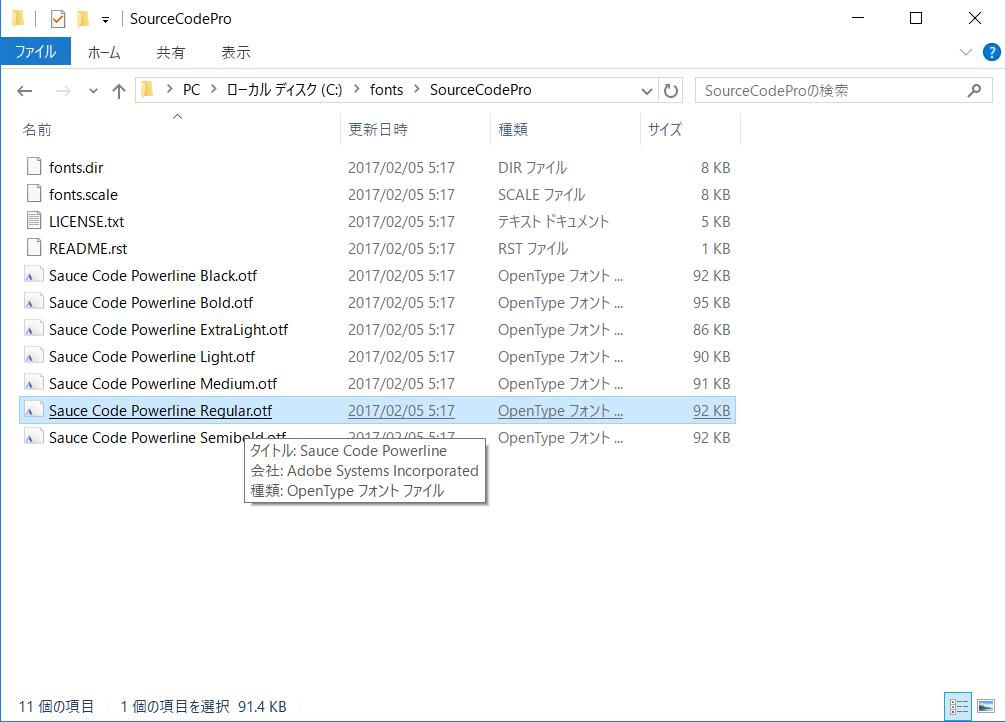
Cドライブ直下にfontsフォルダが移動したと思うので、
C:¥fonts¥SourceCodePro¥Sauce Code Powerline Regular.otf
をダブルクリックし、フォントをインストールしてください。
5.ConEmuのインストール
Windows用タブ付きコンソールエミュレータです。
公式からDownload ConEmu Stable, Installer (32-bit, 64-bit) を選択して、
exeファイルをDLし、インストールしてください。
6.ConEmuの設定
ConEmuを起動し、右上メニューのSetting...から設定をします。
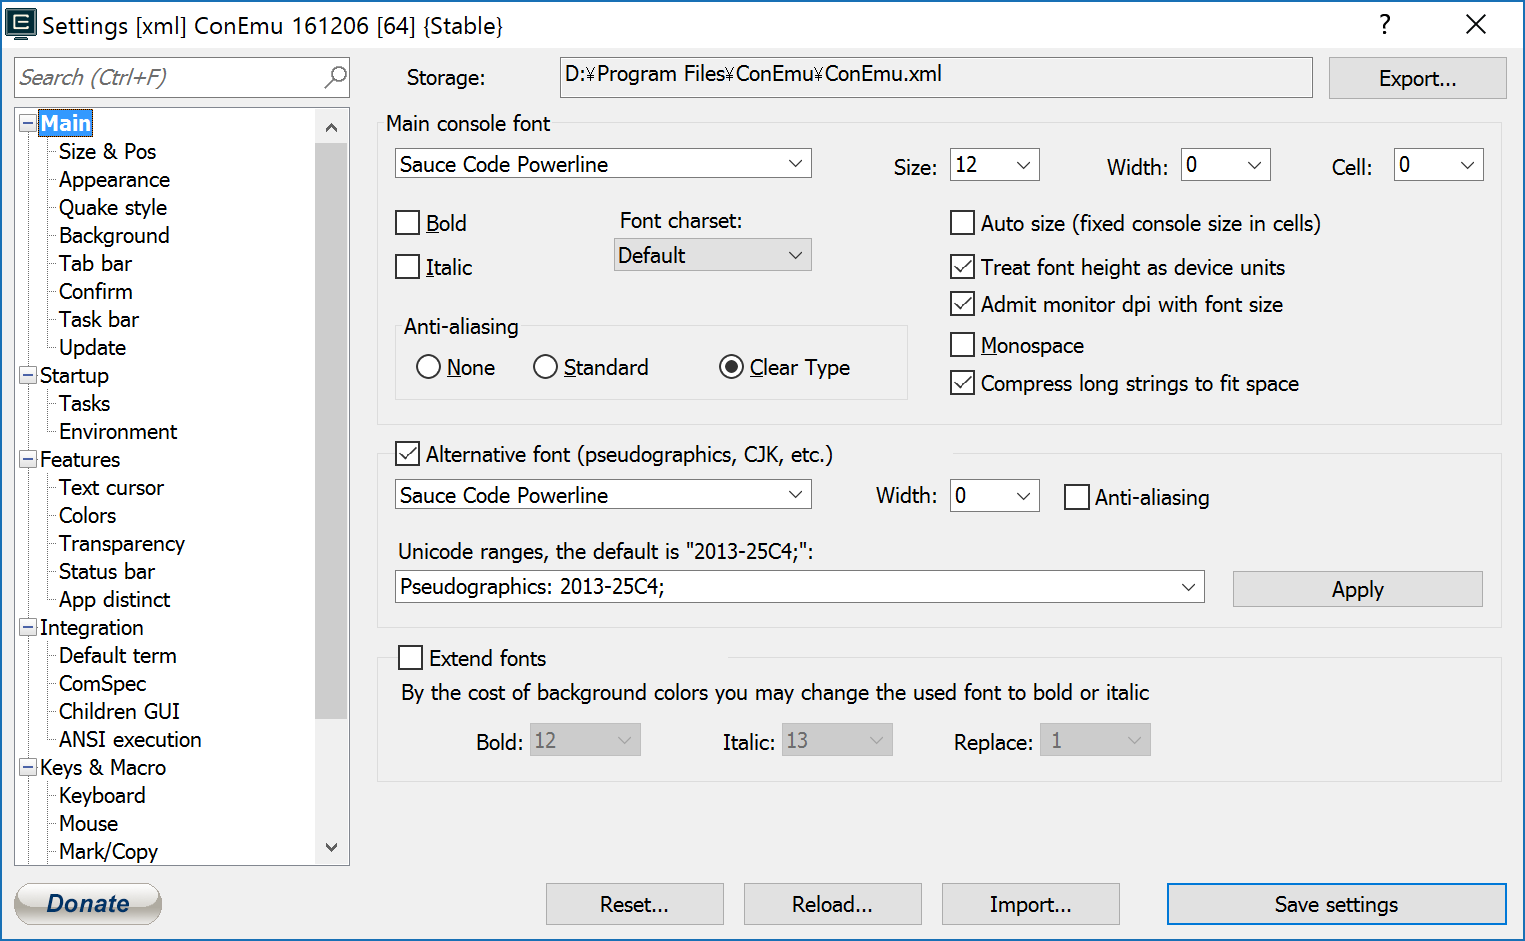
[Main]の設定では、Main Console fontを先ほどインストールしたSauce Code Powerlineに設定し、Monospaceのチェックを外します。(文字化け対策)
[Startup]>[Tasks]の設定では、以下のようにCommandsを設定してください。タスク名、アイコン等はお好みです。
%windir%¥system32¥bash.exe ~ -new_console:t:"Fish" -cur_console:p -c fish
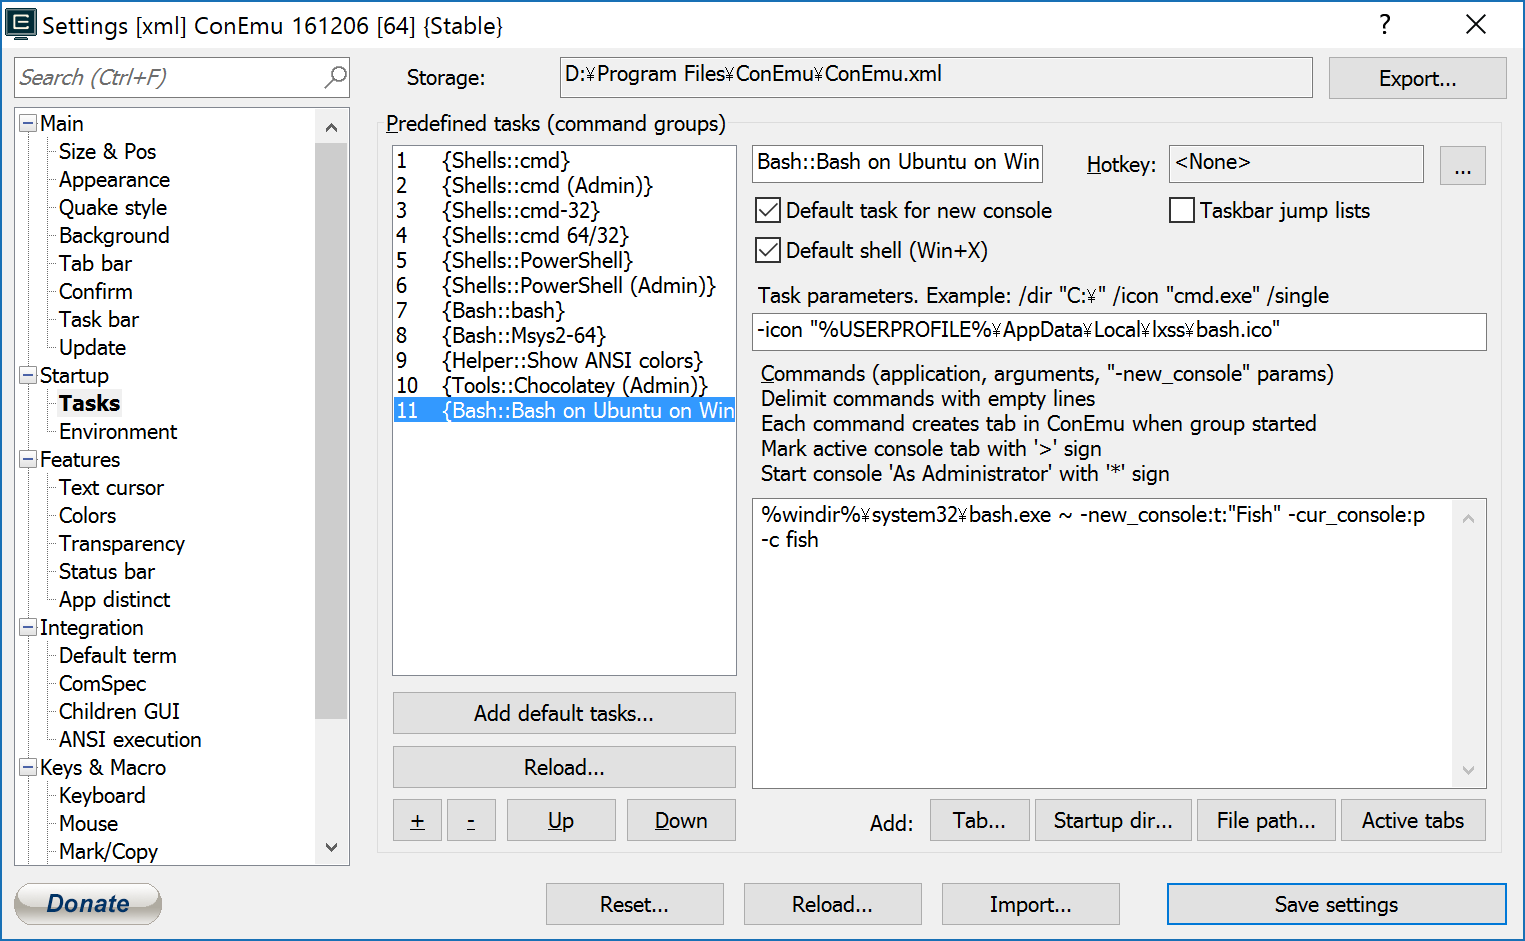
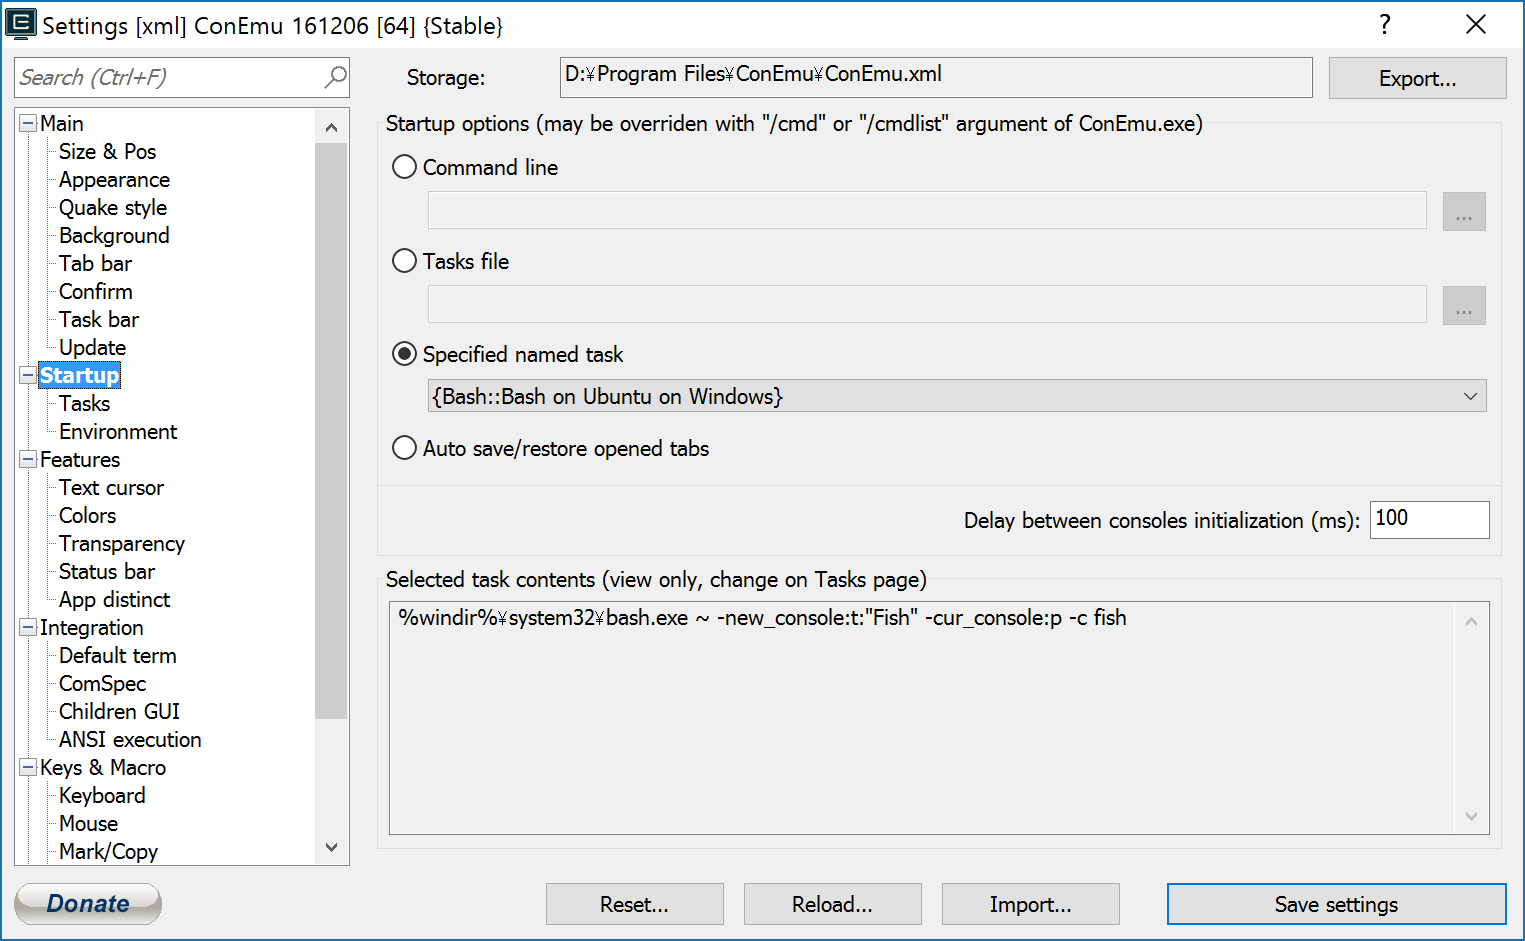
その後、[Startup]で先ほど設定したタスク名を選択します。
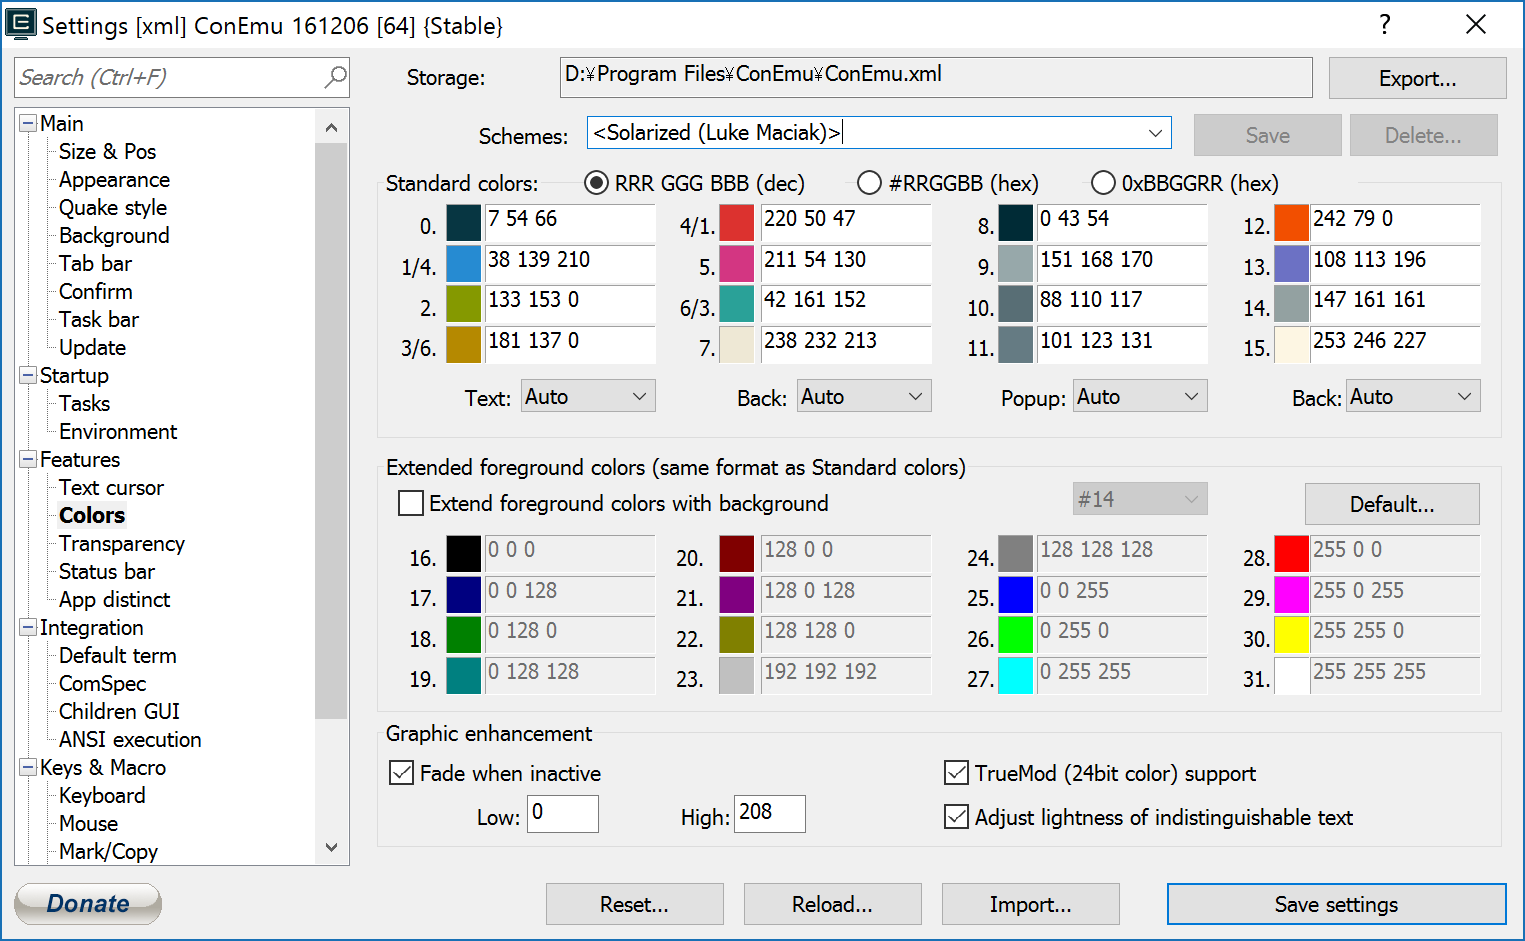
最後に、[Colors]設定です。
用意されているSchemesから<Solarized (Luke Maciak)>を選択し、
右下の[Save Settings]をクリックすれば設定完了です。
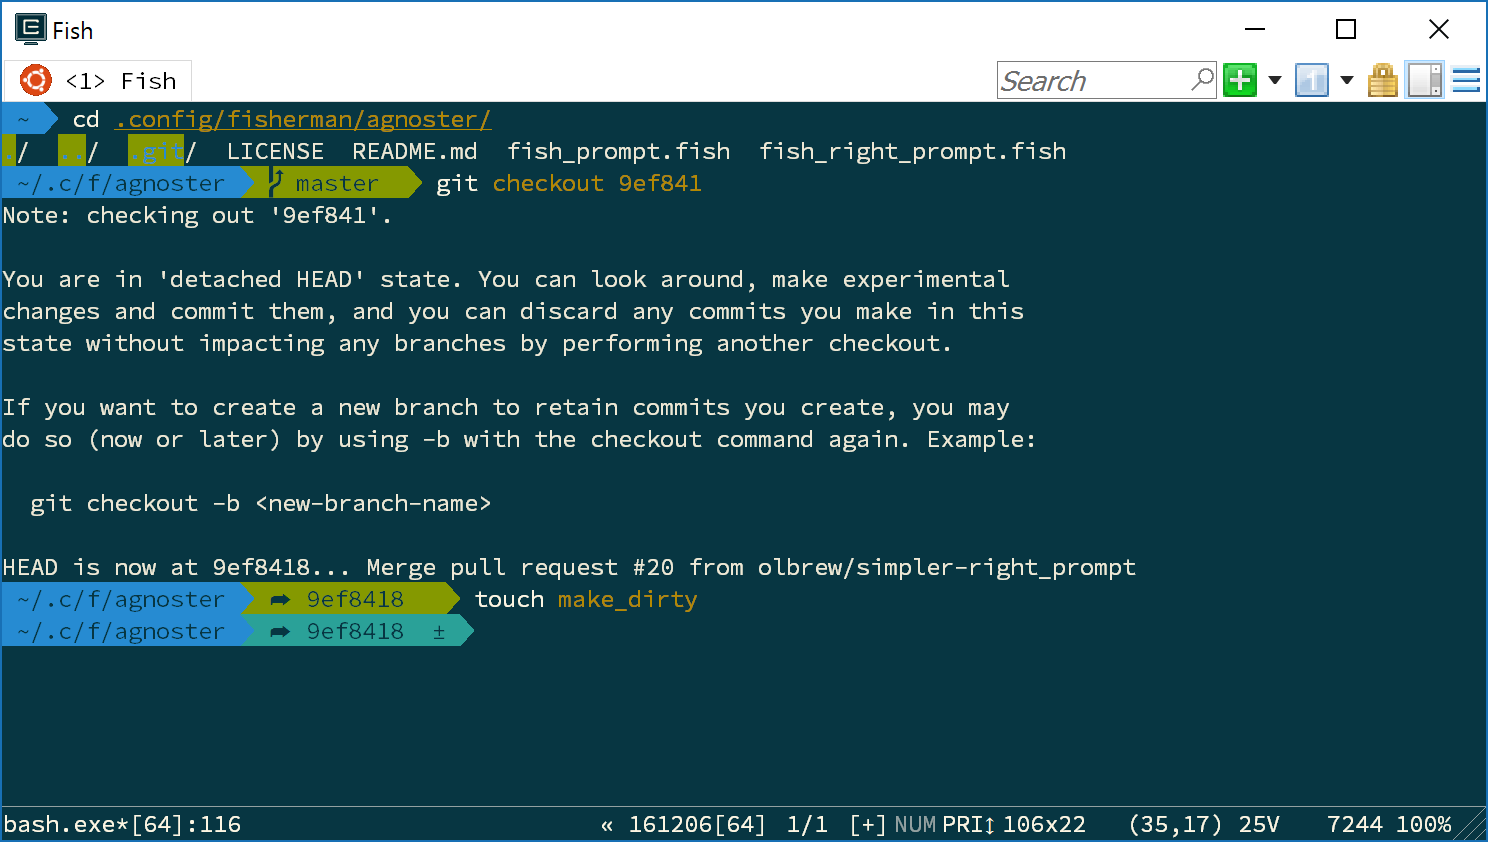
7.見た目完成
8.プラグインの設定
ここでは、非常に便利なfishのプラグインを紹介していきます。
edc/bass
標準では使えないbashの記法に対応できるようになります。
$ fisher install edc/bass
fzf
Ctrl + R でコマンド履歴を検索できるようになります。めちゃくちゃ便利です。
# pluginのインストール
$ fisher install jethrokuan/fzf

# fzf本体のインストール
$ git clone --depth 1 https://github.com/junegunn/fzf.git ~/.fzf
$ ~/.fzf/install
z
zコマンドで、ディレクトリ移動がかなり捗ります。
$ fisher install jethrokuan/z
fish-bd
cd ./..をbdコマンドでできるようになります。地味ですが、これもディレクトリ移動がかなり捗ります。
$ fisher install 0rax/fish-bd
nvm
node.jsバージョンマネージャです。
(2018年秋頃にはfnm(fish nodejs manager)という名前だったのですが、いつの間にか改名されていました。)
nvm use latestコマンドで最新版を利用、nvm use ltsコマンドで安定版を利用できるようになります。
$ fisher install jorgebucaran/fish-nvm
9.その他(config.fishの設定)
.bashrc相当の設定は以下から。
$ vim ~/.config/fish/config.fish
参考に筆者のconfig.fishの一部を掲載します。
いろいろ検索して、最適なfish環境を作り上げてください。
## vimで開く
alias vi='/usr/bin/vim'

## for windows explorer (required win10 creators update)
alias open='explorer.exe'
alias e='explorer.exe .'

# cd > ls
function cd
  builtin cd $argv
    ls -a
end

# lsの色を見やすく変更
if test ! -e ~/.dircolors/dircolors.ansi-dark
    git clone https://github.com/seebi/dircolors-solarized.git ~/.dircolors
end
eval (dircolors -c ~/.dircolors/dircolors.ansi-dark)

# aliases for git
alias g="git"
alias gd="git diff"
alias ga="git add"
alias gca="git commit -a -m"
alias gcm="git commit -m"
alias gbd="git branch -D"
alias gp="git push"
alias gb="git branch"
alias gcob="git checkout -b"
alias gco="git checkout"
alias gba="git branch -a"
alias glog="git log --graph --date=iso --pretty='[%ad]%C(auto) %h%d %Cgreen%an%Creset : %s'"
alias gll="git log --pretty=format:'%C(yellow)%h%Cred%d\\ %Creset%s%Cblue\\ [%cn]' --decorate --numstat"
10.(参考)Homebrewの利用方法
Macユーザーにはお馴染みのHomebrewがWindows Subsystem for Linuxに正式対応しました。本記事で紹介しているfish shell自体もこのHomebrewを使って、インストールできます。
ここではインストール方法を紹介します。
$ sudo apt-get install build-essential curl file git
$ curl -fsSL https://raw.githubusercontent.com/Linuxbrew/install/master/install.sh | sh
$ echo 'set -gx fish_user_paths $HOME/.linuxbrew/bin $fish_user_paths' >> ~/.config/fish/config.fish
$ brew update
11.(参考)ghqのインストール
Gitのローカルリポジトリが増えてくると、フォルダ構成や移動が悩みどころですよね。そんなときにおすすめしたいのが、ghqです。
git clone {url}と同じようにghq get {url}で使えます。brewでさっくり入れましょう。
fishのTAB補完も使えるようfish-ghqも追加します。
$ brew install ghq
$ fisher install decors/fish-ghq
参考
*1) 2017年お手軽なのに格好良くて最強のWindowsターミナル環境構築。「Windows8.1にcmder+Powerline」にて
http://qiita.com/hmcGit/items/98b80507406cf25c10b4
*2) 詳解 fishでモダンなシェル環境の構築(fish,tmux,powerline,peco,z,ghq,dracula)
http://qiita.com/susieyy/items/ac2133e249f252dc9a34
