6
3

Delete article

Deleted articles cannot be recovered.

Draft of this article would be also deleted.

Are you sure you want to delete this article?

More than 3 years have passed since last update.

GitHubリポジトリの公開/非公開を切り替える方法

Posted at

#設定環境
Windows10

#内容
GitHubにある既存リポジトリを公開または非公開に切り替える方法を記載します。

  1. 対象のリポジトリを表示
  2. Settingsページ表示
  3. Change repository visibilityで画面表示
  4. Change repository visibilityで公開/非公開設定
  5. 設定変更
  6. 設定変更確認

#手順

  1. GitHubにログインし、リポジトリ一覧画面設定を変更したいリポジトリを表示します。
    スクリーンショット (236).png

  2. settingsタブをクリックします。
    スクリーンショット (226).png

  3. settings画面の一番下にあるDanger Zoneの中にある、Change repository visibilityの
    Change visibilityボタンをクリックします。
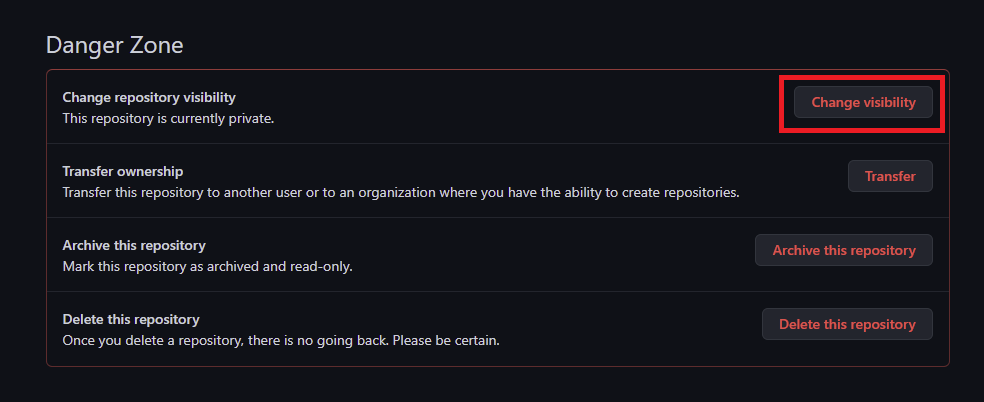
    スクリーンショット (228).png

  4. Change repository visibilityポップアップが出てくるので、公開または非公開をラジオボタンで設定します。
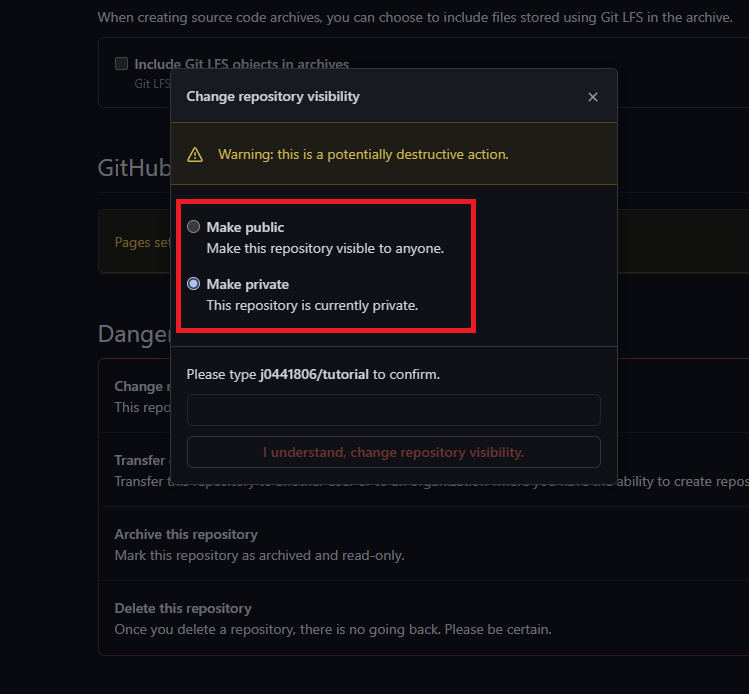
    スクリーンショット (231).png
    公開設定にする→Make publicを選択
    非公開設定にする→Make privateを選択

  5. 「Please type [アカウント名]/[設定を変更するリポジトリ名] to confirm.」の下のテキストボックスに[アカウント名]/[設定を変更するリポジトリ名]を入力し、「I understand, change repository visibility.」のボタンをクリックします。
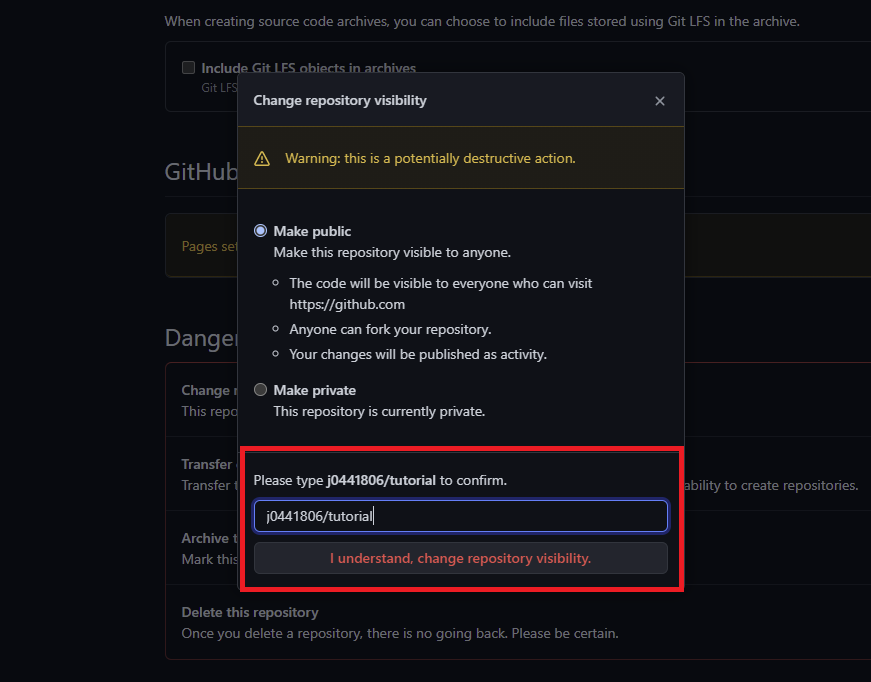
    スクリーンショット (233).png

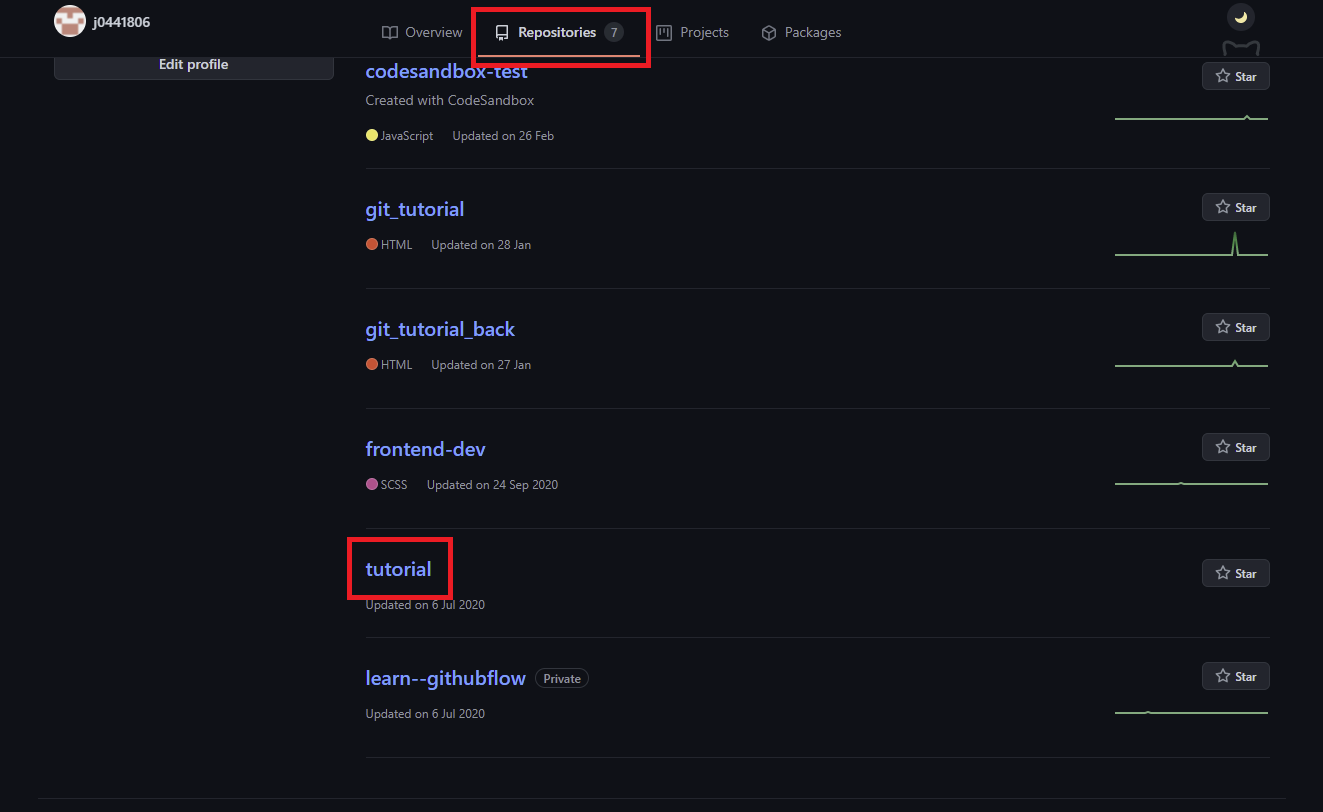
  6. 以上で、設定変更は完了です。リポジトリ画面に戻ると、非公開の場合、リポジトリ名の横にPrivateが表示されます(公開の場合は、何も表示されません)。
    スクリーンショット (238).png

個人的な備忘録を兼ねて記事を書きましたが、どなたかのお役に立てれば幸いです。
参考:
GitHub Docs リポジトリの可視性を変更する

6
3
2

Register as a new user and use Qiita more conveniently

  1. You get articles that match your needs
  2. You can efficiently read back useful information
  3. You can use dark theme
What you can do with signing up
6
3

Delete article

Deleted articles cannot be recovered.

Draft of this article would be also deleted.

Are you sure you want to delete this article?