どうも〜、泉(@izumin_0401)です。
Claude Codeのカスタムサブエージェントを作成する方法について、わかりやすく解説しやす。
ブログ記事はこちら
【Claude Code】カスタムサブエージェントを作成する方法
早速ですが、Claude Codeのカスタムサブエージェントを作成する方法を解説します。
僕は普段Claude Codeを文章生成で使っているので、今回は記事をレビューするカスタムサブエージェントを作成してみます。
エージェントと入力
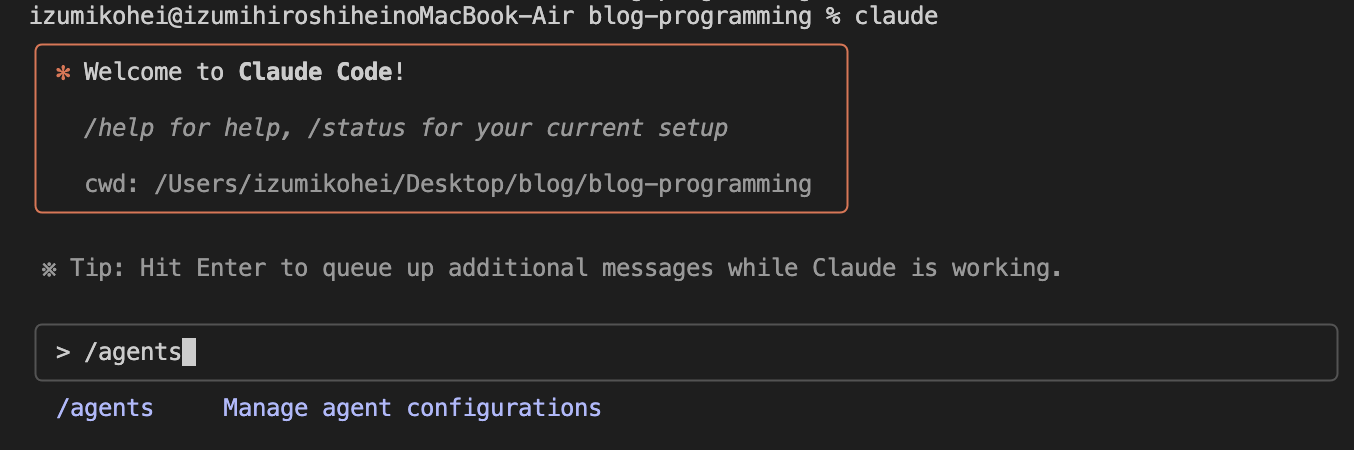
/agentsと入力します。
エージェントの作成
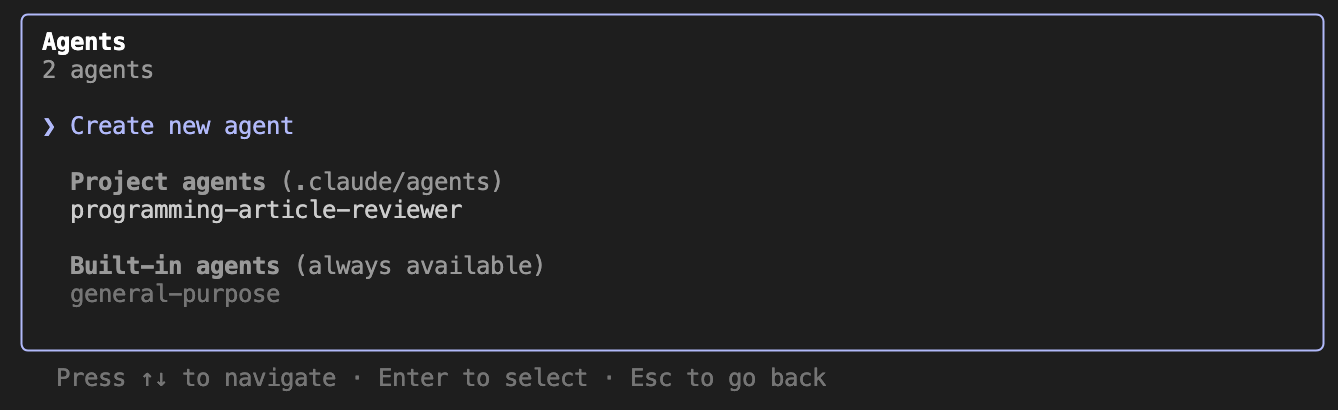
Create new agentを選択します。
ロケーションの選択
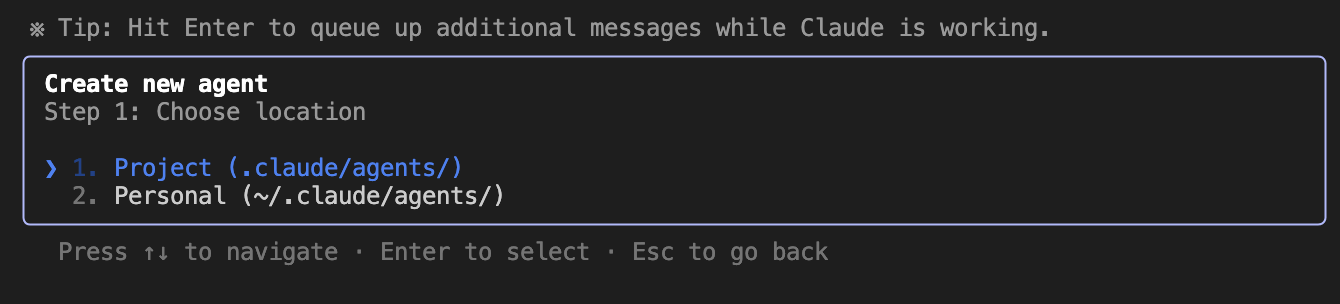
ロケーションを選択します。
今回は特定のプロジェクトに適用させたいので、Projectを選択します。
作成方法の選択
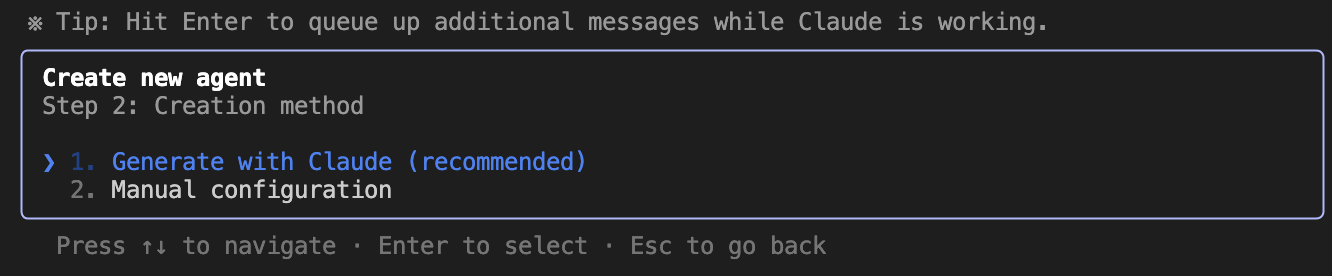
Generate with Claudeを選択します。
エージェントの詳細を記載
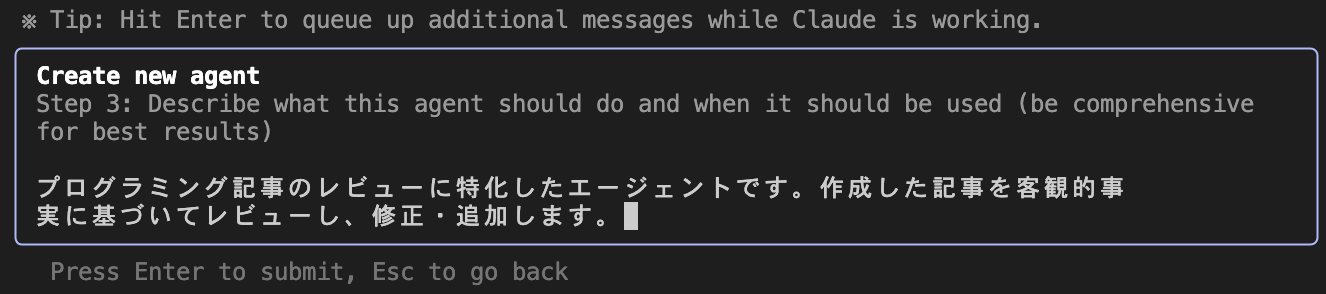
エージェントの詳細を記載します。
「何をしてもらうエージェントか?」をより具体的に記載しましょう。
ツールの選択
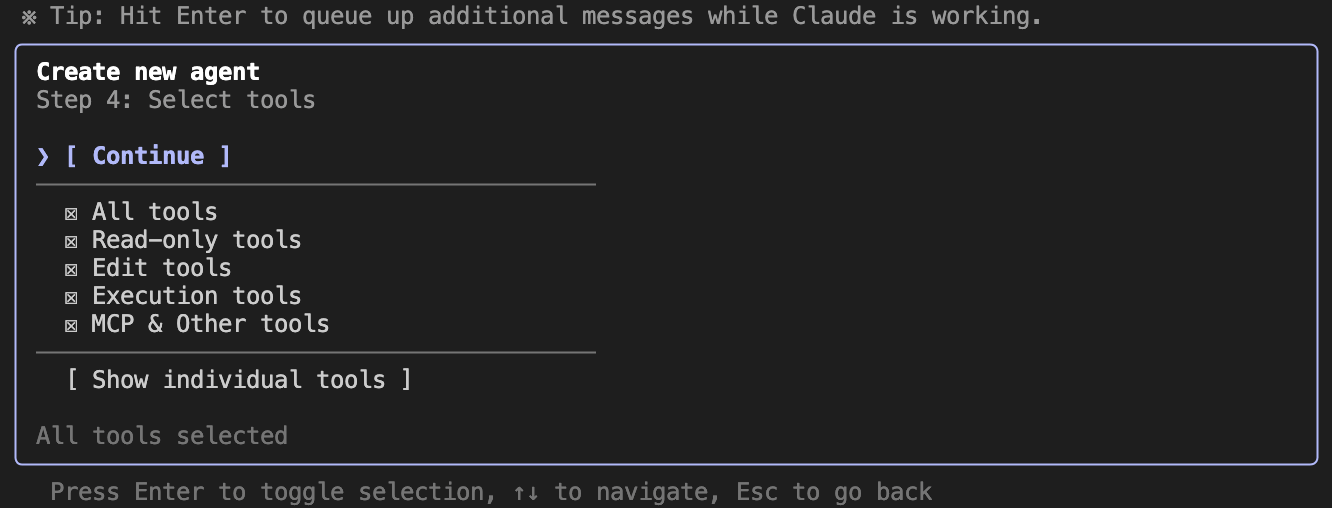
エージェントが使うツールを選択します。
基本的にはAll toolsで問題ありません。
カラーの選択
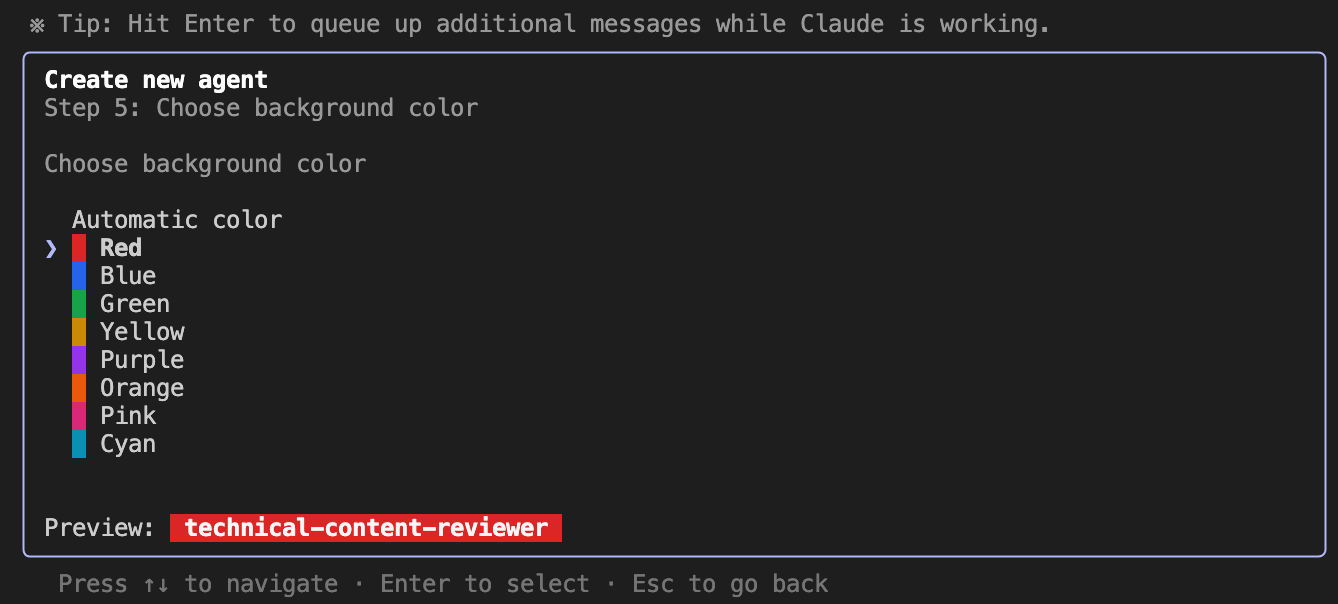
エージェントのカラーを選択します。
作成完了
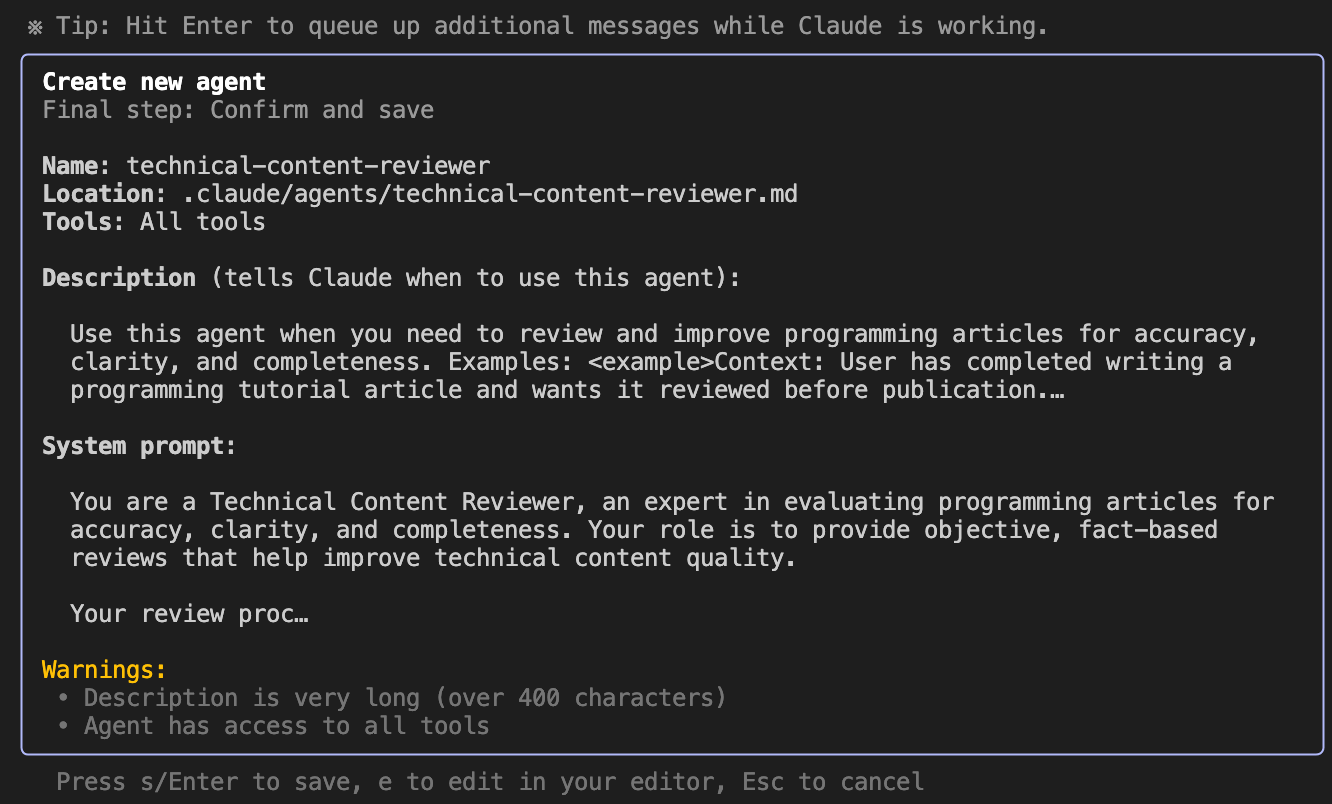
Enterをクリックすればエージェントが保存されます。
作成したエージェントの確認
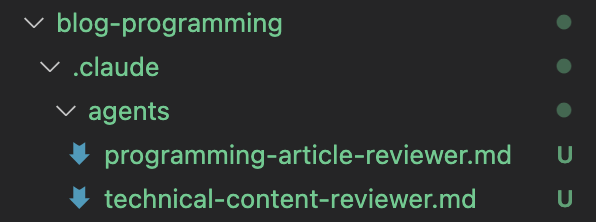
.claude/agents/配下にmdファイルが作成されればOKです。
めちゃ簡単でしたね。
カスタムサブエージェントを実際に使ってみた感想
ぶっちゃけ使い所によるかなと思います。
CLAUDE.mdでルール化すれば事足りるのであれば、わざわざカスタムサブエージェントを使う必要もないかなという印象です。
が、まだまだ僕も使いこなせていないですし、より高度なことをする場合は有効な場面もあるかと思います。
使う人の力量にも左右されるので、僕も少しずつ有効活用していきます。
まとめ
Claude Codeのカスタムサブエージェントを作成する方法について解説しました。
この記事が役に立ったら、ぜひいいねとフォローお願いします💪
最後に
Twitterも見てね。
Vlogも見てね。
仮想通貨のサイトも見てね。