本記事は NECソリューションイノベータ Advent Calendar 2021の12/24の記事です。
AWS Amplify Studio とは?
2021年12月上旬に発表されたAWSの新しいサービスで以下のような特徴があります。
Amplify Studioは、Figmaで作成されたデザインを人間が読めるReactのコンポーネントコードに自動的に変換します。
また、Amplify Studioでは、開発者が生成されたコンポーネントをアプリのバックエンドデータに視覚的に接続することができます。
現在はプレビュー版が利用できます。
詳しくは以下を参照ください。
AWS Amplify Studioを触る動機
最近Reactを使いはじめていたりFigmaを使ってみたいと思っていたのですが、Figmaで作成したコンポーネントをReactのコードに変換してくれる!? なにそれ?俺得?ってなり、これは早速使ってみようと思った次第です。
実装するぞ!
Figma × Amplify Studio × Reactで簡単なユーザ登録フォームを作成してみます。
以下に書いた内容はAmplify Studioのチュートリアルを事前に済ませておくとより分かりやすくなると思います。まだの方はぜひチュートリアルからやってみてください。
実装の流れ
以下のような流れで進めました。
- Amplify CLI のインストール
- Figmaでデザイン
- Reactのプロジェクト作成
- Amplifyの環境を準備
- FigmaのコンポーネントをAmplify Studioに同期する
- Amplify Studioでコンポーネントとデータモデルに紐付け
- GraphQLクライアント側の実装
- UIコンポーネントとデータモデルの紐付け
- ReactでUIコンポーネントを利用した実装
- 動作確認
1. Amplify CLI のインストール
CLIをインストールしていないかたは予めインストールします。
npm install -g @aws-amplify/cli
今回利用したバージョン
amplify version
7.6.4
2. Figma でデザイン
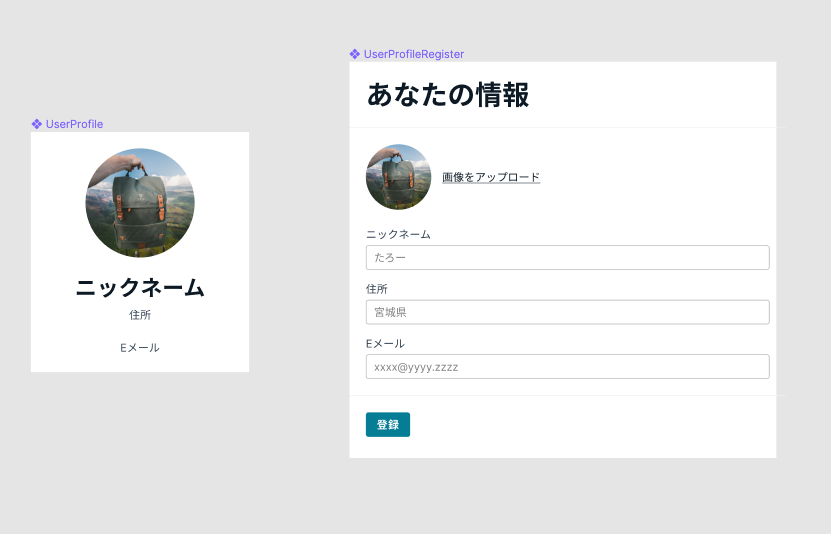
とても簡単なコンポーネントを2つ作りました。Figmaの使い方わからない、デザインという作業をほぼしたことがない状態で作ったこともありこれが精一杯でした。
ここで利用した素材はAmplify Studioのチュートリアルを実施したときに取得したAmplifyが提供するFigmaファイルにあるものを利用しています。
デザインする際の注意点のですが、プレビュー版ではAmplifyから提供されるFigmaファイルの素材を利用しないといけないという制限があります。
12/23時点で以下URLに下図のような記載がありました。
https://docs.amplify.aws/console/tutorial/buildui/#create-ui-components-in-figma

3. Reactのプロジェクトを作成
Reactのプロジェクトを作成し、必要なライブラリをインストールしておきます。
作成後Githubに登録します。
(今回TypeScriptで作っていないのですが対応しているのかな?そのうち試してみようと思います)
npx create-react-app user-register-form
npm i @aws-amplify/ui-react aws-amplify react-router-dom
4. Amplifyの環境を準備
Amplify アプリのビルド・デプロイ
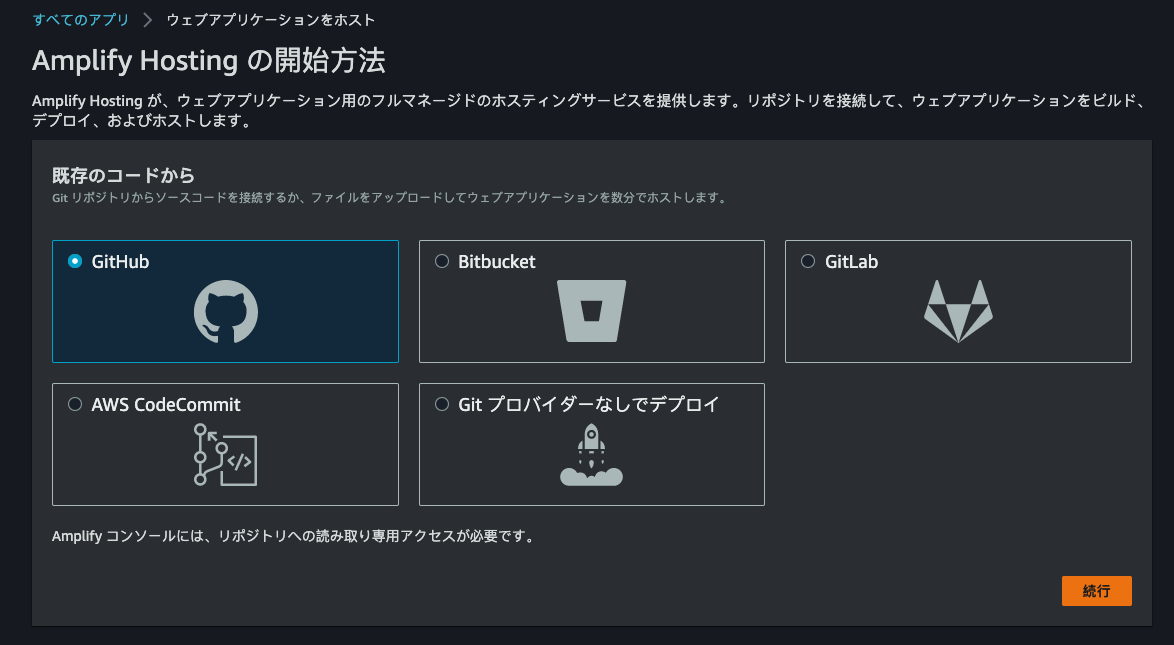
AWSコンソールでAWS Amplifyの画面を表示し「新しいアプリケーション-ウェブアプリケーションをホスト」をクリックします。
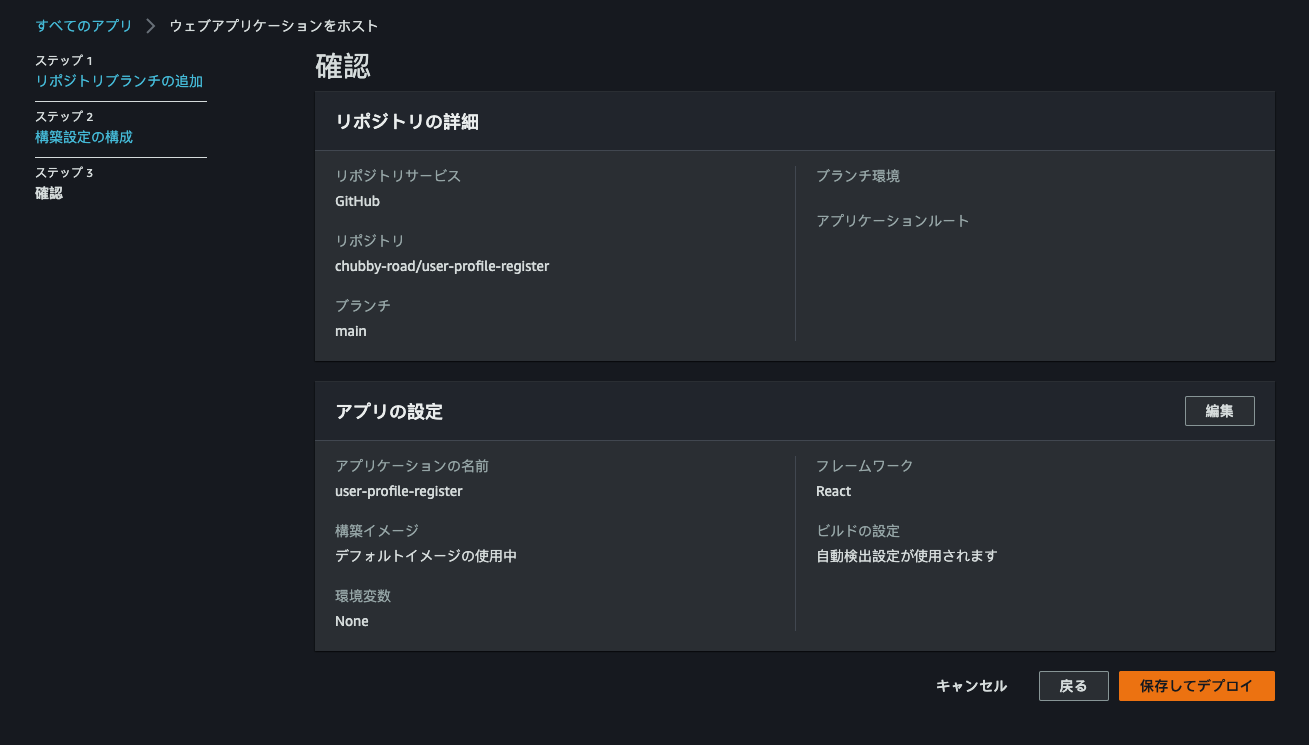
表示されたダイアログでGithubにプッシュしておいたリポジトリを指定し、ビルドの設定などを確認しながら進めていきます。
-
問題なければ「保存してデプロイ」を実行します。
-
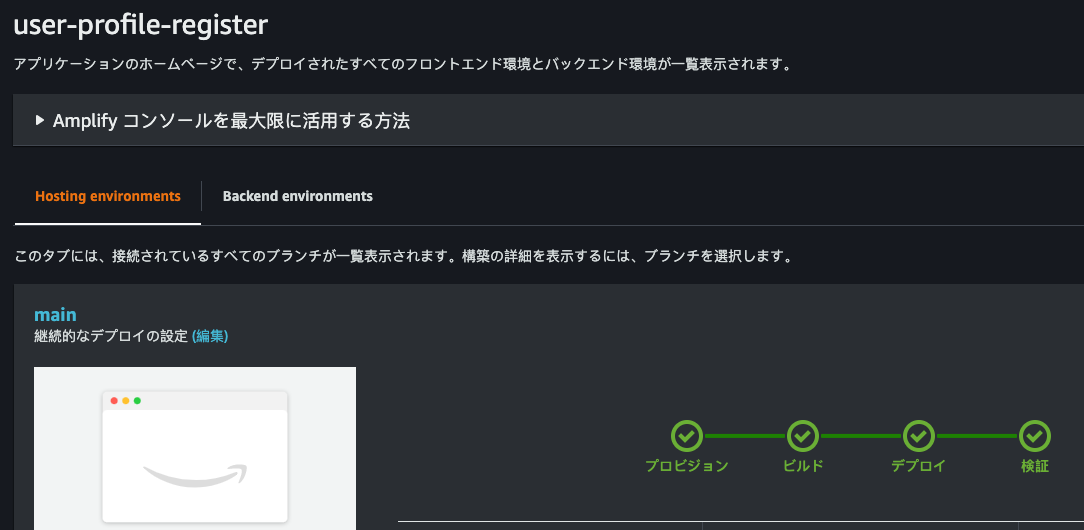
検証まで問題なく完了するとこのような表示になります。
Amplify Studio 環境の準備
-
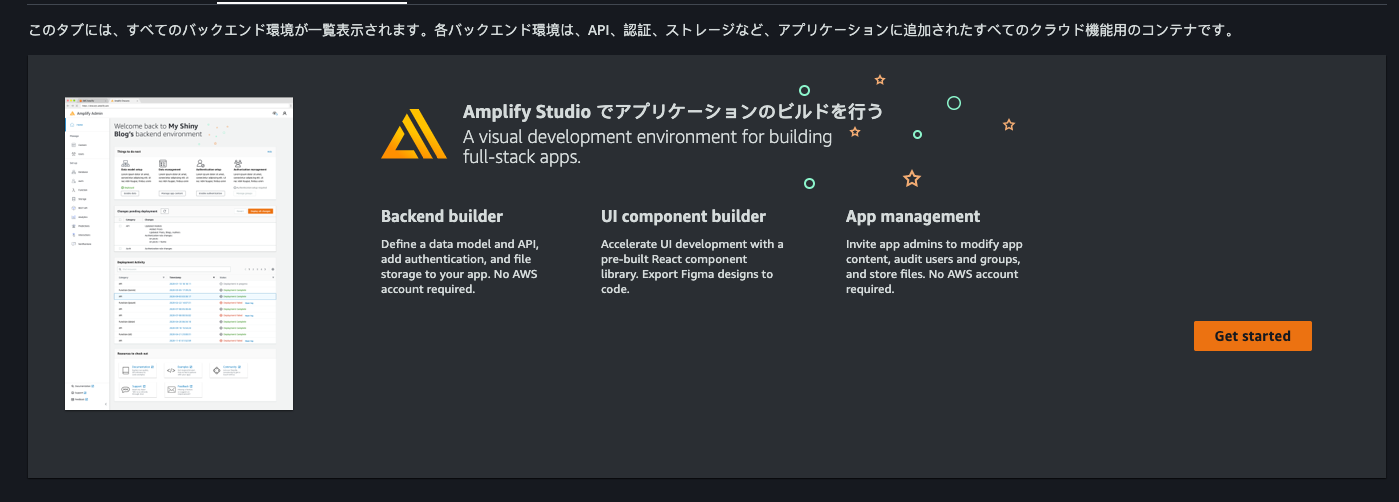
Backend environmentsタブでAmplify Studioの Get started をクリックします。
-
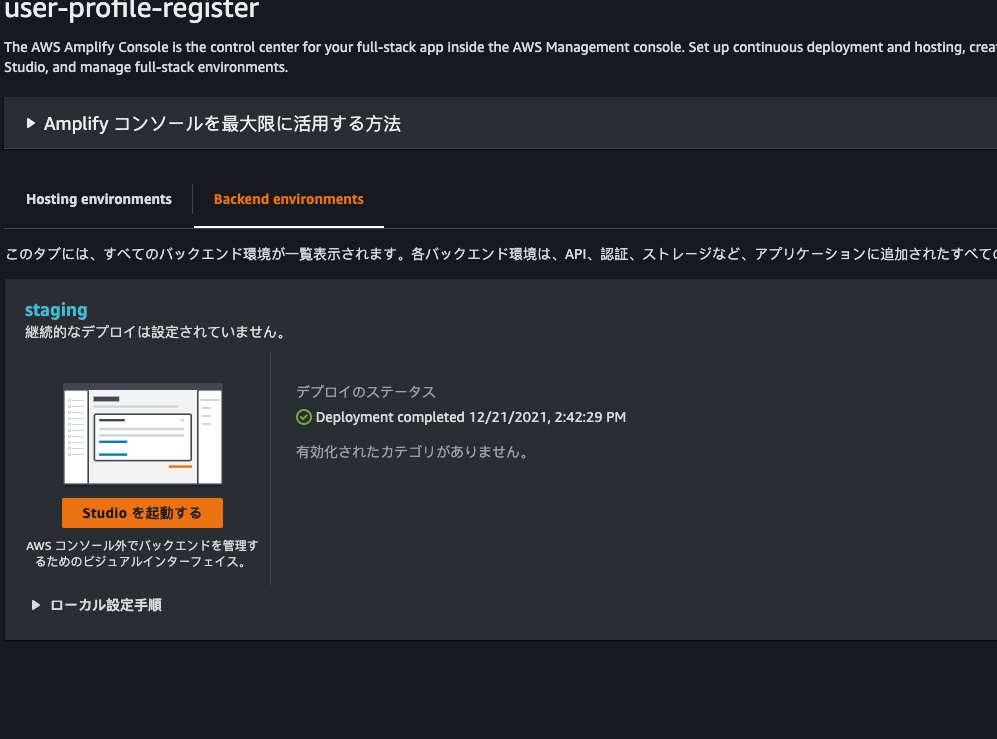
しばらくするとstaging環境が用意され「Studio を起動する」とボタンが出ます。これをクリックします。
-
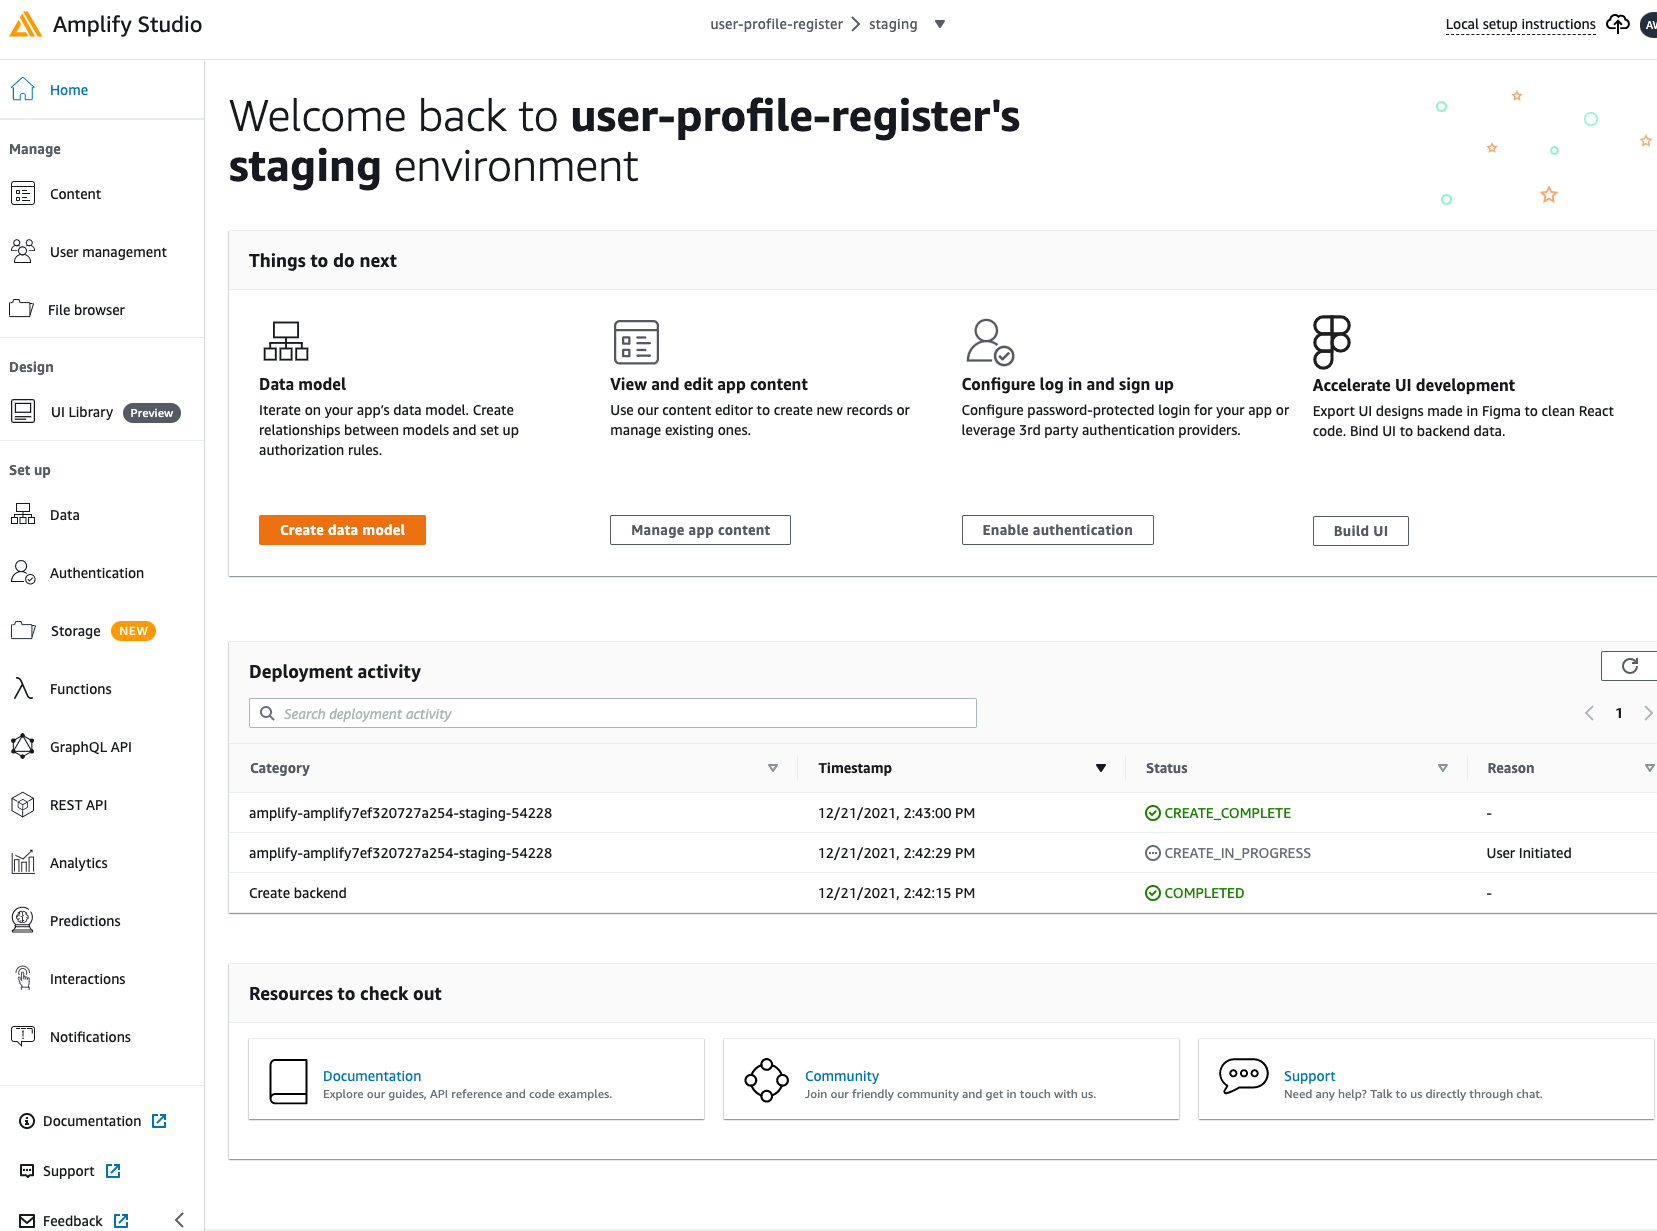
Amplify Studio が表示されました。これでAmplify Studioを使う準備完了です。
5. FigmaのコンポーネントをAmplify Studioに同期する
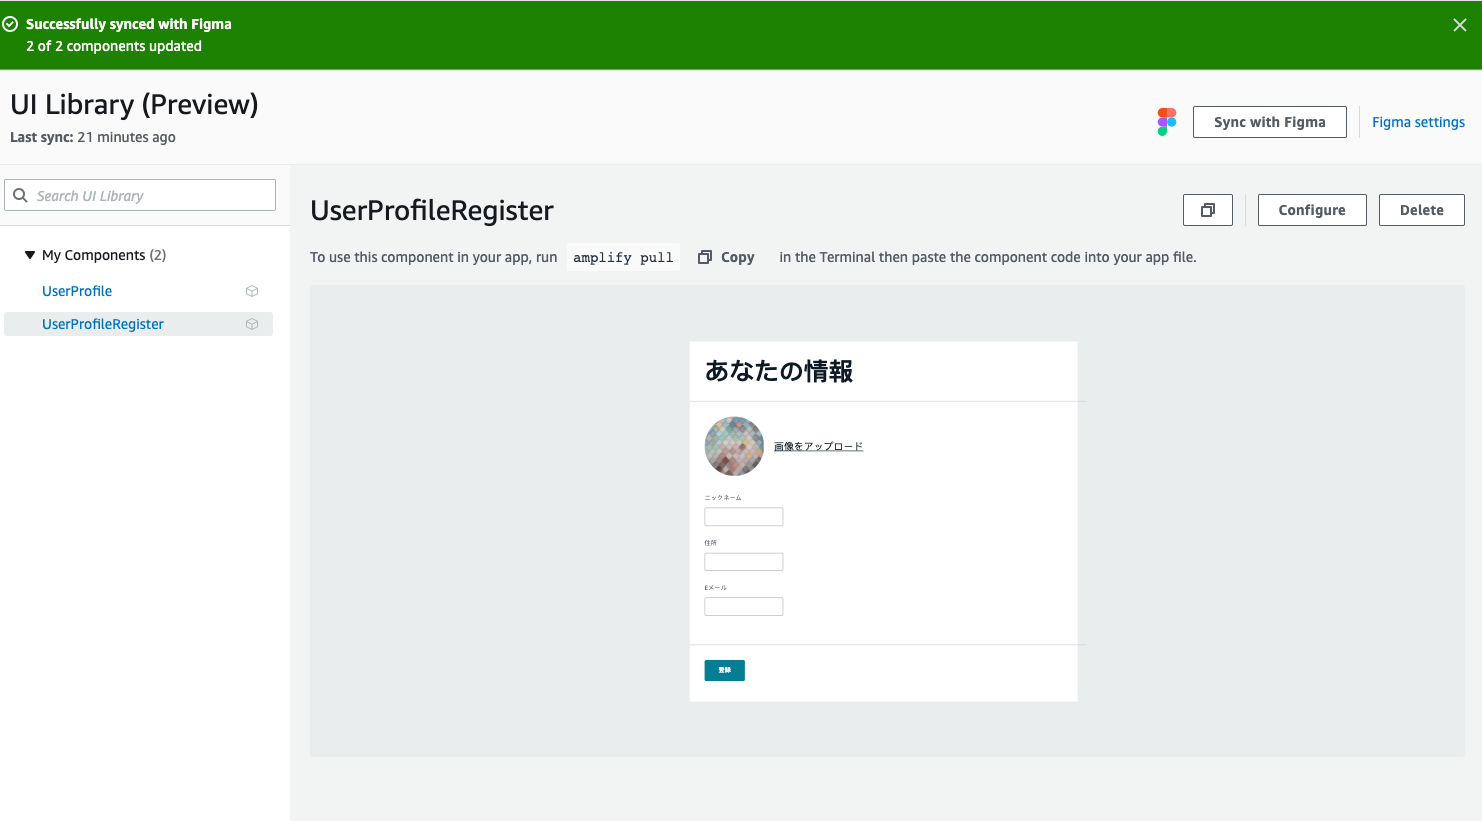
ここはチュートリアルの「デザイナーから開発者へのシームレスな引き継ぎ」通りにやれば問題なくできると思います。下の図では私がFigmaで作成したた2つのコンポーネントが同期されAmplify StudioのUI Library(Preview)に表示されています。
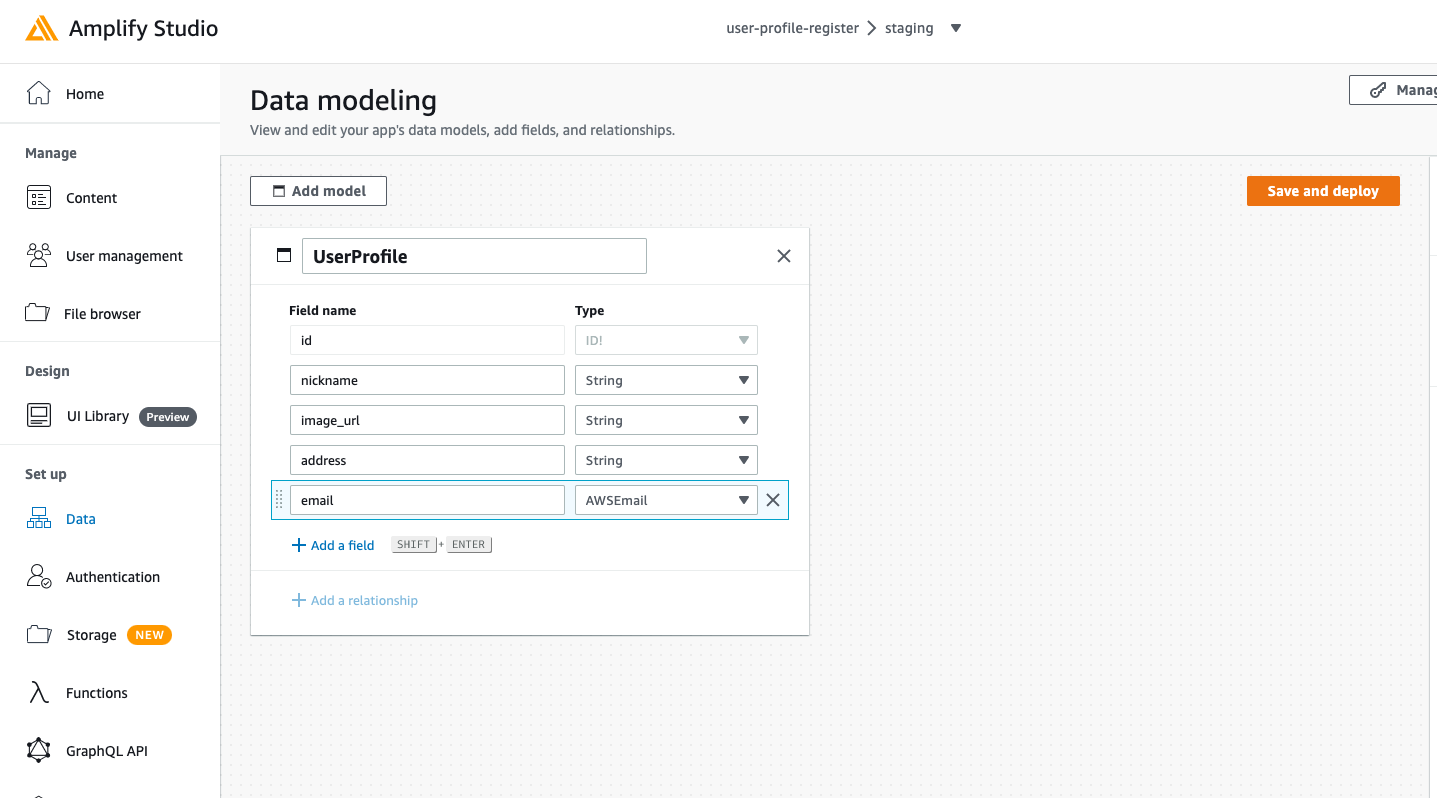
6. データモデルの作成&デプロイ
「Data」メニューから下の図のようなデータモデルを作成し「Save and deploy」をクリックします。
デプロイが完了すると Deployment Status が見ることができるので、そこに表示されるコマンドamplify pull --appId hoge --envName stagingをReactのプロジェクト直下で実行します。
実行時にいろいろ確認されますが以下のような感じで入力していきます。
amplify pull --appId hoge --envName staging
Opening link: https://ap-northeast-1.admin.amplifyapp.com/admin/xxxxxxxxxxxxxxxxxxxxxx/staging/verify/
✔ Successfully received Amplify Studio tokens.
Amplify AppID found: hoge. Amplify App name is: user-profile-register
Backend environment staging found in Amplify Console app: user-profile-register
? Choose your default editor: Visual Studio Code
? Choose the type of app that you're building javascript
Please tell us about your project
? What javascript framework are you using react
? Source Directory Path:  src
? Distribution Directory Path: build
? Build Command:  npm run-script build
? Start Command: npm run-script start
✔ Synced UI components.
GraphQL schema compiled successfully.

Edit your schema at /Users/iwahiro/user-register-form/amplify/backend/api/userprofileregister/schema.graphql or place .graphql files in a directory at /Users/iwahiro/user-register-form/amplify/backend/api/userprofileregister/schema
Successfully generated models. Generated models can be found in /Users/iwahiro/user-register-form/src
? Do you plan on modifying this backend? No

Added backend environment config object to your project.
Run 'amplify pull' to sync future upstream changes.
この時点でソースを見ると、src/ui-components 配下にFigmaでデザインしたコンポーネントが作成されており、src/models配下には先程作成したデータモデル用のスキーマなどが作られています。また src/aws-exports.js には、AppSyncに接続するための情報が自動で作成されておりすぐにアクセスできるように設定されています。
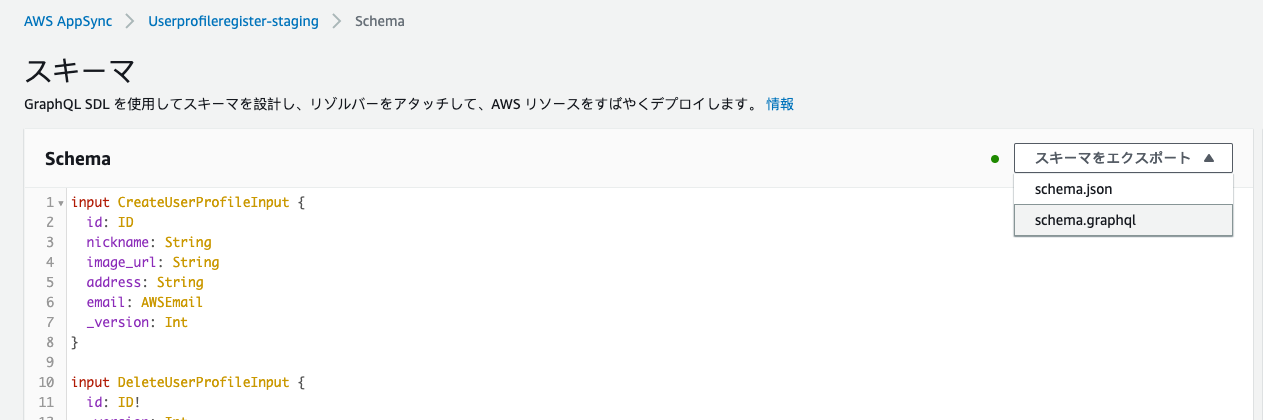
7. GraphQLクライアント側の実装
クライアント側で使うGraphQLのmutationやqueryのコードをスキーマから自動生成をします。
-
AWSコンソールでAppSyncの画面を開き、
schema.grapqlをダウンロードします。
-
ダウンロードした
schema.grapqlをReactのプロジェクト直下に配置し自動生成のコマンドを実行していきます。
(自動生成のコマンドはAWSコンソールのAppSyncの画面から確認できます)
amplify add codegen --apiId hoge
? Choose the type of app that you're building javascript
? What javascript framework are you using react
? Choose the code generation language target javascript
? Enter the file name pattern of graphql queries, mutations and subscriptions src/graphql/**/*.js
? Do you want to generate/update all possible GraphQL operations - queries, mutations and subscriptions Yes
? Enter maximum statement depth [increase from default if your schema is deeply nested] 2
✔ Generated GraphQL operations successfully and saved at src/graphql
amplify codegen
これでReactプロジェクトのsrc/grapql配下にquery/mutaion/subscriptionのコードが自動で作成されたと思います。
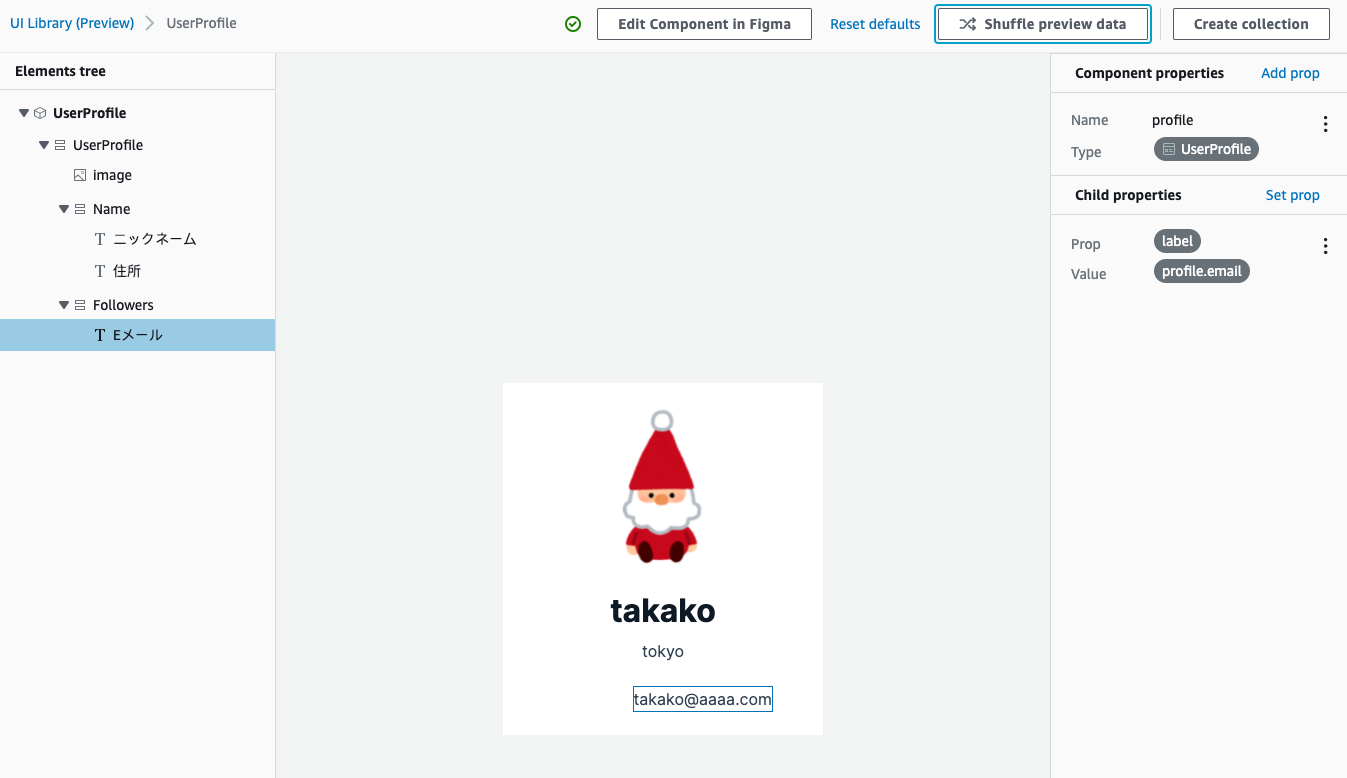
8. UIコンポーネントとデータモデルの紐付け
次にAmplify StudioのUI Library(Preview)でFigmaでデザインした画面に表示するデータモデルの項目の紐付けを行います。こちらもチュートリアルの「UIコンポーネントをデータと紐付ける」を見て進めます。
今回は登録したユーザのデータを表示するコンポーネントで下図のような感じで設定しました。
9. ReactでUIコンポーネントを利用した実装
Amplify Studio でコンポーネントを編集したので更新後のコンポーネントのコードをpullします。
- Reactのプロジェクト直下でコマンド実行
amplify pull
主に実装したコード
とりあえず動かすことを目的に雑に実装しています。
- Amplifyの初期処理を追加
import React from "react";
import ReactDOM from "react-dom";
import "./index.css";
import App from "./App";
import reportWebVitals from "./reportWebVitals";
import Amplify from "aws-amplify";
import { AmplifyProvider } from "@aws-amplify/ui-react";
import "@aws-amplify/ui-react/styles.css";
import awsconfig from "./aws-exports";
Amplify.configure(awsconfig);

ReactDOM.render(
  <React.StrictMode>
    <AmplifyProvider>
      <App />
    </AmplifyProvider>
  </React.StrictMode>,
  document.getElementById("root")
);

// If you want to start measuring performance in your app, pass a function
// to log results (for example: reportWebVitals(console.log))
// or send to an analytics endpoint. Learn more: https://bit.ly/CRA-vitals
reportWebVitals();
- ルーターと表示するページのコンポーネントを追加
import React from "react";
import UserProfileRegisterPage from "./pages/UerProfileRegisterPage";
import UserProfilePage from "./pages/UserProfilePage";
import { BrowserRouter, Routes, Route } from "react-router-dom";

function App() {
  return (
    <BrowserRouter>
      <Routes>
        <Route path="/profile" element={<UserProfilePage />} />
        <Route path="/" element={<UserProfileRegisterPage />} />
      </Routes>
    </BrowserRouter>
  );
}

export default App;
- 自動生成された
UserProfileRegisterコンポーネントを利用するコードを新規追加(イメージのアップロード部分は省略)
import { UserProfileRegister } from "../ui-components";
import React,{useState} from "react";
import { API } from "aws-amplify";
import * as mutaion from "../graphql/mutations"
import { useNavigate } from "react-router-dom";

export default function UserProfileRegisterPage() {
let navigate = useNavigate();
const [nickName, setNickName] = useState("");
const [addres, setAddress] = useState("");
const [email, setEmail] = useState("");

// 自動生成したUserProfileRegisterにわたすパラメータ
// 自動生成したコンポーネントのonChangeやスタイルなどはここで指定
// Flex.Flex[0].Flex[3].TextField[0] となっている部分は自動生成されたUserProfileRegisterを見ると該当箇所がわかります
const profileOverrides = {
  "Flex.Flex[0].Flex[3].TextField[0]": {
    onChange: (event) => { setNickName(event.target.value) }
  },
  "Flex.Flex[0].Flex[3].TextField[1]": {
    onChange: (event) => { setAddress(event.target.value) }
  },
  "Flex.Flex[0].Flex[3].TextField[2]": {
    onChange: (event) => { setEmail(event.target.value) }
  },
  "Flex.Flex[0].Flex[4].Button[0]": {
    onClick: () => registerProfile(),
    padding: "8px 8px 8px 8px"

  },
  "Flex.Flex[0].Divider[1]":{
    margin: "12px"
  }
}

// GraphQLのschema.graphqlから自動生成した mutationのコードを使ってユーザ情報を登録
// 登録後はユーザ情報を表示する画面にIDをクエリに指定して遷移
const registerProfile = () =>{
  const profile = {
    nickname: nickName,
    address: addres,
    email:email,
    image_url: "https://xxxxxxxxx/ofuro_sauna_tonttu_character.png"

  }
  const f = async () => {
  const newProfile = await API.graphql({query:mutaion.createUserProfile,variables:{input: profile}})
  navigate("/profile?id=" + newProfile.data.createUserProfile.id)
  }
  f()
}

return (
    // さきに用意した profileOverrides をわたして自動生成したコンポーネントを表示
    <UserProfileRegister overrides={profileOverrides}/>
)
}
- 自動生成された
UserProfileコンポーネントを利用するコードを新規追加
import { useEffect,useState } from "react"
import { UserProfile } from "../ui-components"
import { API } from "aws-amplify"
import * as query from "../graphql/queries"
import { useLocation } from 'react-router-dom'

export default function UserProfilePage(){
    const search = useLocation().search;
    const queryString = new URLSearchParams(search);
    const [profile,setProfile] = useState(null);

    useEffect(()=>{
       // GraphQLのschema.graphqlから自動生成したqueryのコードを使ってユーザ情報を取得
       const f = async () =>{
         const profile = await API.graphql({query:query.getUserProfile,variables:{id:queryString.get("id")}})
         setProfile({
             nickname:profile.data.getUserProfile.nickname,
             address:profile.data.getUserProfile.address,
             email:profile.data.getUserProfile.email,
             image_url:profile.data.getUserProfile.image_url
         })
       }
       f()
    },[])

    // 自動生成したUserProfileにわたすパラメータ
    // 自動生成したコンポーネントのonChangeやスタイルなどはここで指定
    // Flex.Flex[0].Flex[4].Button[0] となっている部分は自動生成されたUserProfileを見ると該当箇所がわかります
    const profileOverrides = {
        "Flex.Flex[0].Flex[3].TextField[0]": {
        },
        "Flex.Flex[0].Flex[4].Button[0]": {
          padding: "8px 8px 8px 8px"

        },
      }

    return (
    // さきに用意した profileOverrides をわたして自動生成したコンポーネントを表示
        <UserProfile profile={profile} overrides={profileOverrides}/>
    )
}
10. 動作確認
ローカルで動かしてみました。
なんとか動いたのですがFigma力やReact力が足りない感じが良くわかる結果になっています(笑)。
(時間があればもうちょっと見栄えのよい画面にしたかった・・・![]() )
)
利用した感想
- デザイナーさんにFigmaでデザインしてもらったものをすぐにコードに落として実装に移れるようになるのは魅力的ですね。デザイナーさんがデザインに変更を入れてもすぐに少ない手間で取り込めるようにもなります。ただ
src/pages/UserProfilePage.jsxで実装したようにFlex.Flex[0].Flex[4].Button[0]のように指定して実装するのは直感的でなく分かりにくいのでつらいところと感じました。またこれは未検証なのですが、Flex.Flex[0].Flex[4].Button[0]は生成されたコンポーネント内のタグの構造に依存していると推測されます。もしデザイナーさんがこのFlexの構造に影響があるレイアウトの変更をしてしまうとoverridesで渡すパラメータを渡すとき指定も変える必要が出て来そうな予感が・・・ここは課題な気がします。 -
ui-components配下に自動で作成されたコンポーネントが置かれますが、このコンポーネントは基本的に手を入れてはいけないものだと思いました。デザイナーさんがFigmaでコンポーネントを更新したらそれをamplify pullで取り込むわけですが、手を入れていたコンポーネントもこの時上書きされてしまいますしデザイナーさんが変更したコンポーネントがエンジニアが手を入れていたコンポーネントの場合はマージしないといけないと思います。これは避けたいですよね。 - 今回登録フォームを作ってみた感じではReactやAWS Amplifyの実装知識はそれなりに必要と感じました。正式版になったときにはチュートリアルにあるコレクションを作るような感覚で今回のような画面も簡単に実装できるようになると嬉しいですね。
- 動作確認で動かした時Figmaスキルが必須と実感(笑)。デザイナーさんがいなくても簡単な画面は自分でデザインして作れるようになりたいので今後スキルアップを目指したいところです。Figmaを使いこなせるようになると、より早く・素敵なデザインで実装できるようになるはずー。
- 今回のメインではないのですがAmplify Studioの画面からデータモデルを登録するだけでDynamoDBのテーブルやAppSyncのエンドポイントを作ってくれるのはとても楽ちん♪
細かいところは置いておいて、サッと作ってスッと動かしたものを見せたいときに活かせそうです。
Reactの実装でハマったりFigmaの使い方わからなくて途方にくれたりと途中で心が折れそうになりましたが、何とか記事を書けて安心しました。これで安心してクリスマスを迎えられそうです ![]() 。
。
参考記事
本記事を書くにあたり以下の記事・マニュアルを参考にさせて頂きました。
- AWS Amplify Studio – 最小限のプログラミングでFigmaからフルスタックのReactアプリを実現
- Amplify Docs Amplify Studio
- AWS Amplify Studioを使ってローコードでLIFFアプリを作る
- 【Amplify と Figma の連携】Amplify Studio の UI Library を使ってみた
補足:自動生成されたUIコンポーネント
↑で載せるには長くなりすぎると思ったのでこちらに自動生成されたUIコンポーネントのソースやpackage.jsonを載せます。
(本当はGithubのリポジトリを共有できればいいのですがしがらみがあってできなくて・・・![]() )
)
/***************************************************************************
 * The contents of this file were generated with Amplify Studio.           *
 * Please refrain from making any modifications to this file.              *
 * Any changes to this file will be overwritten when running amplify pull. *
 **************************************************************************/

/* eslint-disable */
import React from "react";
import { getOverrideProps } from "@aws-amplify/ui-react/internal";
import { Flex, Image, Text, View } from "@aws-amplify/ui-react";
export default function UserProfile(props) {
  const { profile, overrides: overridesProp, ...rest } = props;
  const overrides = { ...overridesProp };
  return (
    <View
      width="320px"
      padding="0px 0px 0px 0px"
      position="relative"
      height="352px"
      {...rest}
      {...getOverrideProps(overrides, "View")}
    >
      <Flex
        padding="24px 24px 24px 24px"
        backgroundColor="rgba(255,255,255,1)"
        alignItems="center"
        top="0px"
        left="0px"
        gap="24px"
        width="320px"
        position="absolute"
        direction="column"
        {...getOverrideProps(overrides, "View.Flex[0]")}
      >
        <Image
          padding="0px 0px 0px 0px"
          borderRadius="160px"
          shrink="0"
          src={profile?.image_url}
          width="160px"
          position="relative"
          height="160px"
          {...getOverrideProps(overrides, "View.Flex[0].Image[0]")}
        ></Image>
        <Flex
          padding="0px 0px 0px 0px"
          alignItems="center"
          shrink="0"
          gap="8px"
          width="192px"
          position="relative"
          direction="column"
          {...getOverrideProps(overrides, "View.Flex[0].Flex[0]")}
        >
          <Text
            padding="0px 0px 0px 0px"
            color="rgba(13.000000175088644,26.000000350177288,38.0000015348196,1)"
            textAlign="center"
            shrink="0"
            display="flex"
            justifyContent="flex-start"
            fontFamily="Inter"
            fontSize="32px"
            lineHeight="40px"
            position="relative"
            fontWeight="700"
            direction="column"
            children={profile?.nickname}
            {...getOverrideProps(overrides, "View.Flex[0].Flex[0].Text[0]")}
          ></Text>
          <Text
            padding="0px 0px 0px 0px"
            color="rgba(48.000000938773155,64.00000378489494,80.00000283122063,1)"
            textAlign="center"
            shrink="0"
            display="flex"
            letterSpacing="0.010000000000000009px"
            justifyContent="flex-start"
            fontFamily="Inter"
            fontSize="16px"
            lineHeight="24px"
            position="relative"
            fontWeight="400"
            direction="column"
            children={profile?.address}
            {...getOverrideProps(overrides, "View.Flex[0].Flex[0].Text[1]")}
          ></Text>
        </Flex>
        <Flex
          padding="0px 0px 0px 0px"
          alignItems="flex-start"
          shrink="0"
          gap="16px"
          width="59px"
          position="relative"
          direction="row"
          {...getOverrideProps(overrides, "View.Flex[0].Flex[1]")}
        >
          <Text
            padding="0px 0px 0px 0px"
            color="rgba(48.000000938773155,64.00000378489494,80.00000283122063,1)"
            textAlign="center"
            shrink="0"
            display="flex"
            letterSpacing="0.010000000000000009px"
            justifyContent="flex-start"
            fontFamily="Inter"
            fontSize="16px"
            lineHeight="24px"
            position="relative"
            fontWeight="400"
            direction="column"
            children={profile?.email}
            {...getOverrideProps(overrides, "View.Flex[0].Flex[1].Text[0]")}
          ></Text>
        </Flex>
      </Flex>
    </View>
  );
}
/***************************************************************************
 * The contents of this file were generated with Amplify Studio.           *
 * Please refrain from making any modifications to this file.              *
 * Any changes to this file will be overwritten when running amplify pull. *
 **************************************************************************/

/* eslint-disable */
import React from "react";
import { getOverrideProps } from "@aws-amplify/ui-react/internal";
import {
  Button,
  Divider,
  Flex,
  Image,
  Text,
  TextField,
} from "@aws-amplify/ui-react";
export default function UserProfileRegister(props) {
  const { overrides: overridesProp, ...rest } = props;
  const overrides = { ...overridesProp };
  return (
    <Flex
      width="640px"
      padding="0px 0px 0px 0px"
      position="relative"
      gap="24px"
      direction="column"
      {...rest}
      {...getOverrideProps(overrides, "Flex")}
    >
      <Flex
        width="640px"
        padding="0px 0px 0px 0px"
        position="relative"
        shrink="0"
        height="581px"
        {...getOverrideProps(overrides, "Flex.Flex[0]")}
      >
        <Flex
          padding="24px 0px 24px 0px"
          backgroundColor="rgba(255,255,255,1)"
          top="0px"
          left="0px"
          gap="16px"
          width="626px"
          position="absolute"
          direction="column"
          height="581px"
          {...getOverrideProps(overrides, "Flex.Flex[0].Flex[0]")}
        ></Flex>
        <Flex
          padding="0px 24px 0px 24px"
          alignItems="center"
          top="24px"
          left="0px"
          gap="16px"
          width="640px"
          position="absolute"
          direction="row"
          {...getOverrideProps(overrides, "Flex.Flex[0].Flex[1]")}
        >
          <Text
            padding="0px 0px 0px 0px"
            color="rgba(13.000000175088644,26.000000350177288,38.0000015348196,1)"
            textAlign="left"
            shrink="0"
            display="flex"
            justifyContent="flex-start"
            fontFamily="Inter"
            fontSize="40px"
            lineHeight="48px"
            position="relative"
            fontWeight="700"
            direction="column"
            children="あなたの情報"
            {...getOverrideProps(overrides, "Flex.Flex[0].Flex[1].Text[0]")}
          ></Text>
        </Flex>
        <Divider
          width="640px"
          orientation="horizontal"
          position="absolute"
          top="96px"
          size="small"
          left="0px"
          {...getOverrideProps(overrides, "Flex.Flex[0].Divider[0]")}
        ></Divider>
        <Flex
          padding="0px 0px 0px 24px"
          alignItems="center"
          top="121px"
          left="0px"
          gap="16px"
          width="640px"
          position="absolute"
          direction="row"
          {...getOverrideProps(overrides, "Flex.Flex[0].Flex[2]")}
        >
          <Image
            width="96px"
            padding="0px 0px 0px 0px"
            position="relative"
            borderRadius="160px"
            shrink="0"
            height="96px"
            {...getOverrideProps(overrides, "Flex.Flex[0].Flex[2].Image[0]")}
          ></Image>
          <Text
            padding="0px 0px 0px 0px"
            color="rgba(13.000000175088644,26.000000350177288,38.0000015348196,1)"
            textAlign="left"
            shrink="0"
            display="flex"
            textDecoration="underline"
            justifyContent="flex-start"
            fontFamily="Inter"
            fontSize="16px"
            lineHeight="22px"
            position="relative"
            fontWeight="400"
            direction="column"
            children="画像をアップロード"
            {...getOverrideProps(overrides, "Flex.Flex[0].Flex[2].Text[0]")}
          ></Text>
        </Flex>
        <Flex
          padding="0px 24px 0px 24px"
          position="absolute"
          top="241px"
          left="0px"
          gap="16px"
          direction="column"
          {...getOverrideProps(overrides, "Flex.Flex[0].Flex[3]")}
        >
          <TextField
            alignSelf="stretch"
            label="ニックネーム"
            size="default"
            shrink="0"
            variation="default"
            display="flex"
            {...getOverrideProps(
              overrides,
              "Flex.Flex[0].Flex[3].TextField[0]"
            )}
          ></TextField>
          <TextField
            alignSelf="stretch"
            label="住所"
            size="default"
            shrink="0"
            variation="default"
            display="flex"
            {...getOverrideProps(
              overrides,
              "Flex.Flex[0].Flex[3].TextField[1]"
            )}
          ></TextField>
          <TextField
            alignSelf="stretch"
            label="Eメール"
            size="default"
            shrink="0"
            variation="default"
            display="flex"
            {...getOverrideProps(
              overrides,
              "Flex.Flex[0].Flex[3].TextField[2]"
            )}
          ></TextField>
        </Flex>
        <Divider
          width="640px"
          orientation="horizontal"
          position="absolute"
          top="489px"
          size="small"
          left="0px"
          {...getOverrideProps(overrides, "Flex.Flex[0].Divider[1]")}
        ></Divider>
        <Flex
          padding="0px 0px 0px 24px"
          position="absolute"
          top="514px"
          left="0px"
          gap="10px"
          direction="column"
          {...getOverrideProps(overrides, "Flex.Flex[0].Flex[4]")}
        >
          <Button
            padding="8px 16px 8px 16px"
            size="default"
            shrink="0"
            display="flex"
            width="65px"
            variation="primary"
            children="登録"
            {...getOverrideProps(overrides, "Flex.Flex[0].Flex[4].Button[0]")}
          ></Button>
        </Flex>
      </Flex>
    </Flex>
  );
}
{
  "name": "user-register-form",
  "version": "0.1.0",
  "private": true,
  "dependencies": {
    "@aws-amplify/ui-react": "^2.1.5",
    "@testing-library/jest-dom": "^5.16.1",
    "@testing-library/react": "^12.1.2",
    "@testing-library/user-event": "^13.5.0",
    "aws-amplify": "^4.3.11",
    "react": "^17.0.2",
    "react-dom": "^17.0.2",
    "react-router-dom": "^6.2.1",
    "react-scripts": "5.0.0",
    "web-vitals": "^2.1.2"
  },
  "scripts": {
    "start": "react-scripts start",
    "build": "react-scripts build",
    "test": "react-scripts test",
    "eject": "react-scripts eject"
  },
  "eslintConfig": {
    "extends": [
      "react-app",
      "react-app/jest"
    ]
  },
  "browserslist": {
    "production": [
      ">0.2%",
      "not dead",
      "not op_mini all"
    ],
    "development": [
      "last 1 chrome version",
      "last 1 firefox version",
      "last 1 safari version"
    ]
  }
}