MCPサーバーを使ってみました!
環境構築編
以下の記事やFigmaの公式を参考に構築しました。
自分の環境(Windows)だとCursor settingにMCPアイコンがなかったので、
Figma公式も参考にしてます。
Figma-Context-MCP(Framelink Figma MCPサーバー)徹底解説と使い方
Dev Mode MCPサーバー利用ガイド
※FigmaでMCPを利用するには課金が必要でした!さらば、3000円・・・
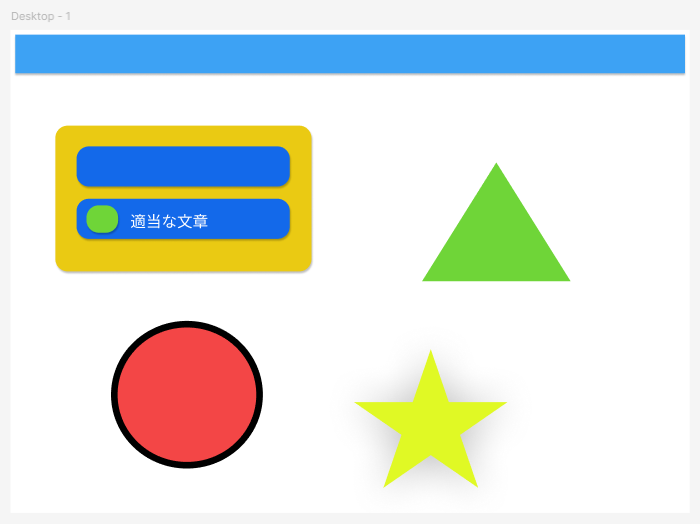
Figmaで作った画面(適当)
Figmaのデザインのリンクをコピーしたうえで
以下のように指示してみました。(さすがに雑すぎました)
以下のリンクのコンポーネントを作成して
[コピーしたFigmaのリンク]
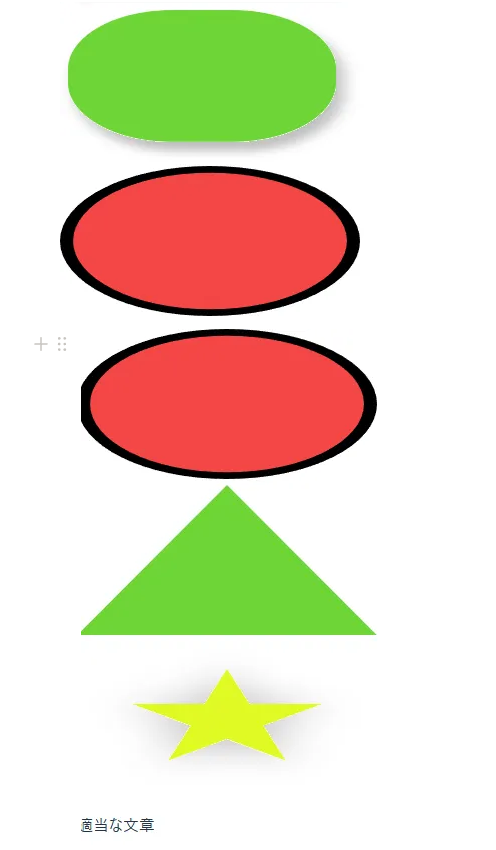
出来上がったものがこちらです。
確かに読み取れている・・・!
画面としても成立させてみたかったので、以下のように指示を変更しました。
あなたはプロのフロントエンドエンジニアです。
以下のリンクの画面を作成してほしいです。
Figmaの各要素についてはコンポーネントとして切り出して作成してください。cssについても保守しやすいように記載してください。
[コピーしたFigmaのリンク]
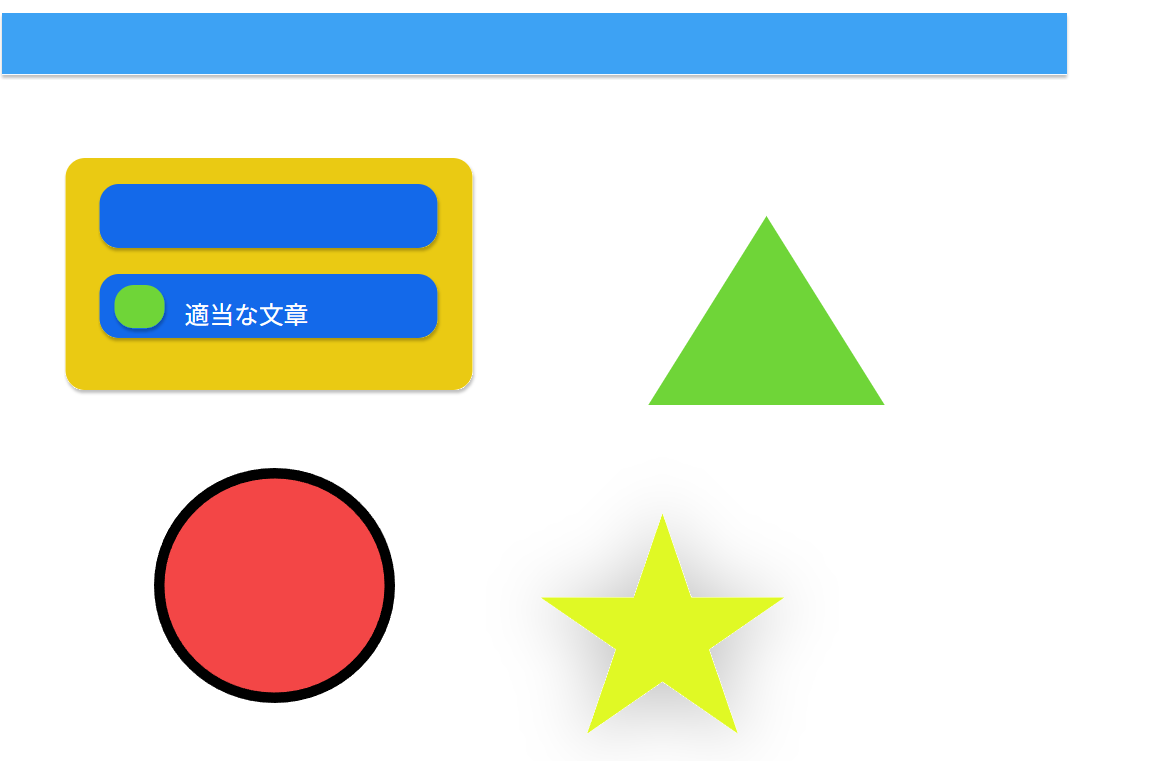
出来上がったものがこちら
見た目はできている・・・!
出来上がったPGがこちらです。
import React from 'react'
import MaskGroup from './components/MaskGroup';
import RectangleCard from './components/RectangleCard';
import EllipseImage from './components/EllipseImage';
import PolygonImage from './components/PolygonImage';
import StarImage from './components/StarImage';
import MainText from './components/MainText';

function App() {
  return (
    <div style={{ position: 'relative', width: '1440px', height: '1024px', background: '#fff' }}>
      <MaskGroup />
      <RectangleCard />
      <EllipseImage />
      <PolygonImage />
      <StarImage />
      <MainText />
    </div>
  )
}

export default App
このコンポーネント
import React from 'react';

const imgRectangle2 = "http://localhost:3845/assets/30fac8c9862003e1af2548d5900692494daf5486.svg";
const imgRectangle3 = "http://localhost:3845/assets/aee6f2fe3198165f29917b4b4cfe01e882add84c.svg";
const imgRectangle5 = "http://localhost:3845/assets/0b910b5c309a6a11d9ca1a654b372a1b1a4249be.svg";

const RectangleCard: React.FC = () => (
  <>
    <div style={{ position: 'absolute', height: 309, left: 95, top: 203, width: 543 }}>
      <div style={{ position: 'absolute', bottom: '-2.589%', left: '-0.368%', right: '-1.105%', top: 0 }}>
        <img alt="" style={{ display: 'block', maxWidth: 'none', width: '100%', height: '100%' }} src={imgRectangle2} />
      </div>
    </div>
    <div style={{ position: 'absolute', height: 85, left: 140, top: 238, width: 452 }}>
      <div style={{ position: 'absolute', bottom: '-9.412%', left: '-0.442%', right: '-1.327%', top: 0 }}>
        <img alt="" style={{ display: 'block', maxWidth: 'none', width: '100%', height: '100%' }} src={imgRectangle3} />
      </div>
    </div>
    <div style={{ position: 'absolute', height: 85, left: 140, top: 358, width: 452 }}>
      <div style={{ position: 'absolute', bottom: '-9.412%', left: '-0.442%', right: '-1.327%', top: 0 }}>
        <img alt="" style={{ display: 'block', maxWidth: 'none', width: '100%', height: '100%' }} src={imgRectangle3} />
      </div>
    </div>
    <div style={{ position: 'absolute', height: 58, left: 161, top: 372, width: 67 }}>
      <div style={{ position: 'absolute', bottom: '-13.793%', left: '-2.985%', right: '-8.955%', top: 0 }}>
        <img alt="" style={{ display: 'block', maxWidth: 'none', width: '100%', height: '100%' }} src={imgRectangle5} />
      </div>
    </div>
  </>
);

export default RectangleCard;
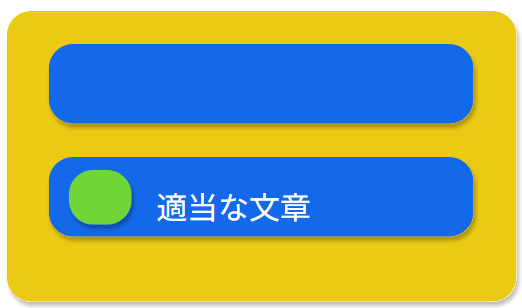
おそらくFigmaの書き方が悪かったのか、
プロンプトが悪かったのか画像で認識されてますね。
ひとまず、Figmaの情報を読み取れていることがわかったので、
次回はもう少し実用化できるような方法を模索してみたいと思います。
参考
Figma-Context-MCP(Framelink Figma MCPサーバー)徹底解説と使い方
Dev Mode MCPサーバー利用ガイド