3連休ですが天気も悪く、台風の残骸がやってきて被害も出てますね。被災地の方々は大変かと思います。
前回 GPUI がわりとうまくできていたので、もうちょっと進めたいと思います。
Rust で画像を表示させてマウスで動かす
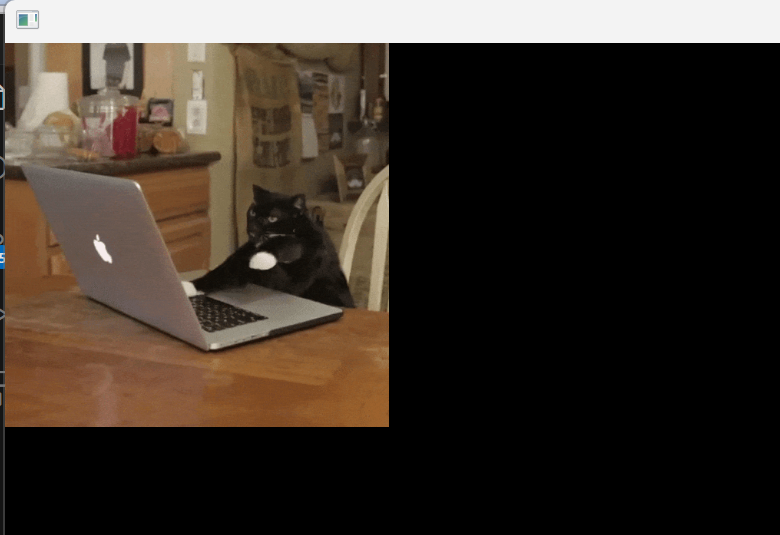
GPUIのexamples には GIF を表示するサンプルがあります。別途 image もあるのですが、gif_viewer の方が簡単で改造するには利用しやすそうでした。
サンプルはGIFを表示するだけなので、これにマウスイベント処理を付けていきたいと思います。
GIF表示
新しくプロジェクトを作って、サンプルをコピー。画像を適当なところに配置して、プログラム内の画像のパスを適宜修正します。GPUIの Cargo.tomlには含まれていなかったので、動くか心配でしたが、問題ありませんでした。それから、サンプルのままだと大きな画像が表示されるので小さく表示するように修正しました。以下のように w, h を加えると画像を入れる枠の大きさを指定できます。
impl Render for GifViewer {
......
            img(ImageSource::File(self.gif_path.clone().into()))
                .size_full()
                .object_fit(gpui::ObjectFit::Contain)
                .id("gif")
                .w(px(256.0))
                .h(px(256.0)),
.......
それから、crate を GPUI だけの最小限にしているの、特に必要ないモノは外しておきます。
fn main() {
    // env_logger::init();
これでビルドできるはずです。こんな感じに表示されたでしょうか。

マウスイベント処理を付ける
マウスイベントは GPUI の examples の input.rs を参考にしました。
手始めに on_mouse_down を付けてみます。処理部分を GifViewer の new の下に加えます。
impl GifViewer {
.....
    fn on_mouse_down(&mut self, _event: &MouseDownEvent, _cx: &mut ViewContext<Self>) {
        println!("左クリック");
    }
.....
}
さらに、描画処理(Render)の中のDiv要素 にマウスインベントと先の関数を結びつけます。
impl Render for GifViewer {
    fn render(&mut self, cx: &mut ViewContext<Self>) -> impl IntoElement {
        div()
        .on_mouse_down(gpui::MouseButton::Left, cx.listener(Self::on_mouse_down))
        .size_full().child(
コンパイラやanalyzer に event や cx を使ってるとか、使ってないとか指摘される場合は適宜修正してください。
実行すると、左クリックするたびにコンソールへ "左クリック"と表示されます。
PS C:\Users\...\gpui_move_image> cargo run
   Compiling gpui_move_image v0.1.0 (C:\Users\...\gpui_move_image)
    Finished `dev` profile [unoptimized + debuginfo] target(s) in 3.13s
     Running `target\debug\gpui_move_image.exe`
左クリック
左クリック
マウスの動きをつかまえる
このあとは、on_mouse_up, on_mouse_move を加えていきます。マウスの動きをとらえるには、次のような手順になります
- ボタンを押したところでマウスポインタの現在位置を覚える
- マウスポインタの位置の変化量を計算する
- moveイベントが発生した時点のマウスポインタと覚えていた位置の差を計算
- 画像の上下のマージンに差を加える
- 覚えている位置を更新する
- ボタンを離したら画像位置の更新をしない
このために、以下をGifViewerに追加します。
- 動かしている途中かどうかのフラグ
- 位置の記憶
- 画像の上下のマージン
構造体の中身を修正したので合わせて new も修正します。
struct GifViewer {
    gif_path: PathBuf,
    l: Pixels,
    t: Pixels,
    is_moving: bool,
    last_position: Point<Pixels>,
}

impl GifViewer {
    fn new(gif_path: PathBuf) -> Self {
        let l = px(0.0);
        let t = px(0.0);
        let is_moving = false;
        let last_position = Point {x:px(0.0), y:px(0.0)};
        let img_viewer = Self {gif_path, l, t, is_moving, last_position};
        img_viewer
    }
イベント処理を追加します。Pointの計算がそのままできるのか心配でしたが、問題なかったようです。最近のモノは違いますね。
    fn on_mouse_down(&mut self, event: &MouseDownEvent, _cx: &mut ViewContext<Self>) {
        self.is_moving = true;
        self.last_position = event.position;
    }

    fn on_mouse_up(&mut self, _event: &MouseUpEvent, _cx: &mut ViewContext<Self>) {
        self.is_moving = false;
    }

    fn on_mouse_move(&mut self, event: &MouseMoveEvent, _cx: &mut ViewContext<Self>) {
        if self.is_moving {
            let d_position = event.position - self.last_position;
            self.l += d_position.x;
            self.t += d_position.y;
            self.last_position = event.position;
        }
    }
そして、Div要素にイベントを結びつけます。
    fn render(&mut self, cx: &mut ViewContext<Self>) -> impl IntoElement {
        div()
        .on_mouse_down(gpui::MouseButton::Left, cx.listener(Self::on_mouse_down))
        .on_mouse_up(gpui::MouseButton::Left, cx.listener(Self::on_mouse_up))
        .on_mouse_move(cx.listener(Self::on_mouse_move))
いかがでしょうか。マウスを左クリックしてドラッグすると画像が追従すると思います。

ちなみに、画面の更新は呼んでないのですが、自動的に更新されるようです。すごいです。
追記
リポジトリを載せるのを忘れていました。ご参考まで。
おわりに
render の中のDiv要素やその操作がCSSに似ているなぁと思っていました。VScode で参照するドキュメントも Tailwind CSS なので、そんな感じなのだろうと思います。

今回は、実際に手を動かしてみました。Rustっぽさがあるのかどうかよくわからないので、ちゃんとRustを勉強してから見直してみたいと思っています。会社では使わないので使える場所も探した方がいいのかも。