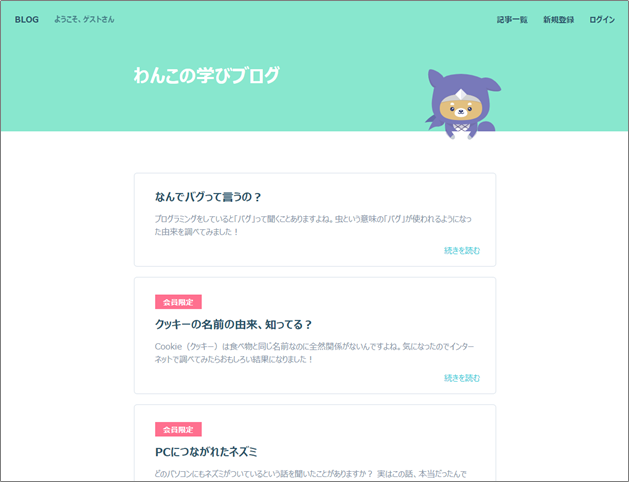
目標物の確認
ProgateのNode.jsコースで作ったブログアプリと同じものをDjangoで作ってみます。
Djangoでのアプリ開発の一連の流れを整理するために記していきます。
ログイン機能の実装
Djangoでは簡単にログイン機能を実装できます。
**authenticate()とlogin()**を使うため、importします(☆1)。
**authenticate()**は、loginの前段階として、formから送られてきたデータとUserテーブルのデータを照合するために使用します。照合が無事にできた場合は、オブジェクトが返されます(☆2)。ウェブサイトではログインにメールアドレスが使われるのが一般的です。ですが、Djangoではデフォルトでユーザー名を使っており、メールアドレスでのログインは少し面倒なので今回はユーザー名を使います。
if user is not Noneというコードは二重否定になっているため、userがNoneでなければ、つまりuserがいればif user is not None:の下の行のコードが実行されます(☆3)。
**login()**を使うことによってユーザーをログイン状態にすることができます(☆4)。ログイン状態の管理にはsessionが使われます。sessionはユーザーの状態を記録するために用いられる機能であり、**login()**を使うことによって、ログインしたユーザーの情報をサーバーのsessionの中に保存できます。setting.pyファイルを見ると、MIDDLEWAREという変数があり、その中に`'django.contrib.sessions.middleware.SessionMiddleware'``というコードがあります。Djangoがあらかじめsessionの仕組みを準備してくれており、勝手にsession機能を使うことができます。
from django.shortcuts import render, redirect
from django.views.generic import TemplateView
from django.contrib.auth.models import User
from django.db import IntegrityError
from django.contrib.auth import authenticate, login # ☆1

class BlogTop(TemplateView):...

def signupview(request):...

def loginview(request):
    if request.method == 'POST':
        username = request.POST['username'] # ☆2
        password = request.POST['password'] # ☆2
        user = authenticate(request, username=username, password=password) # ☆2

        if user is not None: # ☆3
            login(request, user) # ☆4
            return redirect('blog:list')
        else:
            return redirect('blog:login')

    return render(request,'blog/login.html')
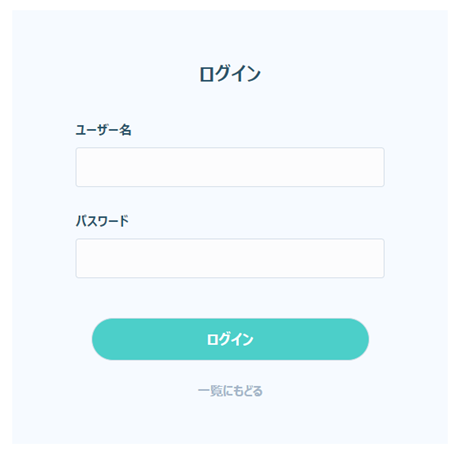
ログイン用のページも作ります。
{% load static %}
<!DOCTYPE html>
<html>
  <head>
    <meta charset="utf-8">
    <title>BLOG</title>
    <link rel="stylesheet" href="{% static 'blog/style.css' %}">
  </head>
  <body>
    <div class="sign">
      <div class="container">
        <h1><a href="{% url 'blog:list' %}">BLOG</a></h1>
        <div class="panel">
          <h2>ログイン</h2>
          <form action="" method="post">{% csrf_token %}
            <p>ユーザー名</p>
            <input type="text" name="username">
            <p>パスワード</p>
            <input type="password" name="password">
            <input type="submit" value="ログイン">
            <a href="{% url 'blog:list' %}">一覧にもどる</a>
          </form>
        </div>
      </div>
    </div>
  </body>
</html>
最後に、urls.pyを編集して完了です(☆5)。
from django.urls import path
from .views import BlogTop, signupview, loginview # ☆5

app_name = 'blog'

urlpatterns = [
    path('', BlogTop.as_view(), name='top'),
    path('signup/', signupview, name='signup'),
    path('login/', loginview, name='login'), # ☆5

]
これでログインページの実装は完了です!

