SIPトランク
2つのSIPサーバーをSIPトランクで接続して動作確認。ここでは、FreepbxとAsteriskとを接続。Freepbxも実質Asteriskを利用しているのであるが、設定はだいぶ異なる(GUIとCUIの差?)。適宜、ChatGPTなど利用。
環境
ネットワークは下図。

VirtualBox上の2つのVM(DebianとUbuntu)を利用し、DebianにてFreepbxを、UbuntuにてAsteriskを動作させる。Virtualboxネットワークアダプタをホストオンリーアダプタとし、Virtualboxを動作させるホストOS上の2つの異なるSIPクライアントをFreepbxとAsteriskとに接続。
ここでは簡略化のため、内線番号(Freepbxが管理する9000番台(9XXX)およびAsteriskが管理する6000番台(6XXX))のみを対象とする。
設定
Freepbx
トランク
General
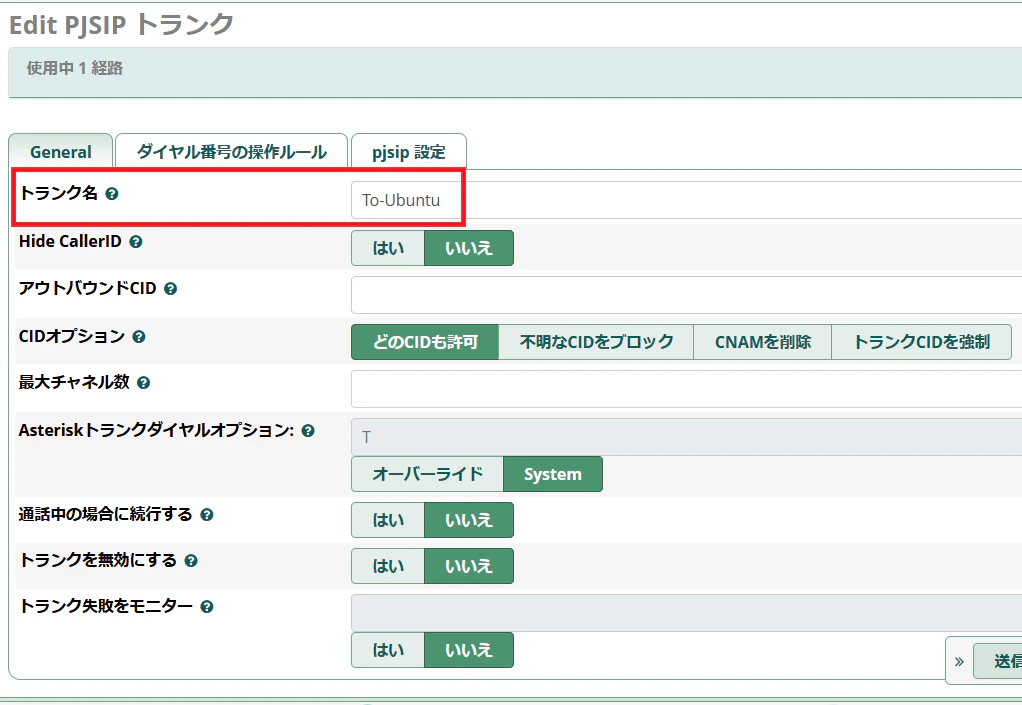
- トランク名(ここでは「To-Ubuntu」)を設定
pjsip設定

- 対向SIPサーバーのIPアドレスおよびポート番号指定(192.168.56.112および5060)
- コンテキストとして「from-internal」指定(トランクから来た番号を内線番号扱い)
- UDP
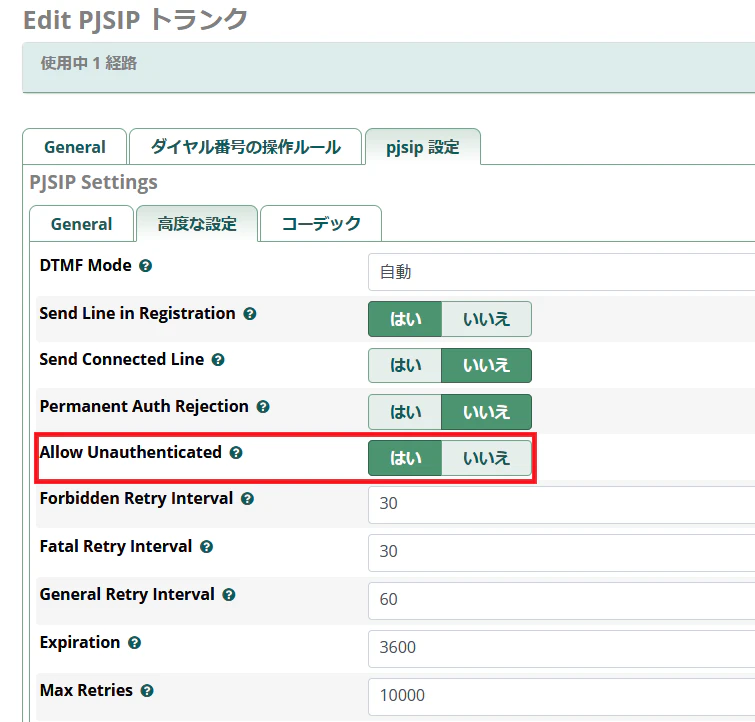
- Allow Unauthenticated:はい(対応SIPサーバーをIPアドレスで認証)
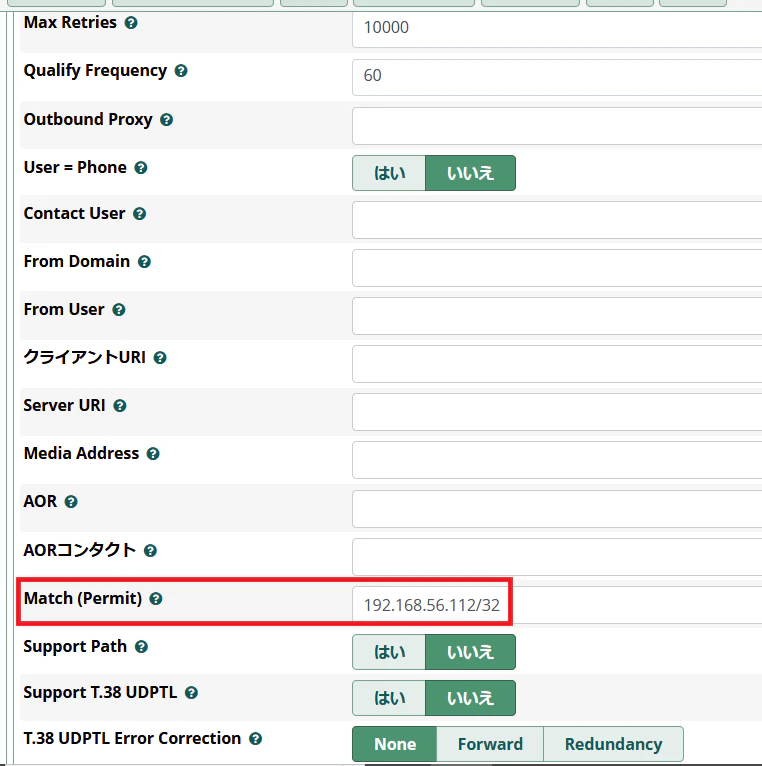
- 対向SIPサーバーのネットワーク(ここでは「/32」により1つのみ)
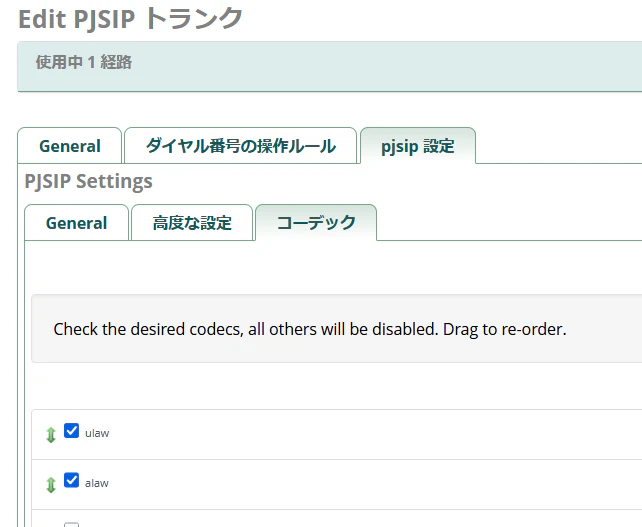
- コーデック:u-lawおよびa-law
アウトバウンドルート

- 先ほど設定したトランク名「To-Ubuntu」の指定
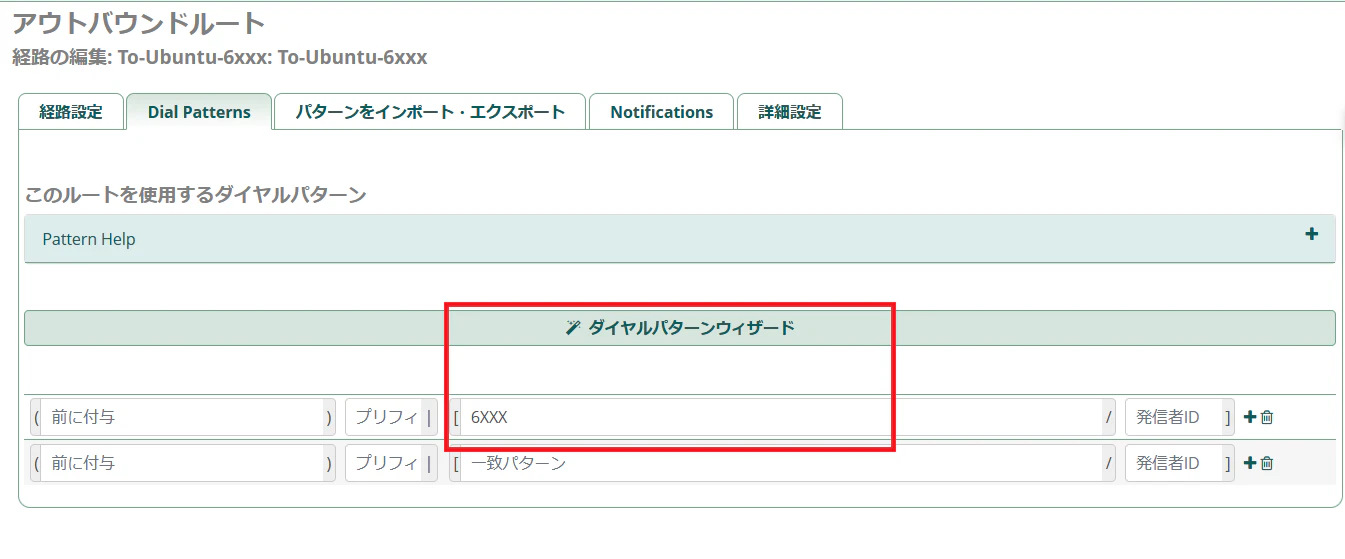
- このアウトバウンドルートに適用される番号(6000番台)
なお、6000番台番号を内線番号として受けるため、インバウンドルートの設定は不要(DIDとして受けていない)。
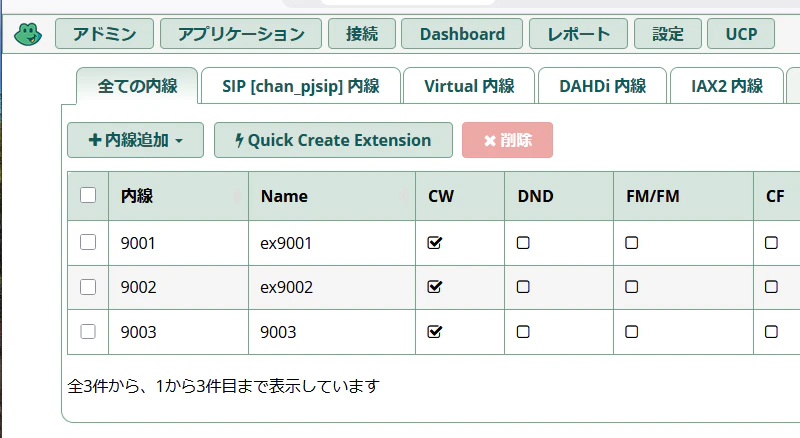
内線番号
ここは、小生の過去投稿「SIPサーバー(その2)」を参照。
Asterisk
小生の過去投稿「SIPサーバー(その1)」も参照。
/etc/pjsip.conf
[freepbx-trunk]
type=endpoint
transport=transport-udp
context=from-freepbx
disallow=all
allow=alaw,ulaw
aors=freepbx-trunk

[freepbx-trunk]
type=aor
contact=sip:192.168.56.111:5060

[freepbx-trunk]
type=identify
endpoint=freepbx-trunk
match=192.168.56.111

[6003]
type=endpoint
transport=transport-udp
context=from-internal
disallow=all
allow=ulaw
allow=gsm
auth=auth6003
aors=6003

[auth6003]
type=auth
auth_type=userpass
password=6003
username=6003

[6003]
type=aor
max_contacts=1

[6001]
type=endpoint
transport=transport-udp
context=from-internal
disallow=all
allow=ulaw
allow=gsm
auth=6001
aors=6001

[6001]
type=auth
auth_type=userpass
password=6001
username=6001

[6001]
type=aor
max_contacts=1

[6002]
type=endpoint
transport=transport-udp
context=from-internal
disallow=all
allow=ulaw
auth=6002
aors=6002
rewrite_contact=yes

[6002]
type=auth
auth_type=userpass
password=6002
username=6002

[6002]
type=aor
max_contacts=2
- SIPトランク
- context: from-freepbx(extension.conf内のエントリ)
- 対向SIPサーバー(Freepbx)のIPアドレス(192.168.56.11)およびポート番号(5060)
- 音声コーデック
- 内線(6001,6002,6003)
- context: from-internal(extension.conf内のエントリ)
- 番号およびパスワード
- 音声コーデック
/etc/extensions.conf
[general]
static=yes
writeprotect=no

[from-internal]
; For Test
exten = 100,1,Answer()
 same = n,Wait(1)
 same = n,Playback(demo-congrats)
 same = n,Hangup()

; Inside Ubuntu (6xxx)
exten => _6XXX,1,NoOp(Local Ubuntu ext ${EXTEN})
 same => n,Dial(PJSIP/${EXTEN},30,r)
 same => n,Hangup()

; To FreePBX (6xxx -> 9xxx)
exten => _9XXX,1,NoOp(To FreePBX ${EXTEN})
 same => n,Dial(PJSIP/${EXTEN}@freepbx-trunk,30)
 same => n,Hangup()

[from-freepbx]
; From FreePBX (9xxx -> 6xxx)
exten => _6XXX,1,NoOp(From FreePBX to Ubuntu ${EXTEN})
 same => n,Dial(PJSIP/${EXTEN},30,r)
 same => n,Hangup()
- from-internal(内線)
- 6000番台のCallであればそのまま呼び出し
- 9000番台のCallであればSIPトランクへ
- 100であればデモ音声
- from-freepbx(SIPトランク)
- SIPトランクから来た6000番台のCallを呼び出す
検証
6001(Ubuntu配下番号)から9001(Freepbx配下番号へ)の通話にて、SIPサーバー間データのやりとりをWiresharkで取得したもの。

EOF