すいません。いきなりタイトルに偽りありです。
センサーはこの465円で買ったやつを使います。
Rasbee DHT22 デジタル温度センサーモジュール AM2302 接続線付き Arduino DIY用 1個 [並行輸入品]
あとはESP32。これを使います。


これが500円かっていうとたぶん違うんだけど、ESP32なら500円あれば用意できるよねって事で許して下さい。1000円くらいでやるできる、ですね。。で、どこで買ったかというとたぶんaliexpress系のとこで買ったはず。なんか電池ボックスついてて便利そうだなって買ってたけどそれっきり眠ってました。せっかくなのでこれ使おうかなと。
で、何やるかっていうと、この記事の続編みたいなもんです。
コンビニで買った育てるサラダをrasPiで撮ってKinesisに流してゴニョゴニョする 前編
すでにリクガメさんは我が家にいらっしゃってて外からストリーミング動画は観れてるんだけど、温度とか湿度とかハッキリ見えてないし、そもそもモニターもしといたほうがいいだろうと。
そんなわけでまずは値を拾うのと外に飛ばしてみるところまで。
たぶん3部作くらいでこれが前編になる。
環境
- wemos esp32
- Rasbee DHT22 デジタル温度センサーモジュール AM2302
- MicroPython
ESP32はarduino IDEでしか触った事ないんだけど、なんかちっちゃいPythonが使えるらしいので使ってみようと思います。ちっちゃいrubyも使えるらしいですね。
MicroPythonセットアップ
micropython esp32でググって一番上にHitした、こちらを参考にさせていただきましょう。
- esptoolsとやらを入れる
pip install esptool
- http://micropython.org/downloadよりesp32-20181215-v1.9.4-754-g5146e7949.bin をDLします
- ESP32にファームウェアを焼きます。comポートはデバイスマネージャーで見るとわかります。自分はcom8だった。
C:\a>esptool --port COM8 flash_id
esptool.py v2.5.1
Serial port COM8
Connecting........_
Detecting chip type... ESP32
Chip is ESP32D0WDQ6 (revision 1)
Features: WiFi, BT, Dual Core
MAC: 30:ae:a4:43:a7:58
Uploading stub...
Running stub...
Stub running...
Manufacturer: c8
Device: 4016
Detected flash size: 4MB
Hard resetting via RTS pin...
成功したっぽいです。
C:\a>esptool --port COM8 erase_flash
esptool.py v2.5.1
Serial port COM8
Connecting........_
Detecting chip type... ESP32
Chip is ESP32D0WDQ6 (revision 1)
Features: WiFi, BT, Dual Core
MAC: 30:ae:a4:43:a7:58
Uploading stub...
Running stub...
Stub running...
Erasing flash (this may take a while)...
Chip erase completed successfully in 3.9s
Hard resetting via RTS pin...

C:\a>esptool --chip esp32 --port COM8 write_flash -z 0x1000 C:\a\esp32-20181215-v1.9.4-754-g5146e7949.bin
esptool.py v2.5.1
Serial port COM8
Connecting........_____....._
Chip is ESP32D0WDQ6 (revision 1)
Features: WiFi, BT, Dual Core
MAC: 30:ae:a4:43:a7:58
Uploading stub...
Running stub...
Stub running...
Configuring flash size...
Auto-detected Flash size: 4MB
Compressed 1084016 bytes to 685385...
Wrote 1084016 bytes (685385 compressed) at 0x00001000 in 61.4 seconds (effective 141.3 kbit/s)...
Hash of data verified.

Leaving...
Hard resetting via RTS pin...
こちらもうまくいきました。
- teratermでつないでhelloworld
MicroPython v1.9.4-754-g5146e7949 on 2018-12-15; ESP32 module with ESP32
Type "help()" for more information.
>>> print ("hello Esp32")
hello Esp32
>>>
おー!pythonだ!
ちなみにボーレートを115200にしたらうまく表示されました。
なお起動時にOSError: [Errno 2] ENOENT ってエラーが出てたりしますが、main.pyを作ってやると消えるらしいです。main.pyがあると最初に実行するようになってるんですね。
f = open("main.py", "w")
f.write("print(\"hello Esp32\")\n")
f.close()
起動時のメッセージがこんな感じになりました。
rst:0x1 (POWERON_RESET),boot:0x13 (SPI_FAST_FLASH_BOOT)
configsip: 0, SPIWP:0xee
clk_drv:0x00,q_drv:0x00,d_drv:0x00,cs0_drv:0x00,hd_drv:0x00,wp_drv:0x00
mode:DIO, clock div:2
load:0x3fff0018,len:4
load:0x3fff001c,len:4732
load:0x40078000,len:7496
load:0x40080400,len:5512
entry 0x4008114c
I (399) cpu_start: Pro cpu up.
I (400) cpu_start: Single core mode
I (400) heap_init: Initializing. RAM available for dynamic allocation:
I (403) heap_init: At 3FFAE6E0 len 00001920 (6 KiB): DRAM
I (409) heap_init: At 3FFC0E00 len 0001F200 (124 KiB): DRAM
I (416) heap_init: At 3FFE0440 len 00003BC0 (14 KiB): D/IRAM
I (422) heap_init: At 3FFE4350 len 0001BCB0 (111 KiB): D/IRAM
I (428) heap_init: At 400915E0 len 0000EA20 (58 KiB): IRAM
I (435) cpu_start: Pro cpu start user code
I (5) cpu_start: Starting scheduler on PRO CPU.
hello Esp32
MicroPython v1.9.4-754-g5146e7949 on 2018-12-15; ESP32 module with ESP32
Type "help()" for more information.
>>>
なお、upyshとかいうちっちゃいシェルがあるみたい。
>>> from upysh import *

upysh is intended to be imported using:
from upysh import *

To see this help text again, type "man".

upysh commands:
pwd, cd("new_dir"), ls, ls(...), head(...), cat(...)
newfile(...), mv("old", "new"), rm(...), mkdir(...), rmdir(...),
clear

>>> ls
     139 boot.py
      21 main.py

>>> cat ("boot.py")
# This file is executed on every boot (including wake-boot from deepsleep)
# import esp
# esp.osdebug(None)
# import webrepl
# webrepl.start()
viとかあるとすごい便利なんだけど。。
そんなわけでuPyCraft (IDE)
なんかそういうステキなやつがあるらしいです。
Wemos Lolin ESP32 OLED で、MicroPython から OLED 出力をする
サイトに沿ってやったらサックリ入りました。ちなみにV1.1です。

センサーを読んでみる
import dht
import machine
import time

print("Starting DHT22.")
d = dht.DHT22(machine.Pin(4))

while True:
  print("Measuring.")

  ng = 0
  try:
    d.measure()
  except:
    ng = ng + 1

  print("Temperature: %3.1f °C" % d.temperature())
  print("   Humidity: %3.1f %%" % d.humidity())

  time.sleep(5)
温度と湿度取れたー
>>> exec(open('./main.py').read(),globals())
Starting DHT22.
Measuring.
Temperature: 23.2 C
   Humidity: 36.6 %
Measuring.
Temperature: 23.2 C
   Humidity: 36.5 %
Ambient
さて、なんかAmbientというのが便利らしいです。IoT向けのクラウドサービスなのですが、ここにデータを送ると記録されてグラフで確認できたりもするみたい。
ひとまず、ここにデータ送るプログラム書いてみようかな。
- まず登録 -> https://ambidata.io/usr/signup.html
- ライブラリをGET -> https://github.com/AmbientDataInc/ambient-Python-lib
使うのはambient.py - esp32にambient.pyをコピー
- コードをこんな感じにしました
import dht
import machine
import time
import ambient

ssid = '000000000'
password = 'XXXXX'
channel_id = '0000'
write_key = '0000000000000000'

def do_connect(ssid, password, timeout=10):
  import network
  sta_if = network.WLAN(network.STA_IF)
  if not sta_if.isconnected():
    print ('connecting ...')
    sta_if.active(True)
    sta_if.connect(ssid, password)
    while not sta_if.isconnected() and timeout > 0:
      print('.')
      time.sleep(3)
      timeout -= 1
  print(sta_if.ifconfig())


print("Starting DHT22.")
d = dht.DHT22(machine.Pin(4))
am = ambient.Ambient(channel_id, write_key)

do_connect(ssid, password)

while True:
  print("Measuring.")

  ng = 0
  try:
    d.measure()
  except:
    ng = ng + 1

  print("Temperature: %3.1f °C" % d.temperature())
  print("   Humidity: %3.1f %%" % d.humidity())

  res = am.send({
    "d1": d.temperature(),
    "d2": d.humidity()
  })

  print(res.status_code)
  res.close()
  time.sleep(5)
すると・・
Starting DHT22.
state: 3 -> 5 (10)
add 0
aid 6

connected with 00000000, channel 9
dhcp client start...
cnt


connecting ...
.


scandone


ip:192.168.xxx.xxx,mask:255.255.255.0,gw:192.168.xxx.xxx


('192.168.xxx.xxx', '255.255.255.0', '192.168.xxx.xxx', '192.168.xxx.xxx')
Measuring.


Temperature: 23.3 °C
   Humidity: 37.3 %


200
そしてambientの画面では・・
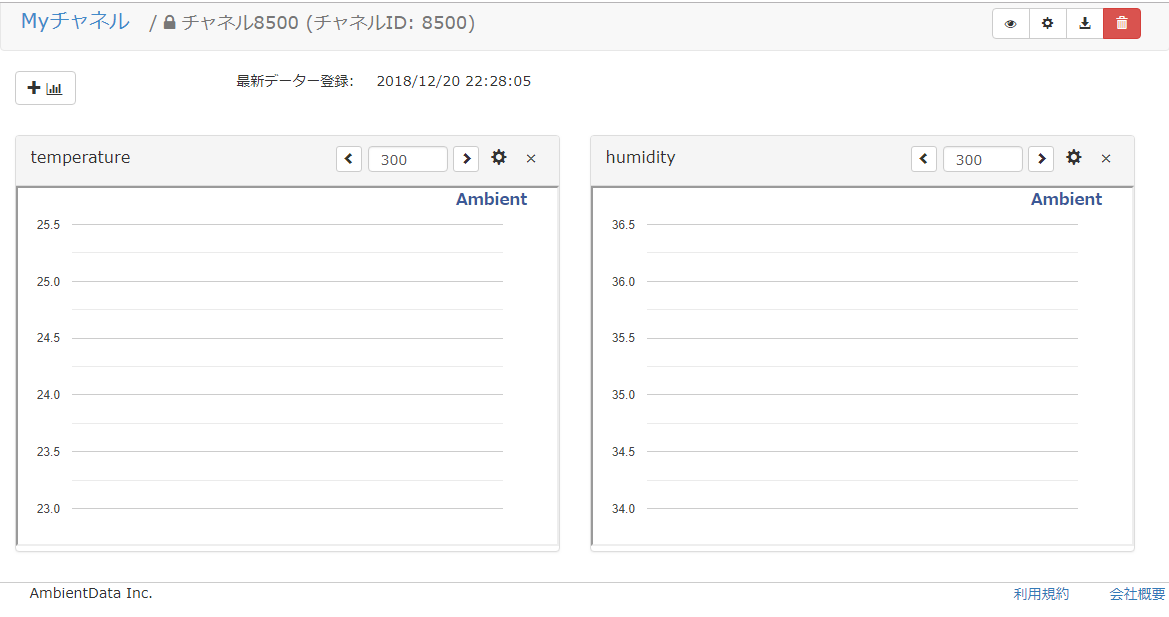
サンプル少なくてグラフは出てないですけどね。。
10分平均値にしたから10分経ったらでるかな。
データのcsvダウンロードしたらちゃんと記録されてたのでOK.
created,d1,d2,d3,d4,d5,d6,d7,d8
2018-12-20T13:27:06.241Z,23.3,37.3,,,,,,
2018-12-20T13:27:11.641Z,24.3,34.8,,,,,,
2018-12-20T13:27:17.065Z,24.3,34.7,,,,,,
2018-12-20T13:27:22.490Z,24.3,34.7,,,,,,
2018-12-20T13:27:27.916Z,24.3,35,,,,,,
2018-12-20T13:27:33.314Z,24.4,35.4,,,,,,
2018-12-20T13:27:38.714Z,24.4,35.3,,,,,,
2018-12-20T13:27:44.139Z,24.4,35.5,,,,,,
2018-12-20T13:27:49.538Z,24.5,35.5,,,,,,
2018-12-20T13:27:54.964Z,24.5,35.2,,,,,,
2018-12-20T13:28:00.388Z,24.6,35.2,,,,,,
2018-12-20T13:28:05.813Z,24.6,35,,,,,,
お次はこれをaws iotに飛ばしてみたい。
最後にiotからのjsでviewかなぁ。