次の記事でGASをローカル環境で開発するためのテンプレートを作りました。
Google Apps Script をローカル環境で快適に開発するためのテンプレートを作りました - Qiita
ローカル開発ができるようになったら、次にほしいのはCI/CD環境ですよね。
テストが通らないコードをマージしたくないですよね。
マージされたと同時に自動でデプロイしたいですよね。
上記のテンプレートに Circle CI を設定したサンプルリポジトリを作ったので参考にしてみてください。
howdy39/gas-clasp-library
※このリポジトリはGASのライブラリ使用時のサンプルでもあります。(SlackAppを使っています)
本記事では Circle CI 使用時のCI/CD環境の構築手順を解説をしていきます。
clasp の仕組み
設定する前にまず clasp の仕組みを理解しましょう。
clasp は clasp login を行った際に、ユーザーディレクトリに.clasprc.json ファイルを作成します。
中身は次のようになっています。
{
  "access_token": "<your_access_token>",
  "token_type": "Bearer",
  "refresh_token": "<your_refresh_token>",
  "expiry_date": 1521039498389
}
期限が切れていたらリフレッシュトークンでアクセストークンを取り直す仕組みです。
つまり、ユーザーディレクトリに .clasprc.json がある状態を CI 環境でも用意してあげればよいわけです。
※clasp にサービスアカウント認証は、2018/3時点では、用意されていません
デプロイスクリプトを作成する
ローカル環境の .clasprc.json を Circle CI の環境変数に入れておきます。
デプロイスクリプト中で echo して ~/.clasrpc.json に書き出してあげるだけです。
clasp 本体は、プロジェクト内にインストールしていないので、 npx で実行するようにしています。
# !/bin/bash

echo $CLASPRC_JSON > ~/.clasprc.json
npx @google/clasp push
Circle CI の設定ファイルを作成する
Circle CI の説明をするのが主旨ではないので細かい説明はしません。
Lint, Test, Build をおこない、 masterブランチ にマージしようとするときにだけデプロイスクリプトを起動するようにしています。
version: 2

references:
  container_config: &container_config
    docker:
      - image: circleci/node:8.9.4
    working_directory: /home/circleci/project

  node_modules_cache_params: &node_modules_cache_params
    key: node_modules-{{ .Branch }}-{{ checksum "./package-lock.json" }}
    paths:
      - node_modules

jobs:
  build_deploy:
    <<: *container_config
    steps:
      - checkout
      - run:
          name: Show system information.
          command: |
            echo "Node $(node -v)"
            echo "Npm $(npm -v)"
      - restore_cache:
          name: Restore Cache.
          <<: *node_modules_cache_params
      - run:
          name: Set up to gas clasp environment.
          command: npm install
      - save_cache:
          name: Saving Cache.
          <<: *node_modules_cache_params
      - run:
          name: Run Lint.
          command: npm run lint
      - run:
          name: Run Test.
          command: npm run test
      - run:
          name: Run webpack build.
          command: npm run build
      - run:
          name: Deploy to GAS.
          command: |
            if [ ${CIRCLE_BRANCH} = "master" ]; then
              ./scripts/deploy-ci.sh
            else
              echo "${CIRCLE_BRANCH} isn't deploy branch."
            fi
workflows:
  version: 2
  build_deploy_workflow:
    jobs:
      - build_deploy
動作確認
エラーの確認
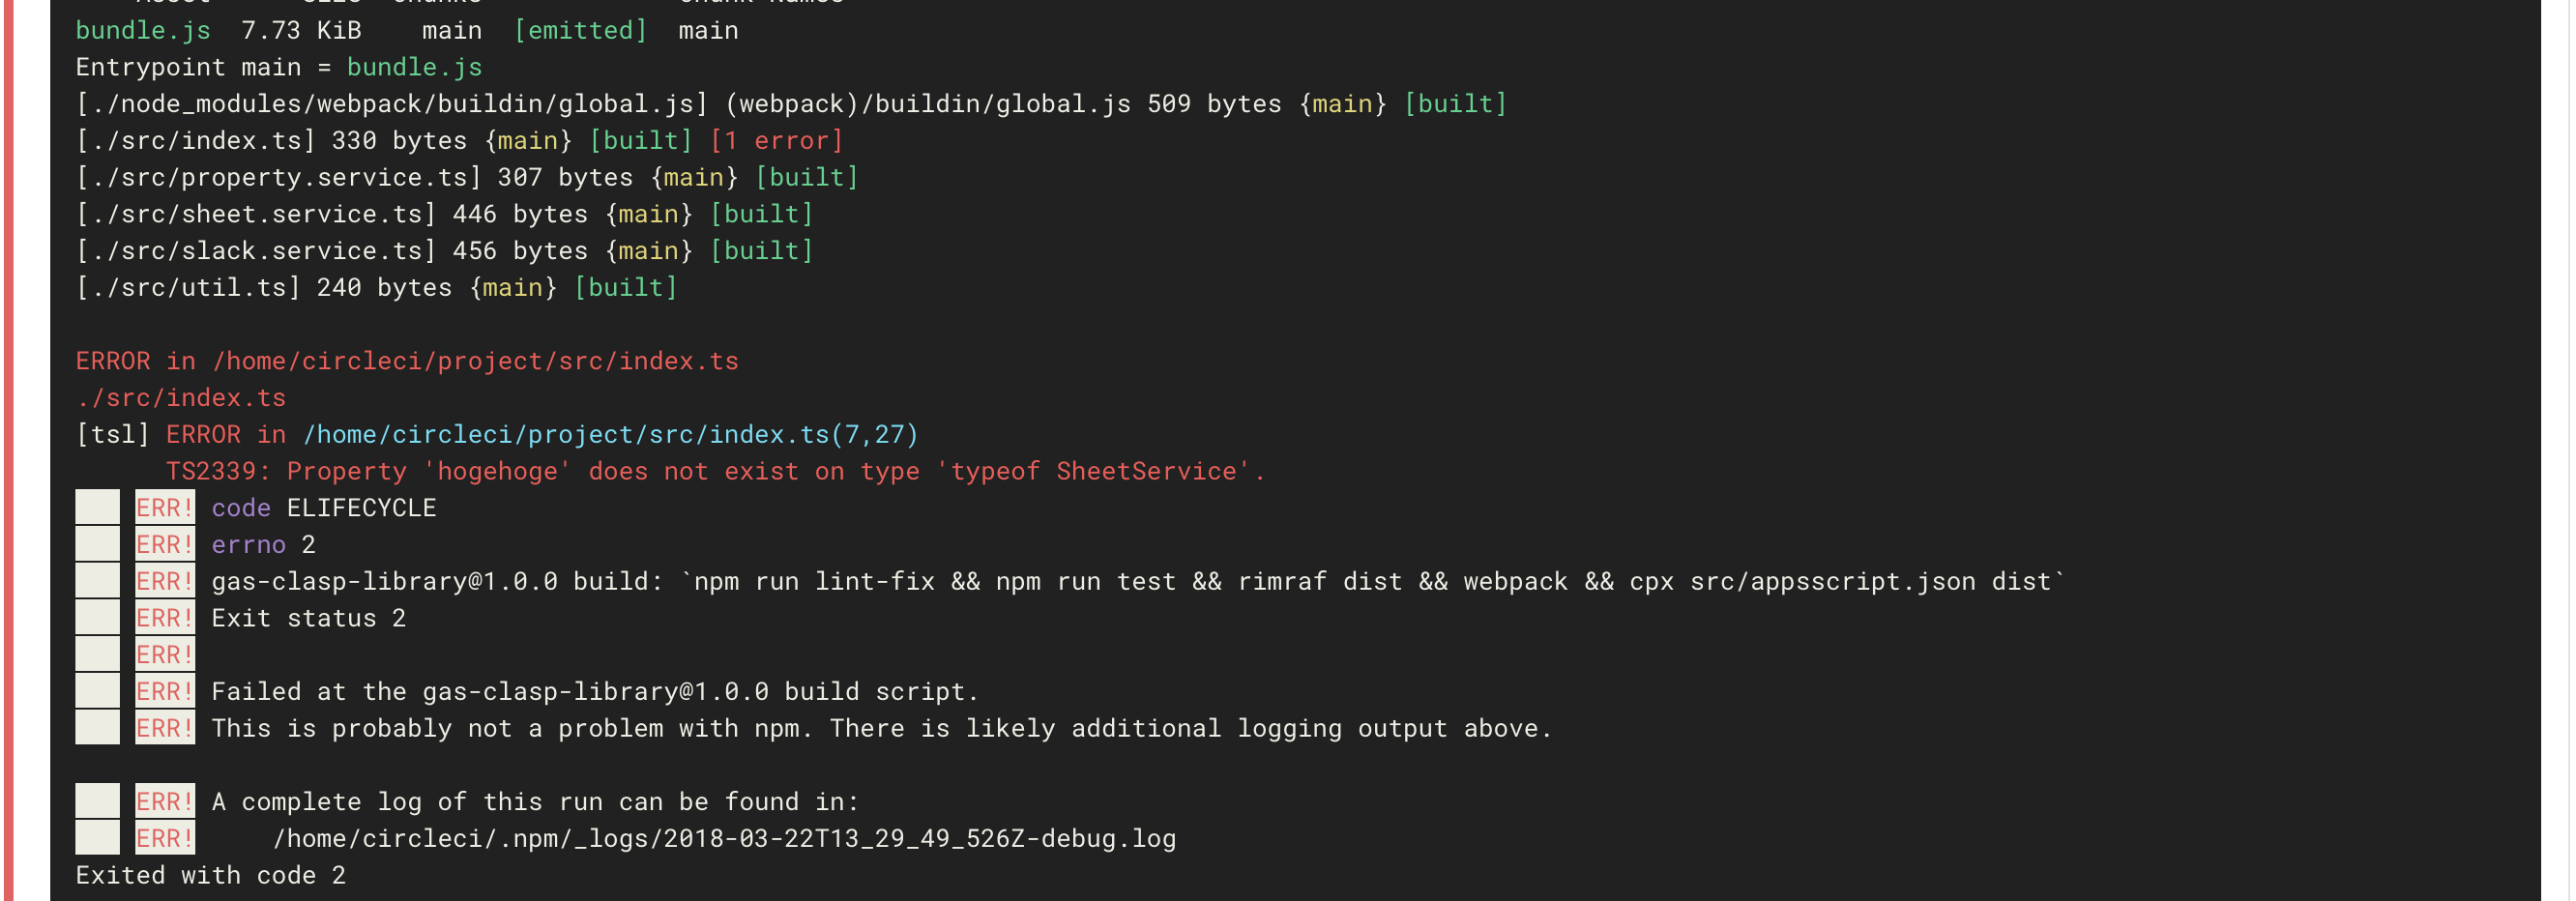
わざとエラーを起こすコミットをしてCIが異常終了することを確認します。
masterブランチへのマージでデプロイされることを確認
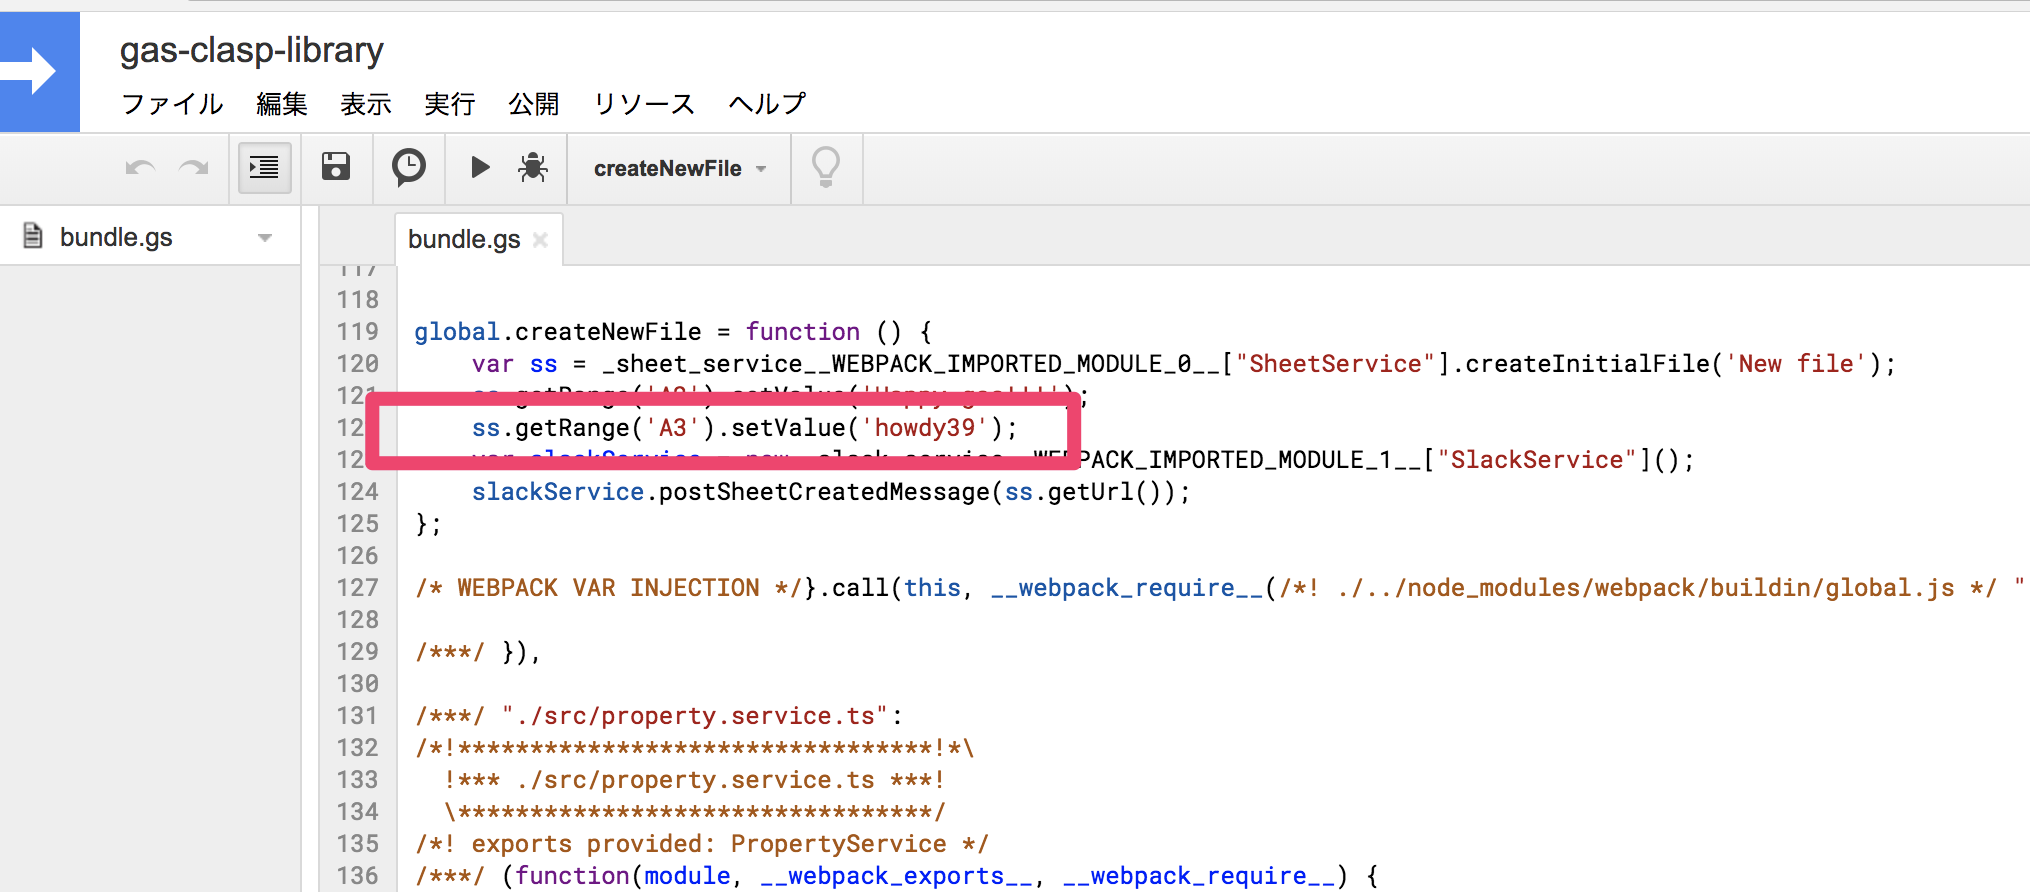
スプレッドシートのA3セルにhowdy39と書き込む処理を追加したPRを送ります。
Write A3 cell by howdy39 · Pull Request #2 · howdy39/gas-clasp-library
GASファイルを開いてみましょう。
A3セルにhowdy39と書き込む処理が追加されていることが確認できます。

GASの実行
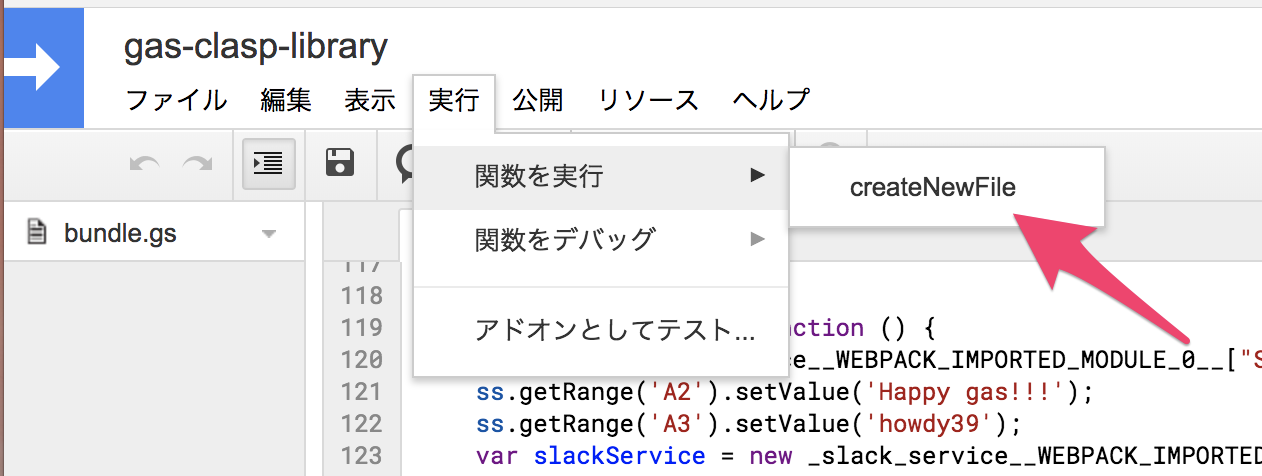
GASを実行して動作を確認します。
[実行]-[関数を実行]-[createNewFile]をクリックします。
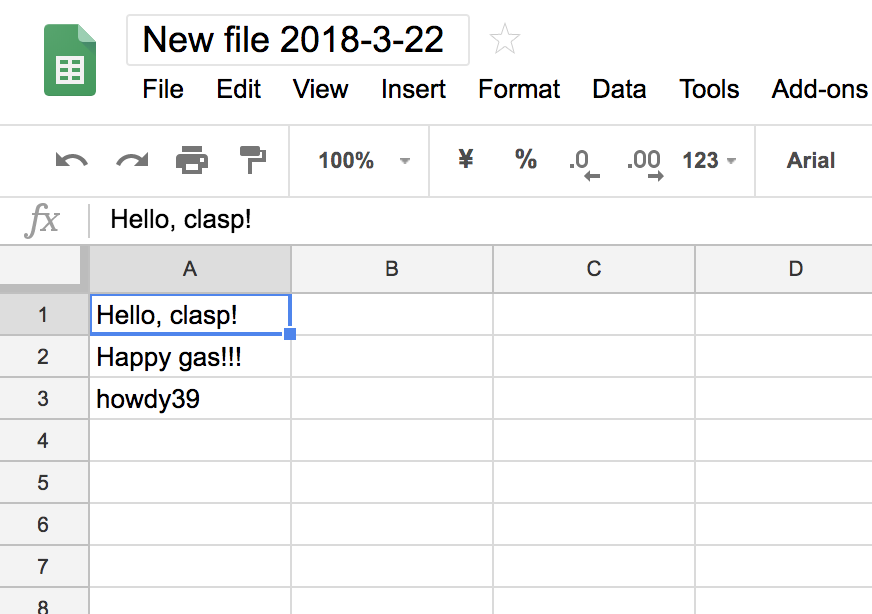
ちゃんと A3 セルに書き込む処理が入ったことが確認できます。

まとめ
GASはローカル環境で開発できる。
GASはCI/CD環境も構築できる。
GASをどんどん使っていこう!


