自分で作成した.qt creatorのプロジェクトに
以下のイメージクロップウィジェットクラスを取り込んでみます.
クラス取り込み
1.まずqtcreatorでビルドシステムcmake,基底クラスQMainWindowの新規プロジェクトを作成します.
ディレクトリ構成
$ tree
.
├── CMakeLists.txtlayout->addWidget(button1);
├── CMakeLists.txt.user
├── main.cpp
├── mainwindow.cpp
├── mainwindow.h
└── mainwindow.ui
2.プロジェクト内にimagecropperディレクトリを作成します.次にその中に,上で紹介しているGithubリポジトリのsrc内のファイルをコピーします.
ディレクトリ構成
$ tree
├── CMakeLists.txt
├── CMakeLists.txt.user
├── imagecropper
│   ├── imagecropper.cpp
│   ├── imagecropper.h
│   ├── imagecropper_e.h
│   └── imagecropper_p.h
├── main.cpp
├── mainwindow.cpp
├── mainwindow.h
└── mainwindow.ui
3.CMakeLists.txtに以下のように追加
CMakeLists.txt
else()
  add_executable(bbb
    main.cpp
    mainwindow.cpp
    mainwindow.h
    mainwindow.ui

    imagecropper/imagecropper.h # add
    imagecropper/imagecropper.cpp # add
    imagecropper/imagecropper_e.h # add
    imagecropper/imagecropper_p.h # add
  )
endif()
mainwindow.cppを以下のように変更
mainwindow.cpp
# include "mainwindow.h"
# include "./ui_mainwindow.h"

# include "./imagecropper/imagecropper.h"
# include <QVBoxLayout>

MainWindow::MainWindow(QWidget *parent)
    : QMainWindow(parent)
    , ui(new Ui::MainWindow)
{
    ui->setupUi(this);
    QVBoxLayout *layout = new QVBoxLayout();

    ImageCropper *w = new ImageCropper;
    layout->addWidget(w);
    ui->centralwidget->setLayout(layout);
}

MainWindow::~MainWindow()
{
    delete ui;
}
qtcreatorを実行すると以下のようにImageCropperクラスが取り込めているような感じになります.
画像ダウンロード
wget https://github.com/hoshianaaa/TestFiles/raw/master/image.jpg
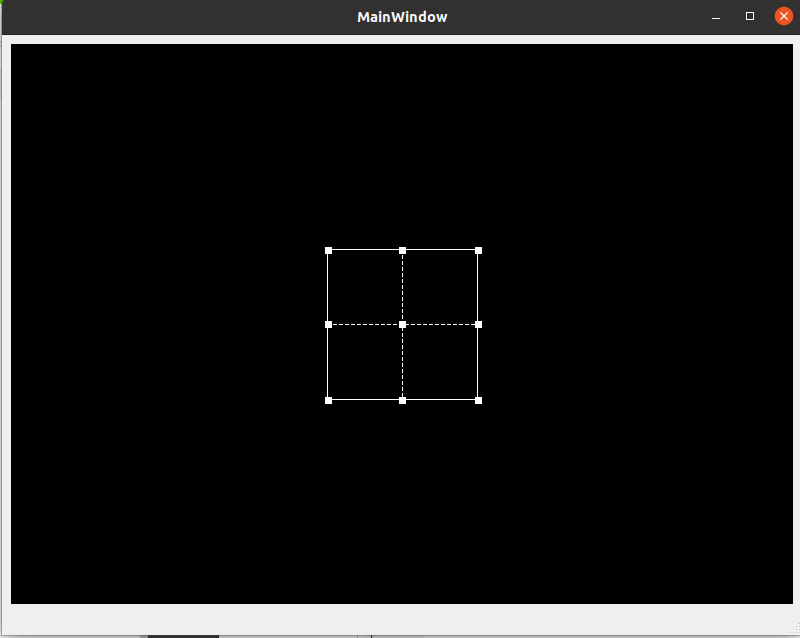
setImageをしても写真がでない...
背景グレーはできた
mainwindow.cpp
# include "mainwindow.h"
# include "./ui_mainwindow.h"

# include "./imagecropper/imagecropper.h"
# include <QVBoxLayout>

# include <QPixmap>

MainWindow::MainWindow(QWidget *parent)
    : QMainWindow(parent)
    , ui(new Ui::MainWindow)
{
    ui->setupUi(this);
    QVBoxLayout *layout = new QVBoxLayout();

    ImageCropper *w = new ImageCropper;
    w->setProportion(QSize(4,3));
    w->setProportionFixed(true);
    w->setImage(QPixmap("./image.jpg"));
    w->setBackgroundColor(Qt::lightGray);

    layout->addWidget(w);
    ui->centralwidget->setLayout(layout);

}

MainWindow::~MainWindow()
{
    delete ui;
}
相対パスではだめで,絶対パスにしたらできた.
mainwindow.cpp
# include "mainwindow.h"
# include "./ui_mainwindow.h"

# include "./imagecropper/imagecropper.h"
# include <QVBoxLayout>

# include <QPixmap>

MainWindow::MainWindow(QWidget *parent)
    : QMainWindow(parent)
    , ui(new Ui::MainWindow)
{
    ui->setupUi(this);
    QVBoxLayout *layout = new QVBoxLayout();

    ImageCropper *w = new ImageCropper;
    w->setProportion(QSize(4,3));
    w->setProportionFixed(true);
    w->setImage(QPixmap("/home/hoshina/bbb/img.jpg"));
    w->setBackgroundColor(Qt::lightGray);

    layout->addWidget(w);
    ui->centralwidget->setLayout(layout);

}

MainWindow::~MainWindow()
{
    delete ui;
}
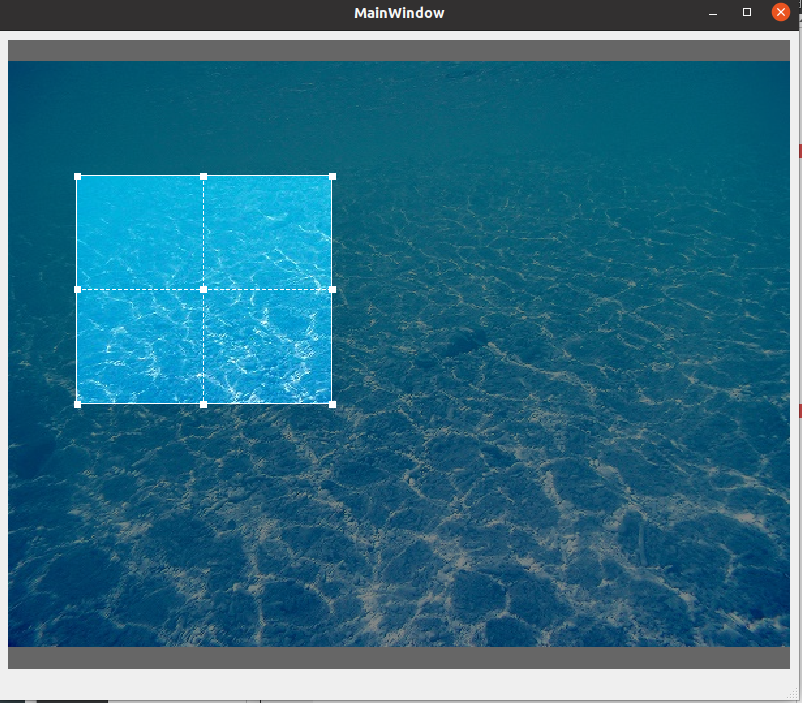
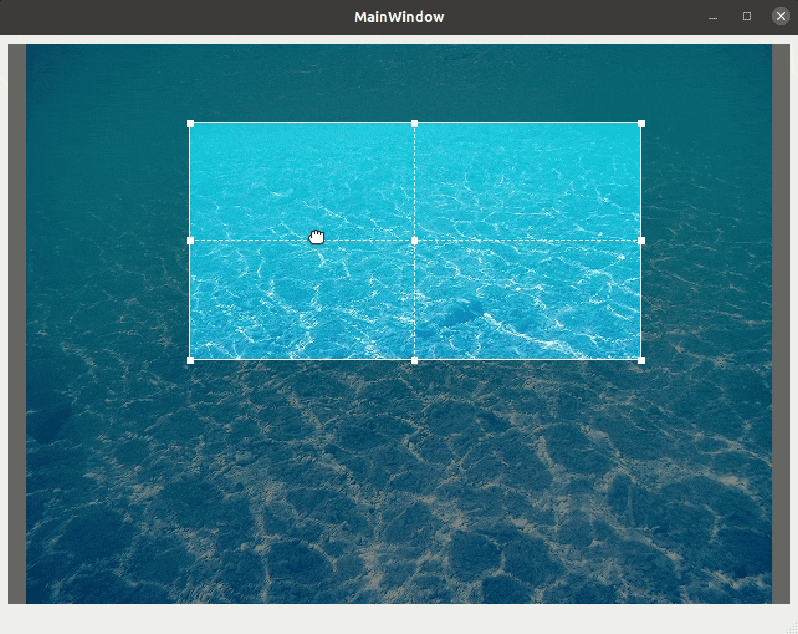
切り取り枠のアスペクト比固定なし.
# include "mainwindow.h"
# include "./ui_mainwindow.h"

# include "./imagecropper/imagecropper.h"
# include <QVBoxLayout>

# include <QPixmap>

MainWindow::MainWindow(QWidget *parent)
    : QMainWindow(parent)
    , ui(new Ui::MainWindow)
{
    ui->setupUi(this);
    QVBoxLayout *layout = new QVBoxLayout();

    ImageCropper *w = new ImageCropper;
    w->setImage(QPixmap("/home/hoshina/bbb/img.jpg"));
    w->setBackgroundColor(Qt::lightGray);

    layout->addWidget(w);
    ui->centralwidget->setLayout(layout);

}

MainWindow::~MainWindow()
{
    delete ui;
}
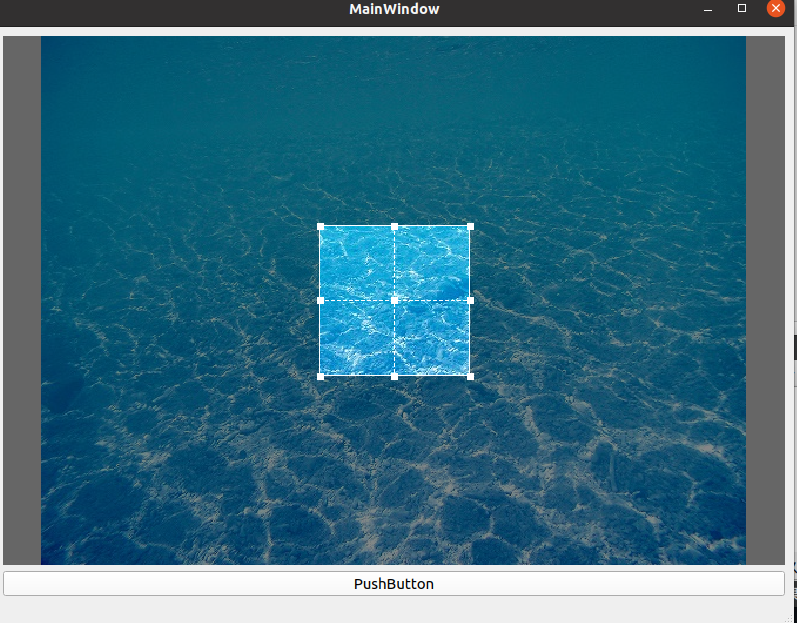
いい感じにできました!
クロップ
クロップ用のボタンを設置
1.ui上にボタンを配置
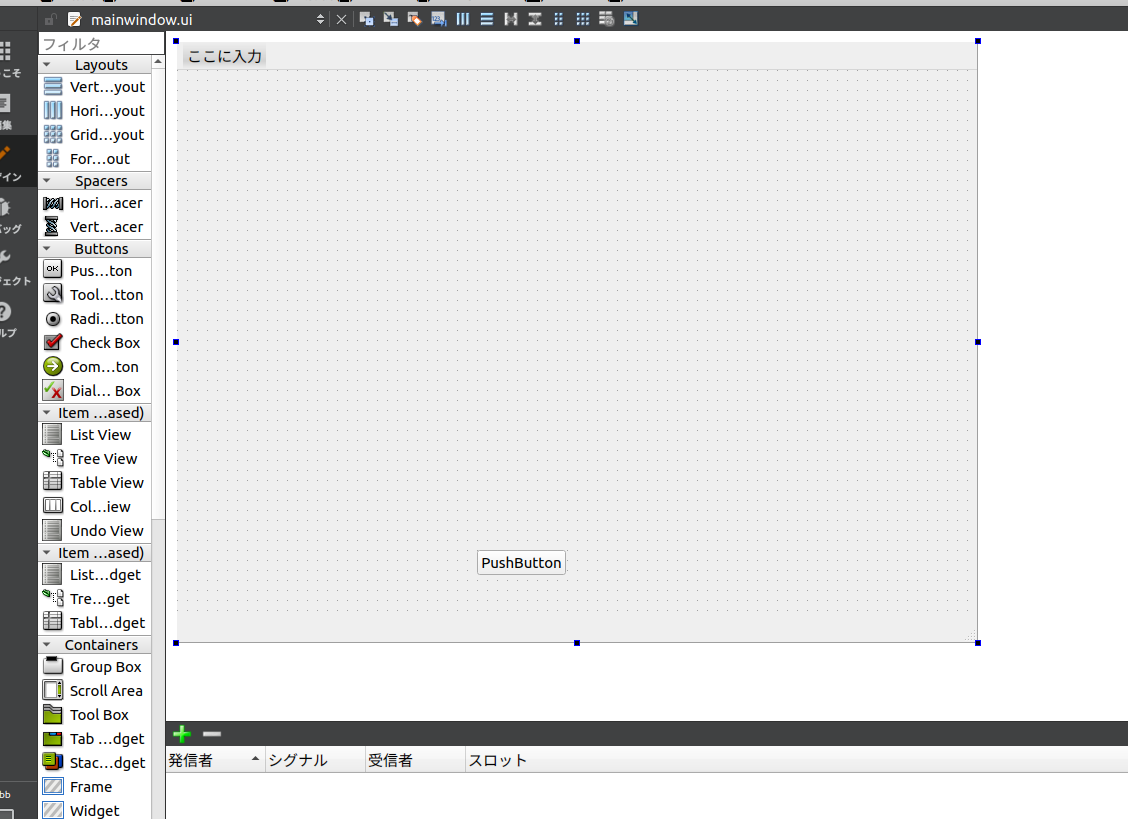
2.次のプログラムを追加して,uiに配置したボタンをlayout内に入れるlayout->addWidget(ui->pushButton);
3.結果
ボタン内でクロップ画像取得
1.uiに配置したpushButtonのsignalを生成
2.プログラムを以下のように変更
mainwindow.h
# ifndef MAINWINDOW_H
# define MAINWINDOW_H

# include <QMainWindow>
# include "./imagecropper/imagecropper.h"

QT_BEGIN_NAMESPACE
namespace Ui { class MainWindow; }
QT_END_NAMESPACE

class MainWindow : public QMainWindow
{
    Q_OBJECT

public:
    MainWindow(QWidget *parent = nullptr);
    ~MainWindow();

private slots:
    void on_pushButton_clicked();

private:
    Ui::MainWindow *ui;
    ImageCropper *w;
};
# endif // MAINWINDOW_H
mainwindow.cpp
# include "mainwindow.h"
# include "./ui_mainwindow.h"

# include "./imagecropper/imagecropper.h"
# include <QVBoxLayout>

# include <QPixmap>
# include <iostream>

MainWindow::MainWindow(QWidget *parent)
    : QMainWindow(parent)
    , ui(new Ui::MainWindow)
{
    ui->setupUi(this);
    QVBoxLayout *layout = new QVBoxLayout();

    w = new ImageCropper;
    w->setImage(QPixmap("/home/hoshina/bbb/img.jpg"));
    w->setBackgroundColor(Qt::lightGray);

    layout->addWidget(w);
    layout->addWidget(ui->pushButton);
    ui->centralwidget->setLayout(layout);

}

MainWindow::~MainWindow()
{
    delete ui;
}


void MainWindow::on_pushButton_clicked()
{
    std::cout << "click!!!" << std::endl;
    QPixmap croppedImage = w->cropImage();
}
これでcallback内でクロップ画像を取得できました.
クロップ画像表示
1.ui上にQLabelを設置
2.mainwindow.cppを以下2点変更
-
以下プログラムでQLabelを並べる
layout->addWidget(ui->label); -
buttonクリックシグナル関数以下追加でクロップ画像を表示
ui->label->setPixmap(croppedImage);
mainwindow.cpp
# include "mainwindow.h"
# include "./ui_mainwindow.h"

# include "./imagecropper/imagecropper.h"
# include <QVBoxLayout>

# include <QPixmap>
# include <iostream>

MainWindow::MainWindow(QWidget *parent)
    : QMainWindow(parent)
    , ui(new Ui::MainWindow)
{
    ui->setupUi(this);
    QVBoxLayout *layout = new QVBoxLayout();

    w = new ImageCropper;
    w->setImage(QPixmap("/home/hoshina/bbb/img.jpg"));
    w->setBackgroundColor(Qt::lightGray);

    layout->addWidget(w);
    layout->addWidget(ui->pushButton);
    layout->addWidget(ui->label);
    ui->centralwidget->setLayout(layout);

}

MainWindow::~MainWindow()
{
    delete ui;
}


void MainWindow::on_pushButton_clicked()
{
    std::cout << "click!!!" << std::endl;
    QPixmap croppedImage = w->cropImage();
    ui->label->setPixmap(croppedImage);
}
3.実行しpushbuttonを押すと,クロップ画像が表示されました.
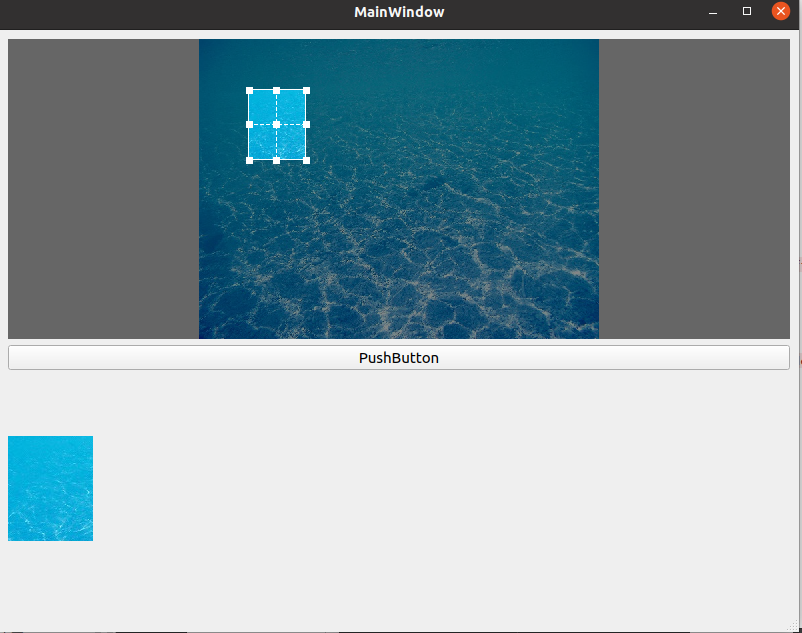
画像クロップができました!