はじめに
Apache Airflow ハンズオンに続いて、The Complete Hands-On Introduction to Apache Airflow で理解を深める。本記事では、デフォルトで設定されている SQLite と SequentialExecutor での挙動を確認した後、それらを PostgreSQL と LocalExecutor に変更し、並列処理を試す。
デフォルト設定の確認
Apache Airflow では、初期化した段階でデフォルトの設定がなされている。設定は以下コマンドで確認できる。
$ airflow config get-value core sql_alchemy_conn
sqlite:////home/airflow/airflow/airflow.db
$ airflow config get-value core executor
SequentialExecutor
これを見ると、DB には SQLite が採用され、Executor は SequentialExecutor となっていることがわかる。一旦、デフォルトの設定のままでどのような挙動になるかを確認する。
以下で簡単な DAG を作成した。
from datetime import datetime

from airflow import DAG
from airflow.operators.bash import BashOperator

default_args = {"start_date": datetime(2020, 1, 1)}

with DAG(
    "parallel_dag", schedule_interval="@daily", default_args=default_args, catchup=False
) as dag:

    task_1 = BashOperator(task_id="task_1", bash_command="sleep 3")

    task_2 = BashOperator(task_id="task_2", bash_command="sleep 3")

    task_3 = BashOperator(task_id="task_3", bash_command="sleep 3")

    task_4 = BashOperator(task_id="task_4", bash_command="sleep 3")

    task_1 >> [task_2, task_3] >> task_4
airflow webserver と airflow scheduler を実行し、http://localhost:8080 にアクセス。DAGs の中から parallel_dag を選択し、Graph View を選ぶと以下のような画面となる。
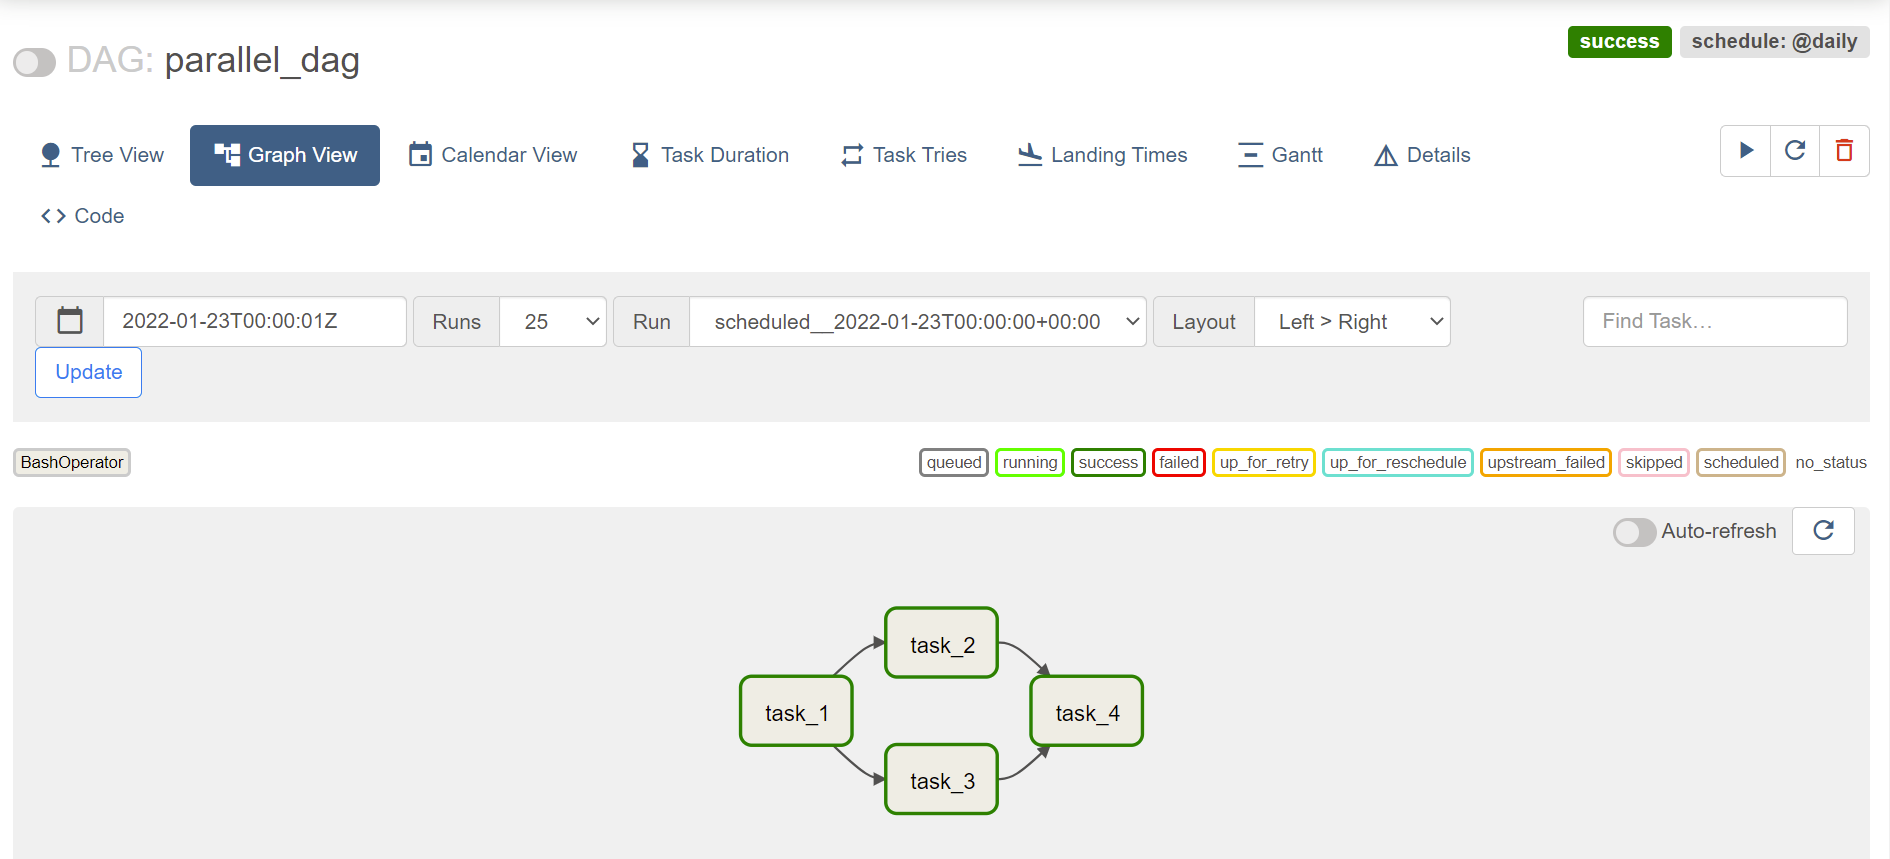
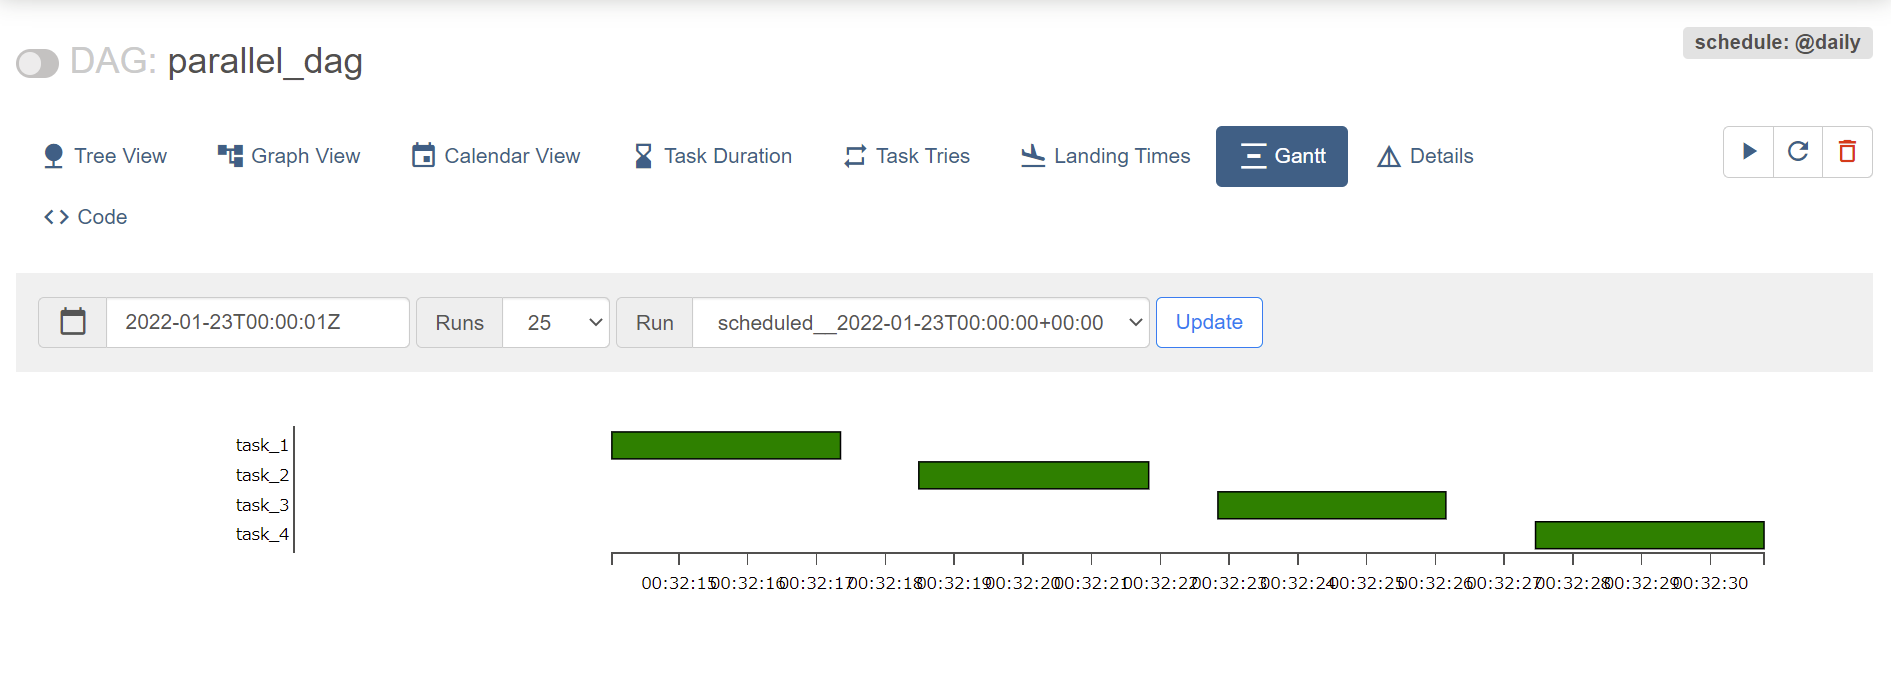
このグラフを見ると、並列処理が実装されていそうだが、画面左上のトグルをオンにして実行した後に Gantt 画面に遷移すると並列処理ではなく、順次実行されていることが確認できる。
これはデフォルトの Executor が Sequantial Executor であることが原因である。これら設定は ~/airflow/airflow.cfg に記述されている。
並列処理を行うための設定
並列処理を行うためには、並列処理に対応する DB と Executor に変更する必要がある。ここでは、DB として PostgreSQL を採用し、Executor を Sequantial Executor から Local Executor に変更する。
$ sudo apt update
$ sudo apt install postgresql
接続するために、ユーザ postgres のパスワードを設定。
$ sudo -u postgres psql
postgres=# ALTER USER postgres PASSWORD 'postgres';
ALTER ROLE
Postgres を扱うためのパッケージをインストール。
$ pip install 'apache-airflow[postgres]'
以下で設定を変更していく。まず DB 設定を以下のように変更した。設定の正確なフォーマットは Database Urls を参照。
...

# sql_alchemy_conn = sqlite:////home/airflow/airflow/airflow.dbost:port/database
sql_alchemy_conn = postgresql+psycopg2://postgres:postgres@localhost/postgres
変更を反映した後、以下コマンドが問題なく実行されれば、DB を PostgreSQL に設定できている。
$ airflow db check
続いて、Executor も変更する。
...

# executor = SequentialExecutor
executor = LocalExecutor
設定を変更できたので、Postgres DB を初期化する。airflow webserver と airflow scheduler が立ち上がっている場合は、一旦停止しておく。
$ airflow db init
...
$ airflow users create -u admin -p admin -r Admin -f admin -l admin -e admin@airflow.com
...
Admin user admin created
DB の初期化および新しいユーザの作成を行ったので、airflow webserver と airflow scheduler を実行し、http://localhost:8080 にアクセス。以前のユーザでログインしたままの場合は、一度ログアウトして admin/admin でログインし直す。DAGs の中から parallel_dag を選択し、Graph View を選ぶと以下のような画面となる。
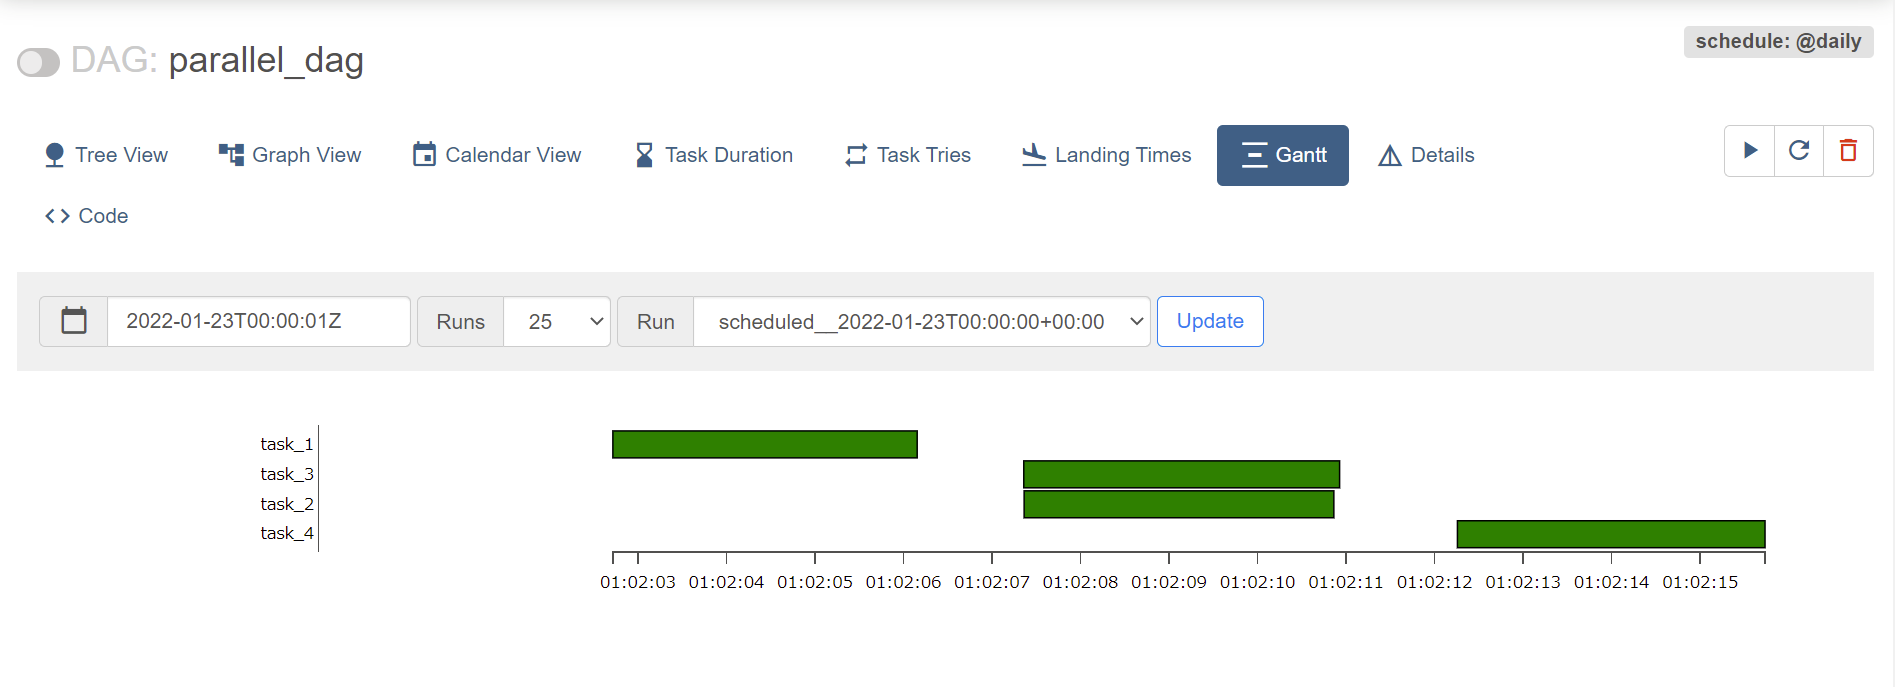
並列処理されていることが確認できる。
おわりに
PostgreSQL と LocalExecutor を用いて、並列処理を実行してみた。引き続き、理解を深めていきたい。