はじめに
機械学習パイプラインの構築をするために、Apache Airflow を学習。公式チュートリアルなどで手を動かしてみたが、あまり理解が進まなかったので The Complete Hands-On Introduction to Apache Airflow を購入。英語だが字幕もあるしとてもよい教材なので、おすすめ。本記事では、この講座を参考にパイプラインの構築の一連の流れを述べる。
環境構築
venv で仮想環境構築した。Apache Airflow のバージョンや依存関係は ここのものに合わせてある。(2022年1月時点で 2.1.0)
$ python3 -m venv sandbox
$ source sandbox/bin/activate
(sandbox) $ sandbox/bin/python3 -m pip install --upgrade pip
(sandbox) $ pip install apache-airflow==2.1.0 --constraint https://gist.githubusercontent.com/marclamberti/742efaef5b2d94f44666b0aec020be7c/raw/21c88601337250b6fd93f1adceb55282fb07b7ed/constraint.txt
(sandbox) $ airflow db init
(sandbox) $ airflow users create --username admin --password admin --firstname Taro
--lastname Yamada --role Admin --email admin@airflow.com
airflow webserver と airflow scheduler を実行し、http://localhost:8080 にアクセスすると以下のような画面が開く。
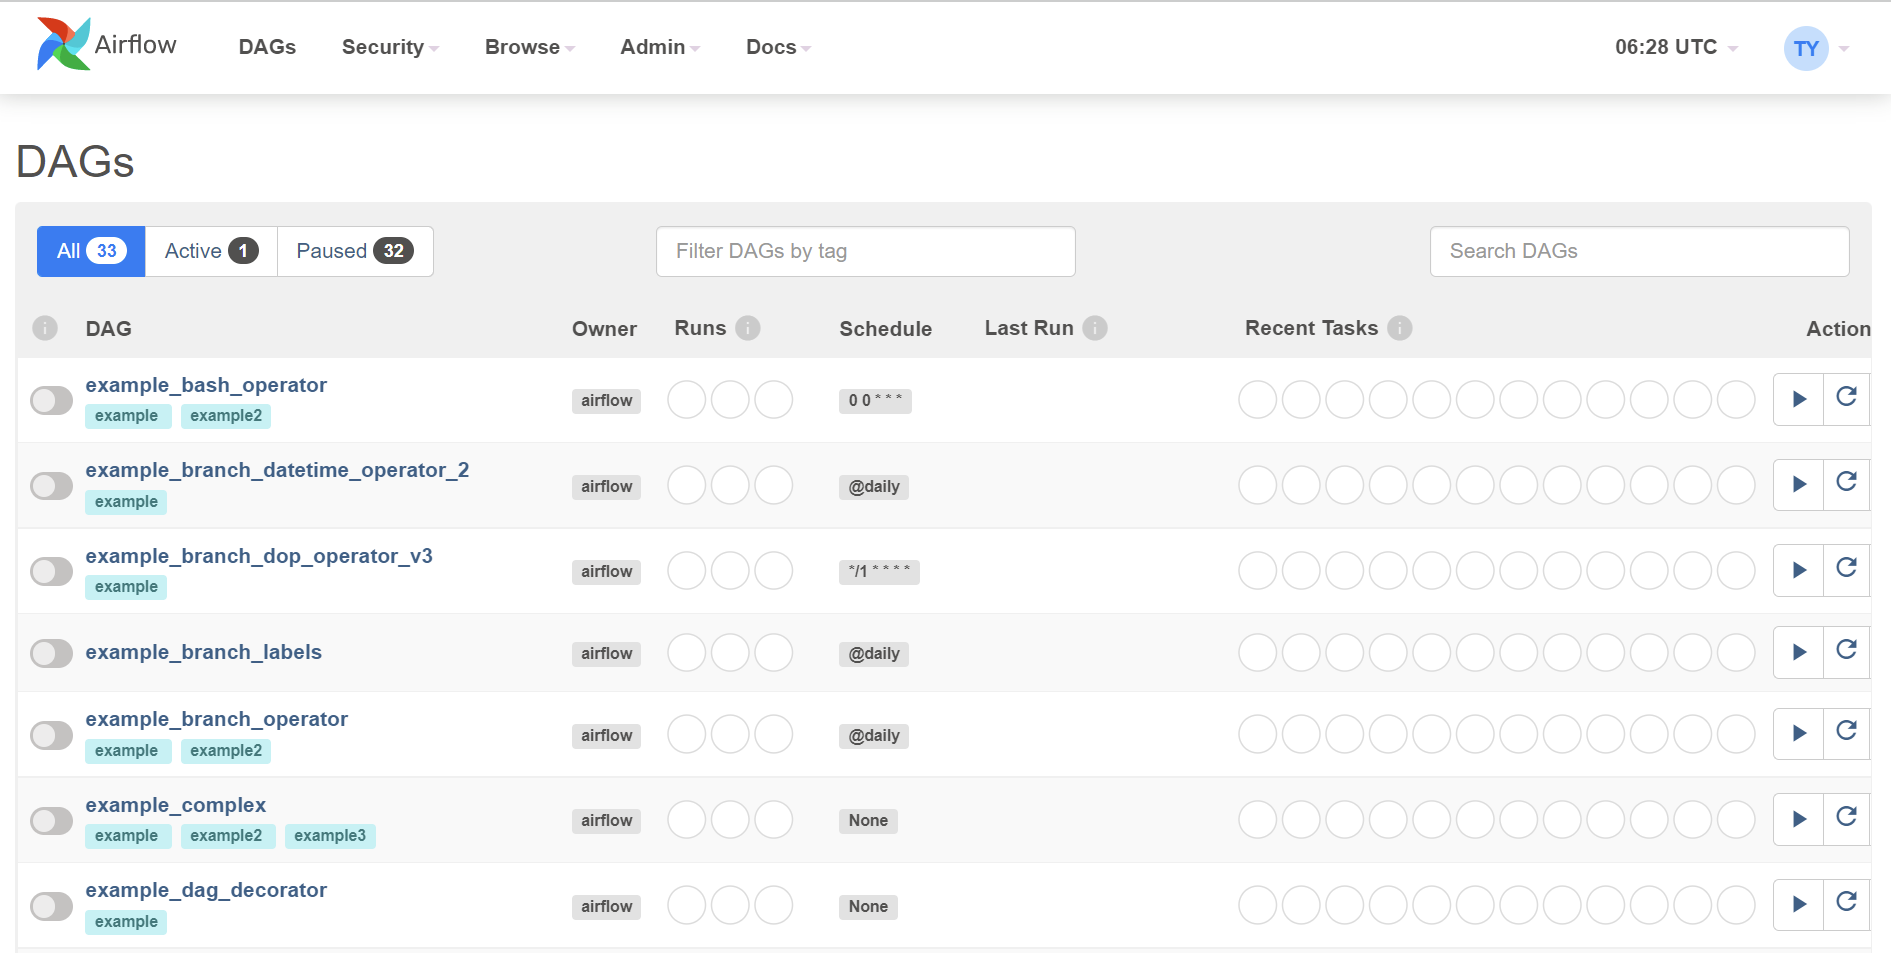
後ほど、この UI 上から行う操作もあるので、開いたままにしておく。
パイプライン概要
~/airflow というディレクトリが作成されているので、その中に dags というディレクトリを作成。DAG は Directed Acyclic Graph の略で、和訳すると有向非巡回グラフという。グラフ理論とかで出てくる用語で、つまりは一方通行かつぐるぐる回ることがないようなもの。dag ディレクトリ内でパイプラインを構築していく。
(airflow-test) $ cd ~/airflow
(airflow-test) $ mkdir dags
本記事では、最終的に以下の図のようなパイプラインを構築する。
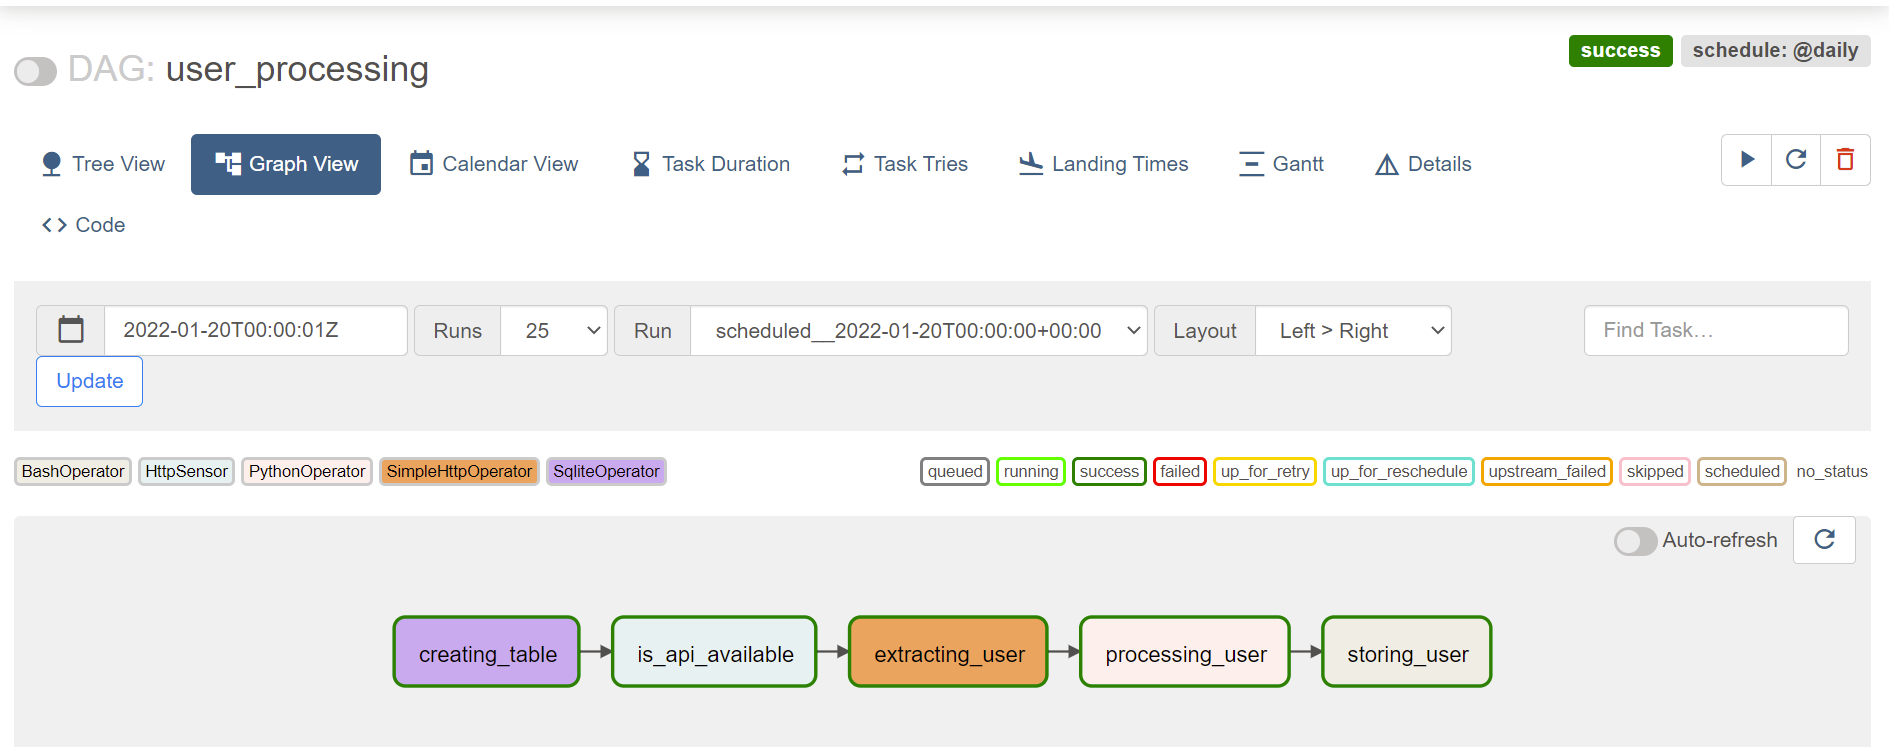
各タスクの簡単な説明は以下。
- creating_table:データを保存するテーブルを作成。
- is_api_available:Random User Generator というサイトの API が利用可能になるまで待機。
- extracting_user:API を叩いてユーザ情報を取得。
- processing_user:取得したユーザ情報から必要なデータを抽出して CSV ファイルに保存。
- storing_user:CSV ファイルのデータをテーブルに保存。
パイプライン構築
airflow/dags/user_processing.py にタスクを作成していく。
0. DAG オブジェクトのインスタンス化
タスクを順に作成していく前に、タスクが属する DAG インスタンスを作成する。with 構文以下で各タスクを定義する。
from datetime import datetime

from airflow.models import DAG

default_args = {
    "start_date": datetime(2020, 1, 1),
}


with DAG(
    "user_processing",
    schedule_interval="@daily",
    default_args=default_args,
    catchup=False,
) as dag:

    # define tasks/operators
1. creating_table
データを保存するテーブルを作成。SQLite を使用しているので、SqliteOperator を使用するため、以下コマンドでインストールする。
(sandbox) $ pip install 'apache-airflow-providers-sqlite'
Airflow は多数のプロバイダがあり、必要に応じてインストールが必要となる。詳細は Providers packages reference 参照。
以下で、タスクを定義。テーブルが存在しない場合、6つのカラムをもつテーブルを作成する。
...
from airflow.providers.sqlite.operators.sqlite import SqliteOperator

...

with DAG(...) as dag:

    creating_table = SqliteOperator(
        task_id="creating_table",
        sqlite_conn_id="db_sqlite",
        sql="""
            CREATE TABLE IF NOT EXISTS users (
                firstname TEXT NOT NULL,
                lastname TEXT NOT NULL,
                country TEXT NOT NULL,
                username TEXT NOT NULL,
                password TEXT NOT NULL,
                email TEXT NOT NULL PRIMARY KEY
            );
            """,
    )
テーブルに接続するには DB とのコネクションが必要なので、先ほど開いていた画面から作成する。上部 [Admin] -> [Connections] を選択し、[+] ボタンで新規に作成する。設定は以下画像を参照。
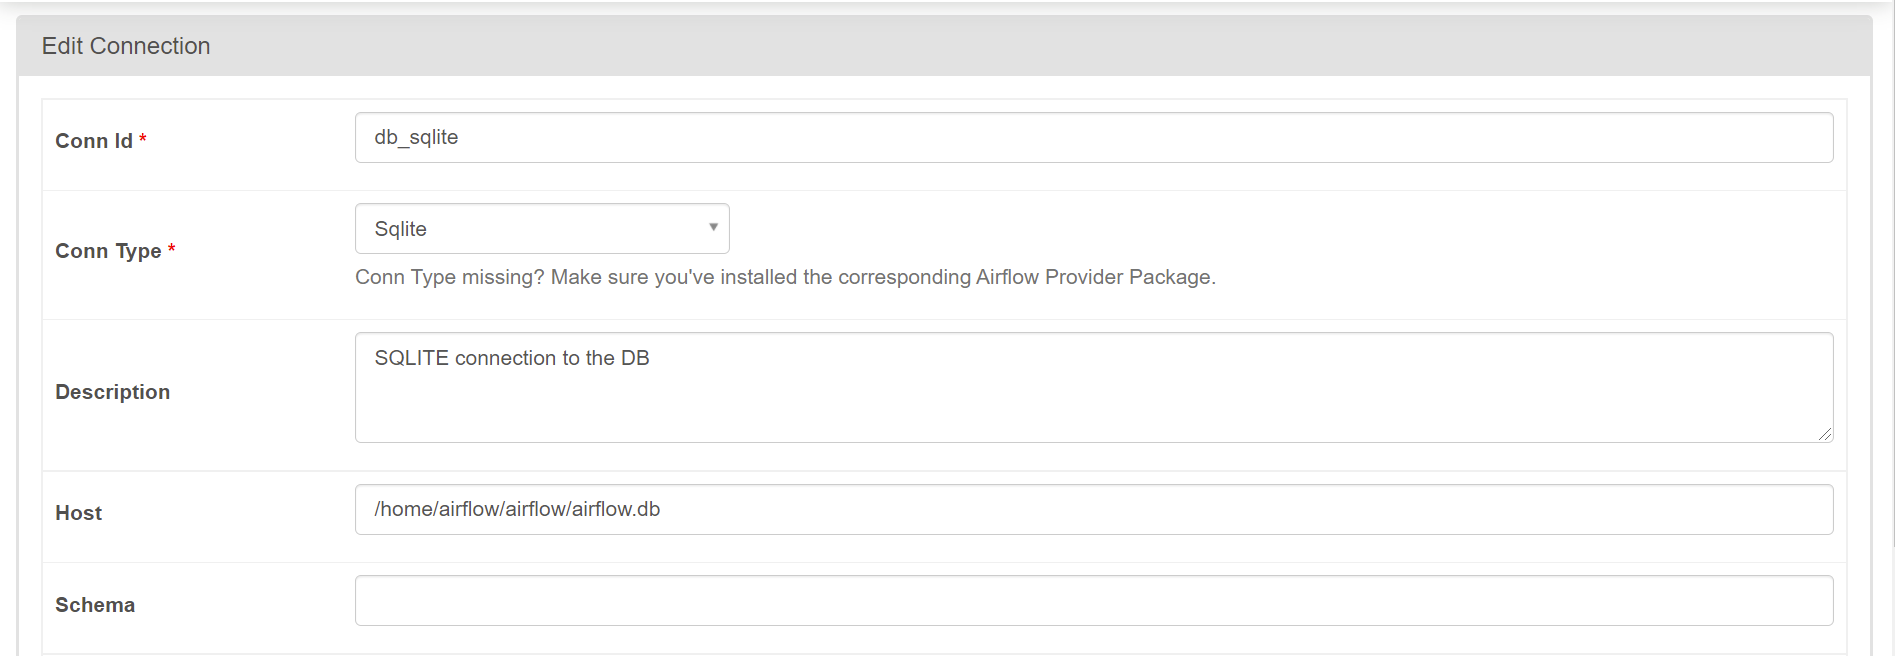
Conn Id を sqlite_conn_id で設定したものと同じ名前とする。Host は airflow.db のパスを指定。
ここまでできたらタスクが問題なく動くかテストを行う。テストコマンドは以下。エラーが発生しなければ適切に作成できている。
(sandbox) $ airflow tasks test user_processing creating_table 2020-01-01
2. is_api_available
API が利用可能になるまで待つような処理を作成するため Sensor を使用。公式ドキュメントによる Sensor の説明は以下。
Sensors are a certain type of operator that will keep running until a certain criterion is met. Examples include a specific file landing in HDFS or S3, a partition appearing in Hive, or a specific time of the day. Sensors are derived from BaseSensorOperator and run a poke method at a specified poke_interval until it returns True.
簡単に言えば、なにかが起きるまで待つもので、今回のように動作を保証したりするときに使うものだと理解している。HTTP を使用するので、以下コマンドでプロバイダをインストール。
(sandbox) $ pip install apache-airflow-providers-http==2.0.0
HttpSensor を使用したコードが以下。
...
from airflow.providers.http.sensors.http import HttpSensor

...

with DAG(...) as dag:

    ...

    is_api_available = HttpSensor(
        task_id="is_api_available", http_conn_id="user_api", endpoint="api/"
    )
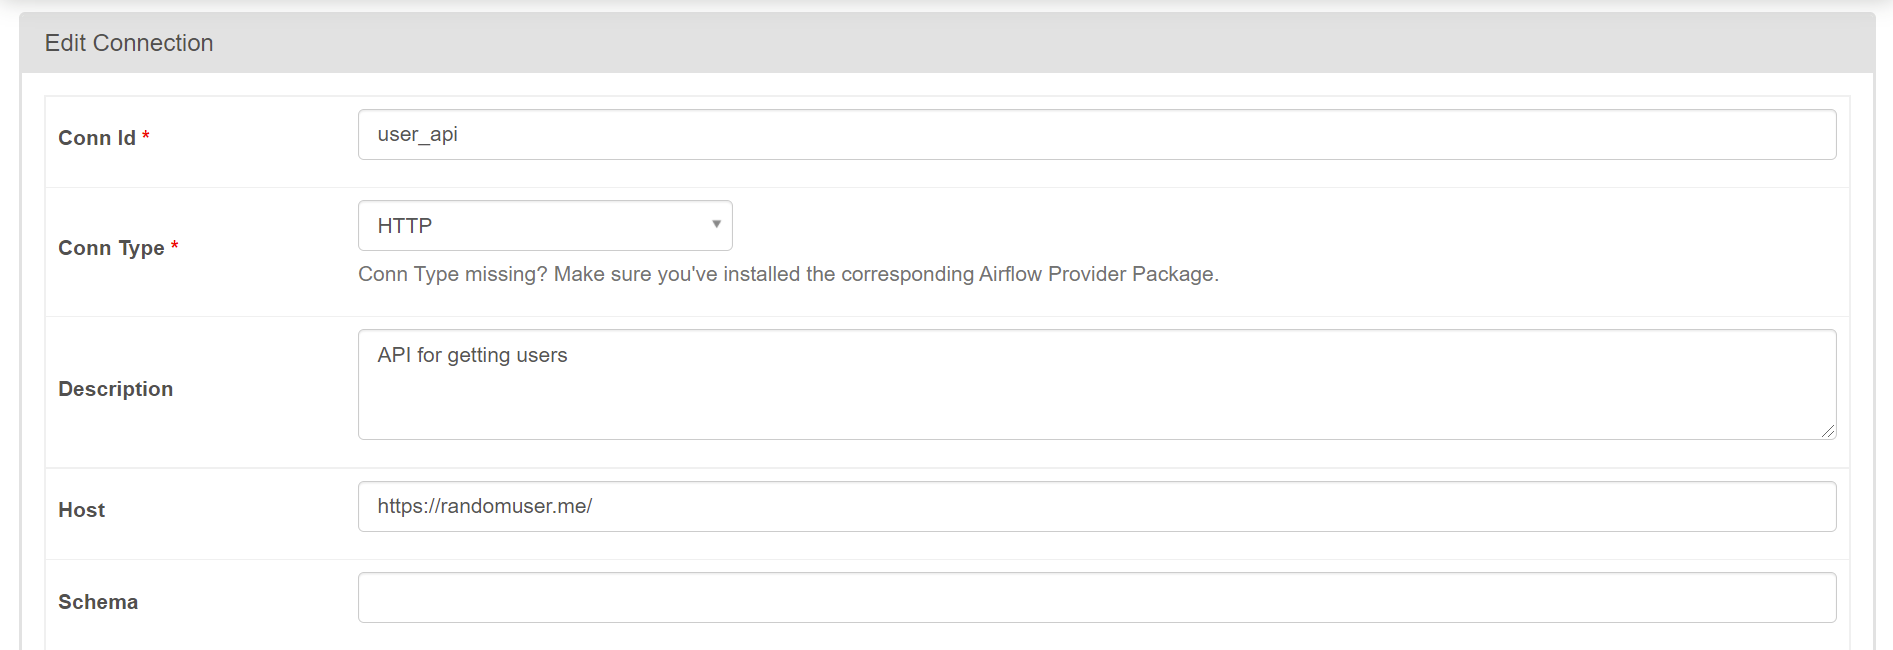
API とのコネクションを作成する。SQLite のときと同様にして、以下画像のように設定。
ここでも作成したタスクのテストを行う。
(sandbox) $ airflow tasks test user_processing is_api_available 2020-01-01
3. extracting_user
以下で API からデータを取得するタスクを定義。
...
import json
from airflow.providers.http.operators.http import SimpleHttpOperator

...

with DAG(...) as dag:

    ...

    extracting_user = SimpleHttpOperator(
        task_id="extracting_user",
        http_conn_id="user_api",
        endpoint="api/",
        method="GET",
        response_filter=lambda response: json.loads(response.text),
        log_response=True,
    )
これまでと同様にテストすると以下のような結果が得られる。Random User Generator API と同様の結果が得られていることが確認できる。
(sandbox) $ airflow tasks test user_processing extracting_user 2020-01-01
...
[2022-01-21 06:56:21,045] {http.py:115} INFO - {"results":[{"gender":"male","name":{"title":"Mr","first":"Darren","last":"King"},"location":{"street":{"number":6614,"name":"Bridge Road"},"city":"Exeter","state":"Clwyd","country":"United Kingdom","postcode":"K86 3ZN","coordinates":{"latitude":"6.5705","longitude":"-158.8391"},"timezone":{"offset":"-3:30","description":"Newfoundland"}},"email":"darren.king@example.com","login":{"uuid":"384a152f-66a9-472d-a592-e1f8557e564f","username":"purplecat905","password":"flyers","salt":"yyPLDi3z","md5":"495955a7b7b4fc0664ac0fc580f2cca4","sha1":"f85a89f3cfb86675bc42b5c0d787e247bbb0ad5e","sha256":"b0824af8b0fcc5de0a996b3f6c41e7ea6a916a749b0aeeb6c648264f7f3c4447"},"dob":{"date":"1951-03-25T05:24:14.327Z","age":71},"registered":{"date":"2019-01-22T19:37:00.577Z","age":3},"phone":"017683 00410","cell":"0752-503-650","id":{"name":"NINO","value":"PJ 90 72 17 S"},"picture":{"large":"https://randomuser.me/api/portraits/men/56.jpg","medium":"https://randomuser.me/api/portraits/med/men/56.jpg","thumbnail":"https://randomuser.me/api/portraits/thumb/men/56.jpg"},"nat":"GB"}],"info":{"seed":"53304cf938cd3a25","results":1,"page":1,"version":"1.3"}}
...
4. processing_user
上記でデータが得られたので、適切に処理してテーブルに登録したいもののみを抽出する。PythonOperator を使用して Python スクリプトで処理を行うので python_callable で実行する関数を定義する。
今回の場合、extracting_user で取得したデータを受け取る必要があるので Xcoms を用いる。Xcoms は Cross Communications の略で、タスクが相互に通信できるようにするメカニズムとのこと。詳細は公式ドキュメントを参照。デフォルトでタスクの返り値が push されているので、xcom_pull() でデータを受け取ることができる。(※ただしデータフレームのような大きなデータの受け渡しは禁止されていることに注意。)
...
from airflow.operators.python import PythonOperator
from pandas import json_normalize

...


def _processing_user(ti):
    users = ti.xcom_pull(task_ids=["extracting_user"])
    if not len(users) or "results" not in users[0]:
        raise ValueError("User is Empy")
    user = users[0]["results"][0]
    processed_user = json_normalize(
        {
            "firstname": user["name"]["first"],
            "lastname": user["name"]["last"],
            "country": user["location"]["country"],
            "username": user["login"]["username"],
            "password": user["login"]["password"],
            "email": user["email"],
        }
    )
    processed_user.to_csv("/tmp/processed_user.csv", index=None, header=False)

with DAG(...) as dag:

    ...

    processing_user = PythonOperator(
        task_id="processing_user", python_callable=_processing_user
    )
以下コマンドでテストすると、cat tmp/processed_user.csv で抽出されたデータがファイルに格納されていることが確認できる。
(sandbox) $ airflow tasks test user_processing processing_user 2020-01-01
...
(sandbox) $ cat /tmp/processed_user.csv
Darren,King,United Kingdom,purplecat905,flyers,darren.king@example.com
5. storing_user
最後に BashOperator で CSV データを DB に保存する。細かい説明は割愛。
...
from airflow.operators.bash import BashOperator

...


with DAG(...) as dag:

    ...

    storing_user = BashOperator(
        ask_id="storing_user",
        bash_command='echo -e ".separator ","\n.import  /tmp/processed_user.csv users" | sqlite3 /home/airflow/airflow/airflow.db',
    )
以下コマンドで DB にデータが格納されているか確認できる。
(sandbox) $ airflow tasks test user_processing storing_user 2020-01-01
...
(sandbox) $ splite3 airflow.db
sqlite> select * from users;
Ana|Blanchard|France|sadbutterfly288|bounty|ana.blanchard@example.com
6. dependencies
ここまでできたら、ブラウザに戻って [DAG] リストから user_processing を選択、[Graph View] をクリック。すると、以下画像のような状態になっている。
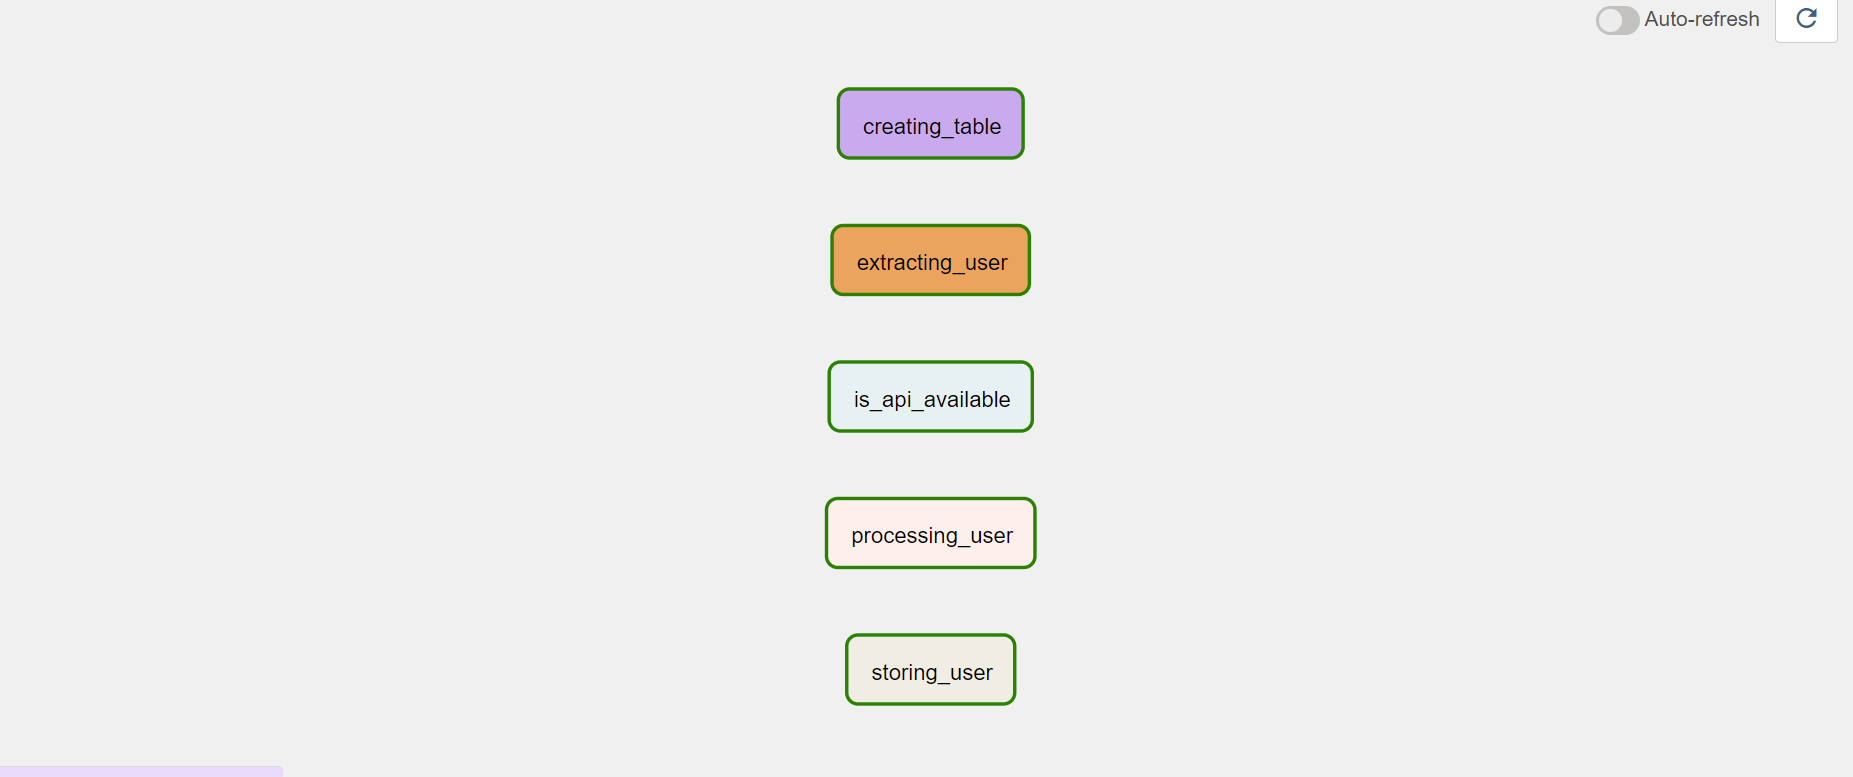
この段階では、タスクがばらばらに作られているだけなので、実行順番を定義してやる必要がある。その場合は、以下のように記述してやれば良い。
...


with DAG(...) as dag:

    ...

    (
        creating_table
        >> is_api_available
        >> extracting_user
        >> processing_user
        >> storing_user
    )
この順番のことを dependency といい、>> を使うことで定義できる。画面をリロードすると、はじめに添付していたようなパイプラインができていることが確認できる。左上のトグルを押せば、パイプライン全体を実行できる。
おわりに
Apache Airflow を用いて、簡単なパイプラインの構築を行った。さまざまなプロバイダを使ったり、機械学習で使用するようなビッグデータも扱えるように検討していきたい。